

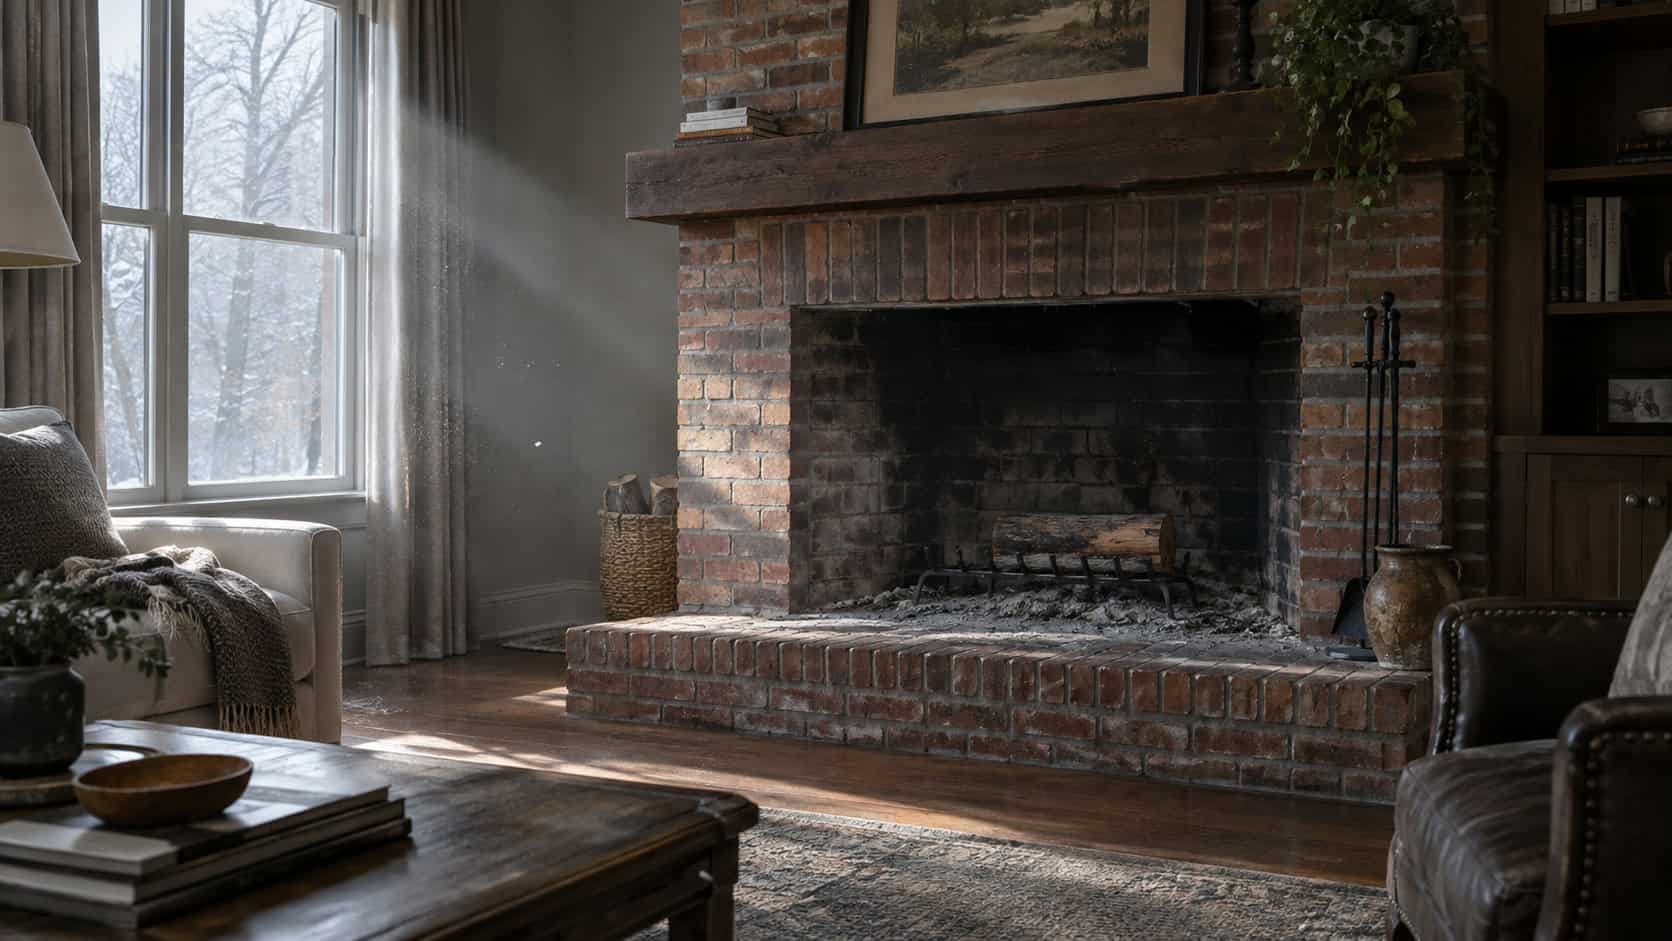
The first winter, everybody loves it. Somebody lights a fire on the first cold Saturday, the house smells like woodsmoke, and the pictures look great.
Then the second winter arrives.
The fire doesn’t get lit. The gas logs run for ten minutes and get shut off because the room’s suddenly 80 degrees. The windows fog up and nobody connects it to the hearth. The damper stays cracked because the handle snapped, and the furnace runs a little longer every night to make up for it.
Fireplace installers see this pattern constantly — the second-winter abandonment. The hardware didn’t fail. The decision did.
Here are the fireplace choices that look fine on install day and go sour by the second cold season, plus what the people who do this for a living put in their own houses.
1. The Open Masonry Firebox You Never Upgraded
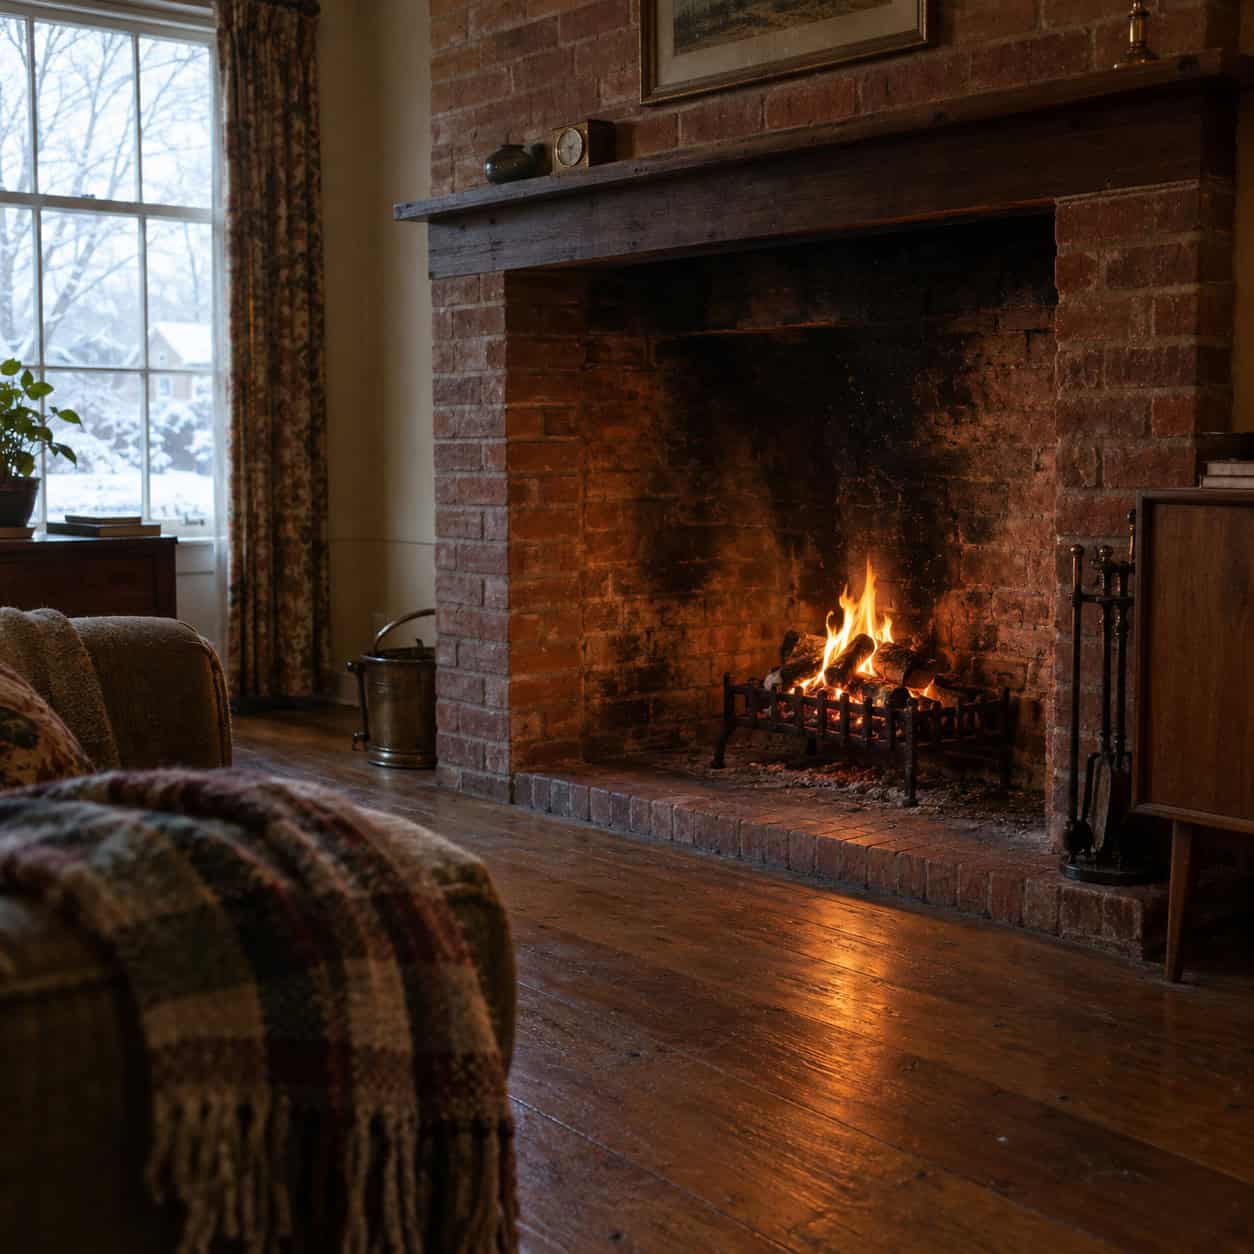
That gorgeous brick hearth is, on most nights, a hole in your house.
An open fire needs enormous volumes of air to burn, and it takes that air from the room you already paid to heat. Canada’s energy regulator has put the effective efficiency of a conventional open fireplace at roughly 5 to 10 percent — and under some conditions it runs negative. You feel warm standing three feet away while the rest of the house gets colder.
That’s why your thermostat kicks on during a fire. It’s not your imagination.
Pros keep the masonry and kill the open burn. A sealed EPA-certified wood insert or a direct-vent gas insert slides into the existing firebox, runs its own liner up the flue, and turns a decorative hole into an actual heat source.
2. The Vent-Free Gas Fireplace
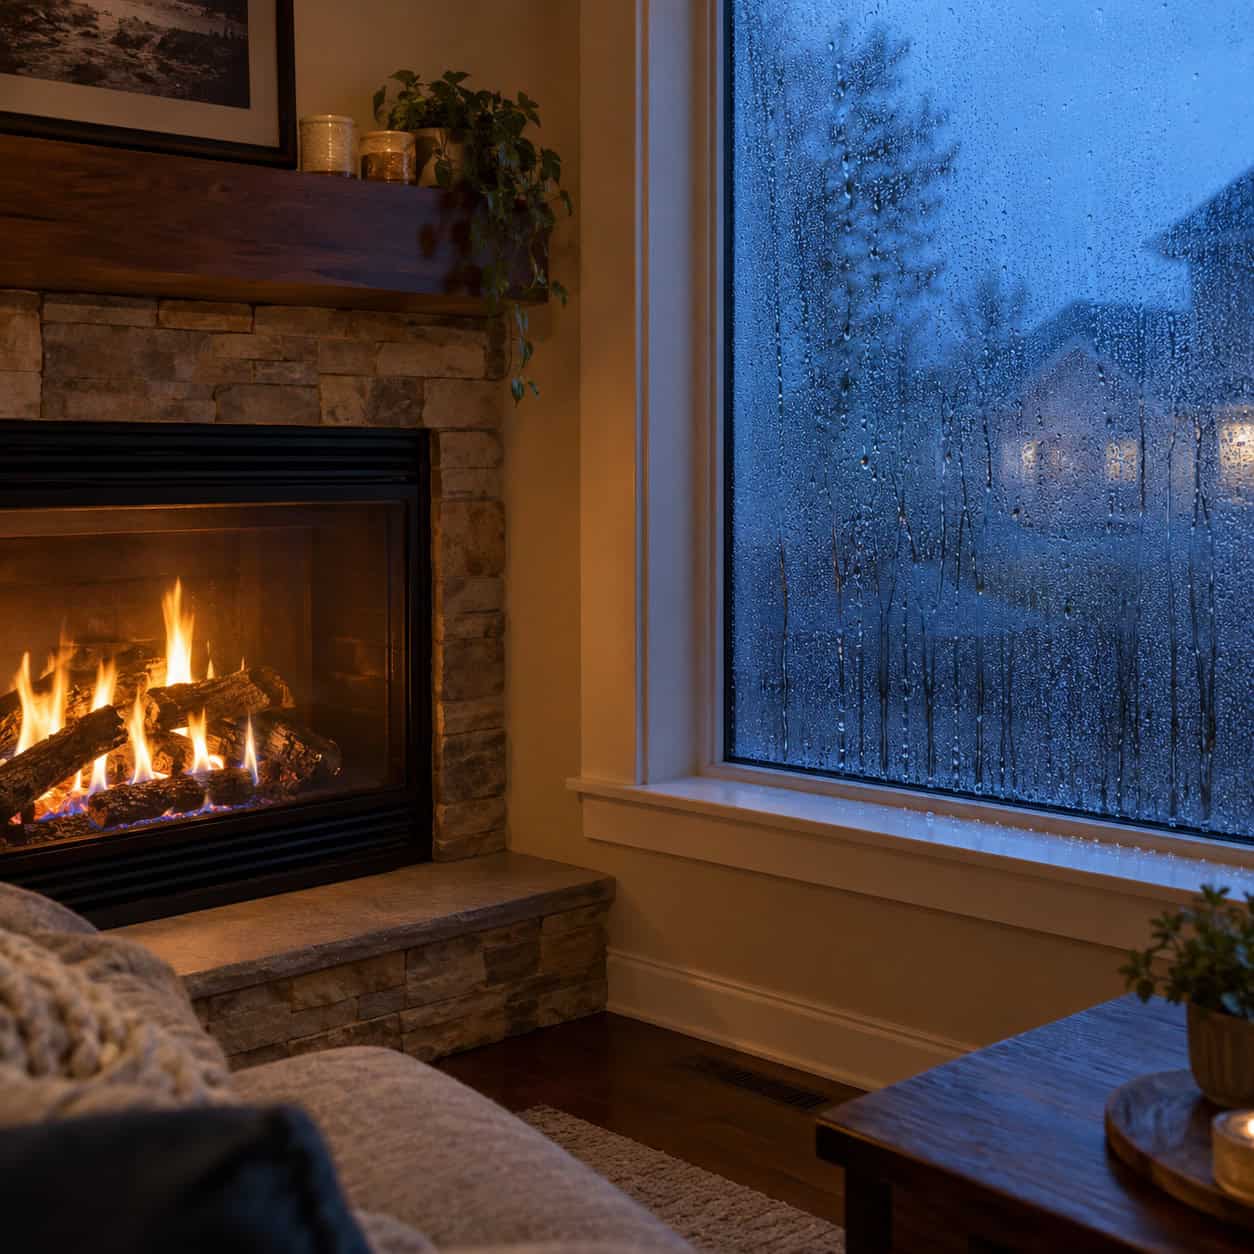
This is the one that causes the most arguments, and the one with the most predictable second-winter symptom list.
Vent-free units have no chimney and no vent pipe. Everything the flame produces stays in your living room — including the water.
That part surprises people. Burning natural gas or propane creates water vapor as a combustion byproduct, roughly a gallon of it for every 100,000 BTU of gas burned. Run a 30,000 BTU vent-free unit four hours a night and you’re pouring more than a quart of water into your air, every night, all winter.
Winter one, you notice the windows sweat a little. Winter two, there’s black speckling in the closet on the north wall, the bathroom caulk is going dark, and the whole house smells faintly like a basement.
Manufacturers address this with an oxygen depletion sensor that shuts the burner down if oxygen drops too far. Regency and others also publish strict room-volume minimums and tell you to crack a window — which rather defeats the point of a heater. California bans them outright. Several other states and municipalities restrict them in bedrooms and bathrooms.
And you’ve added a combustion appliance with no exhaust path, which is exactly the scenario carbon monoxide alarms exist for. If you have one of these, you need working CO detection on every level. Not optional.
Pros install direct-vent instead. A sealed glass front, a coaxial pipe through the wall that draws combustion air from outside and pushes exhaust back out the same way. Nothing from that flame ever touches your indoor air. It costs more to install because somebody has to cut a hole and run pipe. Pay it.
3. Mounting the TV Above the Firebox
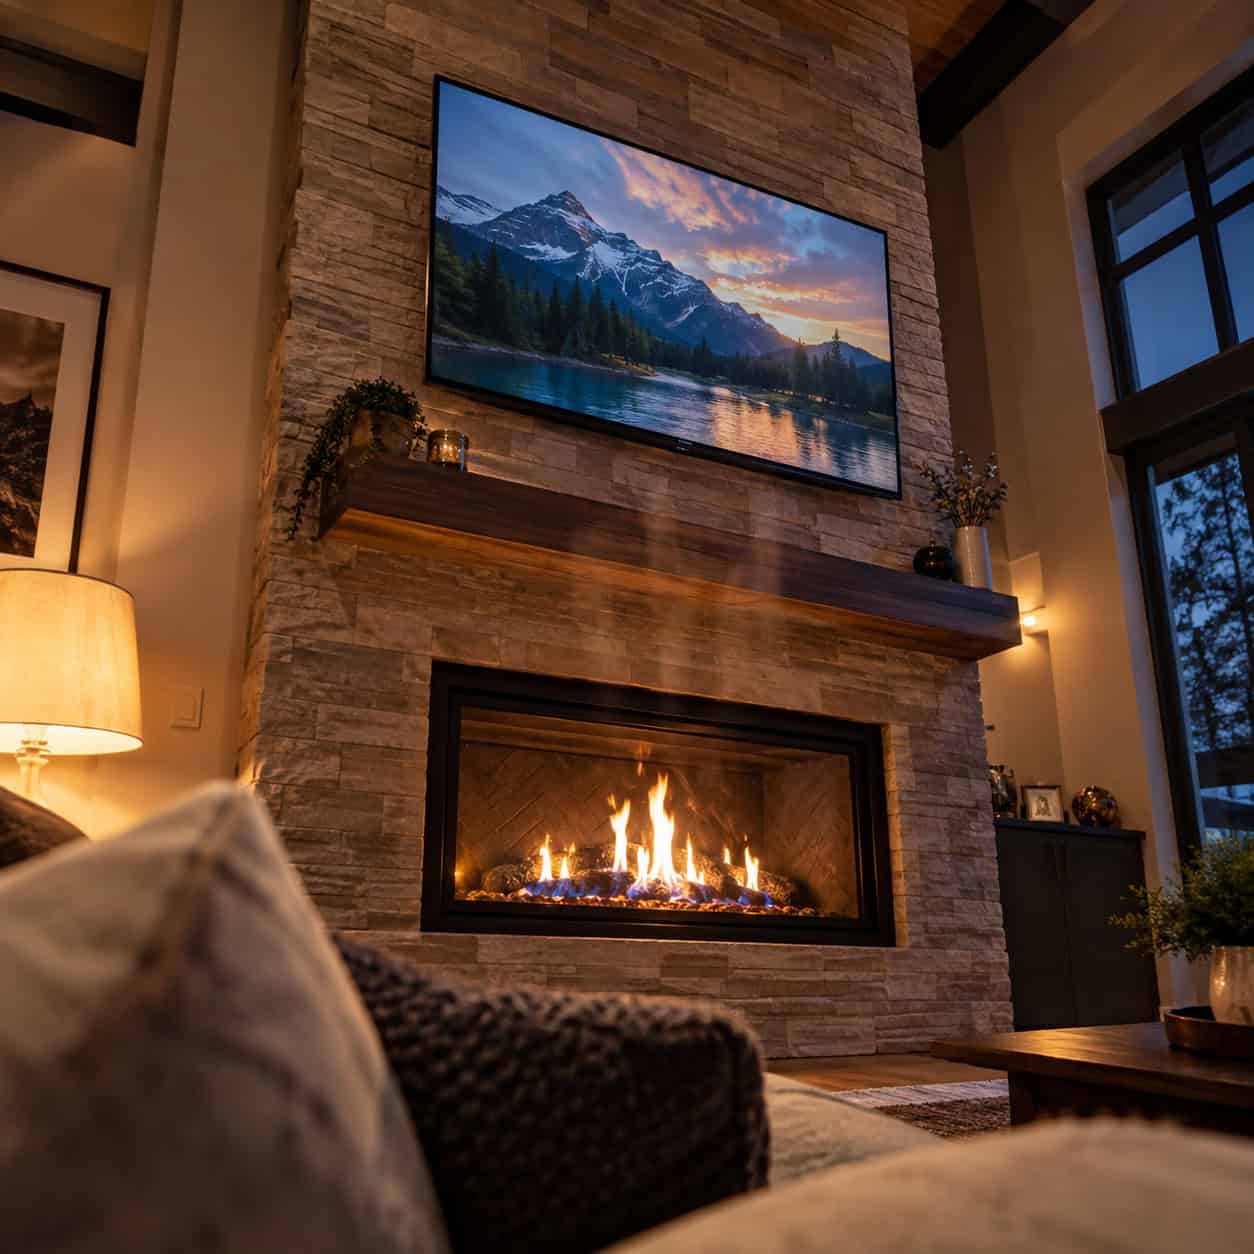
Two problems, and only one of them is about heat.
Electronics hate sustained warmth. Rising air off a firebox can push the space just above the mantel well past the 100-degree range most TV manufacturers list as a maximum ambient operating temperature, and the damage is cumulative — capacitors degrade, panels discolor, warranties get denied.
The bigger issue is your neck. Mantel height puts the screen 15 to 30 degrees above eye level from a seated position, and Bob Vila is one of many outlets that has flagged the chin-up viewing angle as a genuine ergonomic problem, not a design quibble. Two hours of that is a headache.
Put the TV on the adjacent wall. If the layout truly won’t allow it, spec a fireplace with a factory heat-management kit that ducts hot air out above the unit, a mantel shelf at least 8 inches deep to deflect the plume, and a pull-down articulating mount that drops the screen to eye level.
4. Relying on the Original Throat Damper
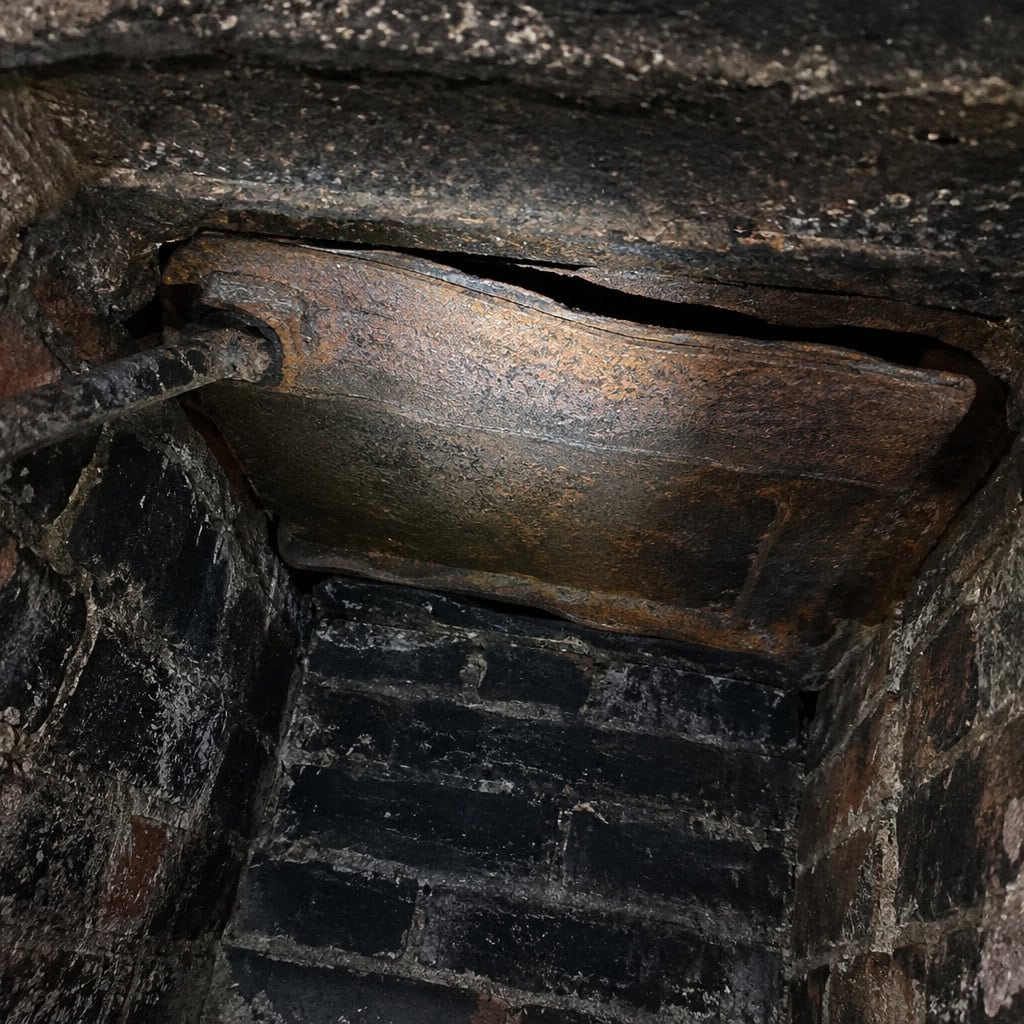
Reach up into an old firebox and feel the cast-iron plate. Now notice that it doesn’t quite sit flat anymore.
Decades of heating and cooling warp those plates, and the masonry seat erodes. A damper that’s 80 percent closed is still a permanently open vent to the sky, leaking conditioned air every hour of the year — including August, when you’re paying to cool air that goes straight up the chimney.
Some of them have rusted open entirely and the handle snapped off years ago.
The fix pros use is a top-sealing damper. It mounts at the chimney crown, seals against a silicone gasket, and operates by a stainless cable that runs down to a bracket in the firebox. It seals like a storm door instead of like a cast-iron flapper, and it keeps rain, snow, and squirrels out of the flue as a bonus.
5. The Builder-Grade Prefab Metal Firebox
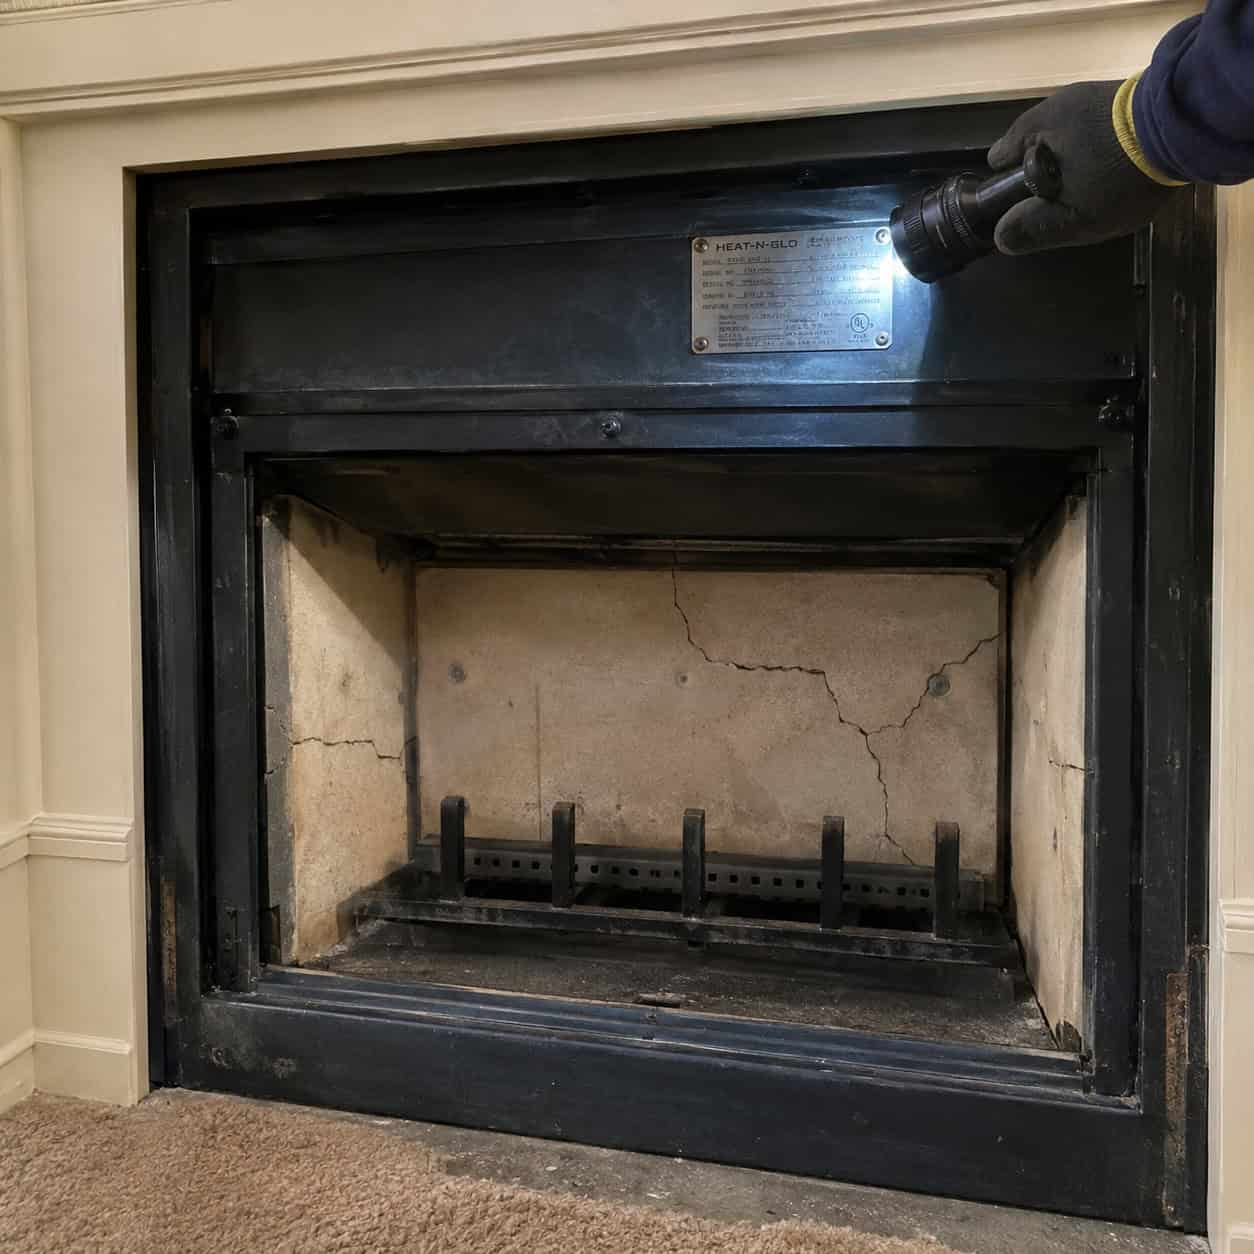
Pull the screen off and look at the back wall. If it’s a panel of pale cast refractory in a metal box rather than real brick laid up by hand, you have a zero-clearance prefab — the standard installation in tract houses from roughly 1980 through the mid-2000s.
These are listed systems, not masonry. The firebox, the chimney pipe, the cap, and the panels were all tested together as one assembly and carry a single UL listing. That matters more than almost anyone realizes.
Because here’s how the second winter goes. A sweep finds hairline cracks in the refractory panels — normal wear, they’re a consumable item. You call for replacement panels. The manufacturer went out of business in 2003, or the model was discontinued and parts are gone.
The temptation is a universal panel cut to fit. Do that and the system is no longer listed as tested. Swede Chimney Sweep and most reputable sweeps will refuse to certify a prefab with non-OEM parts, and your insurer may take the same position after a fire.
Find the data plate before you do anything. It’s a metal tag, usually riveted inside the firebox opening near the top, on the inside of the lower louver panel, or stamped on the damper housing. Photograph it. Model number and listing agency are what every parts counter will ask for first.
From there, pros go one of two directions. Replace the entire listed system — firebox, pipe, and termination — which typically runs $4,000 to $8,000 installed depending on chase access and roof height. Or install a gas or wood insert specifically listed for use in that prefab model, which is often $3,000 to $6,000 and gets you a far better heater than the original ever was. The one thing nobody does is patch it and hope.
6. Wood Mantels and Shiplap Run Right Up to the Opening
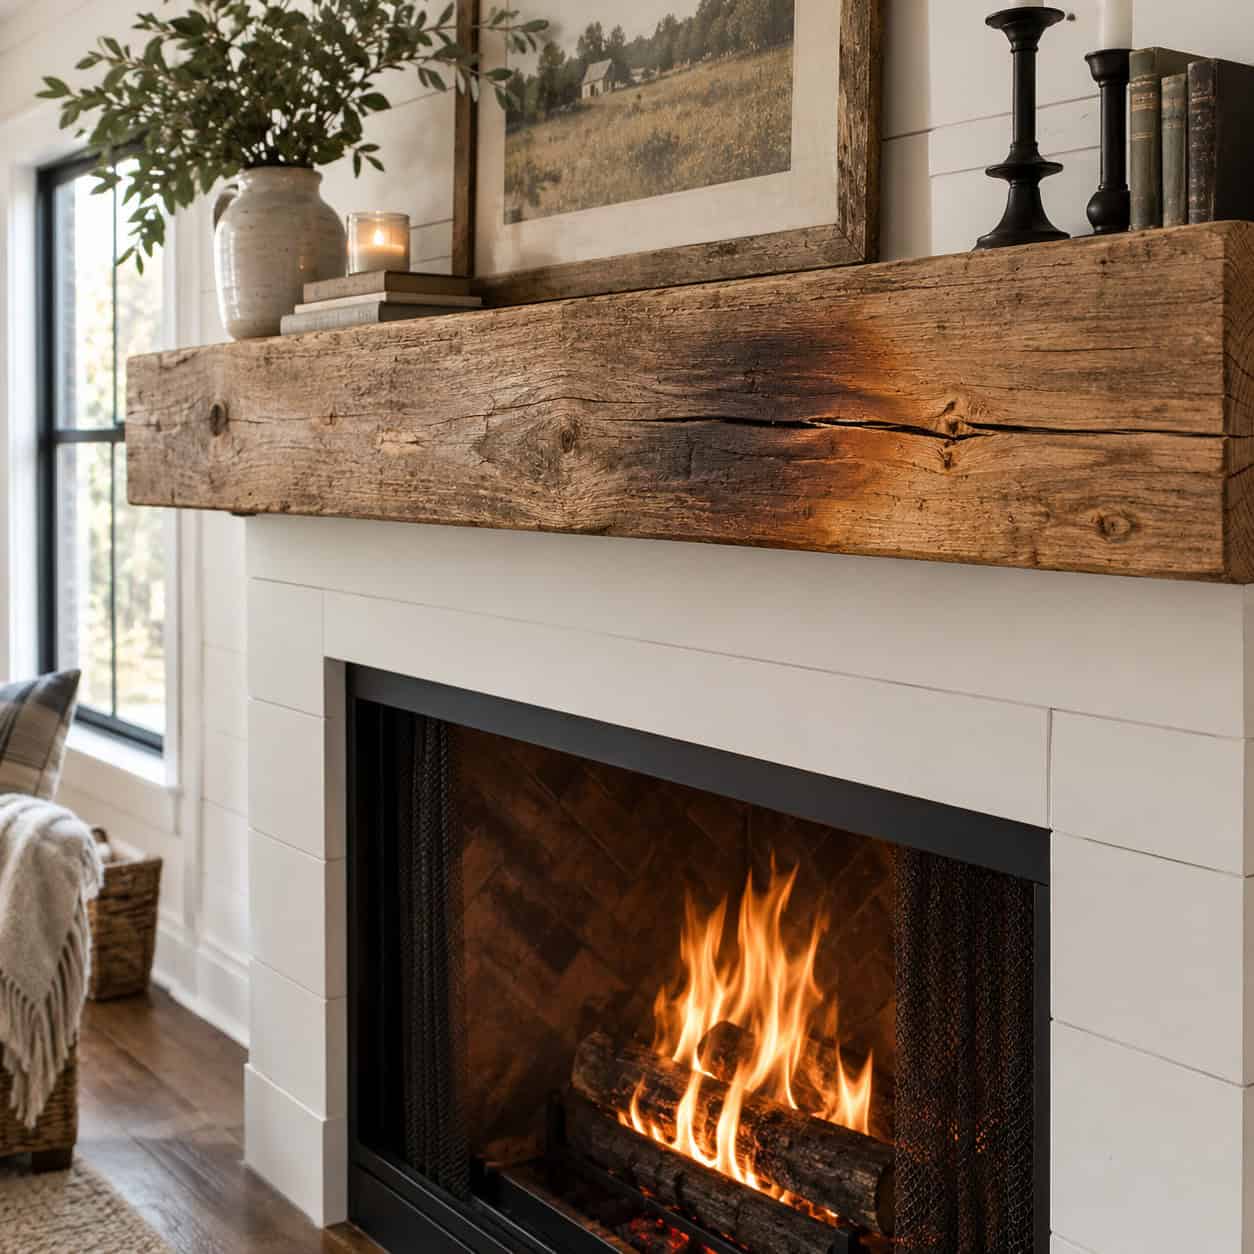
The farmhouse surround that took over Pinterest around 2014 — reclaimed beam mantel, shiplap to the ceiling, maybe a bit of trim framing the opening.
Every fireplace has published clearance-to-combustible dimensions. For a lot of units that means no wood within 6 inches of the opening horizontally, with the required clearance growing as the material projects further off the wall. Shiplap run tight to the firebox is usually inside that zone.
By winter two the wood nearest the opening is amber-brown, the finish has alligatored, and the mantel has a long check running its length. Pyrolysis — slow charring well below normal ignition temperature — is a genuine fire mechanism, not a cosmetic issue.
It also costs you money at resale. Clearance violations are standard write-ups on inspection reports.
Pros keep noncombustible material — stone, tile, steel, brick — inside the clearance zone and start the woodwork outside it. When a client insists on a deep timber mantel at a low height, they add a listed mantel heat shield, a thin metal deflector that mounts under the shelf and redirects the heat plume outward. If you’re building a stone and wood mantel yourself, pull the manual first and lay out the clearances in chalk before you cut anything.
7. A Decorative Gas Log Set Bought as a Heat Source
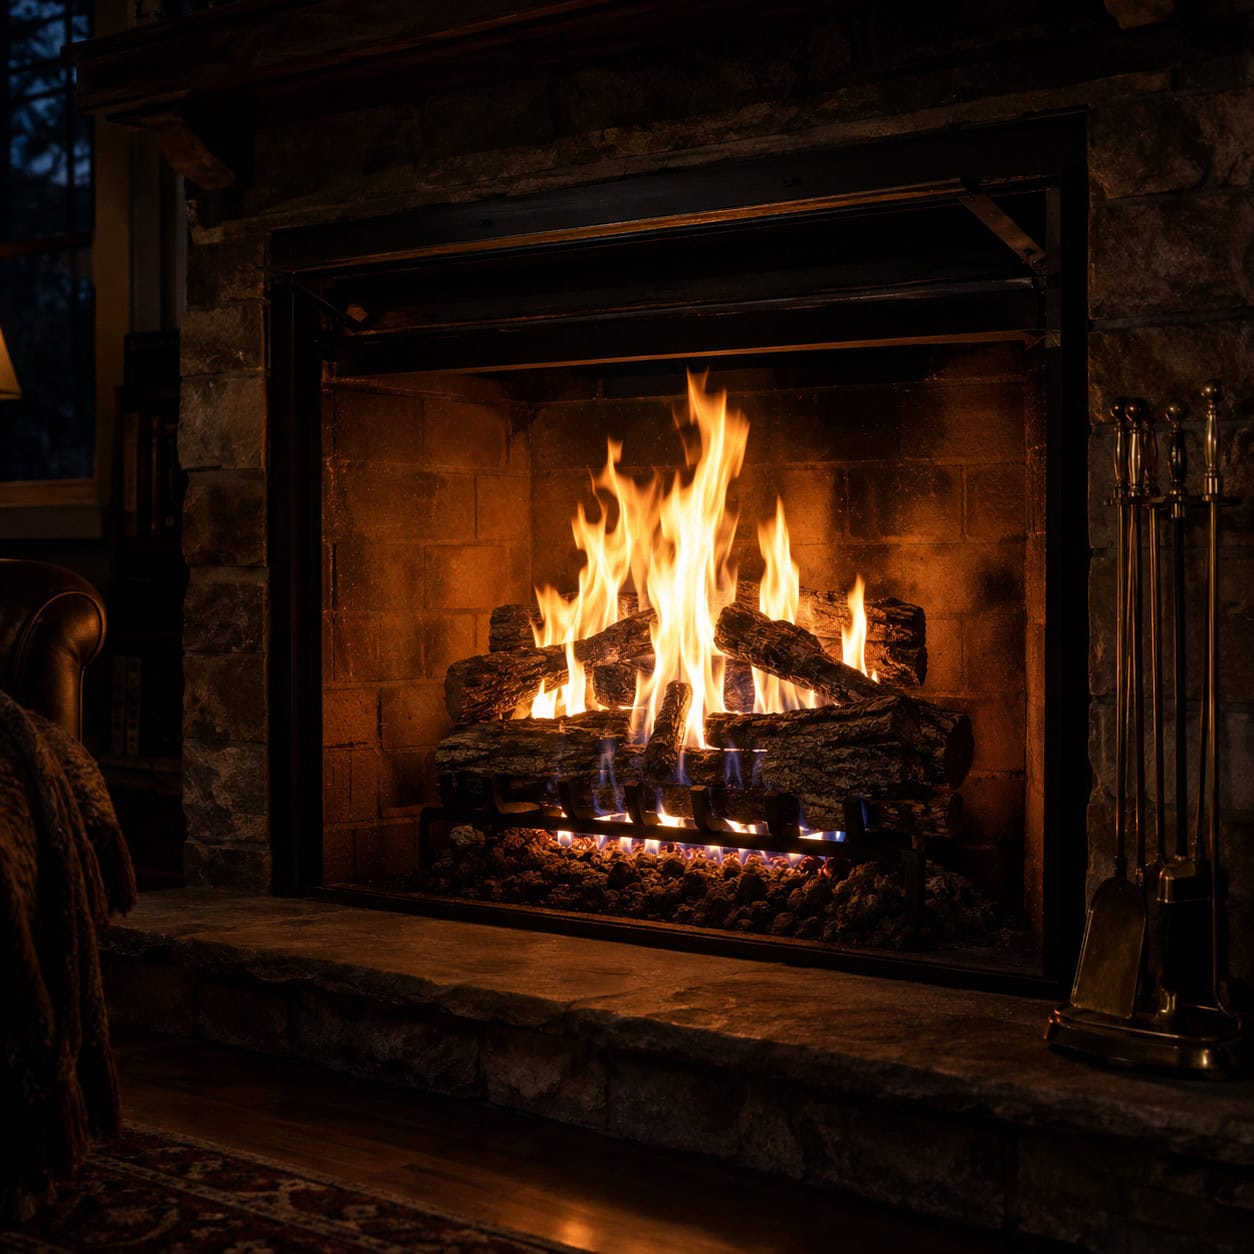
Vented gas logs are classified as decorative appliances. That word is doing a lot of work.
They’re designed to produce a tall, lazy, yellow flame that looks like a wood fire. To burn that flame without sooting and without spilling combustion products, the damper has to stay fully open the entire time — many installations use a damper clamp to make closing it physically impossible.
So you’ve got a wide-open chimney and a 40,000 BTU burner feeding it. Most of that heat leaves the building, along with a good share of the room air it entrained on the way out. Some installations are net losers on a cold night, same as an open wood fire.
As We Love Fire lays out, a gas insert is a fundamentally different appliance: sealed firebox, its own liner, glass front, and a blower. Same flame picture, but the heat stays in the room. If warmth is the goal, that’s the purchase.
8. The Oversized Firebox That Smokes Every Time
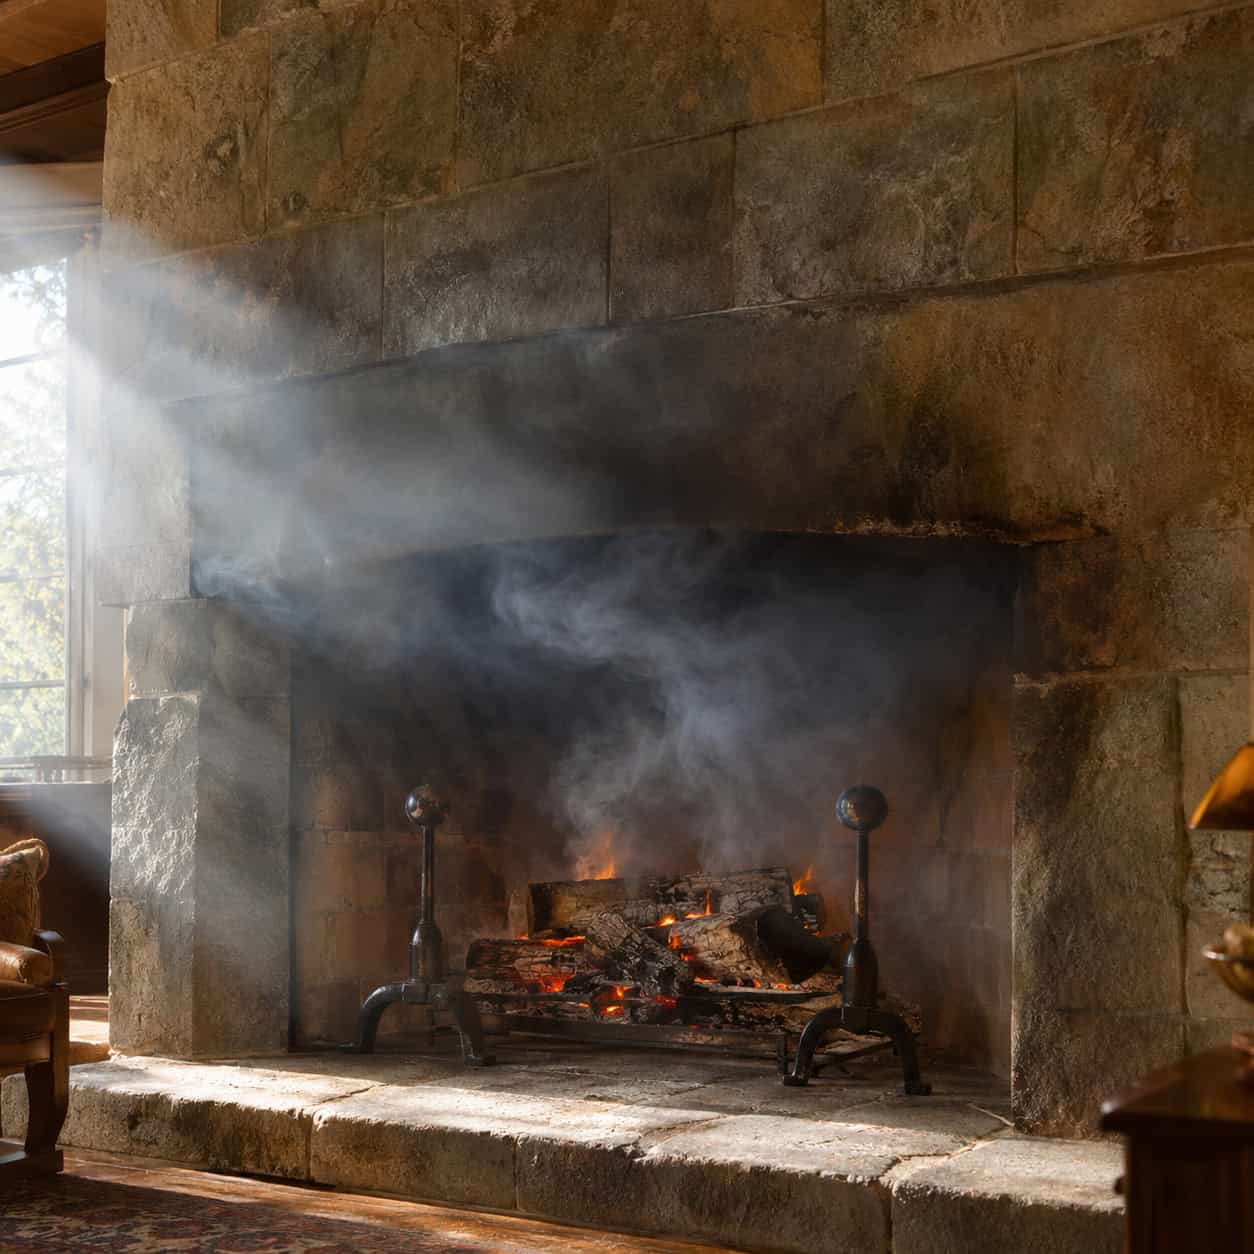
Somebody wanted a dramatic hearth. The mason built a dramatic hearth. Nobody checked it against the flue.
The old rule of thumb is roughly 1:10 — flue cross-sectional area should be about a tenth of the firebox opening area, tighter for exterior chimneys and short stacks. Blow past that and the chimney simply can’t move enough volume to establish draft.
The result is smoke rolling out into the room on every startup, a gray halo creeping up the stone, and a family that quietly decides fires aren’t worth it.
Fixes range from a smoke guard that reduces the opening height, to rebuilding the throat and smoke chamber, to relining with a correctly sized flue. When the budget allows a rebuild, pros go Rumford — shallow, tall, with steeply angled side walls that radiate forward instead of swallowing the fire. Count Rumford worked this out in the 1790s and it still outperforms most of what’s built today.
9. The Electric Fireplace Bought as Real Heat
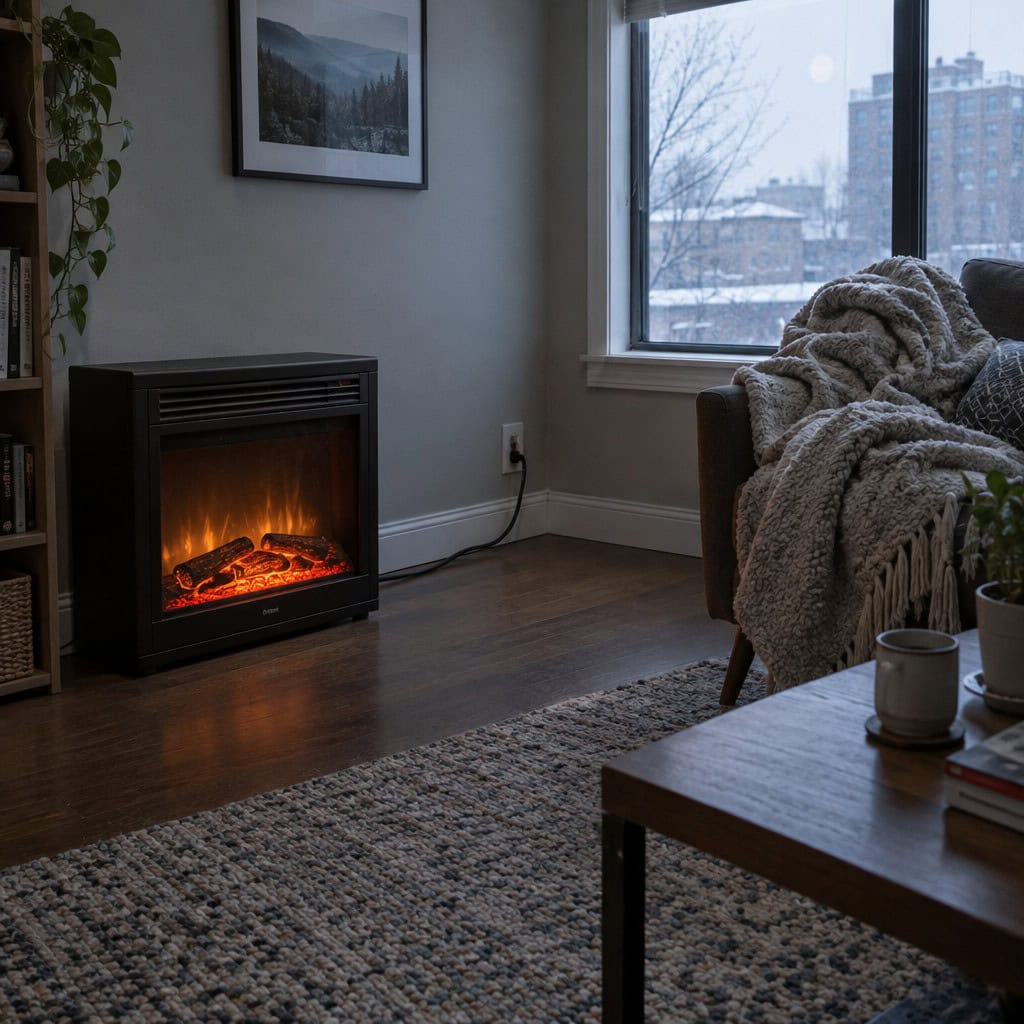
Do the arithmetic before you buy. A standard 120-volt plug-in tops out around 1,500 watts, which is about 5,118 BTU per hour. That is one space heater. It will take the chill off a 150-square-foot bedroom and do nothing measurable to a great room.
It also wants most of a 15-amp circuit to itself. Share that circuit with a lamp, a router, and a vacuum and you’ll be resetting the breaker, which Fireplaces Direct lists among the most common installation mistakes they see.
None of which makes electric a bad product. 240-volt hardwired models exist and put out real output. And for an apartment, a condo with no venting path, or a built-in surround you’re making yourself, nothing else gives you flame-look without a chimney.
Buy it for ambiance with a supplemental boost. Don’t put it on the heating plan.
10. The Chimney Bumped Out on an Exterior Wall
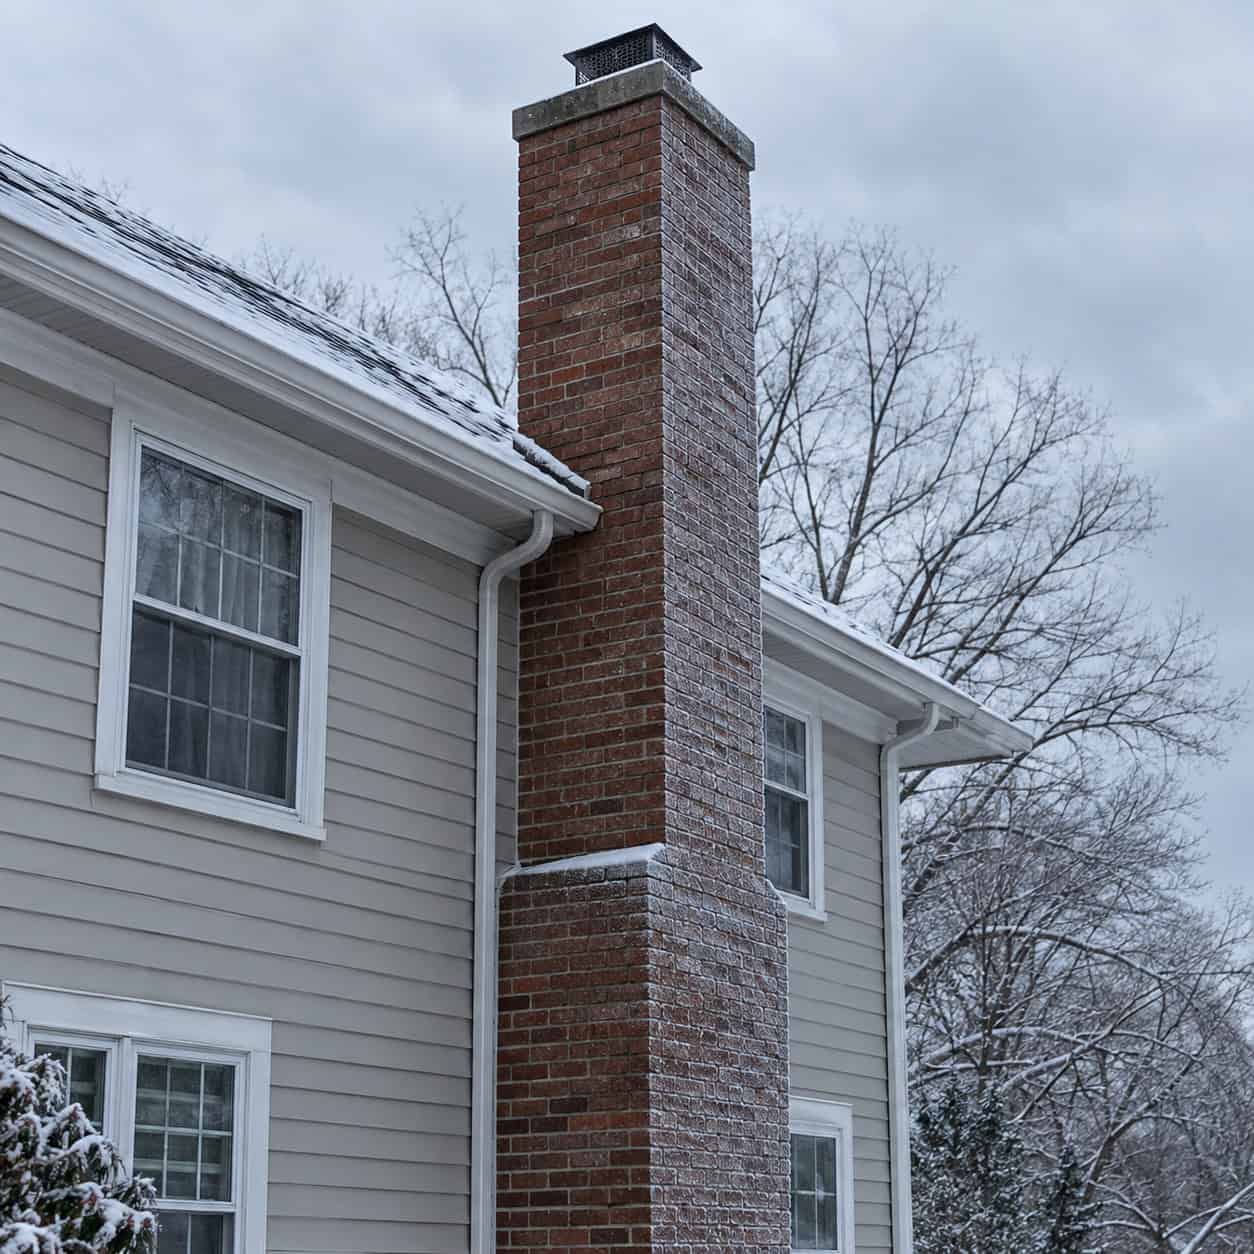
American builders have hung chimneys off the outside of houses for a hundred years because it’s cheaper and it frees up floor space. Thermally, it’s backwards.
Every square foot of that masonry sits in the weather. On a 15-degree night the flue is a cold column of dense air pushing down into your firebox, so the first match produces a face full of smoke until the stack finally warms and reverses.
Then, once the fire’s established, the masonry does what masonry does — stores heat and radiates it. Into your backyard.
New construction done right puts the chimney mass inside the thermal envelope, where every BTU it stores gets released back into the house for hours after the fire dies. For an existing exterior stack, pros install an insulated stainless liner, which keeps flue gas hot enough to draft properly and dramatically reduces creosote condensation on the way up.
Warm a cold flue before lighting. Roll a sheet of newspaper, light one end, hold it up in the damper opening for thirty seconds, and watch the smoke reverse direction.
11. A Gas Fireplace With No Barrier Screen
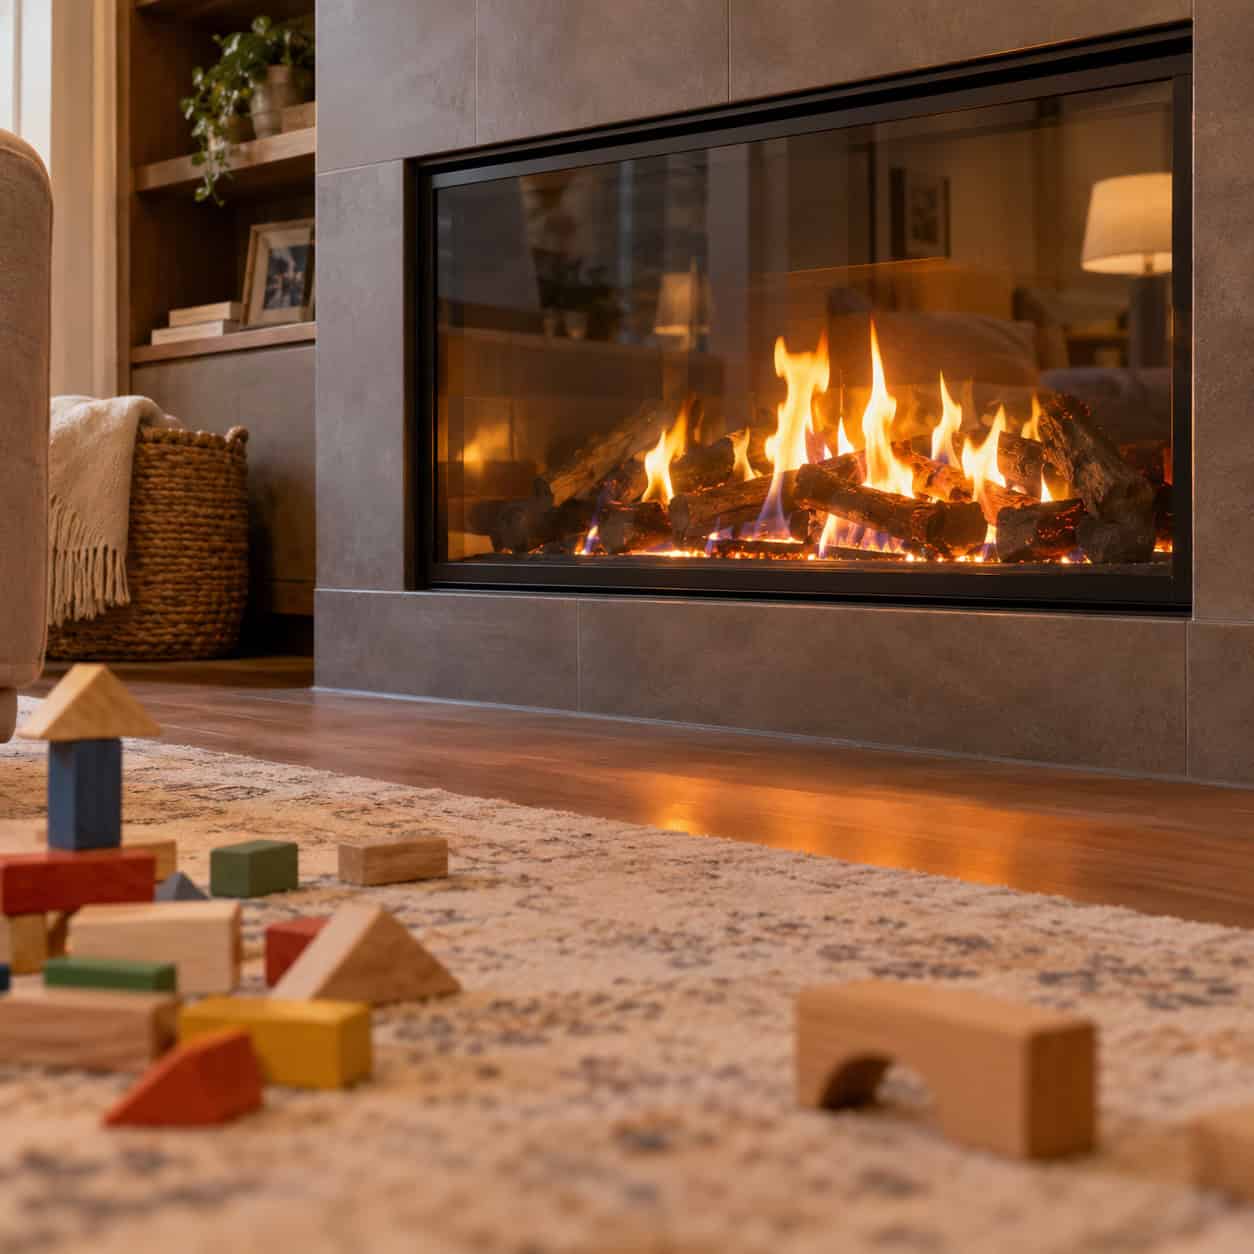
The glass front of an operating gas fireplace can exceed 400 degrees Fahrenheit. It reaches contact-burn temperature within a few minutes of ignition and stays dangerous for a long while after shutdown.
Toddler palms find it. The injury pattern was consistent enough and severe enough — hundreds of cases a year, many requiring grafts — that the industry adopted a mandatory barrier standard for units manufactured starting January 1, 2015.
Anything installed before that likely has bare glass.
Nearly every major manufacturer sells a retrofit barrier screen for older models, usually $60 to $200 and ten minutes with a screwdriver. Call with the model number off the rating plate behind the lower louver. Do it before the baby crawls, not after.
12. Reusing a Cracked Clay-Tile Flue
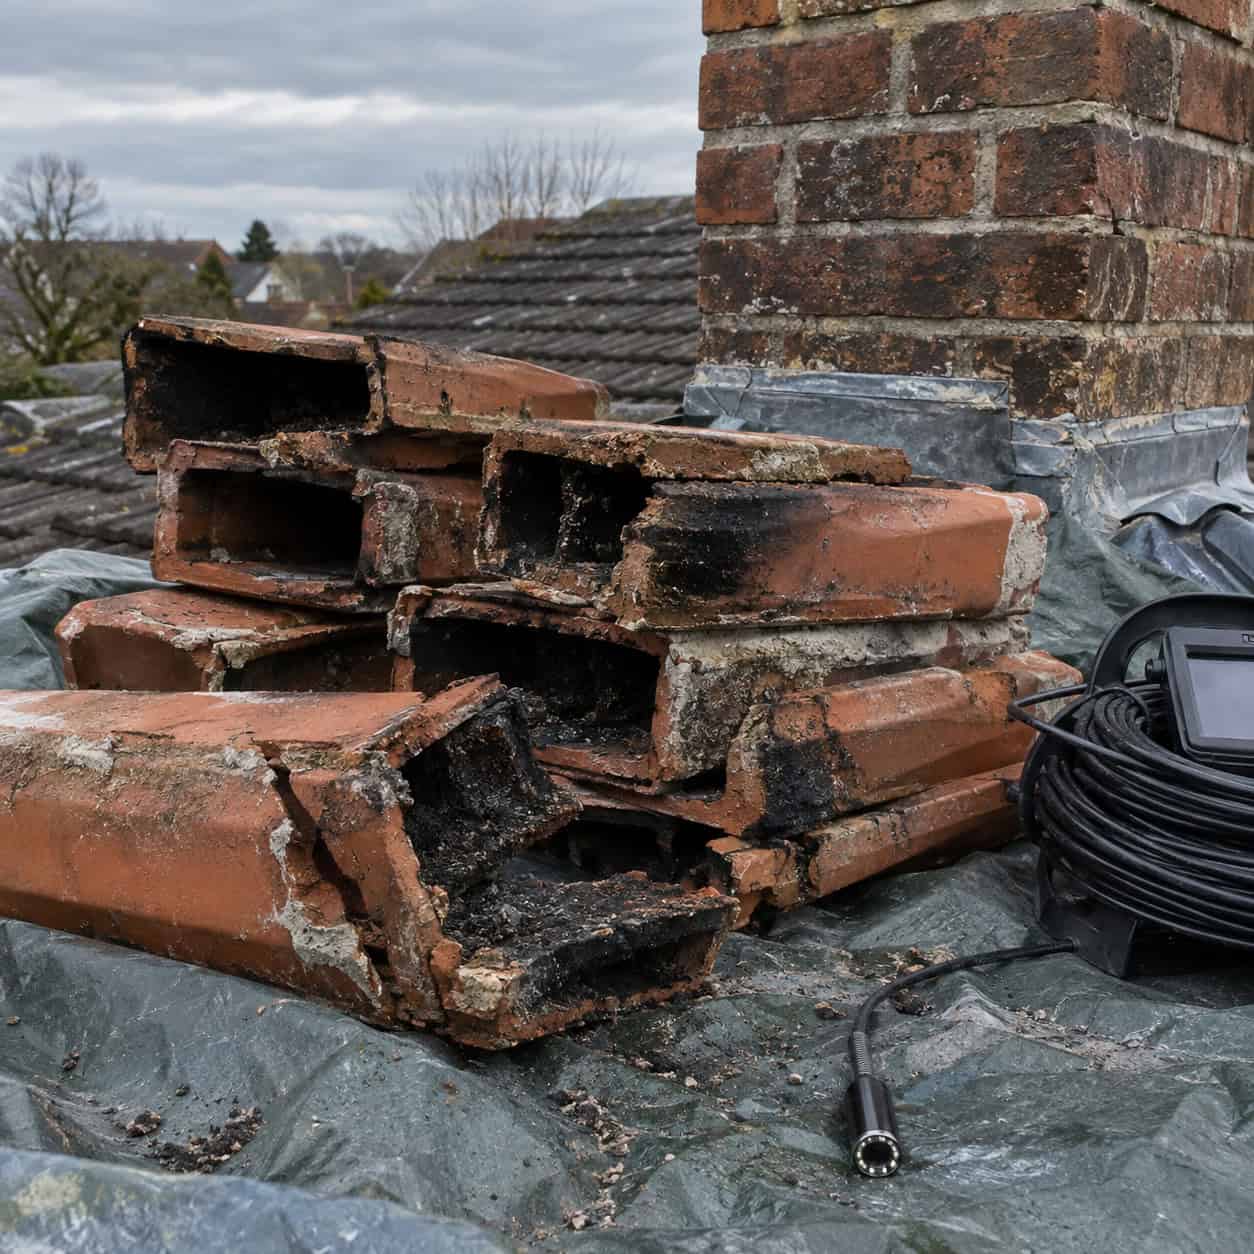
Terra-cotta tile has lined American masonry chimneys since the early 1900s, and when it’s intact it works beautifully. The problem is what happens to it after one chimney fire, one lightning strike, or ninety freeze-thaw cycles a year.
Clay doesn’t fail gracefully. It spalls, cracks through, and the mortar joints between tiles wash out — and those gaps put hot flue gas and liquid creosote in direct contact with the wood framing that was built tight to the masonry a century ago. House fires that start inside a chimney and show up in the attic almost always trace back to this.
You can’t assess it from the firebox with a flashlight. A proper evaluation means a camera run up the full flue — what the industry calls a Level 2 inspection, standard before any appliance change, any property sale, or after any chimney fire or earthquake. A Level 3 goes further and involves opening up the chase or removing masonry where a hidden defect is suspected.
Typical Level 2 cost runs $200 to $500. Compare that to the alternative.
When tiles have failed, pros install a listed stainless liner sized to the appliance — rigid where the flue runs straight, flexible where there are offsets, and wrapped in an insulation blanket or poured vermiculite where clearance to framing is short or where a cold exterior chase needs the thermal help. Alloy matters: 316 for wood, and heavier 316Ti or AL-29-4C where corrosive condensate is a factor. Expect $2,500 to $5,000 for a typical two-story install.
The one thing never to do is connect a new stove or insert to a questionable clay flue because the house “always had fires in it.”
13. A Gas Fireplace Sized by Looks, Not BTUs
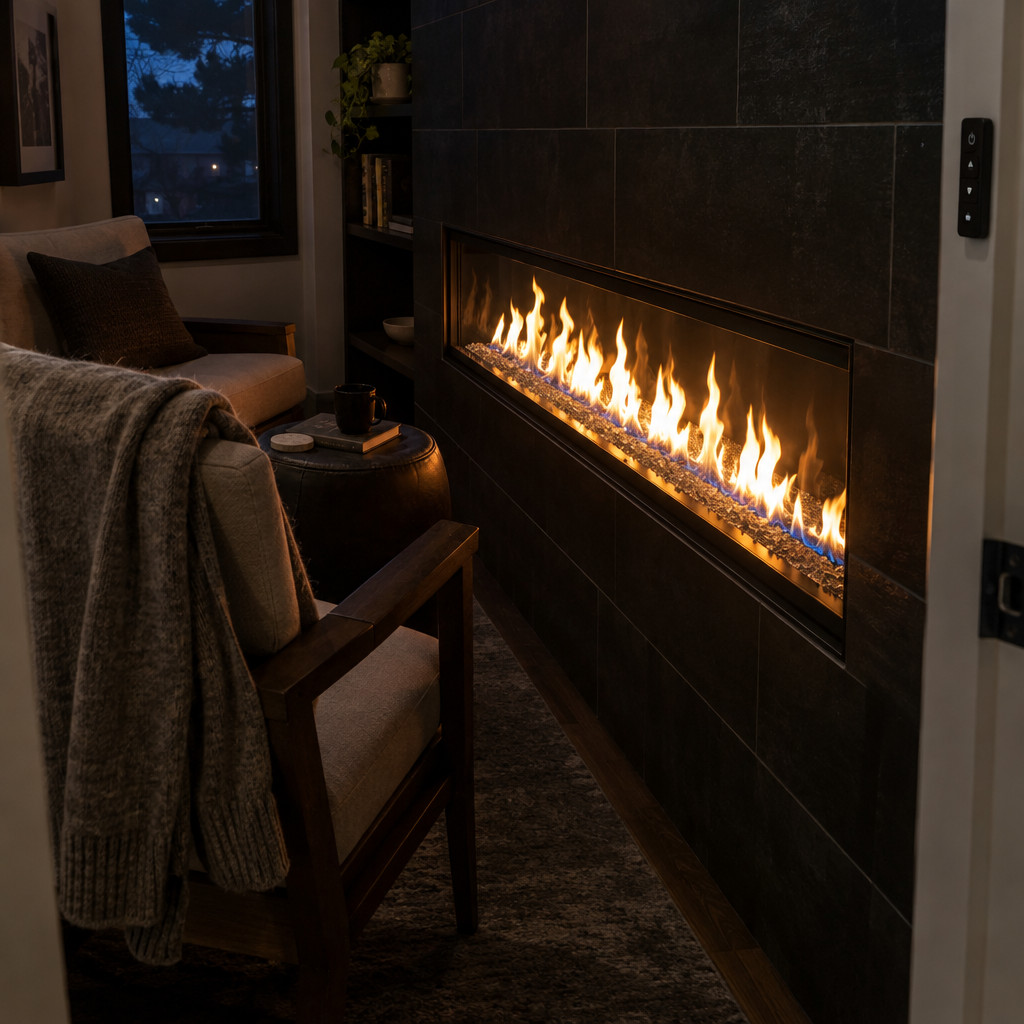
Linear units got long and the BTU ratings got big. A 60-inch showpiece at 40,000 BTU in a 300-square-foot sitting room will have everyone shedding sweaters in twenty minutes and shutting it off.
By winter two the pattern is set — it runs for guests and nothing else.
Rough sizing math: roughly 20 BTU per square foot in a reasonably insulated house, more in a drafty old one, less in new tight construction. A 300-square-foot room wants something in the 6,000 to 10,000 BTU neighborhood, not 40,000.
If the design calls for a big unit anyway, spec a modulating gas valve and a wall thermostat or remote. A modulating burner can idle down to 30 or 40 percent of rated output and hold a room all evening instead of blasting and quitting.
14. The Corner Fireplace
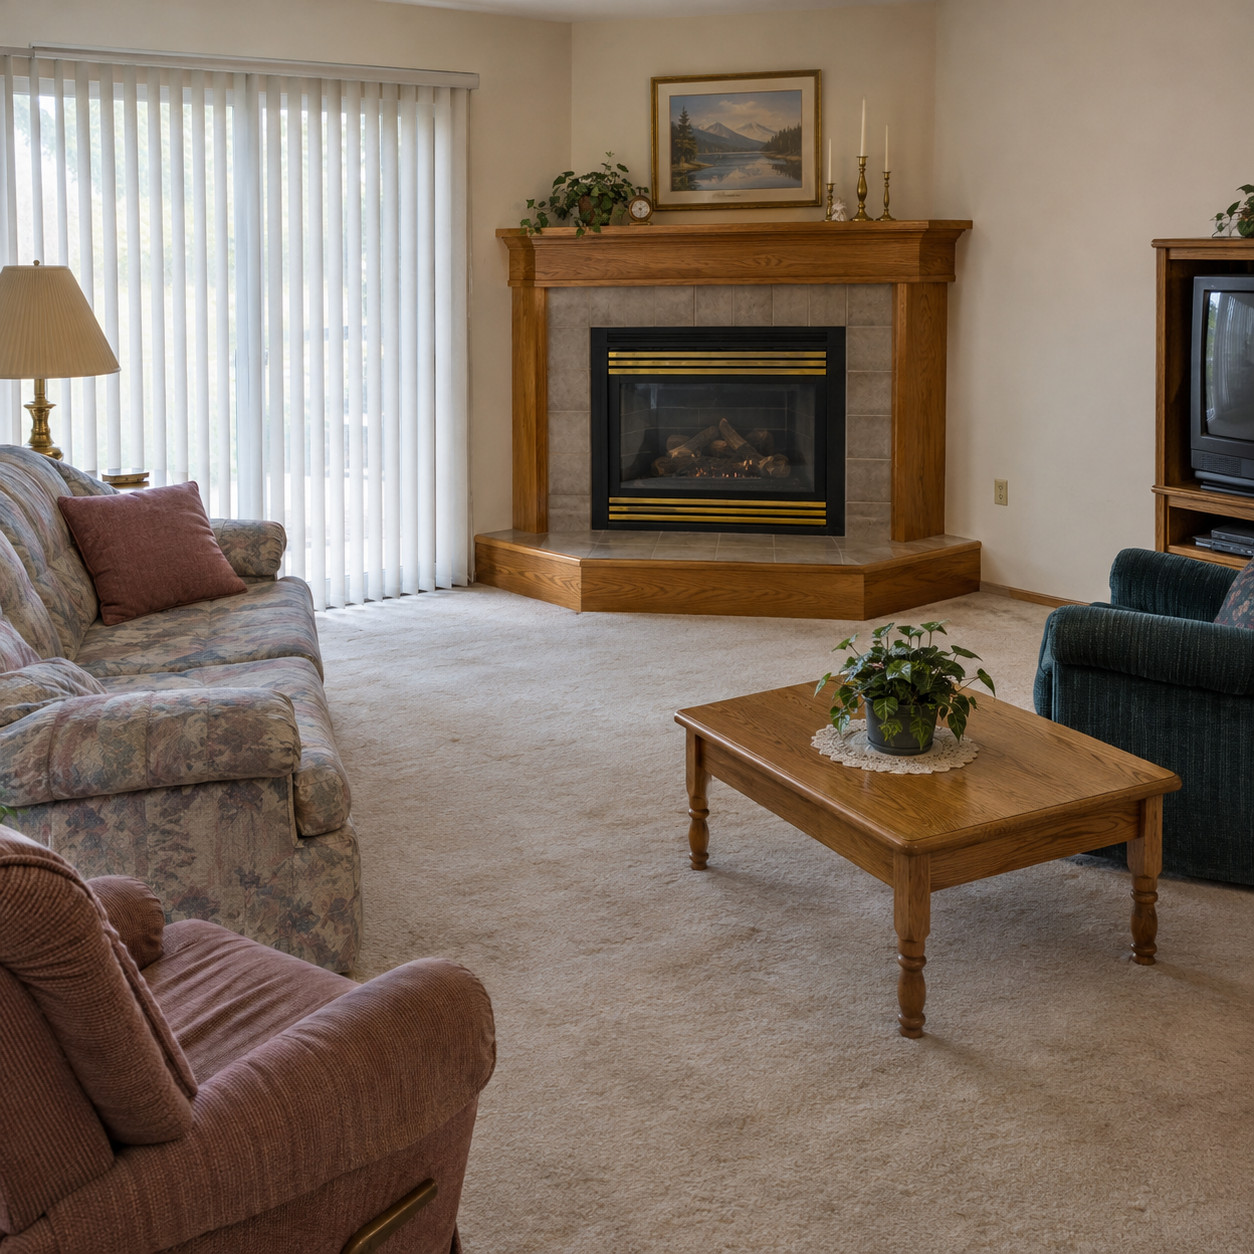
Builders loved these in the 1990s because a 45-degree firebox is cheap to frame and lets a floor plan claim a fireplace without sacrificing a full wall.
What it actually sacrifices is the room.
A corner unit takes the one wall that could have held the sofa, aims its heat diagonally into a dead zone, and forces every subsequent furniture arrangement into a compromise. Nothing faces it squarely. The rug never lines up. People rearrange that room four times over a decade and never like any version.
Pros center the hearth on a wall whenever the structure allows. When a corner is unavoidable, a see-through unit between two rooms — great room and kitchen, bedroom and bath — at least makes the placement pay for itself twice.
15. Tabletop and Wall-Mount Ethanol Fireplaces
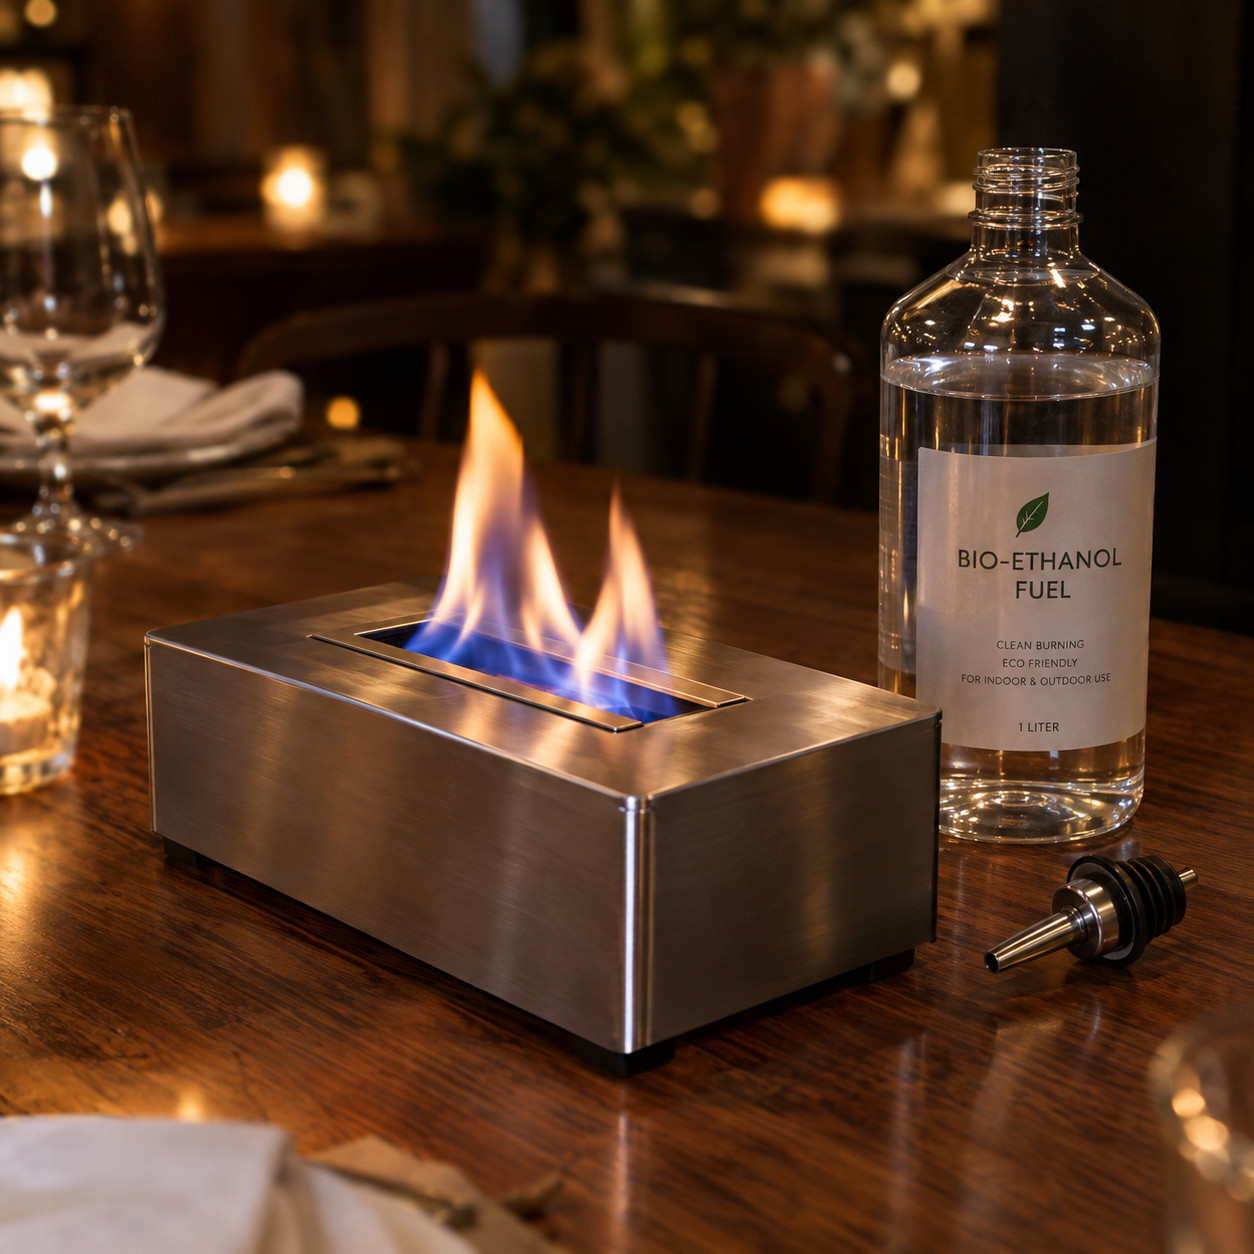
Open liquid alcohol, burning in your living room, in a container you refill by hand.
The failure mode has a name: flame jetting. Refill a burner that’s still hot and alcohol vapor can ignite and shoot flame several feet, often onto the person holding the bottle. The U.S. Consumer Product Safety Commission has issued stop-use warnings on specific tabletop models over exactly this hazard, along with the pool-fire risk when a lightweight unit tips and spreads burning liquid across a table.
And because there’s no vent, everything the flame makes stays in the room — lab testing on these units has measured carbon monoxide, nitrogen dioxide, and ultrafine particles in indoor air.
The look is achievable without any of that. Pros point clients to a listed sealed direct-vent unit, or to a water-vapor electric fireplace, which uses ultrasonic mist lit from below to produce a startlingly convincing three-dimensional flame that’s cool to the touch.
16. Skipping the Outside Combustion Air Kit
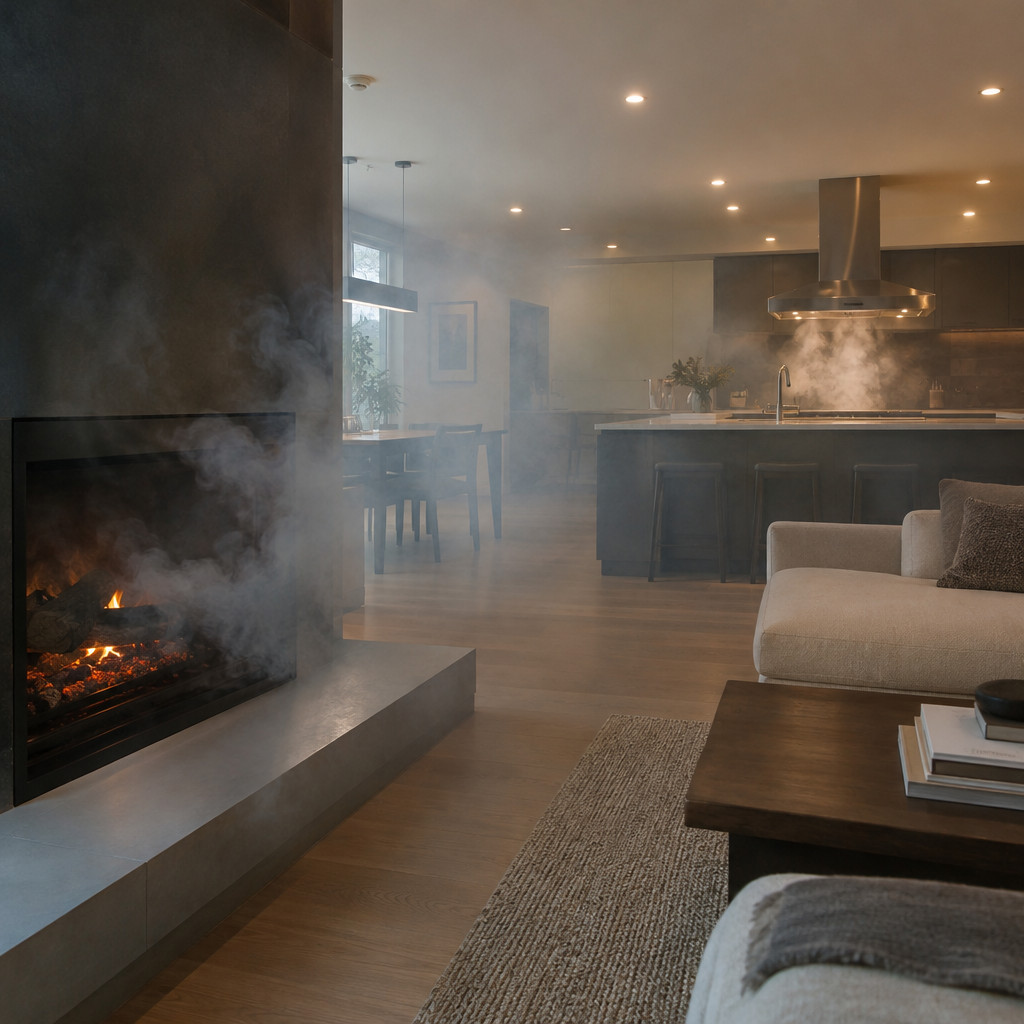
Every fire needs air. In a house built before 1960 it found plenty through the walls, the windows, and the attic hatch.
A house built after 1995 — or an old one that’s been air-sealed and re-insulated — doesn’t leak enough to feed a fire. So the fireplace competes for air with the 600 CFM range hood, the clothes dryer, and two bath fans. It loses every time, because those appliances have motors and the chimney only has buoyancy.
The symptom is specific and maddening: the fire draws fine until somebody starts cooking, then smoke rolls out into the room. Turn the hood off and it recovers.
Fix it with a dedicated outside-air duct running to the firebox, or by specifying a sealed-combustion appliance that never touches room air at all. The EPA’s Burn Wise program is a solid starting point on appliance types before you call anyone for a quote. While you’re thinking about air sealing, it’s worth knowing how attic insulation changes a house’s pressure balance — the two problems are related more often than people expect.
17. Hardwood or Carpet Running to the Firebox Edge
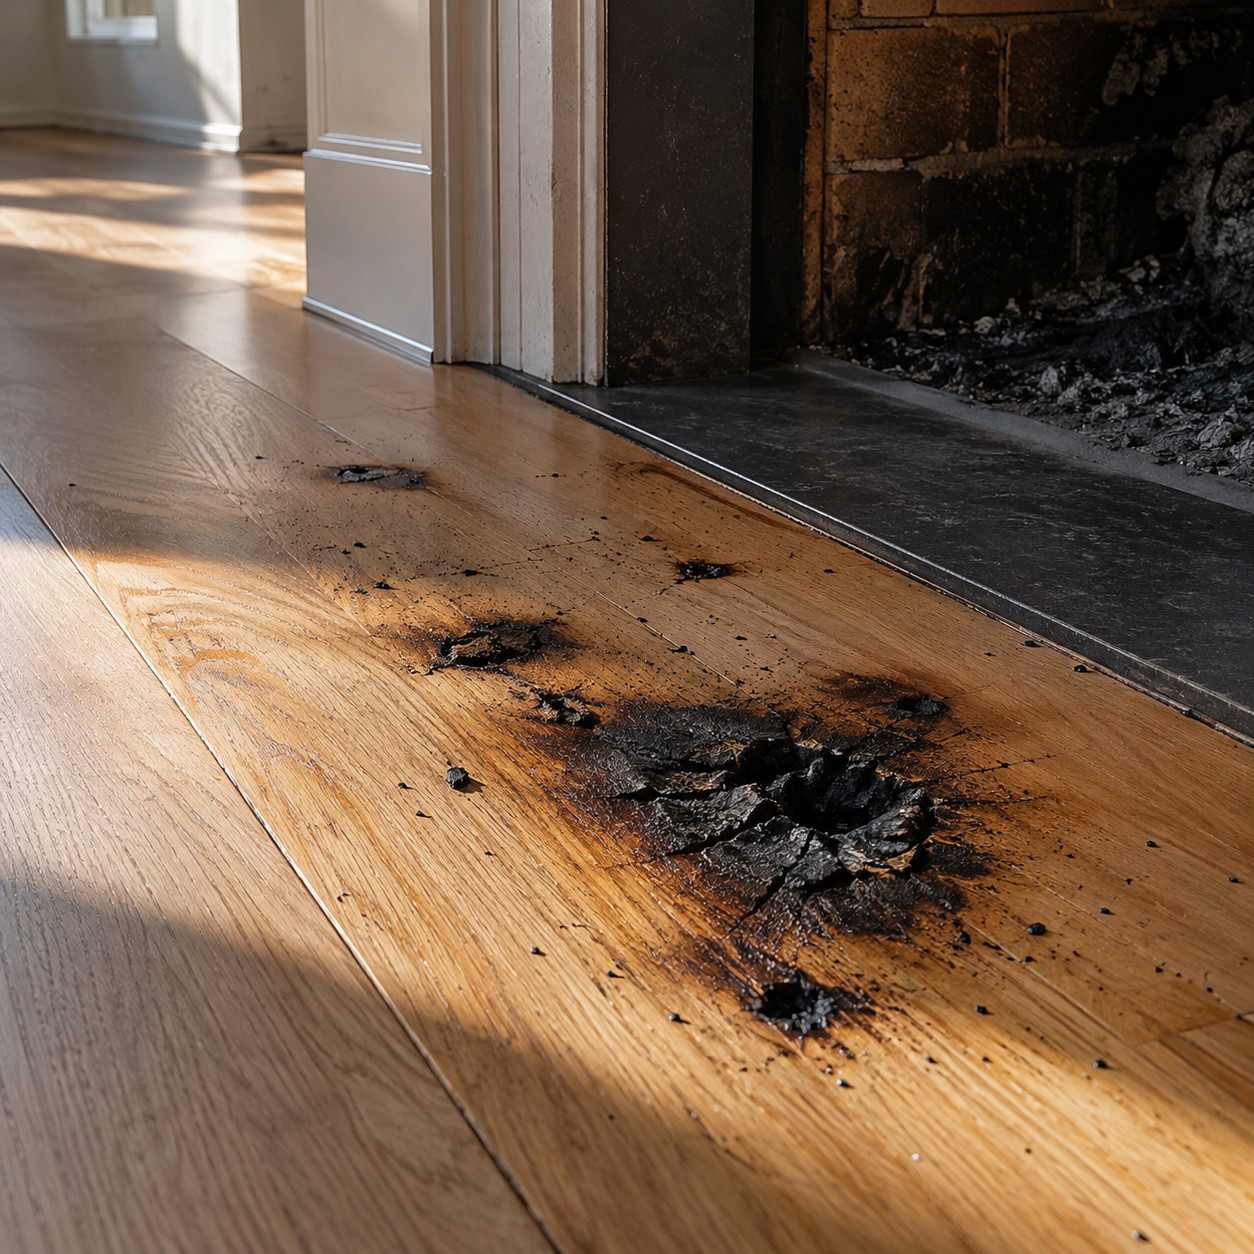
Hearth extensions aren’t decorative trim. They exist because embers roll, sparks pop, and logs shift at two in the morning.
Code typically requires a noncombustible extension of at least 16 inches in front of the opening and 8 inches to each side, growing to 20 and 12 for larger fireboxes — and listed appliances carry their own specified dimensions that supersede the general rule.
Skip it and you get a constellation of black pits burned into white oak within two seasons. Carpet is worse: synthetic fiber melts into hard shiny craters that can’t be repaired, only patched.
The sequencing mistake is almost always the same — flooring goes in during the remodel, the hearth gets figured out later, and by then the subfloor height is wrong for a proper stone apron.
Set the hearth extension first. Then floor to it.
18. Terminating the Direct Vent in the Wrong Spot
Direct vent solved the combustion-air problem. Then installers started putting the termination wherever the pipe ran easiest.
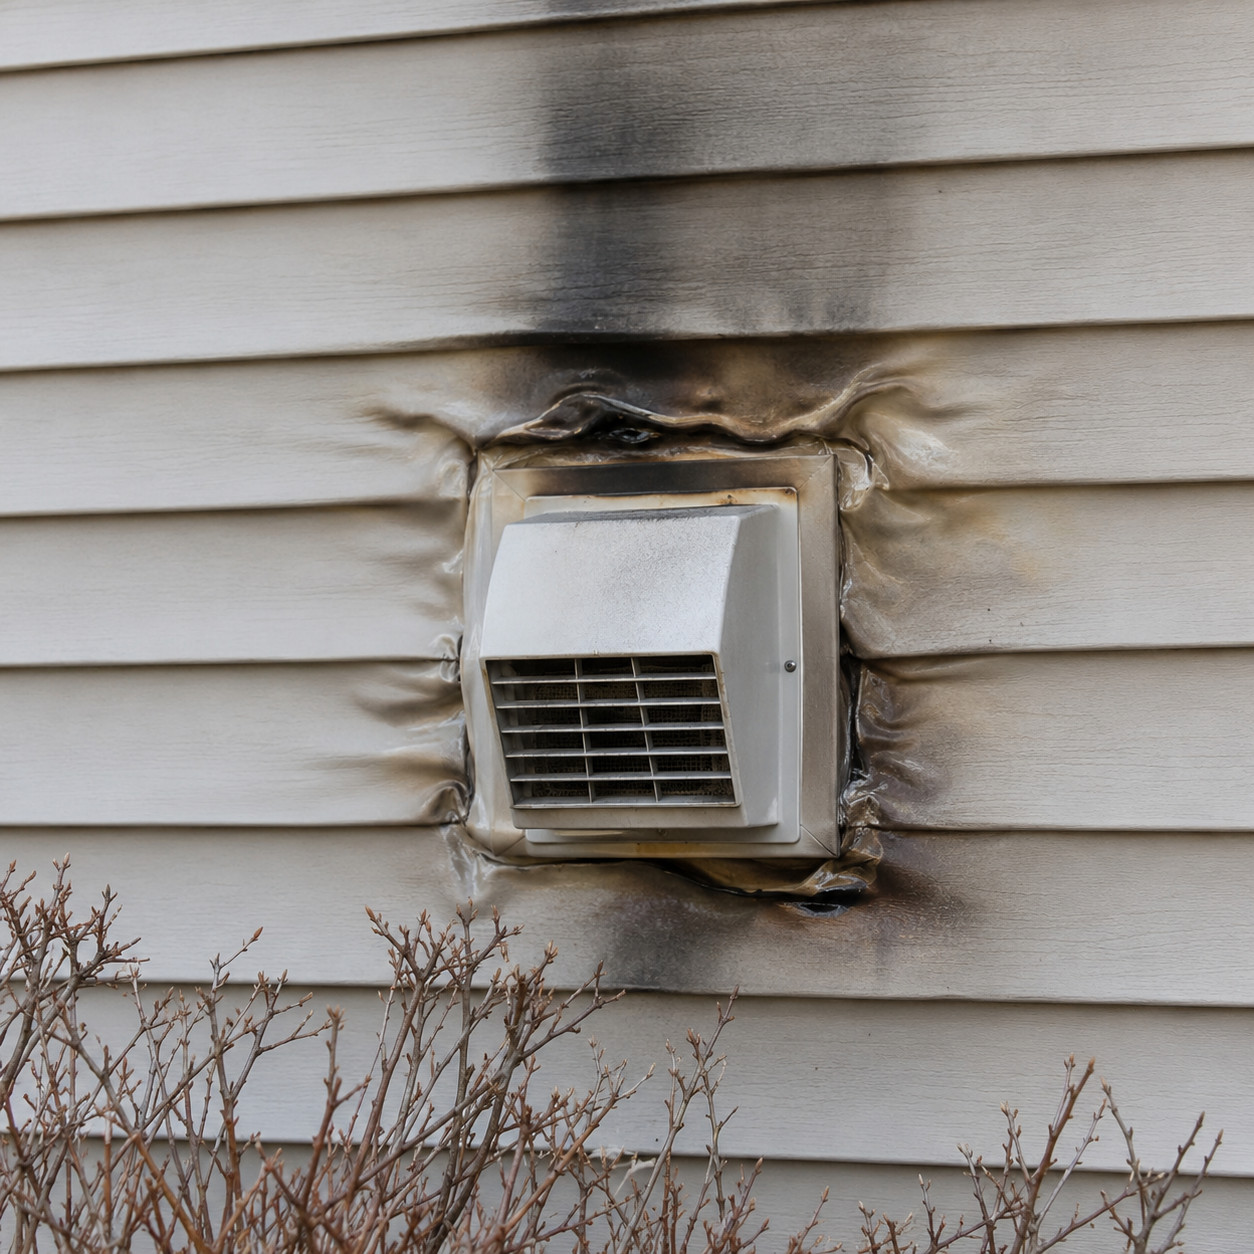
Under a deck, exhaust pools against the joists and stains them. Next to an operable window, it comes right back in. Below a soffit vent, it goes into the attic. Beside vinyl siding, the surface temperature softens the PVC and you get a melted, buckled patch that no amount of scrubbing fixes.
Clearances are published in the manual for a reason, and they’re not suggestions — typically 12 inches below a soffit, 12 inches above grade or expected snow line, 36 inches from any operable opening, and well clear of gas meters and dryer vents.
Vinyl walls need a factory standoff kit that holds the terminal off the siding with a metal shield behind it. Low grade or deep snow country needs a snorkel termination that turns the exhaust upward above the drift line. Both parts cost under $200 and prevent the single most visible installation failure on the exterior of a house.
19. The Pellet Insert Nobody Warned You About
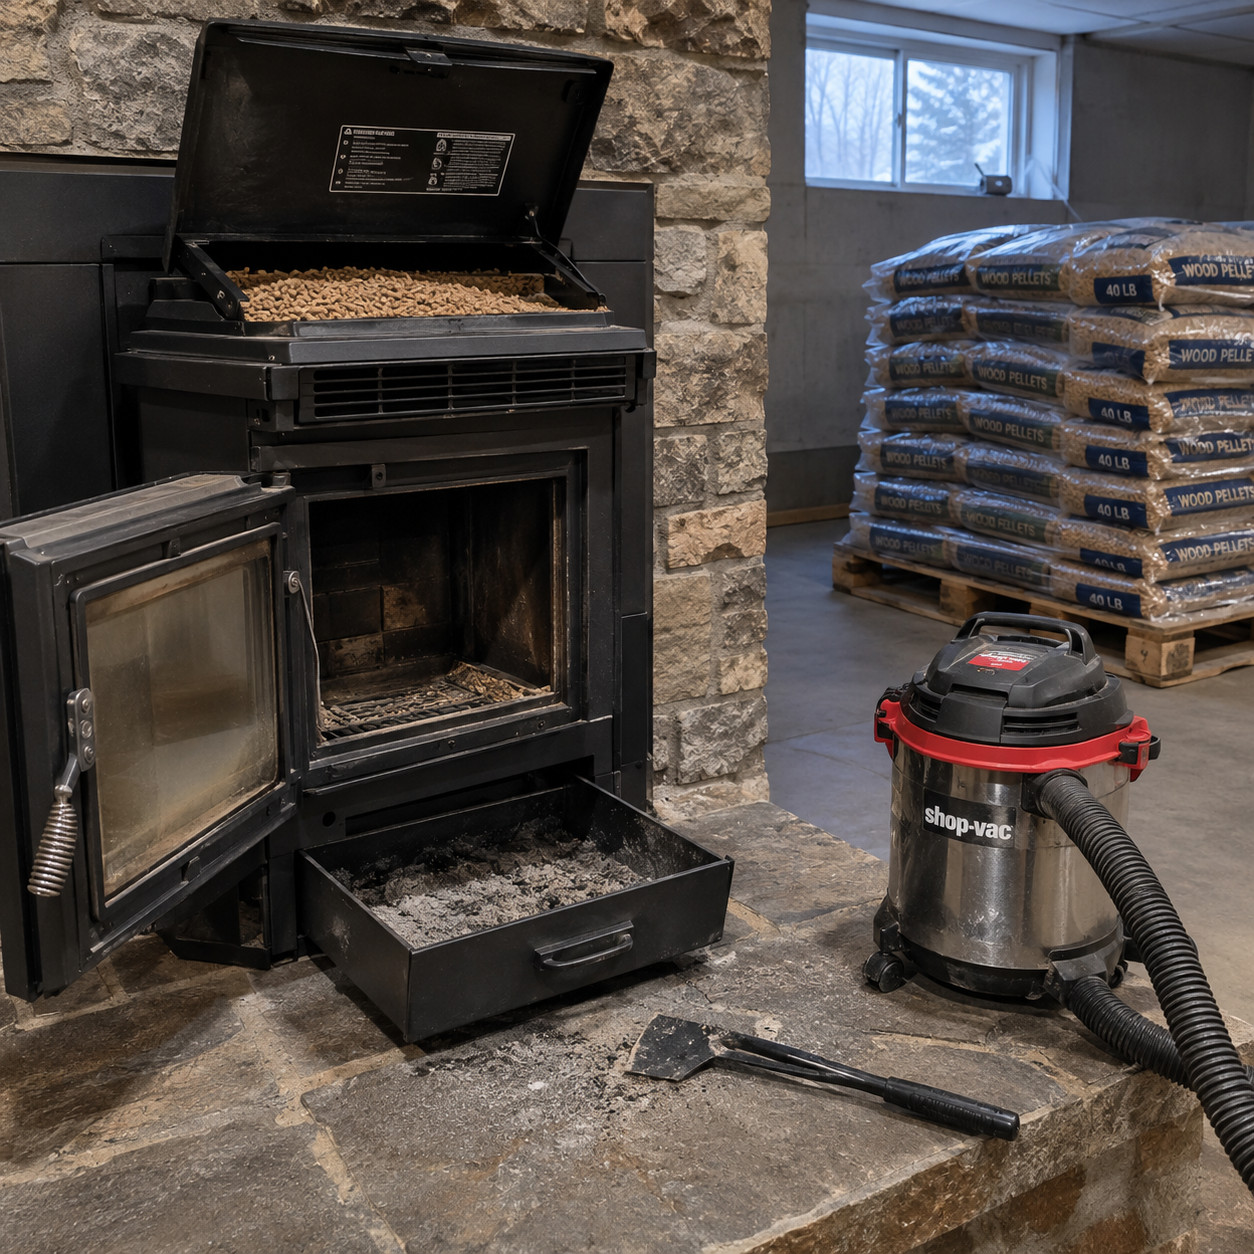
Pellet stoves surged in 2008 when oil spiked, and a lot of them went quiet within three years. Not because they’re bad appliances — they’re efficient and they burn clean — but because they’re a routine.
They need electricity. The auger, the combustion fan, and the convection blower are all motors, so a pellet unit is useless in a power outage unless you’ve added a battery backup or generator inlet.
They need storage. A ton of pellets is fifty 40-pound bags that must stay bone dry, which means dedicated garage or basement space and hauling bags up stairs all winter.
And they need weekly attention. Scrape the burn pot, empty the ash pan, vacuum the heat exchanger. Miss it and the unit starts shutting down on error codes.
Pros ask the honest question first: are you the kind of household that will do a chore every Sunday in February? If yes, a pellet insert is excellent and the fuel is cheap. If the answer is a pause, they point toward a gas insert or a good wood insert and nobody regrets it.
20. The Galvanized Chase Cover and Builder Cap
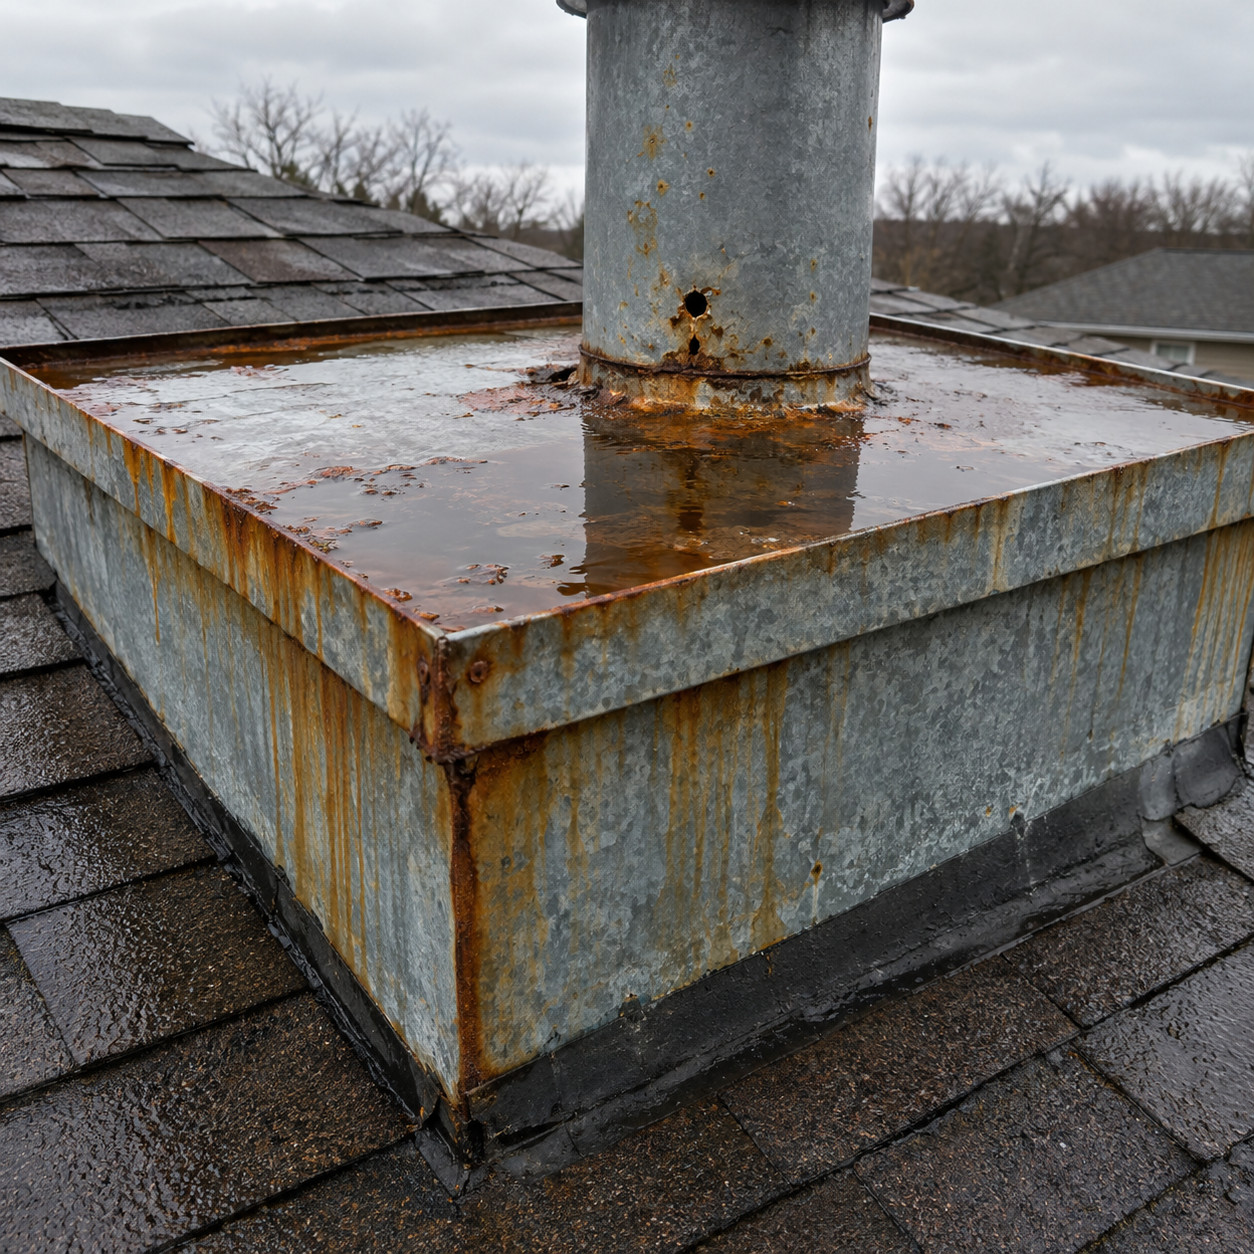
Climb up and look at the top of a framed prefab chimney chase. If the big flat metal lid has rust streaks running down the sides, you’re already on the clock.
Builder-grade chase covers were stamped from thin galvanized steel and set essentially flat. Flat metal ponds water. Standing water eats galvanizing from the top down, and most of these covers perforate somewhere between year twelve and year twenty.
What happens next is slow and expensive and completely invisible from inside the house.
Water enters at the pinholes and runs straight down the inside of the framed chase — a hollow wooden box, usually 2×4 studs with OSB sheathing, that nobody ever opens. It wets the top plates and the studs. It soaks whatever insulation is packed in there, and wet fiberglass holds moisture against wood for months. Mold colonizes the sheathing. The chase framing softens where it meets the roof deck, and the deck itself starts to delaminate around the penetration.
By the time a brown ring shows up on the living room ceiling below, you’re usually looking at rotted framing, compromised roof decking, ruined insulation, and remediation — not a $300 cover swap. Restoration bills in the five figures start exactly this way.
The replacement pros install is a cross-broken stainless or copper cover: a shallow peak formed into the center so water sheds, a drip edge that throws runoff clear of the chase sides, and the flue collar welded rather than caulked. Stainless runs roughly $400 to $900 fabricated to your dimensions, copper more. Add a proper cap with a spark arrestor screen while you’re up there.
One rusted lid is the cheapest warning a house ever gives you.
21. A Porous Limestone or Soft-Plaster Surround
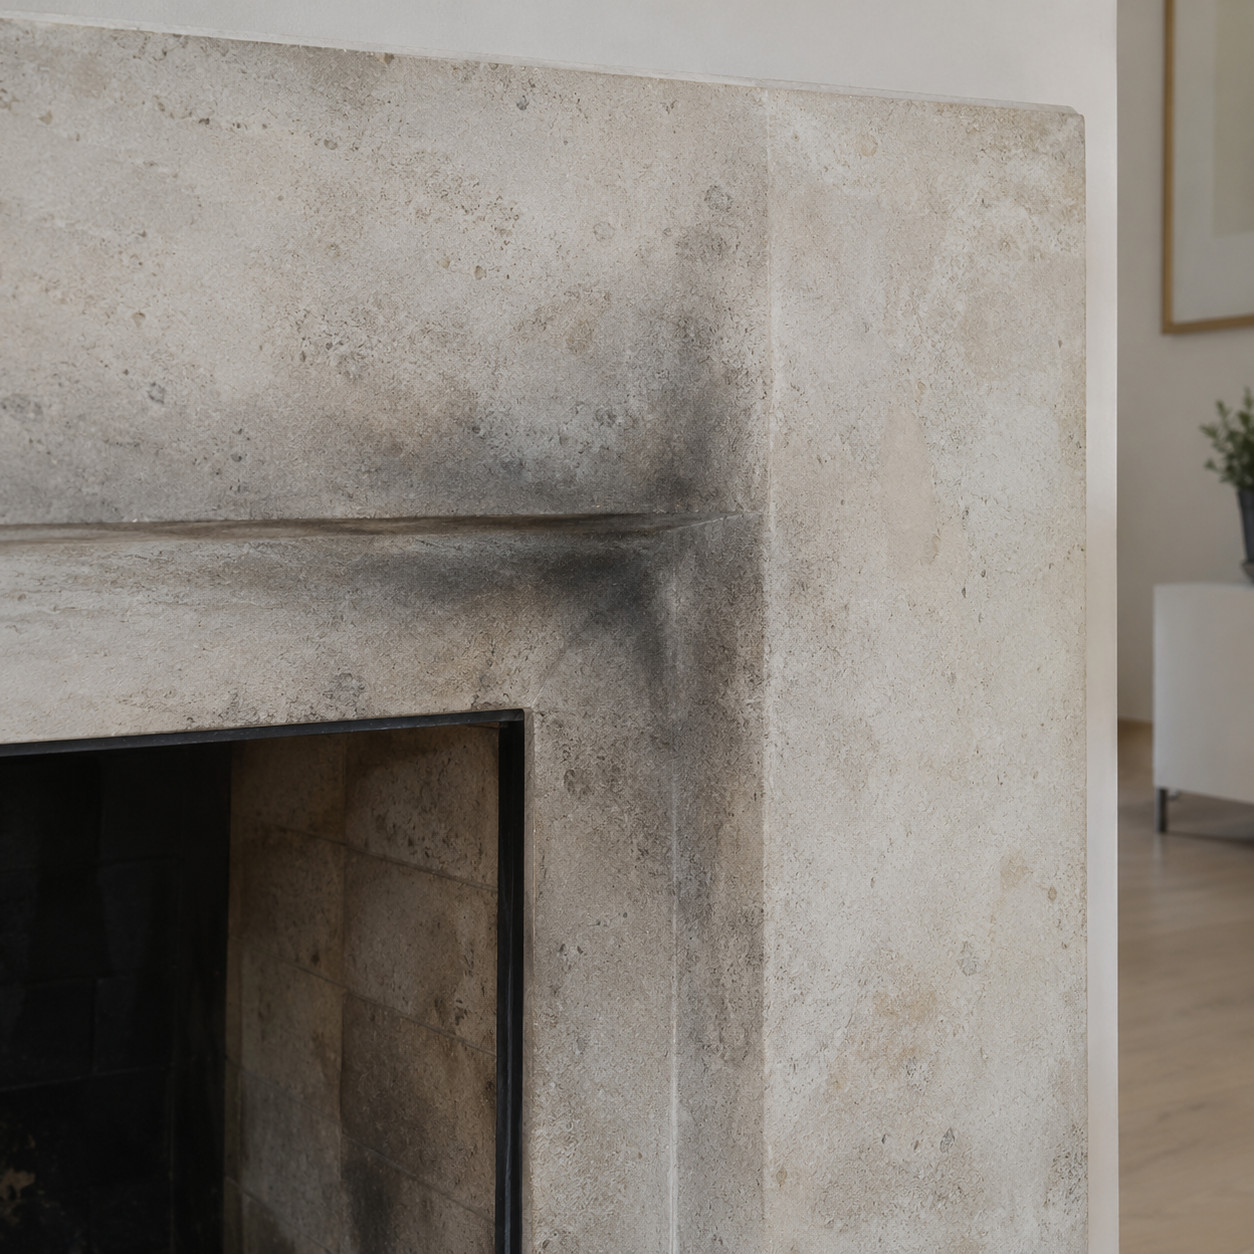
Limestone, travertine, and lime plaster have gorgeous texture. That texture is open pore structure, and open pore structure is a sponge for soot.
The first winter it’s fine. The second winter there’s a soft gray bloom arcing up from the corners of the opening, and the first time somebody scrubs it the stone lightens unevenly and it looks worse. Red wine on unsealed limestone is permanent. So is the gray.
Pros either use dense honed stone with a low absorption rate, or they pre-seal with a penetrating impregnator before the first fire and reapply on a schedule. Firebrick-faced and glazed-tile surrounds wipe clean with a damp rag and look right for a hundred years, which is why old houses used them.
If you already own the soft stone, seal it now rather than after the staining starts.
22. Running a Propane Fireplace as Main Heat
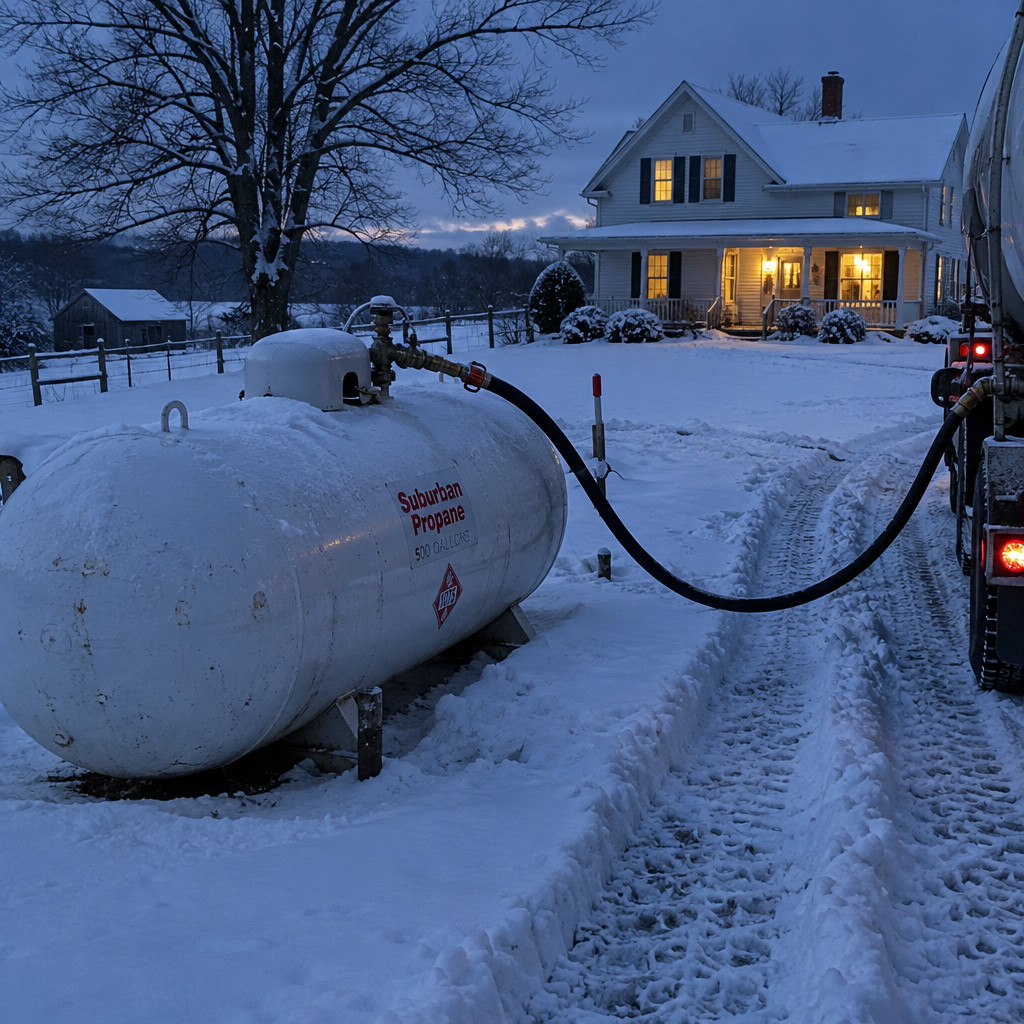
Propane carries about 91,500 BTU per gallon. It’s a fine fuel. The problem is the billing model.
Natural gas arrives by pipe and bills monthly in small increments nobody scrutinizes. Propane arrives by truck and bills in one number. A 500-gallon fill at January pricing is a genuinely unpleasant piece of mail, and it lands weeks after the decision that caused it.
A 35,000 BTU fireplace run six hours a day burns roughly 2.3 gallons daily. Thirty days of that is 70 gallons. Run it as primary heat all season and the arithmetic gets ugly fast.
Pros right-size the appliance to the room, put it on a thermostat so it cycles instead of running wide open, and move the actual heating load somewhere cheaper — usually a cold-climate heat pump. Then the fire goes back to being a fire.
23. Electronic Ignition With No Battery Backup
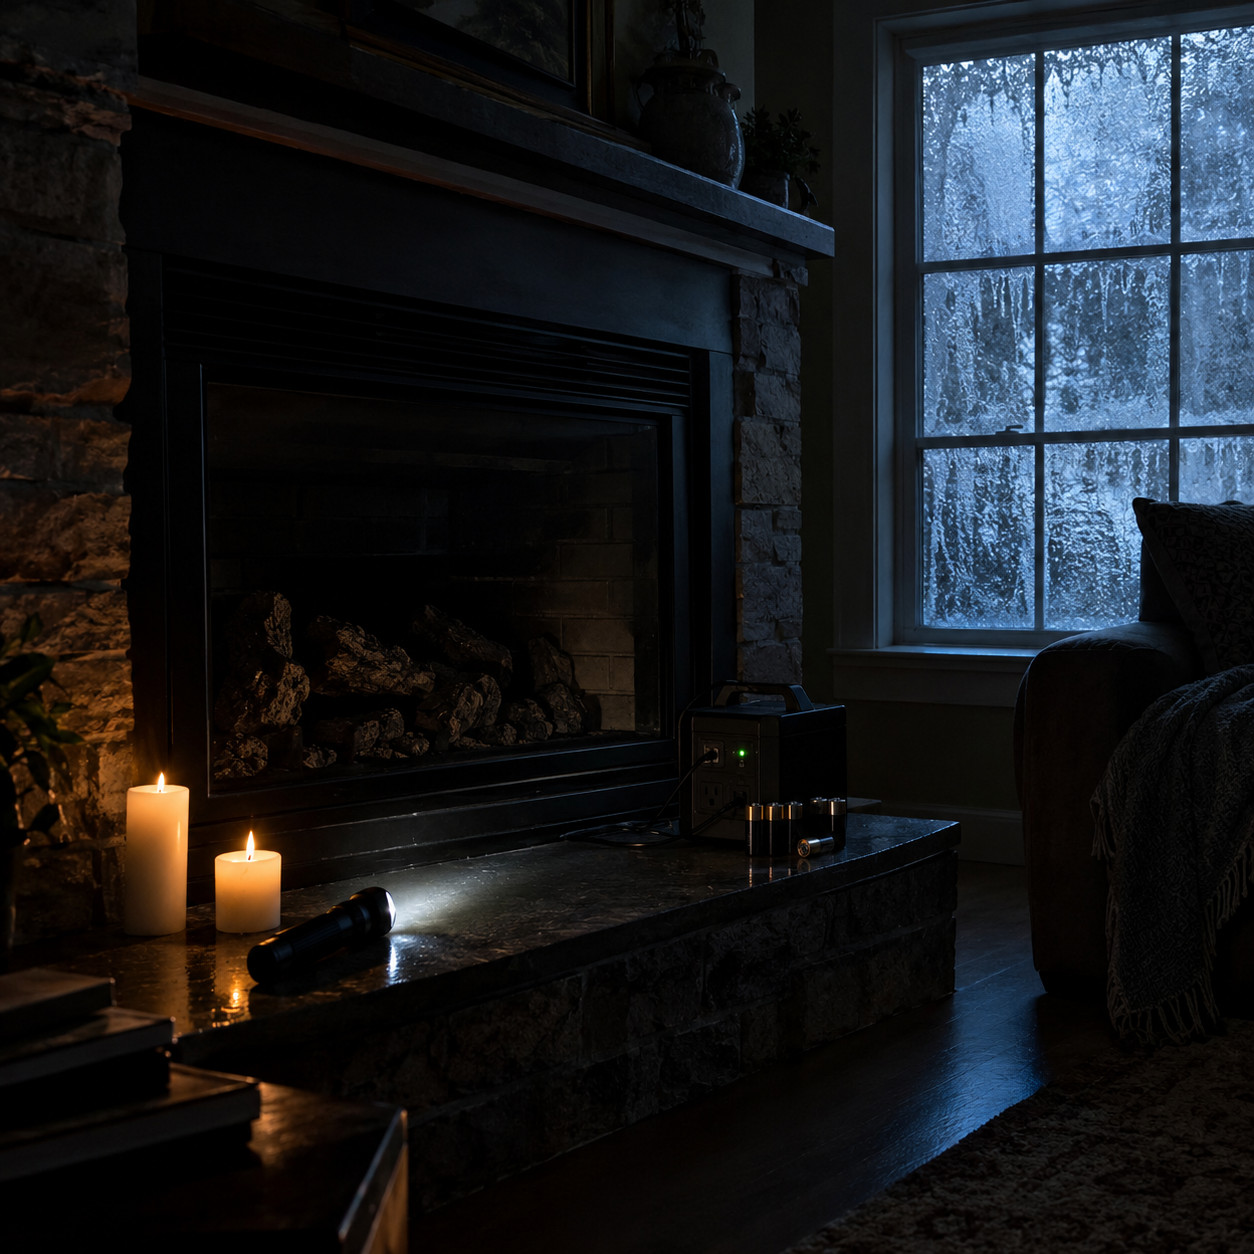
Modern gas fireplaces mostly use intermittent pilot ignition, which is genuinely better — no pilot burning all summer, better efficiency, electronic safety monitoring.
It also means the fireplace is an electrical appliance.
Ice storm takes the lines down. Furnace is dead. Everyone heads to the one thing in the house that burns fuel and doesn’t need the grid, and it clicks and does nothing. That’s the moment people discover what intermittent pilot means.
Nearly every manufacturer sells a battery backup module, typically $50 to $150, that runs the ignition module off four D cells when line power drops. Install it. Keep the batteries fresh.
The alternative is choosing a millivolt standing-pilot unit, which generates its own control voltage off the pilot flame’s thermopile and lights with a match if it has to. Less efficient, more reliable when it counts.
24. An Uncertified or Secondhand Wood Stove
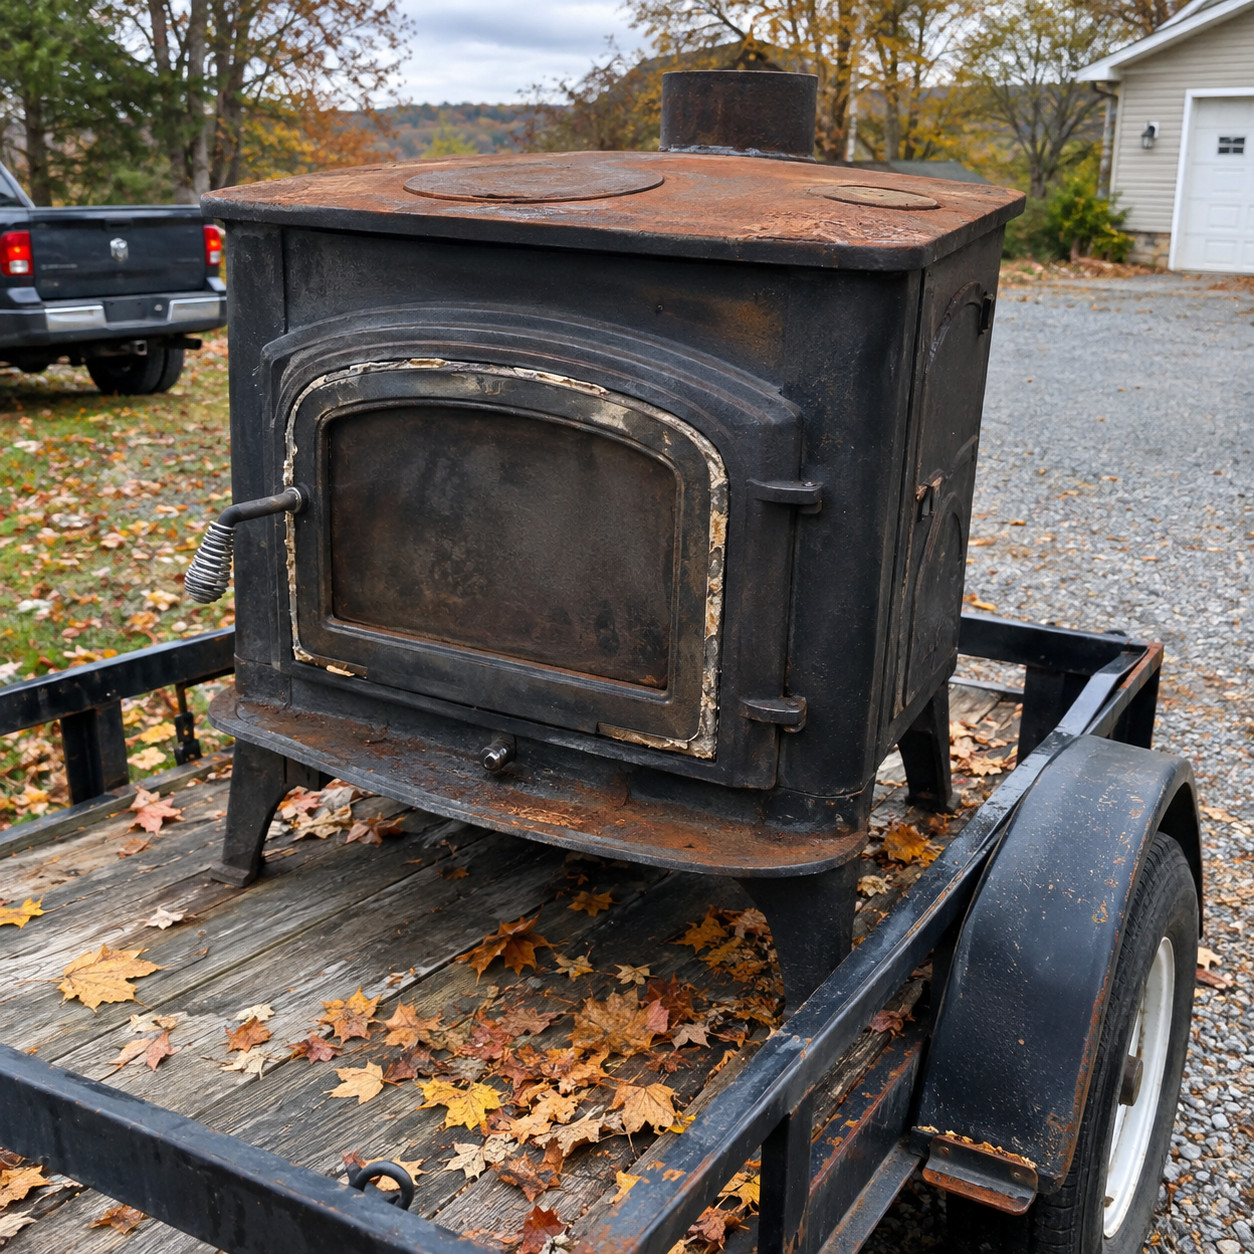
There’s always a beautiful old stove on Marketplace for $300, and it’s always a bigger decision than it looks.
Wood heaters manufactured for sale in the U.S. have had to meet EPA emissions certification since 1988, with the standard tightened substantially in 2015 and again in 2020. An uncertified pre-1988 stove will burn two to five times dirtier, consume noticeably more wood for the same heat, and build creosote faster because it can’t hold a clean secondary burn.
The regulatory side varies enormously by location and that’s where people get caught. Many local air districts restrict or prohibit installation of uncertified appliances outright. Some areas tie woodstove removal to property transfer. Seasonal burn bans during inversion events are common across the mountain West and parts of the Northeast. None of that is uniform, so the only reliable move is to call your local building department and your regional air authority before you buy anything.
Then there’s insurance. Carriers routinely ask whether a solid-fuel appliance is professionally installed and permitted, and some require documentation at binding. An unpermitted install with no inspection record and no listing tag is an argument you do not want to be having after a loss — Fireplaces Direct puts skipped permits near the top of its installation-mistake list for exactly that reason. The Hearth, Patio & Barbecue Association of Canada publishes a plain-language consumer overview of appliance types and certification that’s useful on either side of the border.
What pros do: buy a currently certified stove or insert, pull the permit, get the inspection, and hand the owner a folder with the listing label photo, the permit, the inspection sign-off, and the liner spec. That folder is worth real money the day something goes wrong. It’s also worth getting your firewood seasoning right — the cleanest stove made will still gum a flue if you feed it wet wood.
25. The Outdoor Masonry Fireplace
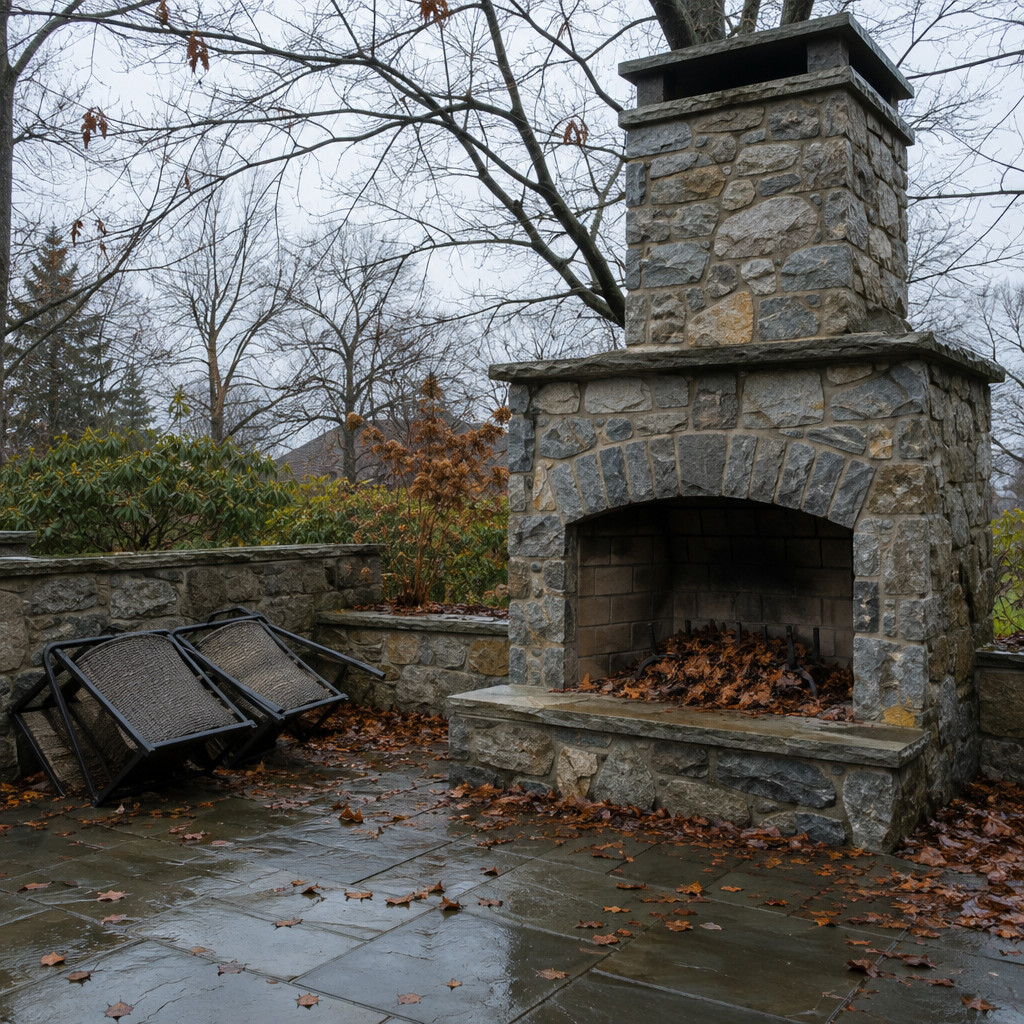
The backyard stone fireplace is one of the most photographed and least used structures in American landscaping.
Eighteen to thirty thousand dollars buys a masonry chimney that radiates in exactly one direction, meaning three chairs get warm and everybody else stands behind them. It blocks whatever view that side of the yard had. It takes forty minutes to get going. And in most of the country it sits cold from October through April and again from June through August.
Count the nights you’d actually use it. Then count what it costs per night.
Pros build a gas fire table or a round pit instead. Circular seating for eight to ten, everybody faces each other, nobody’s in the smoke, and a gas table lights in one second with a knob — which is the whole difference between a thing you use on a Tuesday and a thing you use twice a year.
26. The Fireplace in the Room Nobody Sits In
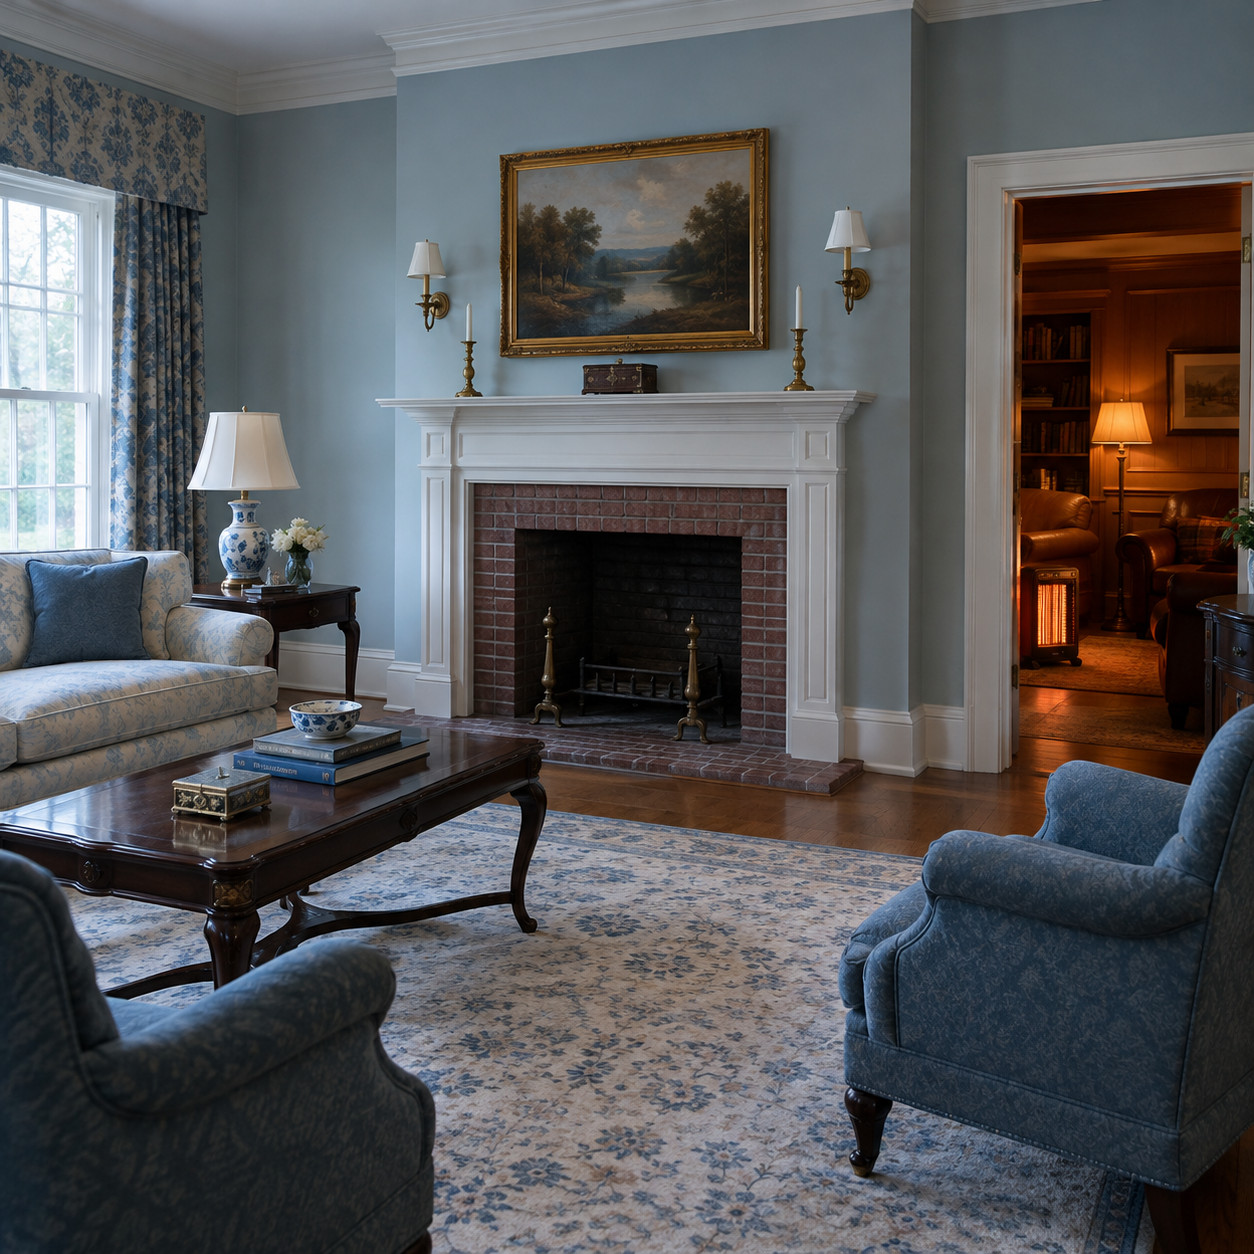
Walk through a lot of mid-century and 1990s plans and you’ll find the best fireplace in the house parked in the formal living room — the room with the good furniture, visible from the entry, used four times a year.
Meanwhile the family is in the den behind the kitchen with a plug-in heater under the desk.
It’s a placement problem, not a hardware problem, and it was baked in by floor plans that assumed formal entertaining was a weekly event. It isn’t anymore.
Pros put the hearth where life actually happens, which in nearly every modern household is the kitchen-adjacent great room. In an existing house, the practical move is a second small direct-vent insert in the room the family already occupies — a 12,000 to 20,000 BTU unit, vented out a sidewall, no chimney required.
The grand one can stay grand. Just stop pretending anyone’s using it.
27. The Fireplace in a Two-Story Great Room
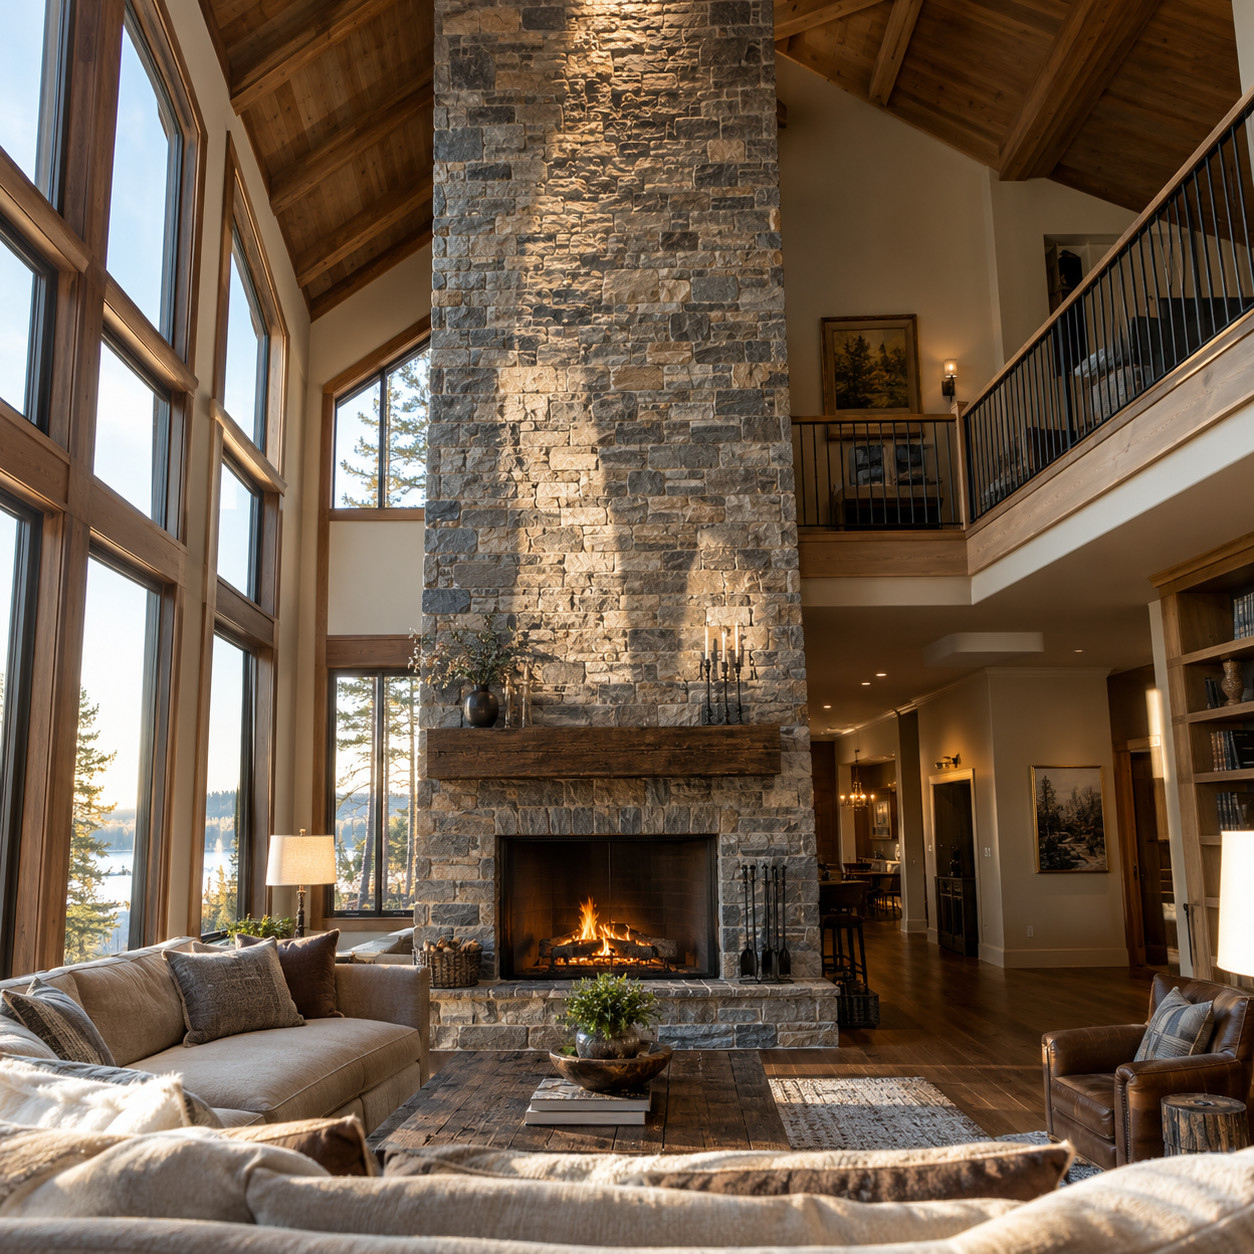
Cathedral ceilings and a stone chimney climbing twenty-four feet. Beautiful photograph, difficult physics.
Warm air rises and stratifies, so the top of that volume can run 10 to 15 degrees warmer than the seating area below. The fire is working. The heat is just collecting where the loft railing is.
You feel radiant warmth sitting close and nothing at all ten feet back.
Pros solve it mechanically: a unit with a strong convection blower to push air horizontally, a ceiling fan on winter reverse at low speed to pull stratified air back down the walls, and sometimes a return duct high on the wall tied into the HVAC. Picking the unit for the cubic volume, not the square footage, is step one.
28. A Gas Insert Ordered Without a Blower
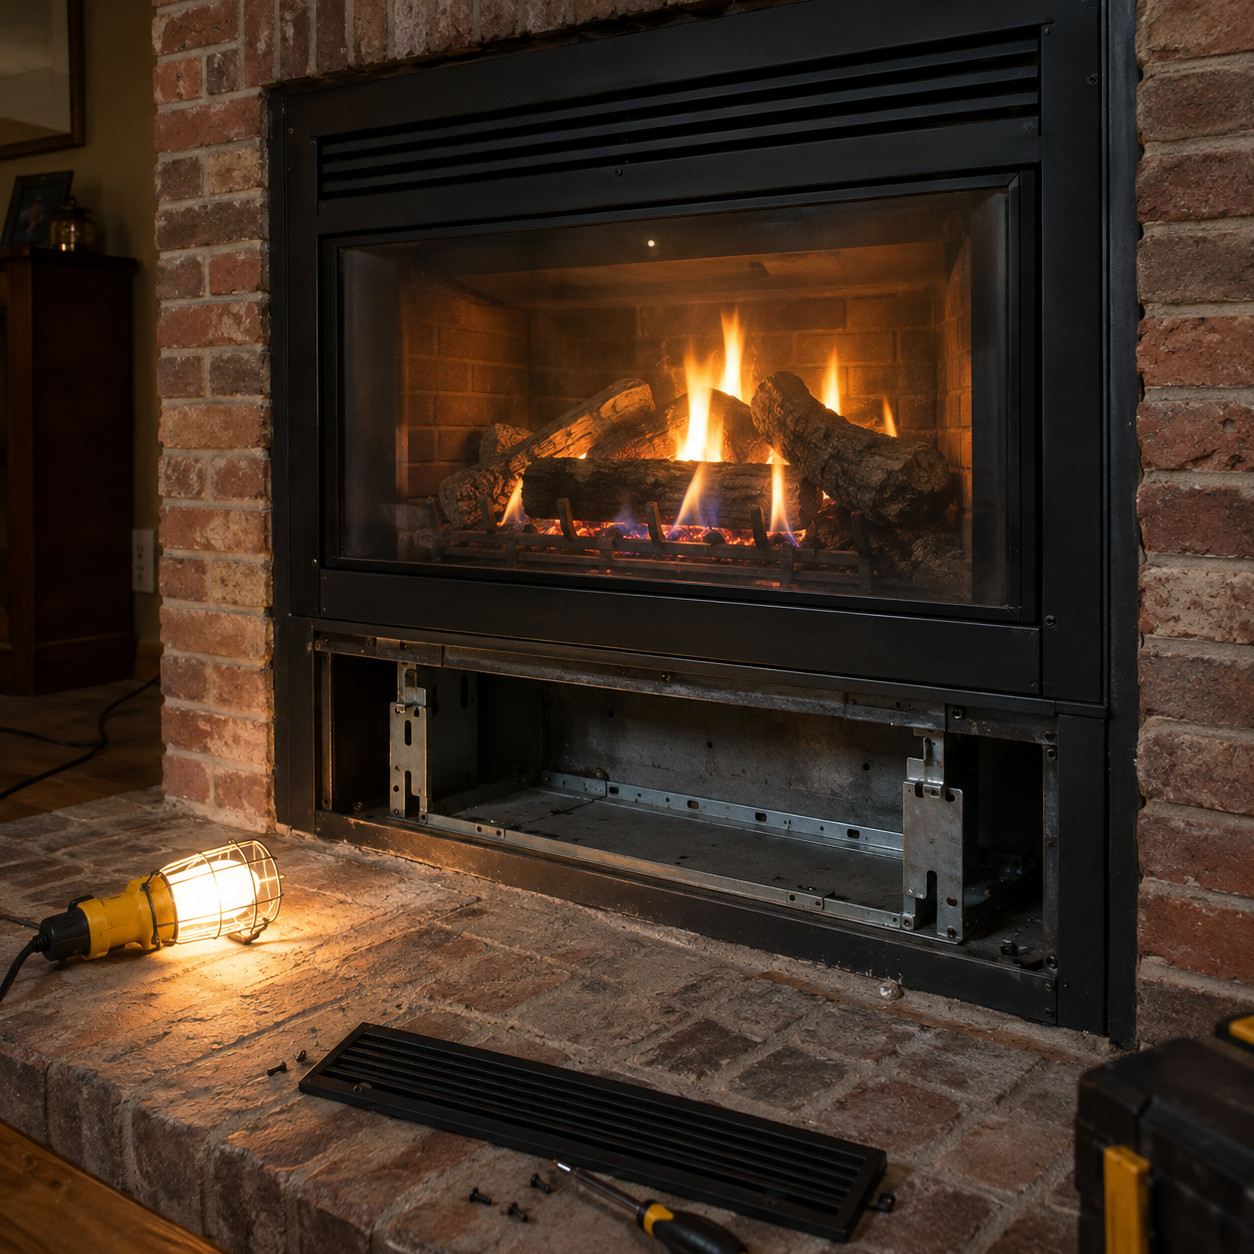
Blowers are often an option line on the order form, and plenty of people skip them to save $200.
Without one, the insert can only move heat two ways — radiating through the glass, and slow natural convection through the louvers. The unit is sitting inside a masonry cavity that’s happily absorbing a third of its output, which means you’re getting a fraction of the BTU number on the brochure.
Add the blower and the same appliance pushes heated air across the room instead of warming the brick.
Order it with the unit. Retrofitting later usually means pulling the insert back out.
29. Leaving a Standing Pilot Burning Year-Round
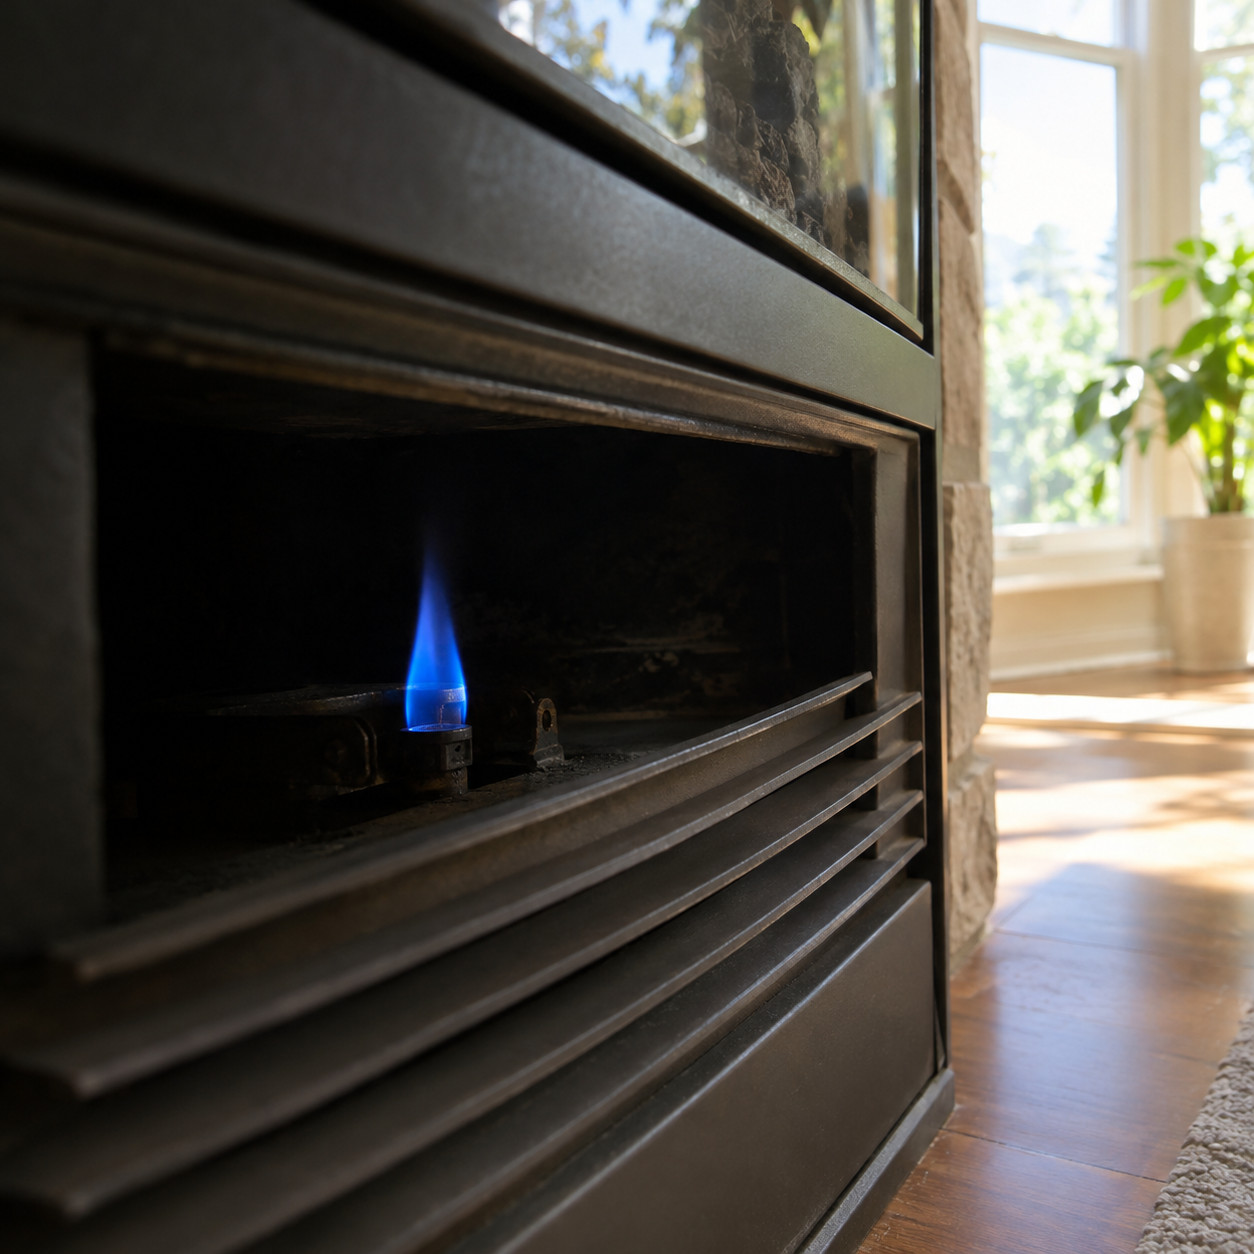
A millivolt standing pilot burns continuously — through April, through August, through every month you haven’t thought about the fireplace once.
Consumption runs roughly 600 to 1,200 BTU per hour depending on the unit. Over a full year that’s in the neighborhood of 60 to 100 therms, enough to notice on a bill and enough to add measurable heat to a house you’re paying to cool in July.
Shut it off in spring. The procedure is in the manual, usually a control knob behind the lower louver turned from PILOT to OFF, and relighting in October takes about two minutes.
One caution worth knowing: some units use the pilot’s warmth to keep the firebox dry and discourage spiders from nesting in the burner orifice. Worth a look with a flashlight before you relight in the fall.
Almost none of these are failures of equipment. They’re failures of sequencing — flooring before hearth, design before clearances, looks before BTUs, a good-looking box before a conversation about how the household actually lives.
The pros who fix these for a living aren’t smarter about fire. They’ve just watched the same second winter happen a few hundred times and learned which questions to ask first.
Ask them before the stone goes up, not after.