

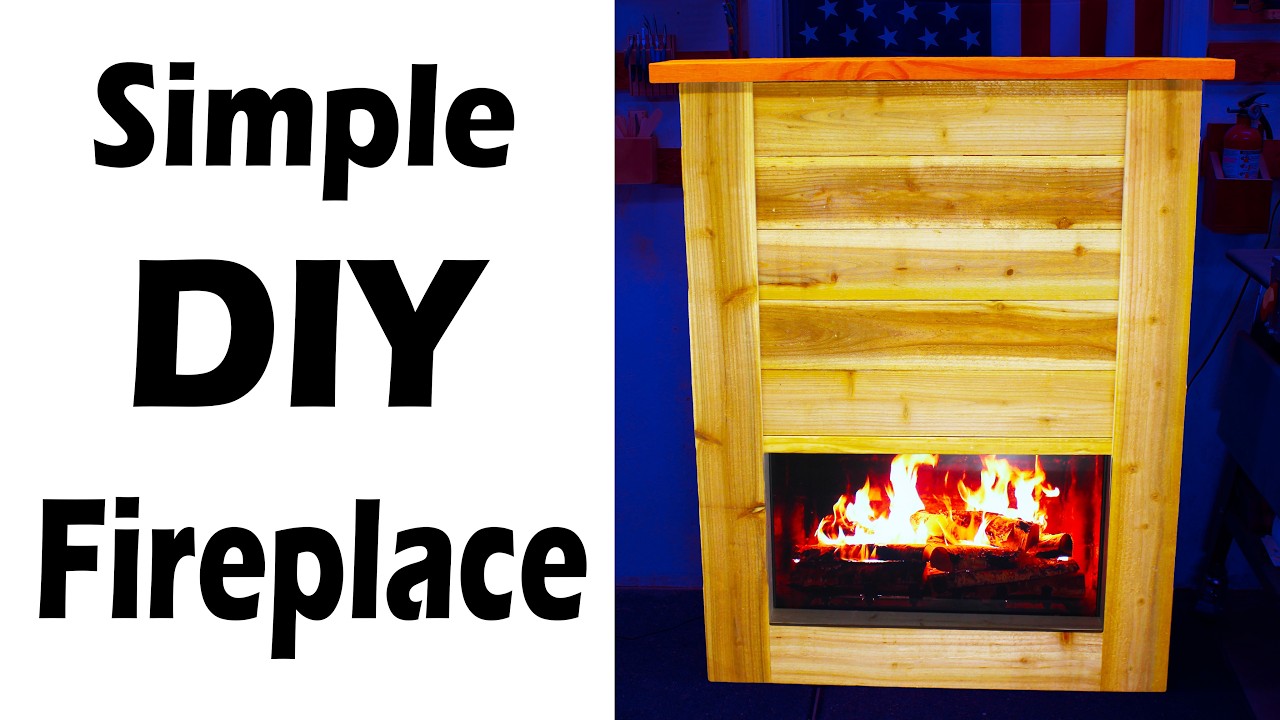
This project was built and designed by Clinton from Specific Love Creations.
Clinton creates a realistic-looking fireplace that can be used in any living space, from houses to apartments. The design focuses on aesthetics rather than heat production, using a television to create the flame effect complete with crackling sounds.
Watch the full video and subscribe to Specific Love Creations:
Materials and Initial Setup
The fireplace requires a combination of dimensional lumber and cedar fence pickets. Clinton recommends selecting the best-looking fence pickets since they serve as the visible trim that gives the fireplace its authentic appearance.
For woodworkers with a table saw, some of the smaller dimensional lumber can be ripped from larger boards to save on material costs. The project uses pocket hole joinery throughout, making it accessible for beginners while ensuring strong connections.
Building the Main Frame
Construction begins with creating the basic frame structure using the larger dimensional lumber. Clinton cuts the boards to specific lengths and uses a pocket hole jig to prepare the joinery points.
The assembly process involves careful attention to pocket hole placement, ensuring they face inward where they won’t be visible in the finished piece. The frame includes both vertical supports and a horizontal top piece that serves as the mantle.
When assembling the frame, Clinton emphasizes protecting the top mantle piece from dents and scratches since it will be prominently displayed in the finished fireplace.
Adding the Cedar Trim
The cedar fence pickets provide the decorative front facing that gives the fireplace its realistic appearance. Clinton demonstrates the importance of selecting pickets with similar color tones to maintain visual consistency.
Before installation, he performs test fitting to ensure proper clearance and prevent the fireplace from rocking when placed on the floor. The cedar pieces are installed with attention to wood grain direction, positioning them so any natural cupping works in favor of a tight, professional appearance.
Clinton recommends using glue for strong adhesion and suggests protecting the cedar during clamping to prevent crushing the softer wood.
Interior Framework and Backing
The interior structure includes additional support pieces that strengthen the overall frame and provide mounting points for the decorative backing. Clinton uses precise measurements to position these internal supports for optimal structural integrity.
The backing consists of multiple fence picket pieces arranged vertically with small gaps between them. These gaps serve a practical purpose, allowing for natural wood movement over time while preventing binding and potential damage.
Clinton uses craft sticks as spacers during installation to maintain consistent gaps between the backing boards. The spacing gradually decreases toward the bottom, creating a natural-looking arrangement.
Final Assembly and TV Integration
The completed fireplace accommodates a television positioned behind the frame to create the flame effect. Clinton demonstrates how the structure perfectly frames a television while maintaining the illusion of a real fireplace.
He suggests additional finishing options such as staining the exterior for enhanced appearance or darkening the interior cavity to create a more authentic fireplace opening. These finishing touches allow customization to match existing home decor.
This clever design combines traditional woodworking techniques with modern technology to create an attractive focal point that brings the ambiance of a real fireplace to any space. The project demonstrates how thoughtful planning and quality construction can produce professional-looking results that enhance any living area.
Watch the full video and subscribe to Specific Love Creations:

Matt’s Take
These are my personal thoughts and tips based on my own experience in the shop. This section is not written, reviewed, or endorsed by the original creator of this project.
This kind of decorative fireplace build really showcases how pocket hole joinery can tackle larger furniture projects. When you’re working with dimensional lumber this way, I always recommend pre-drilling your pocket holes before final assembly — it gives you more control and prevents any splitting, especially near the ends of boards.
The cedar fence picket choice is smart for both budget and appearance. Those pickets can vary quite a bit in quality, so spending extra time at the lumber yard sorting through them pays off. Look for straight grain and minimal knots on the face that’ll show. Also worth noting — cedar’s naturally oily, so if you plan to stain or finish it, a light sanding with 220-grit will help with adhesion.
That spacing technique with craft sticks is a great touch for the backing boards. Wood movement is real, and those small gaps prevent buckling down the road. When you’re gluing cedar to pine or other lumber, remember that cedar can be pretty resinous — clean any squeeze-out immediately with mineral spirits before it sets up hard.
For anyone tackling this project, take your time with the measurements for the TV opening. Measure twice, cut once definitely applies here, and maybe add a hair of extra clearance since TVs can vary slightly from their listed dimensions.