
We like oil finishes for our woodworking projects. There is something about the hand finish of rubbing oil onto the wood that is so satisfying, establishing that connection with the wood and the hard work that has gone into the project, no matter what it might have been – a wine rack, a desk for a daughter, a wooden countertop in the kitchen, a new dining room table.
We especially like Rubio Monocoat, a really good product that we have written about previously. A hard-wax and linseed oil product, it bonds with wood fibers at the molecular level to form a durable, long-lasting, and water-tight finish on wooden surfaces in a single application. With more than 50 colors to choose from, it fits any and all woodworking projects well.
All of that, having been said, we have also used polyurethane as a finish on many projects, also. It has its place, and so long as you apply it properly, it, too, will give your project a durable, long-lasting, and water-tight finish. We’ve written often about polyurethane, too, drying time, food-safe qualities, rag application, fixing a cloudy finish, and more.
Today, we want to talk about spray application of polyurethane, and specifically the thinning of it when spray-applying. As between brush, foam brush, rag, and spray applications of polyurethane, either rag- or spray application is, in our opinion, preferable for a number of reasons.
First, some of the basics.
What is Polyurethane?

As we have noted in our previous writings on the subject, polyurethane is composed of two main chemicals: polymers and urethane. You can see where the name comes from – poly + urethane.
What Is A Polymer?
The dictionary offers a definition that is outside the less complicated wood and nails and screws and glues and power tools that are a part of our woodworking activities. It says that a polymer is a “natural or synthetic substance composed of very large molecules, called macromolecules.” Not very helpful, we know.
Better to give examples of polymers to help explain what they are; we think:
Synthetic polymers include nylon, polyethylene, polyester, Teflon, and epoxy.
Naturally occurring polymers include silk, wool, DNA, and proteins.
While this is still not very helpful, at least we know what some polymers are. We’re not encasing our project in Teflon, nylon, silk, or wool, though. Let’s just say polyurethane is composed of polymers and refers to them as plastics of some sort.
This makes it easier to list such things as clothing made of synthetic materials, fiberglass, plastic bags, Teflon-coated cookware, and even silicone heart valves. We have a friend walking around with one of the latter, actually, and it appears to be working well.
What Is Urethane?
The chemical compound description of urethane is even more obtuse and unclear than that of polymers. We’ll simply say that urethane is not exactly a plastic but is sort of in the category of what is called rubber. It is in between plastic and rubber, or at least that is what makes the most sense to us simple woodworkers.
Polyurethane As A Wood Finish
Putting all this together, what we have is a stable, safe, heat-resistant, and very durable product that makes a good wood finish. It is applied in its liquid form to wood surfaces and dries to a hard and solid plastic sheet that protects the wood from water and spills of all kinds.
It is a film finish in the sense that it does not penetrate the wood. Rather, it simply forms that plastic coating in film form, laying on the surface of the wood, offering a water-proof coating for protection. As such, it makes a good choice for a dining room tabletop, where food, even hot food, is apt to be spilled upon it from time to time.
It applies in a clear coat and allows the natural beauty of the wood to show through if the wood has been stained. However, it may also be used as a topcoat for painted wood, too. Either way, it gives that protection and durability equally.
Types of Polyurethane
There are two types of polyurethane, and each has its good use and advantages, although most woodworkers settle into their single preference. We know we have, and we’ll tell you later about it.
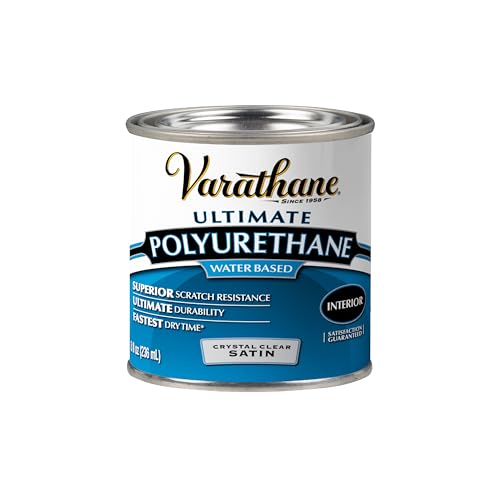
Water-Based Polyurethane
The first type is water-based. It uses water rather than solvents for carrying the polyurethane solids that make up the protective qualities of the poly. Water-based polyurethane dries into the solid film of protective plastic on the wood we’ve mentioned above, although you should expect your project to need more applications than the second type of poly.
This does make the use of water-based poly more expensive because a single coat will not do, according to many woodworkers. However, advancements in the manufacture of water-based poly are considered to have leveled the playing field with the second type.
Multiple layers of water-based poly make the piece more resistant to water, mold, and fungus
- Protects indoor wood surfaces such as furniture, windows, cabinets, trim and more
- Water based formula dries fast and cleans up with soap and water
- Dries to the touch in 30 minutes with coverage up to 31.25 sq. ft., recoat after 2 hours
Oil-Based Polyurethane
This is the second type. It, too, is a film wood finish that cures hard and offers the same degree of protection to the wood as water-based polyurethane.
Oil-based poly is very durable and used to be considered more durable than water-based poly. Advances in water-based poly have shortened the distance here, though, and most woodworkers consider them to be equally durable today.
Woodworkers consider oil-based poly to be highly resistant to abrasion and scratches. As a consequence, oil-based poly is a good choice for wood floors or even cabinets and countertops in the kitchen.
Until it dries fully, 24-48 hours to dry and 30 days to fully cure, it is toxic, though, and a respirator needs to be worn when applying it. Its VOCs are harmful, though. Volatile organic compounds (VOC) are emitted as gasses into the air, and overexposure to them can be harmful, leading to respiratory issues and lung damage.
Before using in a room (on floors, for instance), adequate ventilation must be provided to avoid those effects, and a respirator must be worn when working with oil-based poly. Even then, eye, nose, and throat irritation can be caused, so extra care is needed when working with them.
Many consider working with oil-based polyurethane to be problematic in that there is a longer drying time, the dry finish is more susceptible to denting, the odor is offensive (thus the respirator and lots of ventilation), and they darken over time.

- PROTECT WOOD SURFACES – Minwax Polyurethane Wood Finish protects interior projects like woodwork…
- OIL-BASED DURABLE FINISH – Clear finish provides long-lasting protection and warm beauty to both…
- SATIN SHEEN – Give your wood projects a sleek finish with this satin clear varnish. It not only…
Applying Polyurethane To Wood
Now that we know what polyurethane is and the two types, we can turn to its application on wood (stained or painted, as it makes no difference). It has gone a long way to replace shellac and varnish as a wood finish, and there are several ways to apply it.
- Brush Application. Polyurethane can be brushed on like paint, of course. Initially, poly had to be brushed on, but advances in formulas for it have made it just as easy to wipe on with a rag or spray on.
Brush application can be a bit problematic in that bubbles can form that will require sanding in between each coat. A bit more work is necessary, and extra care for a smooth and even application makes it a chore more than a meditation. A foam brush is more advantageous so as to avoid brush marks, too.
- Rag application. A rag application eliminates the possibility of brush marks and gets you more in touch with the feel of your project. There is a satisfaction that comes with rag application, whether it be stain or poly. The application will be smoother, less apt to bubble, and possibly eliminate the need for sanding between coats.
- Spray application. This is our favorite choice of application. The coat is even, the application is fast, and the finish is smooth. There is less chance of bubbling, thus avoiding the need for sanding. It also gives a more professional appearance to the finish.
Should You Thin Polyurethane For Spraying?
We suppose it isn’t absolutely necessary, but it is desirable, and we think it is a good idea to thin it for spray application. You’ll have greater control of the spray, and there is a greater chance for a smooth and even application. Plus, we think spray guns are fun.
There is less of an opportunity for texture bumps to form and obviously no chance of brush marks or bubbles, both of which are a chore to cure. There is less chance of streaking and the formation of bumps, too.
Thinned polyurethane will dry faster, and if you are going to be applying multiple coats, this can be a factor of convenience for you. You’ll avoid a blotchy surface, minimize a tacky surface, and complete the task of finishing more quickly and efficiently.
How To Thin Oil-based Polyurethane
For thinning an oil-based poly, you will need either mineral spirits, lacquer thinner, or naphtha.
- Mineral spirits. A 100% petroleum distillate without additives. A clean and clear product, it’s used as an organic solvent in painting.
- Lacquer thinner. It’s also called cellulose thinner and is a mixture of solvents used to dissolve resins and plastics commonly used in the making of lacquer.
- Naphtha. Another petroleum distillate from the more volatile forms of petroleum that has the effect of thinning oil-based substances.
You should consider a ratio of 4 parts oil-based polyurethane to 1 part of your chosen thinner.
We suggest using a glass jar to do so, as you will have a clear view of the consistency and viscosity of the mixture. Be sure to stir or mix the poly well before adding it to the jar, and then mix well after adding the thinner of choice.
Don’t rely upon the ratio suggestion, though. Test the thinned poly on a scrap piece of wood or on cardboard for bubbles, color variations, or imperfections. If it sprays well with no issues, you can go ahead and load your sprayer.
Be sure to spray in a well-ventilated area and to wear a respirator mask when doing so. There is an odor, and it is toxic when inhaled, so extra care is required when working with oil-based poly. Outside, if possible, or if indoors, with plenty of open windows and fans. Finishing the spray and getting away is the rule.
Oil-based polyurethane takes longer to dry than water-based polyurethane, so plan accordingly. Be patient and let it dry for 24-48 hours before considering a second application.
How to Thin Water-Based Polyurethane

For thinning a water-based poly, you can use either water (as you would expect) or denatured alcohol. Denatured alcohol is ethanol that has substances added to it to make it bad-tasting, bad-smelling, or nauseating so as to discourage its consumption. Its nature has been diminished to keep it from being drunk.
The process is the same for thinning oil-based poly: mix the poly well; add to a glass jar so you can see what you are going; add the water or denatured alcohol at a ratio of about 2% – 3%; mix well; test on a piece of scrap wood or cardboard.
If you find it tests well, load your spray gun and get to work.
You can work up from that initial 2% – 3% ratio until you have the desired consistency. The poly can often contain information about thinning and the best ratio to work up to, perhaps closer to 10%.
By the way, the mixing before adding the thinning agent is to blend well any flattening agent that has been added. Flattening agents are used to bring down the sheen, with the most being added to a matte finish. You want to be sure to mix them well before thinning for the best emulsification, or you run the risk of an uneven sheen on your workpiece.
With the extra water added to thin the poly out, it will take a bit longer to dry. But that gives the poly a longer opportunity to lay flat before drying. Water-based poly generally requires more coats than oil-based, and be sure to let each coat dry fully before moving on to the next. Water-based polyurethane does not take as long to dry as oil-based poly but do let it dry completely, as we said.
Don’t Over-thin Polyurethane
If the polyurethane is too thin, it will not adhere well to the wood surface. The polymer coat will be too light in color, surface blotchiness is common, durability suffers, and it will not provide the same degree of durability and protection to the wood.
This is why it is wise to test it first and give it a chance to dry a bit before proceeding with a full spray. Again, check the labeling information on the container for thinning instructions and ratios. We’re confident in our own research and experience with polyurethanes to have offered the information above, but it’s prudent to double-check.
Minwax and Varathane are the leading names in polyurethanes, and they are both excellent products that label the cans well. We’ve written about each of them in the past, and you can find more information about them in our piece about applying polyurethane with a rag.
Here’s a video with some basics about spraying polyurethane. It covers many of the points we’ve emphasized here in words, but it can be helpful to both hear and see them in action.
Understand the difference between oil-based and water-based polyurethanes, follow the basic steps, test, and spray. You’ll end up with a smooth, even, and professional-looking finished project.
Last update on 2026-06-14 / Affiliate links / Images from Amazon Product Advertising API