
When it comes to woodworking and door installation, you want to make sure the door hinges are properly fitted. This sets the stage for straightforward installation.
Selecting the right router bit is vital for creating precise hinge mortises – the recesses into which the hinges fit.
This article will guide you through the basics of door hinges and the importance of choosing the appropriate router bit, making the assembly go much smoother.
QUICK ANSWER:
Use a 1/2 in. x 5/16 in. Hinge Mortising Router Bit for door hinges. This size is ideal for precise mortises, ensuring hinges fit perfectly and doors close smoothly.
Why Door Hinges Need to Be Recessed
Recessing door hinges is a critical step in door installation. This process involves creating a hinge mortise, a recess in the door and frame where the hinge sits.
The primary reason for this is to ensure that the door closes flush against the frame without any gaps. If hinges are not recessed, the door will protrude, leading to improper closing and potential damage over time.
Choosing The Best Router Bit Size For Door Hinges
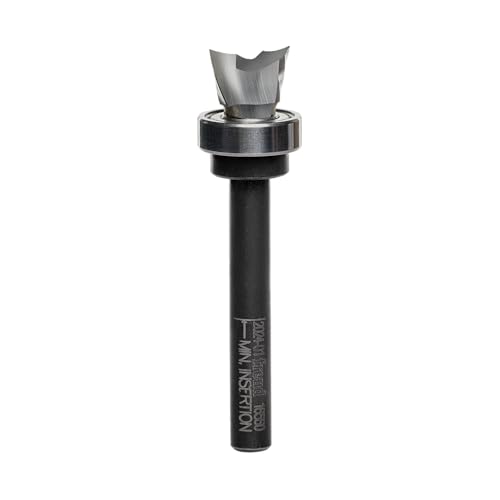
The ideal router bit for door hinges is a 1/2 in. x 5/16 in. Hinge Mortising Router Bit. This specific size is highly recommended for its stability and precision in creating hinge mortises. While there are various sizes available, this particular bit is favored by experienced woodworkers for its superior performance in hinge-related tasks.
These router bits often come with bearing guides crucial for precise routing. The guides ensure the bit follows the pattern accurately, particularly important when working with a hinge template for mortises.
Setting the bearing bit to the correct depth is essential. The dimensions of your hinge will dictate this depth, aiming for the hinge to sit flush with both the door’s surface and the jamb.

A plunge router is the tool of choice for this operation. Its ability to ‘plunge’ into the wood at a set depth is perfect for creating mortises. Adjust the plunge depth for hinge installation to match the hinge’s dimensions, ensuring a flush fit with the door and jamb.
Here’s a helpful video to offer some tips on notching a hinge mortise with a router.
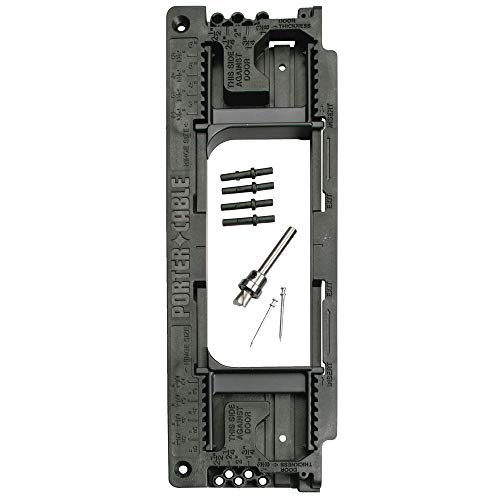
Use a Hinge Template
Hinge templates are available to measure and map out your mortise cuts for your door hinges. They help you set the spot where the cuts will be made and provide the correct dimensions for those cuts.
Set the template on the edge of your door where the hinge is to be placed. You will already have measured the same distance down from the top and up from the bottom for hinge placement to create the right balance for the door hanging.
You can adjust the template to the size of the hinge you are using and tack it into place.
This step will give you a proper measurement that will match the hinge perfectly in both spots (we’re still talking about a cabinet door for the purpose of this article). Two of the three crucial measurements are now set – the width and length of the hinge mortise.
One more word on the mortise layout: if the hinge you are using has square corners, you’ll need a chisel in addition to a router. Most mortise templates are for hinges with rounded corners. As we get to it, the router creates round corners, and the chisel will finish the square corner job once the rest of the mortise has been routed out.
Can You Use a Trim Router For Door Hinges?
If you watched that video, the woodworker said he prefers to use a trim router for hinge mortises. He likes its light weight and ease of control and finds it does the job well.

Many routers can be purchased with both fixed and plunge bases. A trim router with a plunge base obviates the necessity of having to tip the router into the wood, and the guide gives smooth and evenly aligned sides to the mortise. This would be especially convenient for a piece of inlay.
But, the short of it is a trim router for door hinges is a good choice.
Important note: most trim routers only accept 1/4 shank bits, so if you are going to use a trim router, make sure you do not buy a 1/2 shank bit.
Final Thoughts on Routers, Bits, and Hinge Mortises
Perfect fit, proper depth, and flush alignment with the door and jamb surface all lead to a door that hangs well and properly closes with no gap. This is the desired outcome.
In addition to the tools mentioned in this article, you’ll want, as always, to have your safety glasses handy, as pieces of wood and dust will fly up and about. A mask covering the nose and mouth is highly recommended as well.
It’s not a big job. The video mentioned in this article presents helpful tips on the process of creating a proper mortise. Routers are not expensive, and most avid woodworkers and hobbyists consider them essential tools.
There are many brands to choose from, and knowledgeable salespeople can help you choose the best model for your task and skill level. There’s great satisfaction from routing a mortise, installing the hinges, and hanging your own cabinet doors.
Last update on 2026-07-16 / Affiliate links / Images from Amazon Product Advertising API