Jodee from Inspire Woodcraft shared the woodworking tip featured in this video.
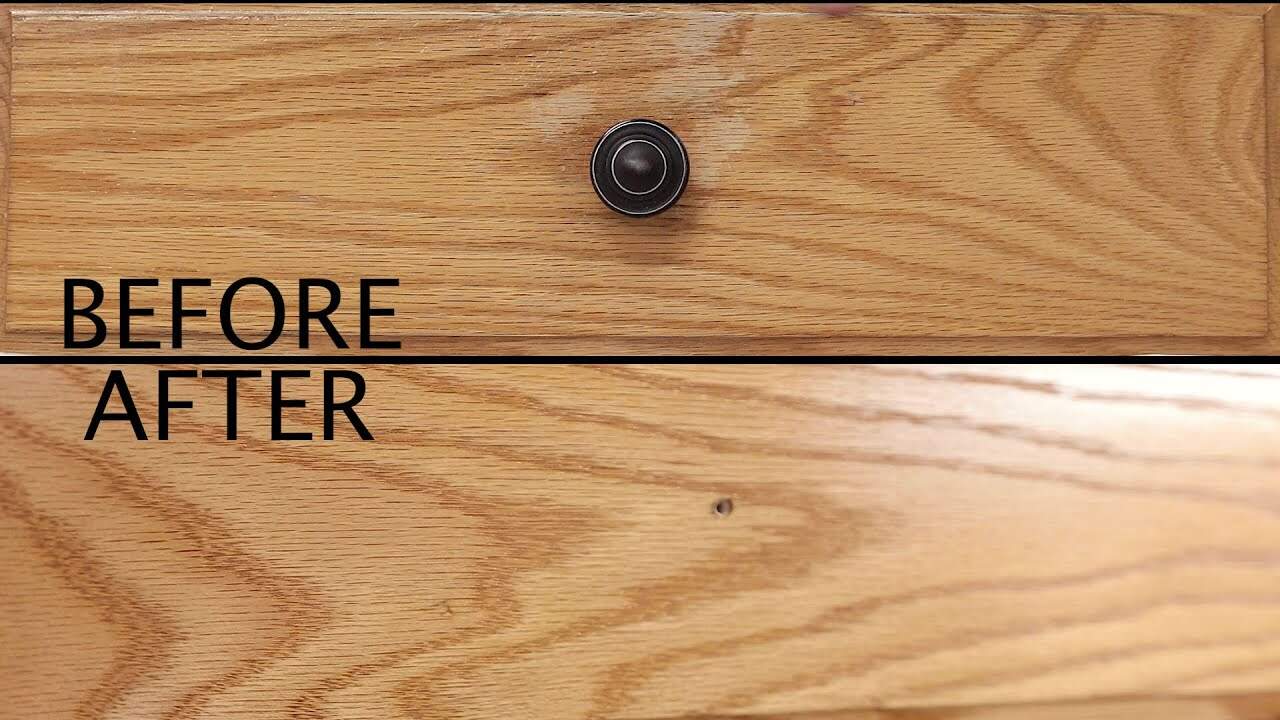
The video follows a single kitchen drawer face brought in by neighbors that had a gummed-up topcoat and worn stain, and shows how to strip, sand, restain, and refinish it to closely match the surrounding cabinetry.
The goal was a near-original color match and a durable finish while avoiding a full kitchen teardown or complete repaint.
Watch the full video and subscribe to Inspire Woodcraft:
Design and Goal
This is a focused refinishing job on one drawer face rather than a full cabinet overhaul, so the approach stayed simple and targeted.
The aim was to remove the degraded topcoat and faded stain, then restain and seal the face so it blends with the rest of the kitchen.
Preparation and Setup
Initial prep included removing hardware, temporary bumpers and any tape, and cleaning the piece with hot, soapy water to strip away grime that would interfere with the stripper and finish. The work area was protected with plastic and the piece was supported for easy access to both sides during the chemical stripping stage.
Stripping and Sanding
A liquid chemical stripper was applied with a brush and allowed to dwell, then the top layers were removed with scrapers; plastic tools work for paint but a metal scraper often performs better on stained, durable woods like oak.
Residual finish was cleaned with mineral spirits, then the face was sanded down — first with a coarser grit to reach bare wood and then a finer grit to smooth the surface and profiles, using a palm sander and sanding sponge for edges and tight areas.
Staining and Finishing
Color testing was done on a scrap piece and on a hidden area at the back of the drawer to confirm the stain match before committing to the visible face.
An oil-based stain that leaned toward the desired amber tone was used, followed by multiple coats of oil-based polyurethane in a gloss sheen to build protection and introduce a subtle ambering that helped the new face blend with the existing cabinetry; light sanding was done between coats to smooth the finish.
Tips, Cautions, and Adaptations
Tool choices matter: use brushes that can handle chemical strippers, choose scrapers appropriate to the wood hardness, and be cautious not to gouge softer species when scraping aggressively.
The same approach can adapt to other small furniture pieces like nightstands or dressers and can guide reuse of salvaged lumber, while larger projects or color changes may call for different strategies such as full-panel stripping or painting.
Conclusion
Refinishing a single drawer face is an effective way to repair visible wear and extend the life of cabinetry without a full renovation, and the techniques shown balance chemical and mechanical methods to achieve a close color match.
The process is approachable for woodworkers who understand surface prep, testing, and careful finishing, and it scales to similar small projects around the home.
Support Jodee by visiting his online store here: https://inspirewoodcraft.com/collections/all.

Matt’s Take
These are my personal thoughts and tips based on my own experience in the shop. This section is not written, reviewed, or endorsed by the original creator of this project.
This kind of targeted repair work is one of my favorite types of projects to see. Instead of ripping out a whole kitchen, you’re solving the real problem — that one drawer face that’s driving everyone crazy. The chemical stripper approach here is spot-on for dealing with that gummy, degraded topcoat that just won’t sand off cleanly.
The color matching process really shows the value of patience in finishing work. Testing on scraps and hidden areas might feel like extra steps, but it’s what separates a professional-looking result from something that screams “repair job.” That amber-toned oil stain combined with the slight ambering from oil-based poly is a smart way to bridge the gap between new wood and aged cabinetry.
One thing I always emphasize with chemical strippers is ventilation — even with “safer” formulations, you want good airflow and maybe a respirator depending on your workspace. Also worth noting that this same approach works beautifully on other pieces around the house. I’ve seen folks use these exact techniques to rescue everything from dining chairs to vintage dressers.
The key takeaway here is that sometimes the best woodworking solution isn’t building something new — it’s bringing old work back to life with careful, methodical refinishing.