This project was built and designed by Tim from Casual Builds. It’s a beginner-friendly walnut cutting board that teaches essential woodworking skills and results in a functional, gift-worthy kitchen item.
Tim walks through each step of the process, focusing on proper preparation, strong glue joints, and a smooth finish. It’s a great first project for anyone new to woodworking or anyone looking to refine their technique with a practical build.
Watch the full video and subscribe to Tim’s channel:
Understanding the Types of Cutting Boards
Before getting into the build, Tim explains the difference between the three main types of cutting boards: face grain, edge grain, and end grain. Each has different advantages depending on your goals.
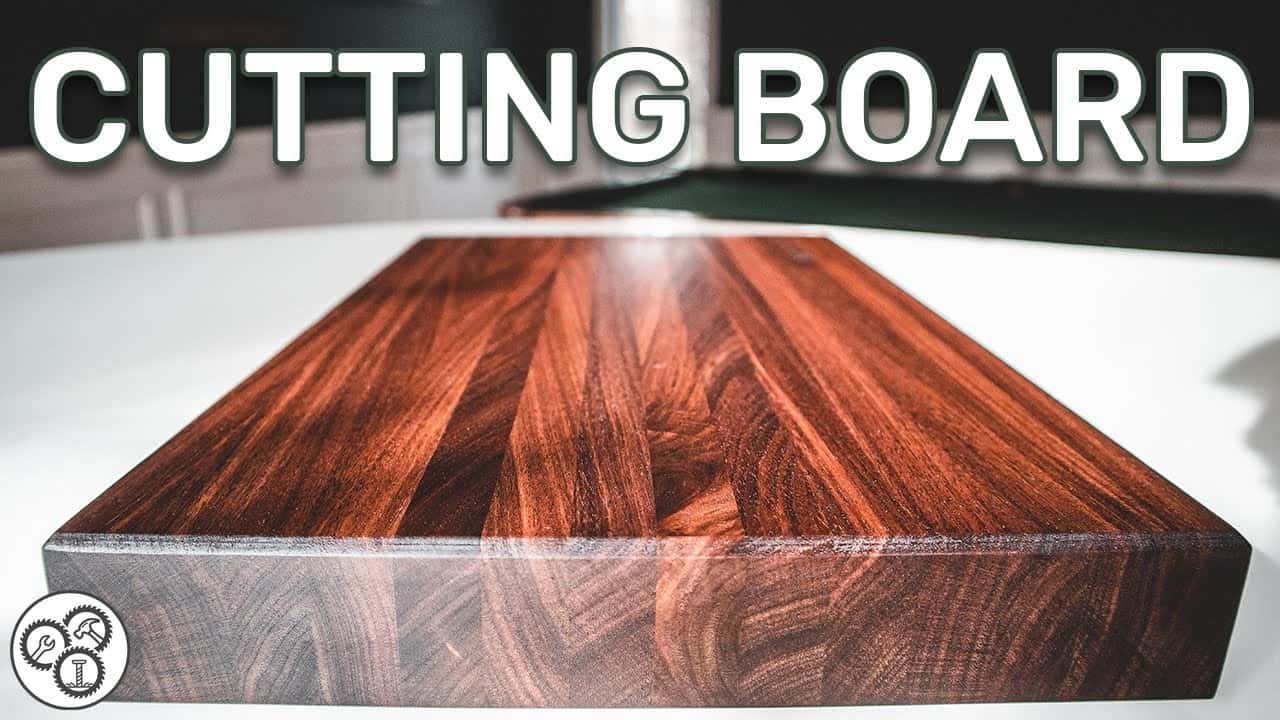
Face grain boards showcase the natural beauty of the wood but tend to show knife marks more easily. End grain boards are the most durable for heavy chopping, but they require more time and sanding. Edge grain boards, like the one featured here, offer a nice balance of appearance, durability, and simplicity—making them ideal for beginners.
Choosing a hardwood like walnut, cherry, or maple is important because tight grain patterns help resist moisture and warping over time.
Preparing and Cutting the Walnut
Tim begins by cutting the walnut into manageable lengths, usually around 15 to 16 inches. Using a miter saw makes quick work of this step, but accuracy and consistency matter more than speed.
Once the lengths are cut, he flattens one edge with a jointer. That reference edge is then run against the fence of a table saw to rip strips to the final width. The width of the strips determines the cutting board’s final height, so this is the moment to think about proportions and design.
After ripping, any twist or bow in the pieces is corrected with a planer, which ensures all the strips will glue together flat and evenly.
Laying Out and Gluing the Pieces
Dry fitting the strips before gluing is an important step Tim recommends. Each board is arranged for best grain appearance and tight joints, and minor adjustments are made with a hand plane if needed.
Titebond III glue is applied across the edges, with just enough to get visible squeeze-out once clamped. Too much glue is messy; too little results in a weak bond. Using at least four clamps spaced evenly across the board, Tim applies equal pressure to pull everything together.
The board is left in clamps overnight to cure fully before moving to the next stage.
Sanding for a Smooth Finish
Once the glue has cured, the cutting board is scraped and sanded. Tim starts with 120 grit to knock down any uneven edges and then progresses up to 220 for a smooth surface.
To take the finish a step further, he sprays the surface with water after the first sanding. This raises the grain, allowing for one final sanding that leaves the surface extra smooth to the touch. This small step helps ensure the board stays smooth even after it’s washed and dried.
Applying Oil and Conditioner
For the finish, Tim applies several coats of food-safe mineral oil. Each coat is allowed to soak in for 15–20 minutes before the excess is wiped away. The oil not only darkens the walnut and brings out the grain but also provides a natural moisture barrier.
To add even more protection, a final layer of wood conditioner is applied. This conditioner is a blend of mineral oil and beeswax or carnauba wax and gives the board a slightly satin feel. It’s especially helpful for gifts or boards that will see frequent use.
Tim reminds viewers to reapply mineral oil or conditioner periodically to keep the board from drying out. A well-maintained cutting board can last for many years and become a staple in any kitchen.
Why This Is a Great Beginner Project
This cutting board introduces key skills like jointing, ripping, gluing, clamping, and sanding—all on a manageable scale. It’s a low-risk project with a high reward, both visually and functionally.
It also offers a chance to experiment with layout, grain matching, and finishing techniques without requiring expensive tools or exotic materials. For beginners, it’s an ideal way to build confidence and walk away with something useful.
Please support Tim by visiting his website: https://www.casualbuilds.com/.

Matt’s Take
These are my personal thoughts and tips based on my own experience in the shop. This section is not written, reviewed, or endorsed by the original creator of this project.
Edge grain cutting boards really are the sweet spot for beginners. They’re forgiving to work with, don’t require the precision of end grain boards, and still produce something that looks and performs great in the kitchen. The balance between durability and visual appeal makes them perfect for gifts too.
One thing I always emphasize with glue-ups like this is the importance of that dry fit stage. Taking time to check how everything goes together, marking your clamp positions, and having all your glue and tools ready before you start makes the actual glue-up much less stressful. Once that glue goes on, you’re working against the clock, so preparation is key.
The water-raising technique Tim uses is something more woodworkers should know about. When you wet the surface after your initial sanding, those wood fibers stand up and get cut off in the final sanding pass. It’s a simple step that makes a noticeable difference in how smooth the final surface feels, especially important on something that will be handled daily.
For anyone thinking about trying this project, walnut is definitely worth the extra cost. It’s stable, works beautifully, and that rich chocolate color only gets better with oil. Plus, it’s hard enough to handle kitchen use but soft enough that it won’t dull your knives quickly.