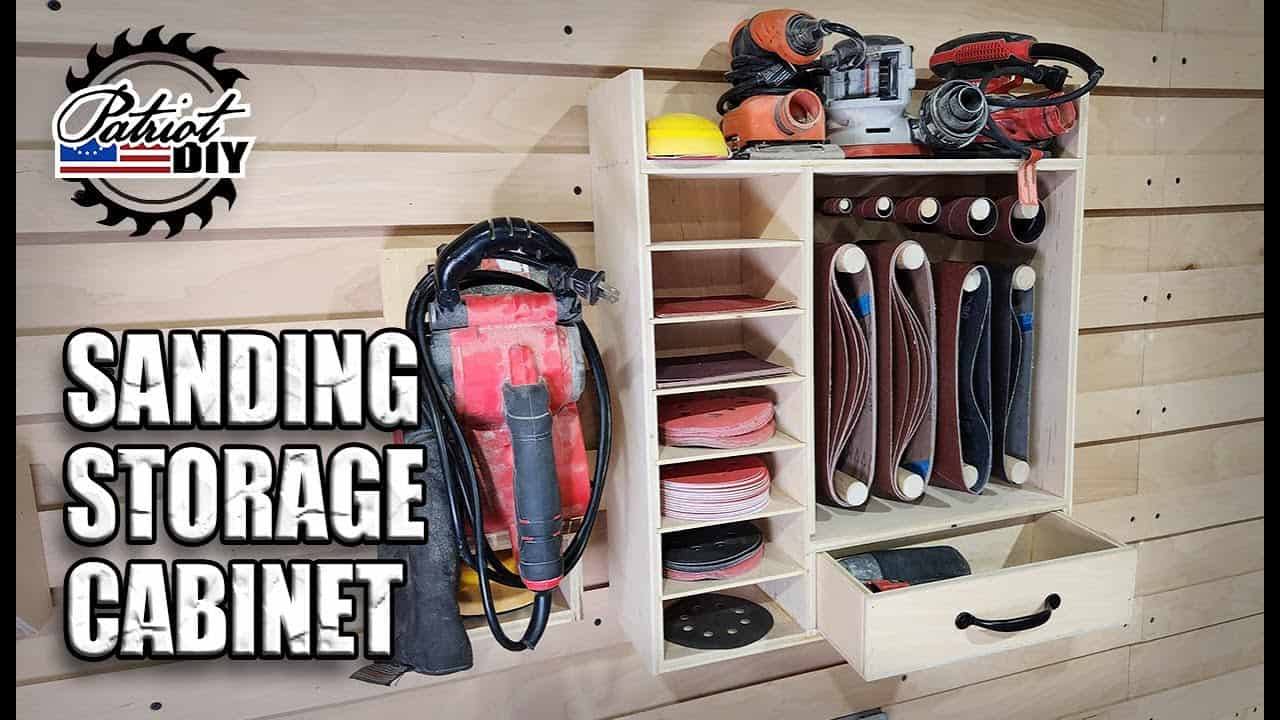
This project was built and designed by Jason from PatriotDIY. It’s a wall-mounted sanding cabinet built to store sanders, sandpaper, and accessories, all in one organized and efficient space.
With smart use of plywood, thoughtful compartments, and a few custom features, this cabinet helps eliminate clutter and makes sanding tasks easier to manage. It’s a great project for woodworkers looking to bring more order to their workspace.
Watch the full video and subscribe to Jason’s channel:
Why a Sanding Cabinet Matters
Keeping sanders and sanding supplies in one place saves time and frustration during projects. Rather than digging through drawers or bins, everything is visible and accessible.
A dedicated sanding station also encourages better workflow. Jason’s cabinet keeps sanders ready to go, sandpaper sorted by grit, and smaller accessories stored neatly in a drawer—all in a compact footprint that mounts right to the wall.
Planning the Layout
Jason begins the project by assessing the number and types of tools he wants to store. His layout includes storage for multiple palm sanders, sanding blocks, belt sanders, and a variety of sandpapers.
The design features pull-out trays, open shelves, and a small drawer for accessories. Adjustable elements make it easy to modify the cabinet later as tool needs evolve.
Materials and Tools
The cabinet is constructed primarily from half-inch plywood. This material is sturdy enough to support the weight of several tools while remaining lightweight for wall mounting.
Basic tools are used throughout the project, including a table saw, miter saw, brad nailer, and drill. Clamps, wood glue, and a measuring tape round out the essential tools needed to complete the build.
Breaking Down the Cuts
Jason begins by cutting all cabinet components to size. He lays out each piece in advance to double-check dimensions and ensure everything will fit together as planned.
Accurate cuts are essential here to keep the cabinet square. Jason emphasizes the importance of taking time in this step to avoid issues during assembly.
Building the Pull-Out Trays
The pull-out trays are cut from thinner plywood and sized to fit between grooves in the cabinet sides. Each tray is designed to hold a variety of sandpaper grits and shapes.
These trays make it easy to find what you need without sorting through a messy drawer. They’re lightweight but sturdy, sliding in and out smoothly once the cabinet is assembled.
Cutting Grooves for the Trays
Grooves are made using a table saw to guide the trays. Jason sets the blade height to remove just enough material for the trays to slide easily without too much play.
This step is repeated for each pair of tray supports, spaced evenly to maximize storage without crowding the cabinet. Consistent spacing is key for clean movement and a professional finish.
Cabinet Assembly
With all components cut and prepared, Jason begins assembly. He uses corner clamps and glue to attach the bottom, sides, and top of the cabinet, then secures each joint with brad nails.
Once the outer frame is built, he installs the center shelf and vertical dividers. These help separate each sander and provide structure for the rest of the cabinet.
Adding the Back Panel
A solid back panel is added for support. It’s secured with brad nails around the edges, locking everything in place and keeping the cabinet square.
This also provides extra strength for wall mounting and helps prevent the cabinet from racking under weight.
Installing Dowel Rods for Belt Storage
For sanding belts, Jason installs a few short dowel rods across the open section of the cabinet. These dowels allow belts to be organized by size and type while keeping them in clear view.
It’s a simple but effective addition that makes it easy to grab the right belt without digging through a box.
Building the Drawer
At the bottom of the cabinet, Jason adds a small drawer to hold accessories like pads, sanding sponges, and discs. The drawer is made with basic butt joints and slides easily on a plywood base.
This drawer helps keep loose items out of sight but still easy to access. It’s a useful feature that rounds out the cabinet’s all-in-one design.
Final Sanding and Mounting
After assembly, the edges are sanded for a smooth finish. Jason chooses not to paint or stain the cabinet, but those options are available depending on your shop’s look.
The cabinet is mounted using a French cleat system. This method provides strong wall support and makes it easy to reposition the cabinet if needed in the future.
A Functional Upgrade for Any Shop
Jason’s sanding cabinet offers a compact and highly functional way to organize sanding tools. With trays, dowels, shelves, and a drawer, it covers everything from storage to workflow.
For woodworkers working in tight spaces or just looking to get more organized, this is a smart upgrade. The cabinet can be adapted for different tool types or built larger for expanded storage.
Please support Jason by visiting his Etsy Store: https://www.etsy.com/shop/patriotdiy.

Matt’s Take
These are my personal thoughts and tips based on my own experience in the shop. This section is not written, reviewed, or endorsed by the original creator of this project.
This type of wall-mounted storage is a game-changer for shop organization, especially when you’re working with limited floor space. The beauty of Jason’s design is how it keeps everything visible and within arm’s reach — no more hunting through drawers when you need to switch from 120 to 220 grit mid-project.
The groove system for those pull-out trays is particularly clever. When cutting grooves like this on the table saw, I always recommend making test cuts on scrap first to dial in that perfect sliding fit. Too tight and the trays will bind, too loose and they’ll rattle around. A few thousandths of an inch can make all the difference in how smoothly they operate.
That French cleat mounting system is the way to go for heavy wall storage like this. It distributes the weight evenly and gives you the flexibility to adjust or remove the cabinet later without patching a bunch of screw holes. Just make sure you’re hitting at least one stud with your wall cleat — sanders might not seem heavy individually, but they add up quickly when you’re storing multiple tools plus supplies.
The dowel rod solution for belt storage is one of those simple ideas that just works. You could easily adapt this concept for other shop storage too — think drill bits, chisels, or even hand tools. Sometimes the most effective organization solutions are the most straightforward ones.