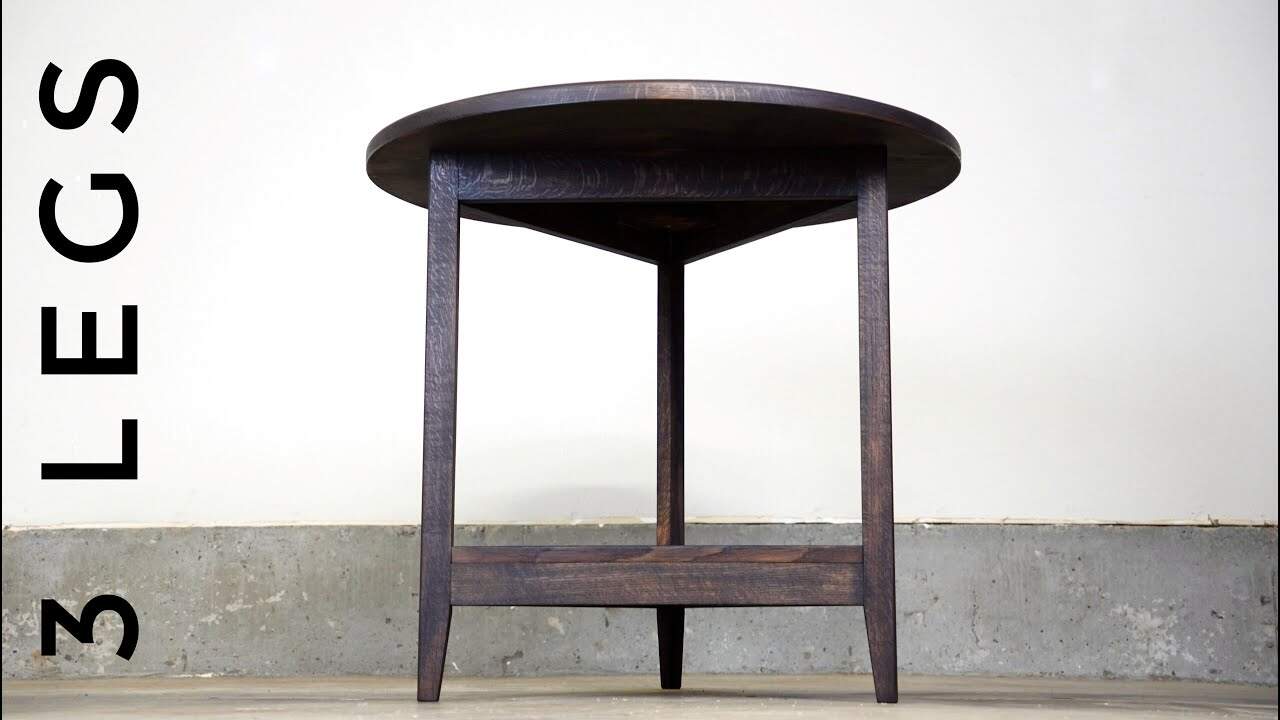
This project was built and designed by Keaton Beyer. It features a custom-built cricket table made from quarter-sawn white oak, blending traditional style with clever joinery and modern woodworking techniques.
The result is a small, elegant table that appears simple on the surface but reveals a deeper level of craftsmanship and planning. This is a perfect example of how subtle details and precision can elevate a basic design into something truly unique.
Watch the full video and subscribe to Keaton’s channel:
A Custom Request with a Twist
The idea for the project came from a client looking for a small antique-style table that would complement their existing dining setup. The twist? Instead of four legs, the table would feature three.
Choosing white oak added strength and character, especially since Keaton worked with quarter-sawn boards. This technique not only offers dimensional stability but also highlights the medullary rays in the wood grain, giving the tabletop a classic, high-end appearance.
Milling and Breaking Down the Lumber
Keaton starts by rough cutting the oak boards to length to make them easier to work with. Without a jointer on hand, he uses alternative methods like a sled setup to flatten the boards—showing that good results can still be achieved with thoughtful workarounds.
Once the boards are flat, they’re brought to final thickness and joined at the edges using a router table. This step ensures tight, gap-free joints for the glue-up and eliminates the need for biscuits or dowels.
Cutting the Circular Top
The round tabletop is shaped using a circle-cutting jig, which delivers clean, even curves. Cutting a perfect circle can be tricky without the right tools, but the jig makes this part of the process manageable and accurate.
Keaton then refines the edge with a router, giving the table a smooth, finished rim. Even though the tabletop seems like a basic component, the steps to make it precise require careful attention and tool control.
Dealing with the Triangular Base Design
The base of the table posed its own unique challenges. Unlike typical rectangular frames, this table required a triangular configuration to support the three-legged design.
Getting the stretcher geometry right meant solving for angles and ensuring each piece met cleanly at the right spots. Keaton had to modify his original plan and think through how the legs would interact with both the stretchers and the tabletop.
Custom Joinery Solutions
Mortises for the legs were created using a drop-and-stop method, which gave Keaton better control over depth and placement. With the legs angled inward, traditional jigs and fixtures had to be adjusted to suit the design.
Each tenon was matched to a specific mortise, and all parts were labeled for easy assembly. This extra organization step pays off during glue-up and minimizes mistakes when aligning multiple angled joints.
Tapering and Smoothing the Legs
With the leg structure shaped, the next step involved tapering each leg for a more refined appearance. Keaton also eased the edges to prevent chips or dents during everyday use.
Sanding was done carefully to preserve clean lines while softening any sharp corners. These finishing details help the table feel polished while still retaining its handmade character.
Glue-Up and Assembly
Before applying glue, a dry fit confirmed that all joints aligned correctly. Once satisfied, Keaton moved forward with final assembly using glue and clamps to secure the base.
Corner braces were added to keep the tabletop in place without restricting seasonal movement. These braces sit just under the top, hidden from view but critical for long-term durability.
Applying a Multi-Layer Finish
The finish begins with an iron acetate solution made from steel wool and vinegar. When applied to white oak, it reacts with the tannins in the wood and creates a rich, aged tone.
To add depth, Keaton follows with a brown stain, layering tones that highlight the figure and grain. As a final step, a hard wax oil is wiped on and buffed off, offering a protective layer that enhances the overall look.
A Lesson in Simplicity
Though the final piece looks understated, every stage of the build presented its own set of decisions, tweaks, and learning moments. What seemed simple on paper became a puzzle of joinery, angle cuts, and aesthetic details.
The final result is a graceful, sturdy table that honors traditional design while showcasing the hands-on problem solving that woodworking often requires. It’s a reminder that simplicity in appearance often demands complexity in execution.
Please support Keaton, but visiting his website: https://www.keatonbeyerwoodworking.com/.

Matt’s Take
These are my personal thoughts and tips based on my own experience in the shop. This section is not written, reviewed, or endorsed by the original creator of this project.
Working with quarter-sawn white oak is always a treat — the medullary rays really do create that distinctive figure that screams quality. The iron acetate reaction with oak tannins is one of those old-school techniques that never gets old. That chemical reaction creates such a natural, authentic aged look that you just can’t replicate with commercial stains alone.
Three-legged furniture presents interesting challenges that most woodworkers don’t think about until they’re in the middle of it. The geometry gets tricky fast, especially when you’re dealing with angled legs and stretchers that all have to meet at precise points. Getting those mortise and tenon joints right when everything’s at an angle requires extra patience and test fits.
The drop-and-stop mortising technique Keaton used is solid for this kind of work. When you’re dealing with angled joints, having that level of control over depth and placement becomes crucial. One thing worth noting for anyone tackling similar projects — labeling everything during the joinery phase saves so much headache during assembly. With complex angles, it’s easy to get turned around.
That hard wax oil finish is a smart choice for a piece like this. It gives you durability without the high-gloss look that might feel out of place on a rustic cricket table. Plus, it’s repairable down the road if the table sees heavy use.