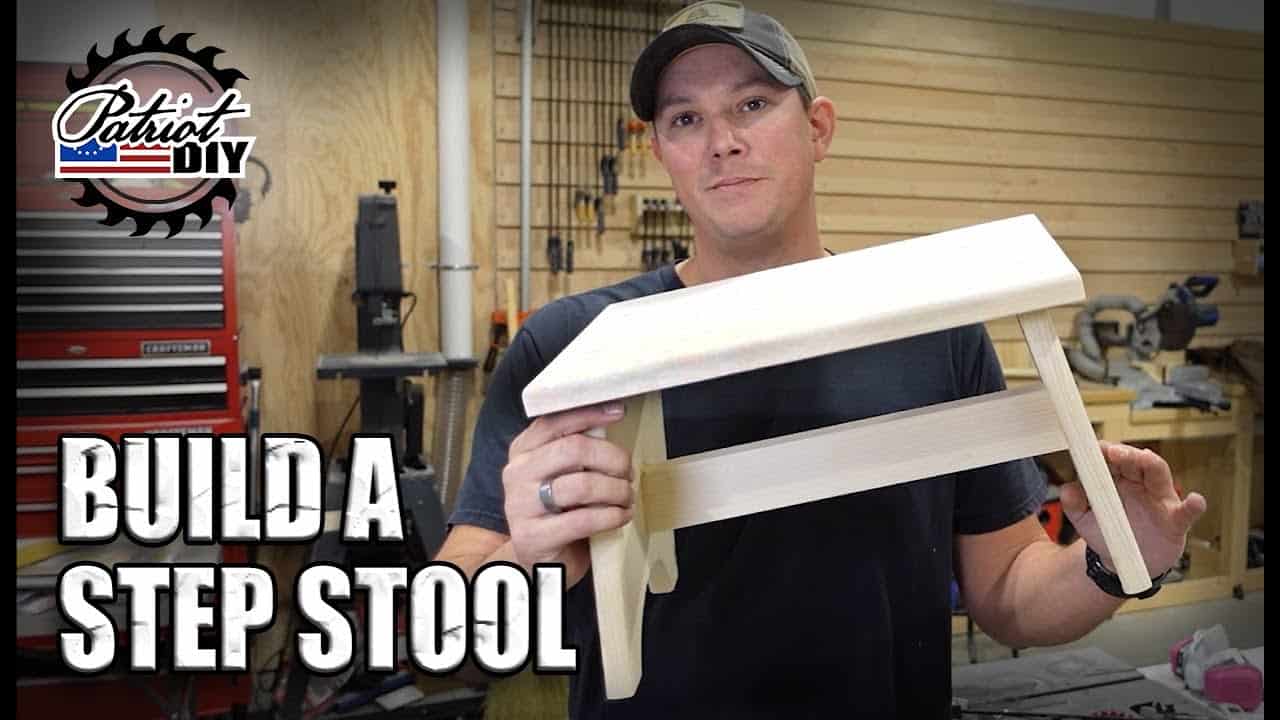
This project was built and designed by Jason from PatriotDIY. It’s a straightforward and practical step stool designed with beginners in mind, combining basic woodworking skills with a finished product you’ll actually use.
Step stools are one of the best starter builds for new woodworkers. They’re useful, easy to customize, and a great opportunity to learn techniques like angled cuts, joinery, and sanding—all in one project.
Watch the full video and subscribe to Jason’s channel:
Why Make Your Own Step Stool?
A step stool is a useful tool in just about any household. Whether you’re reaching high cabinets, helping kids brush their teeth, or just need a quick boost, having one around comes in handy.
Jason’s version of the stool is kid-friendly, customizable, and sturdy. It also offers just enough complexity to be a good challenge for beginners while staying approachable with common tools and one board of material.
Tools and Materials Needed
The main material is a single one-by-ten board, available at nearly any home improvement store. This makes the build affordable and easy to replicate.
As for tools, Jason uses a miter saw, table saw, router, drill, and bandsaw, but substitutions are possible. If you don’t have every tool he uses, most cuts and curves can still be made with alternatives like a circular saw or jigsaw.
Cutting and Shaping the Parts
The project begins by cutting the top of the stool to size. Once the top is ready, attention turns to the legs.
Each leg is cut with a 10-degree taper, which gives the stool extra stability and a more refined look. This slight angle not only improves strength but also ensures the stool won’t wobble when placed on the floor.
Personalizing with Decorative Touches
For an added visual element, Jason cuts a half-circle detail at the base of each leg. This can be done with a bandsaw or jigsaw, depending on what’s available in your shop.
Even if the cuts aren’t perfect, they can easily be cleaned up with a bit of sanding. These small details add personality and allow you to put your own mark on the project.
Prepping for Assembly
With all the pieces cut and shaped, the next step is sanding. Jason notes that this is a great chance to get kids involved—many enjoy helping with this hands-on part of the process.
After smoothing all surfaces and edges, a round-over bit on the router is used to soften corners. This gives the stool a polished appearance and removes any potentially sharp edges, especially important for use around children.
Attaching the Middle Support
Assembly begins with installing the middle brace, which adds strength and keeps the legs securely spaced. Jason uses a mix of wood glue and CA glue for temporary hold, then adds fasteners for permanent strength.
This two-glue approach helps keep parts in place while you work and eliminates the need for clamps in some areas.
Clean Joinery Options
While screws can be used directly, Jason prefers to cover them with dowels for a cleaner look. After driving screws in place, short dowel pieces are glued into the holes to hide the fasteners and improve the stool’s overall appearance.
Once dry, these dowels are trimmed flush with the surface using a small saw. This method gives the project a handmade, intentional finish without requiring complex joinery techniques.
Installing the Top Panel
The stool top is centered and attached in the same way, using glue and screws followed by dowel plugs. Jason emphasizes the importance of measuring carefully so that the top sits evenly and looks symmetrical.
After attaching the top, any misalignments are corrected with a final sanding pass, ensuring everything sits flat and smooth.
Final Steps and Testing
Once assembly is complete, the glue is allowed to dry overnight. The final step involves trimming any excess dowels and giving the entire stool a thorough sanding.
If the stool rocks slightly, the legs can be evened out by lightly sanding the bottoms until level. Once stable, it’s ready to be tested—and it should easily hold weight without flexing or wobbling.
A Solid First Project
This step stool is the kind of project that builds both skills and confidence. It introduces joinery, tool control, shaping, and finishing—all with simple materials and tools.
The finished product is not only useful around the house, but also something you can take pride in every time you use it. For new woodworkers, it’s a great way to get comfortable in the shop while creating something functional.
Please support Jason by visiting his Etsy Store: https://www.etsy.com/shop/patriotdiy.

Matt’s Take
These are my personal thoughts and tips based on my own experience in the shop. This section is not written, reviewed, or endorsed by the original creator of this project.
This type of project really showcases why step stools are such great learning builds. The 10-degree taper on the legs is a smart detail that new woodworkers might overlook – that slight angle makes a huge difference in stability and prevents that dreaded wobble that can plague simple four-legged builds. It’s also a good introduction to working with angles on your miter saw without being too intimidating.
The dowel plug technique Jason uses is worth highlighting for anyone wanting to step up their joinery game. It’s one of those methods that looks way more complicated than it actually is. Just make sure your dowel diameter matches your drill bit perfectly – a snug fit is what makes those plugs disappear seamlessly into the wood. A sharp chisel for the final trimming makes all the difference too.
Safety-wise, that router round-over step is crucial, especially for a piece that’ll see family use. Those crisp edges from the table saw might look clean, but they’re not friendly to hands or shins. Even a small 1/8″ round-over makes the whole piece feel more finished and comfortable to handle.
The single-board approach keeps costs down and eliminates the headache of wood movement from gluing up panels. Pine works great here, but if you want something that’ll age better with heavy use, consider upgrading to a hardwood like oak or maple – the techniques are identical, just plan for a bit more sanding time.