This project was built and designed by Mark from Gunflint Designs.
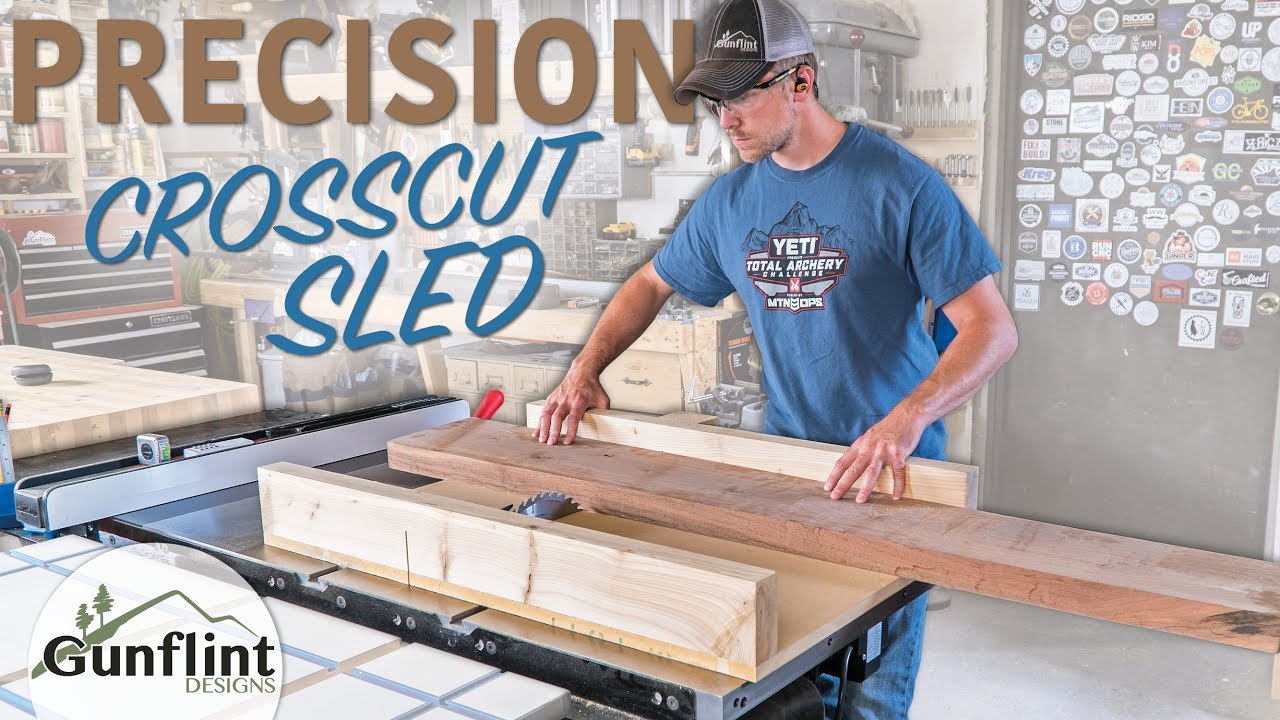
It’s a shop staple—an accurate, reliable crosscut sled designed to improve both safety and precision at the table saw.
If you’ve recently upgraded your table saw or want to enhance your workflow, building a sled like this is a smart move.
Mark’s approach keeps the process simple but effective, showing how thoughtful design and careful assembly can produce professional-level results.
Watch the full video and subscribe to Mark’s channel:
Why a Crosscut Sled Is Essential
A crosscut sled is one of the most important jigs you can make for your table saw.
It allows you to make accurate 90-degree cuts with ease, especially on wider or longer boards that are difficult to control with a miter gauge alone.
By riding in the miter slots of the saw, the sled keeps your workpiece stable and square to the blade. This makes every cut cleaner, more consistent, and safer—especially for small or awkward parts that might otherwise tip or shift.
Materials That Make a Difference
Mark chooses materials that strike a balance between durability and ease of use.
For the sled base, he uses 3/4-inch MDF—a stable and flat option that’s ideal for this kind of jig.
The runners are made from PVC plastic, which glides smoothly in the miter slots and resists seasonal swelling or shrinking. This results in a sled that slides effortlessly without introducing play or friction.
The back fence is made from rough-cut cedar, which has been jointed and planed for stability. It’s lightweight, straight, and provides just the right amount of rigidity without adding unnecessary bulk.
Getting Started: Preparing the Runners
The sled begins with the most important component: the runners. These are ripped to size from PVC and test-fitted in the miter slots to ensure a snug fit without binding.
Once dialed in, the runners are sanded slightly for perfect movement.
A few passes with sandpaper make the difference between a sled that glides smoothly and one that sticks or wobbles.
Building the Sled Body
After the runners are ready, they’re glued to the bottom of the MDF base using CA glue for fast initial hold. Once aligned properly, screws are added from the top to secure them permanently.
This technique allows for small corrections during glue-up while still locking the runners firmly in place.
With the base and runners joined, the structure of the sled is complete and ready for fine-tuning.
Constructing and Installing the Back Fence
Mark preps the cedar stock for the back fence by jointing, planing, and cutting it to size.
A notch is added to the lower portion of the fence to allow sawdust to escape, helping keep cuts clean and accurate.
Once in place, the fence must be perfectly square to the blade. Mark uses the five-cut method to check for any deviation, a trusted technique that involves making a series of test cuts to measure fence alignment.
Small adjustments are made using thin shims or slight repositioning. After verifying that the fence is square, it’s securely fastened to the sled base.
Final Touches for Smooth Operation
To ensure smooth sliding, paste wax is applied to the bottom of the sled and the runners.
This reduces friction and keeps the sled moving freely across the saw table.
Mark also adds a safety block to the back of the fence. This extra feature contains the saw blade at the end of the cut, preventing accidental contact and improving overall shop safety.
Optional Upgrades for Flexibility
While the basic sled works great on its own, Mark points out that it’s easy to customize further.
T-tracks can be installed in the fence to allow for adjustable stops, hold-downs, or other jigs.
These additions expand the sled’s functionality, turning it into more than just a crosscutting jig.
It becomes a versatile work platform for repeatable tasks, angled cuts, and even dado setups.
A Must-Have Shop Project
Whether you’re just getting started with table saw upgrades or want to dial in your accuracy, this crosscut sled is a worthwhile addition.
Mark’s method keeps things simple, avoids unnecessary complexity, and still produces reliable results.
The attention to material choice, precise squaring of the fence, and clean design give this sled everything it needs to become a go-to tool in the shop.
It’s the kind of project that pays off every time you use it.
You can see all of Mark’s full article here: https://www.gunflintdesigns.com/crosscutseld.

Matt’s Take
These are my personal thoughts and tips based on my own experience in the shop. This section is not written, reviewed, or endorsed by the original creator of this project.
The five-cut method Mark uses for squaring the fence is absolutely critical—it’s one of those techniques that separates a decent sled from a truly accurate one. When you’re dealing with tolerances that can affect every cut you make, taking the time to get this right upfront saves countless headaches down the road. If you’re new to this method, it involves making test cuts and measuring the resulting pieces to detect even tiny deviations from square.
I really appreciate Mark’s material choices here, especially the PVC runners. A lot of folks default to hardwood runners, but PVC eliminates the seasonal movement issues that can throw off your sled’s fit over time. That consistent glide is something you’ll notice every single time you use the sled. The MDF base is another smart call—it stays flat, takes glue well, and won’t fight you during assembly.
One safety point worth emphasizing: that blade guard Mark adds to the back fence isn’t just a nice-to-have feature. It’s a real safety upgrade that prevents accidental contact with the blade after completing a cut. When you’re focused on the workpiece, it’s easy to forget the blade is still spinning. Simple additions like this can prevent serious injuries without compromising the sled’s functionality.