This project was built and designed by Caleb from YouCanMakeThisToo. It’s a stylish, sturdy bookshelf inspired by Ana White’s popular Rustic X design, using affordable materials and a straightforward process that works well for beginner and intermediate woodworkers alike.
Built with standard construction lumber and assembled with pocket holes, this bookshelf is a great example of how to create custom home furniture without breaking the bank. It’s the kind of build that offers both practical storage and a bold design statement.
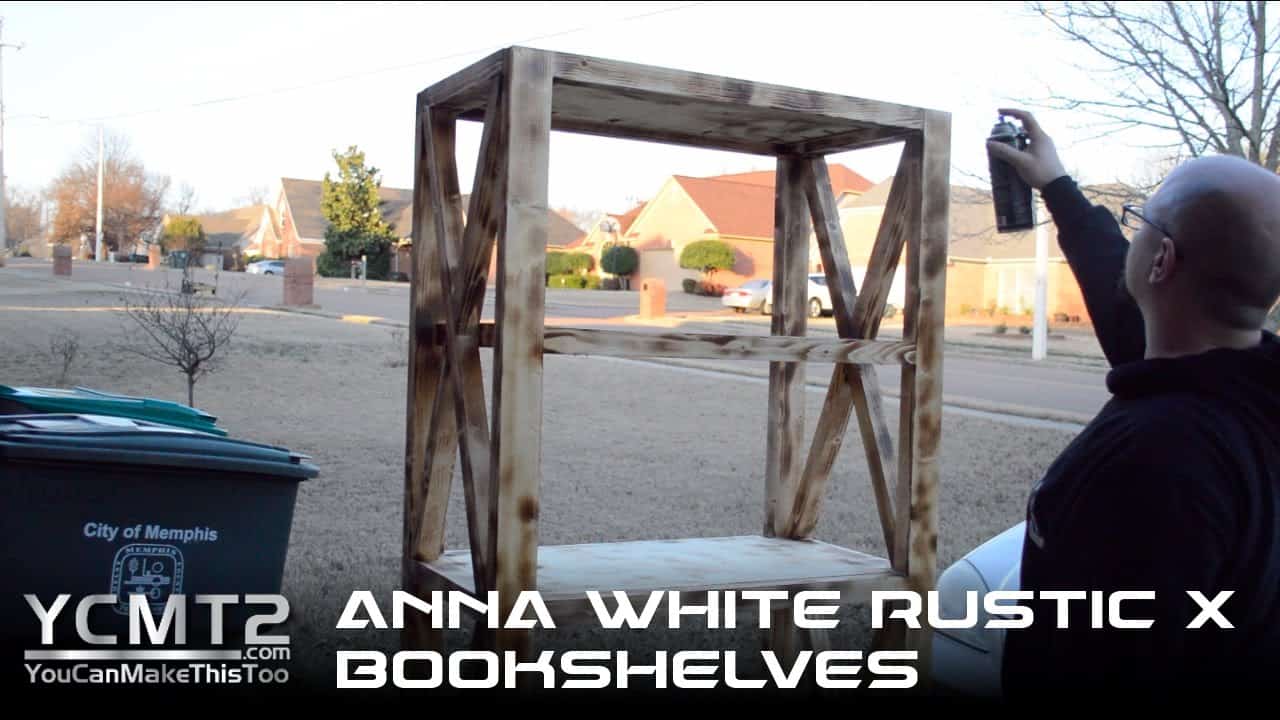
Watch the full video and subscribe to Caleb’s channel:
Why These Bookshelves Work for Any Space
Caleb’s take on the rustic X bookshelf brings a farmhouse feel to almost any room. The bold X-brace on each side adds strength and visual interest, while the wide, deep shelves make it a functional piece for books, décor, or storage bins.
Building your own version allows for full control over the size, finish, and styling. Whether you want it tall and narrow for a hallway or wide and short for a media wall, the core design is adaptable.
Materials and Tool Options
The project is built from readily available construction-grade lumber, like 2x4s, 2x6s, and plywood. Caleb demonstrates how to break down larger boards into usable dimensions, especially if you’re trying to save money or work from what’s available locally.
A table saw helps with ripping clean edges and sizing parts accurately. However, Caleb notes that most of the cuts can be done with a circular saw and a straightedge if you don’t have a full shop setup.
Fasteners include pocket hole screws for most joints, along with standard wood glue. The joinery is simple but strong, and everything is designed to go together cleanly with clamps and a square.
Prepping and Cutting the Wood
The build begins with milling and cutting boards to size. If you’re starting with 2x6s or other rough stock, you’ll want to rip them down for use as vertical legs, shelf frames, and cross supports.
Taking the time to flatten and square the pieces helps ensure strong joints and reduces frustration during assembly. Even with rustic-style furniture, starting with clean cuts makes a big difference.
Building the Frame
Once the lumber is prepped, construction begins with assembling the side frames. These include the vertical legs and horizontal shelf supports, joined with pocket holes for strength and clean lines.
The signature “X” feature is cut and fit into each side panel after the rectangular frame is assembled. This step takes some patience, as each angle needs to be carefully measured and cut for a tight, custom fit.
Caleb uses a mix of miter cuts and trial fits to get the X-braces just right. This adds both stability and style to the bookshelf and is one of the defining features of the design.
Installing the Shelves
With the sides complete, the next step is attaching the shelves. These can be cut from plywood or solid wood, depending on your preference and what you have on hand.
Each shelf is secured with pocket hole screws, and careful measuring ensures even spacing from top to bottom. The shelves can be flush-mounted or given a slight overhang depending on the look you’re going for.
If you want adjustable shelves, Caleb suggests using shelf pin holes instead of permanent mounting, though his build uses fixed shelves for strength and simplicity.
Finishing and Customization
After the full frame is assembled, it’s time to sand and apply the finish. This is where the look of the bookshelf really comes to life. You can go for a clean, modern stain or lean into the rustic aesthetic with distressing, a whitewash, or even a charred wood treatment.
Caleb walks through his process of applying a dark stain followed by a light lacquer finish to seal and protect the wood. He recommends testing your finish on scraps before committing to the entire piece.
Optional touches include decorative plugs for the pocket holes, metal corner brackets, or even caster wheels if you want a mobile shelf. These small upgrades can help match the piece to your space or style.
Cost and Time Commitment
One of the advantages of this build is how affordable it is. Caleb estimates around $60 in materials for one shelf, though prices may vary by region. If you plan on making more than one, buying lumber in bulk can save money and time.
The build can typically be done over a weekend, including cutting, assembly, and finishing. That makes it a great project for those looking to furnish a room quickly or sell handmade furniture locally.
A DIY Project with Long-Term Value
This bookshelf design combines good looks with everyday function. It’s strong enough for heavy books, stylish enough to stand out in any room, and simple enough for a home shop setup.
For woodworkers looking to build furniture they can be proud of—or even turn a hobby into a small business—this project hits the mark. With a little time and care, it’s easy to build something that looks like it came straight from a designer catalog.
Please support Caleb by visiting his website: https://www.ycmt2.com/.

Matt’s Take
These are my personal thoughts and tips based on my own experience in the shop. This section is not written, reviewed, or endorsed by the original creator of this project.
The X-brace design is one of those details that really elevates a simple bookshelf. Getting those angles right takes patience, but it’s worth the extra effort. When cutting the miters for the X, I’d recommend making your cuts slightly long at first, then sneaking up on the perfect fit with test pieces. Wood movement can affect how tight those joints stay over time, so a snug fit without forcing the pieces is ideal.
Pocket holes are perfect for this type of construction lumber project. They’re strong, hidden, and forgiving if your cuts aren’t perfect. Just remember that pocket screws work best when they’re going into the long grain of the wood, not the end grain. If you’re new to pocket hole joinery, practice on some scrap pieces first to get a feel for the drill angle and depth.
Construction-grade lumber can vary quite a bit in quality, so take time to pick through the pile at the lumber yard. Look for straight boards without large knots near where you’ll be making joints. A little extra time selecting your material upfront will save headaches during assembly. And don’t forget that construction lumber is typically sold wet, so let it acclimate in your shop for a few days before starting your cuts.
For finishing, that test piece advice is spot-on. Construction lumber can have varying absorption rates even within the same board, leading to blotchy stain if you’re not careful. A pre-stain conditioner can help even things out, especially on pine or other softwoods.