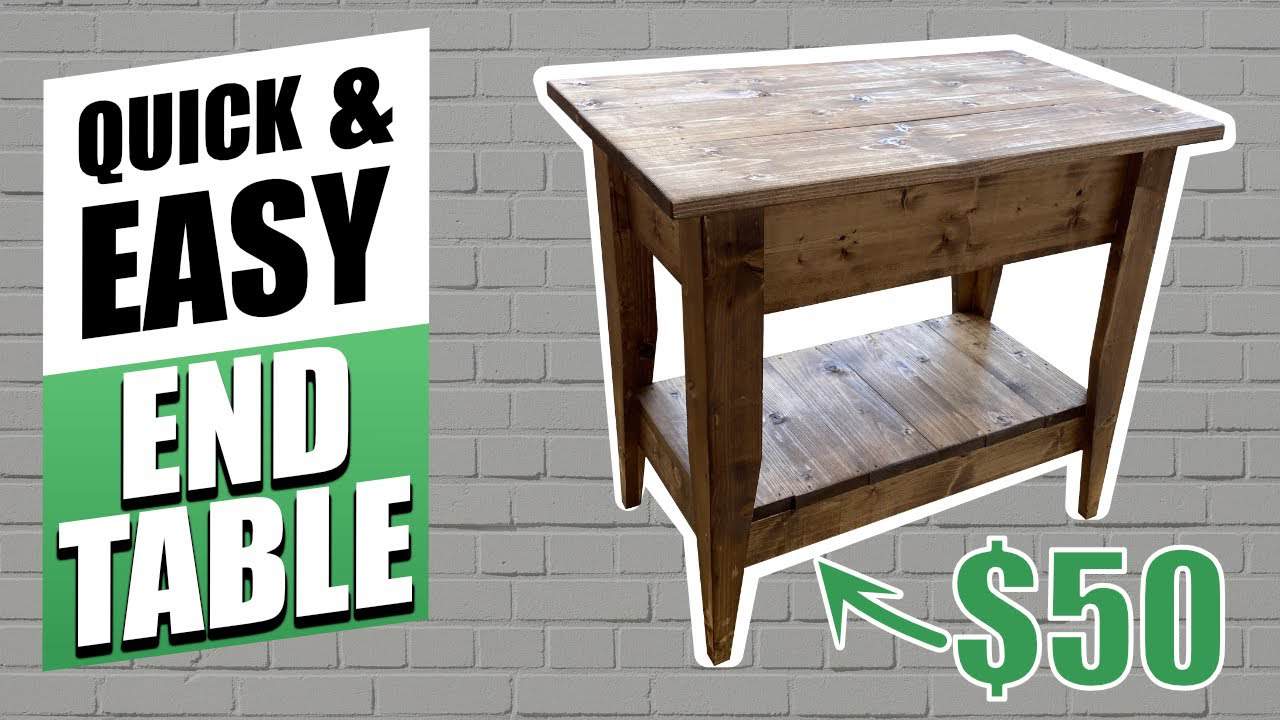
This project was built and designed by Nick from Rocky River Woodworks. It’s a sturdy, attractive end table with a rustic finish that can be built for around $50 in materials and sold for much more.
With clean joinery, simple tools, and a smart design, this build is ideal for woodworkers looking to create something functional and profitable. Nick walks through each step of the process in his detailed video, making it accessible for all skill levels.
Watch the full video and subscribe to Nick’s channel:
A Profitable Project with Rustic Charm
This rustic end table blends function and aesthetics into a build that’s beginner-friendly yet marketable. Whether you’re making one for your own home or producing a small batch to sell, the materials are affordable and the finished product has broad appeal.
Nick notes that tables like this can be made for about $50 in materials and have sold for $300 or more at craft fairs and marketplaces. That kind of return makes it a perfect candidate for side hustle builders or anyone looking to test the waters of selling handmade furniture.
Tools and Materials Overview
The project doesn’t require exotic wood or specialized equipment. Common species like pine or oak work well, with standard 2x material making up most of the structure.
Nick uses a miter saw, table saw, brad nailer, and basic clamps for the bulk of the work. These are all tools found in most home shops, and the joinery approach keeps things efficient without compromising quality.
Cutting and Shaping the Table Legs
Construction begins with the legs, which are cut to length and then ripped down to a uniform width. A typical leg width for this design is about two and a half inches, giving them a solid and balanced look.
Each leg is then cut at a 45-degree angle on the miter saw to prepare for clean miter joints. For a more finished look, Nick adds a taper to the bottom of each leg. Alternating the tapers across each pair helps create symmetry and visual balance.
Assembling the Leg Frames
Once all four legs are shaped and mitered, they’re assembled into L-shaped corner units. Wood glue is applied to each joint, and brad nails are used to hold them securely while the glue sets.
This method allows for fast, accurate assembly while maintaining a clean appearance. Nick builds all four leg assemblies before moving on to the cross supports.
Connecting the Frame with Runners
The next step is cutting and attaching the upper and lower runners that tie the leg assemblies together. These pieces not only provide support for the tabletop and shelf but also stiffen the frame to prevent racking.
Nick positions the nails from the inside of the frame to keep the outer faces free of visible fasteners. Glue is used at each joint to ensure a long-lasting bond.
Lower support pieces are added to create a built-in shelf, making the table more functional. These are installed using the same method, adding stability and giving the table an extra layer of utility.
Attaching the Tabletop
The top is built from several boards cut to equal length, spaced evenly, and marked for alignment. Nick positions the top with a slight overhang on all sides, marking the layout before securing it to the frame.
Brad nails are again used from below or inside to keep the top surface clean. Getting the spacing and alignment right here is key to giving the table a professional, balanced appearance.
Sanding and Applying the Finish
Once assembly is complete, the entire table is sanded thoroughly. This removes any glue residue, evens out transitions between joints, and preps the surface for stain.
Nick uses a warm-toned stain—Early American—for its rich color and rustic feel. The stain is applied generously with a foam brush and wiped down with a clean cloth to allow the wood grain to show through.
After letting the stain dry overnight, a protective coat of polyurethane is applied. Nick uses a rattle can for ease and even coverage, giving the table a durable, low-gloss finish that brings out the beauty of the wood.
A Simple Build with Big Value
This end table is a great example of how simple materials and thoughtful design can produce a valuable result. It’s easy to replicate, customizable in size or finish, and a great seller at local markets or online.
Nick’s clear presentation and step-by-step approach make this an excellent project for hobbyists and aspiring side business owners alike. With low material costs and high resale potential, it’s a practical and rewarding build from start to finish.
Please support Nick by visiting his website here: https://www.rockyriverwoodworks.com/.

Matt’s Take
These are my personal thoughts and tips based on my own experience in the shop. This section is not written, reviewed, or endorsed by the original creator of this project.
The profit margins on projects like this really highlight why simple, well-executed furniture can be such a smart approach for woodworkers. That $50 to $300+ return isn’t just about the materials — it’s about understanding what people value: clean lines, solid construction, and that rustic aesthetic that works in so many homes. The key is keeping your process efficient while maintaining quality joinery.
I really appreciate how this build uses standard lumber dimensions and basic shop tools. The miter joints on the legs create clean corners without needing complex joinery, and using brad nails from the inside keeps everything looking professional. That approach to hiding fasteners makes a huge difference in the final appearance, especially when you’re aiming for that higher-end market.
One thing worth noting about the finishing process — letting that stain cure overnight before applying poly is crucial, even though it’s tempting to rush through. Warm-toned stains like Early American are forgiving and popular for good reason, but they need that drying time to avoid issues with the topcoat. The foam brush application followed by cloth removal gives you good control over the final color depth.
For anyone considering this as a side business project, I’d suggest building a few in different sizes to see what sells best in your area. End tables, coffee tables, and plant stands all use similar construction methods but appeal to different buyers. Start with one to nail down your process, then scale up once you’ve got the workflow dialed in.