This project is by Marcus from Salty Woodworking.
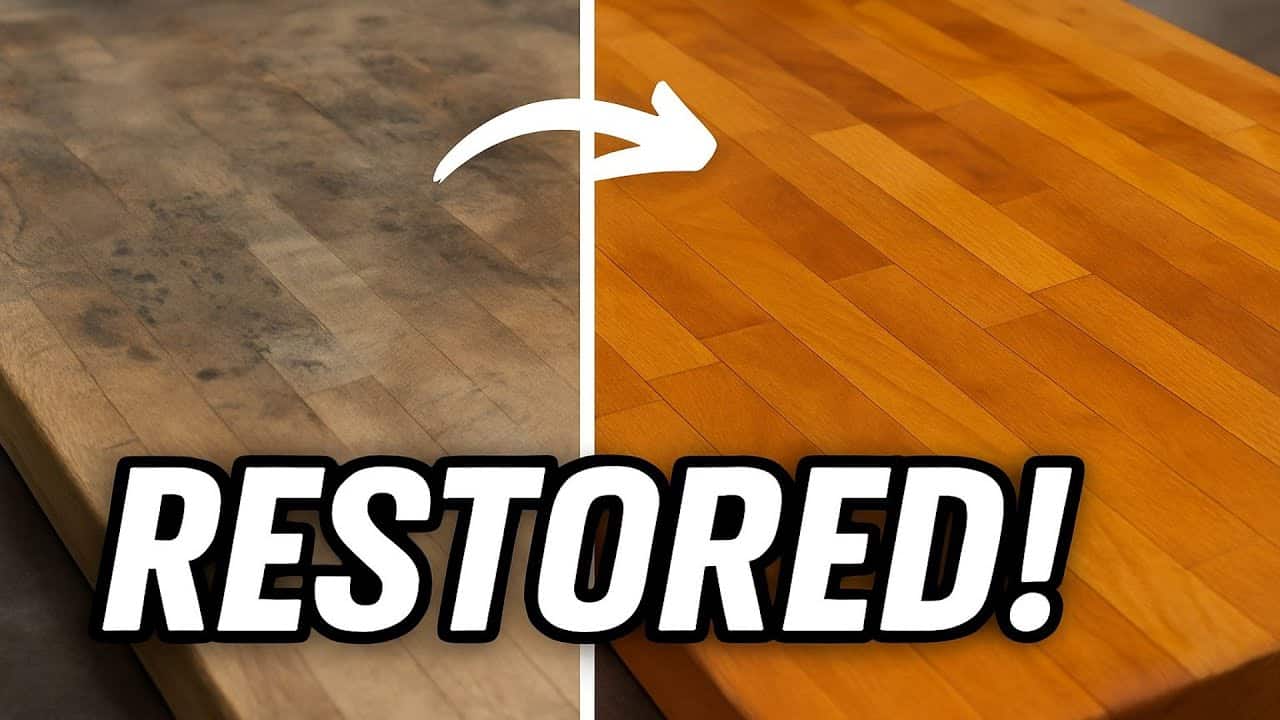
It’s a practical restoration of a worn butcher block that brings the piece back to life using careful sanding, water popping, and a food-safe finish.
What looked ruined at first becomes a beautiful, usable surface again—without replacing the wood.
Marcus walks through the process step-by-step, making it accessible for anyone with basic tools and some patience.
Watch the full video and subscribe to Marcus’s channel:
A Second Life for a Damaged Butcher Block
Old butcher blocks can take years of abuse—knife marks, stains, and worn finishes are common.
But many of them are made from solid hardwood, which means they can be fully restored with the right approach.
Marcus focuses on removing surface damage and reapplying a durable, food-safe finish that makes the butcher block safe for kitchen use. It’s a cost-effective project that avoids waste and shows how simple tools can produce great results.
Tools and Materials You’ll Need
Restoring a butcher block doesn’t require a large tool collection. The main items used in this project include:
- Orbital sander (or hand sanding if preferred)
- Sandpaper in 80 and 120 grit
- Spray bottle with water
- Food-safe finish like Rubio Monocoat or mineral oil
- Microfiber towel and lint-free cloth
Marcus chooses Rubio Monocoat for its ease of use and long-lasting protection.
Unlike some finishes, it’s non-toxic once cured, making it ideal for food surfaces. Mineral oil is another option, though it requires more frequent reapplication.
Step 1: Sanding Down the Surface
The first goal is to remove the top layer of damage—knife marks, stains, and dull finish. Marcus starts with 80-grit sandpaper using an orbital sander, which speeds up the process and provides even results.
If you don’t have a dust collection setup, wear a mask during sanding. A belt sander could be used for deeper gouges, but an orbital sander works well for most situations.
The sanding should be consistent across the entire surface.
Pencil marks help track your progress and ensure you’re not leaving low or untouched spots behind.
Step 2: Water Popping the Grain
After the initial sanding, Marcus uses a spray bottle to lightly mist the surface. This technique, called “water popping,” raises the compressed wood fibers caused by sanding.
Once dry, the surface feels slightly rough, which is expected. He then sands it again with 120 grit to smooth everything back down. This prepares the wood to accept the finish evenly and enhances grain visibility.
For butcher blocks with heavier damage, this cycle of water popping and sanding can be repeated as needed to achieve a smooth surface.
Step 3: Final Sanding and Dust Removal
Before applying finish, Marcus gives the block one more light pass with 120 grit sandpaper.
This helps refine the surface and remove any raised fibers left from water popping.
To clean the surface, he uses a microfiber towel to remove all dust and sanding residue. This step is critical—any leftover dust can interfere with the adhesion of the finish and lead to a gritty texture.
Using pencil marks during this phase again ensures no areas are missed. A quick wipe-down reveals a smooth, even surface ready for finish.
Step 4: Applying Rubio Monocoat
Marcus applies Rubio Monocoat in a thin, even coat using a simple wipe-on, wipe-off method. The finish is mixed just before use, and only a small amount is needed to cover the surface.
He spreads the finish with a cloth and lets it sit briefly before buffing off the excess. A buffer with a soft pad helps even out the sheen and improves coverage.
Any leftover residue is wiped off by hand to ensure a clean finish.
Rubio offers an accelerator to speed curing, but Marcus notes it’s not required. The finish will cure fully over time and still provide durable protection without additives.
The Finished Result
Once complete, the butcher block looks fresh and revitalized. The knife marks are gone, the wood grain is highlighted, and the surface is protected for regular kitchen use.
This type of restoration typically takes a couple of hours, most of which is spent on sanding.
Compared to replacing the block entirely, it’s an efficient and budget-friendly way to bring a high-use surface back to life.
Tips for Better Results
- Use a pencil to track sanding coverage
- Water popping helps grain rise and improves finish absorption
- Don’t soak the block—mist lightly to avoid warping
- Sand with the grain to avoid visible scratch marks
- Clean thoroughly before applying finish
A Smart Way to Restore, Not Replace
This project is a great example of how woodworking can intersect with sustainability. Instead of tossing a worn butcher block, Marcus shows how to give it a new life with a little time and effort.
It’s also a perfect introduction to wood finishing for beginners.
The tools are simple, the materials are safe, and the final product is something useful in any kitchen.
Watch the full video and subscribe to Marcus’s channel:

Matt’s Take
These are my personal thoughts and tips based on my own experience in the shop. This section is not written, reviewed, or endorsed by the original creator of this project.
Butcher block restoration is one of those projects that really shows the value of good hardwood construction. These pieces are built to last, and even when they look completely beat up, there’s usually solid wood underneath just waiting for a fresh start. The water popping technique Marcus uses is something worth keeping in your back pocket for any hardwood project—it’s especially useful when you want to bring out grain definition before staining or finishing.
Safety-wise, that dust mask during sanding is non-negotiable, especially with older blocks where you don’t know what finish was used previously. I’d also suggest having good ventilation when applying any finish, even food-safe ones. Rubio Monocoat is a solid choice here—it’s one of those finishes that’s forgiving to apply and builds up a nice protective layer without being overly thick or plasticky.
The pencil mark tracking system is brilliant and something I use constantly in the shop. It’s amazing how easy it is to miss spots when sanding, especially on larger surfaces. That methodical approach—sand, mark, check, repeat—might seem tedious, but it’s what separates a professional-looking result from something that’ll show uneven wear patterns down the road.
What I really appreciate about this restoration approach is how it preserves the character of the original piece while making it fully functional again. These old butcher blocks often have better wood than what you’d find in new ones today, so taking the time to bring them back makes a lot of sense both practically and economically.