

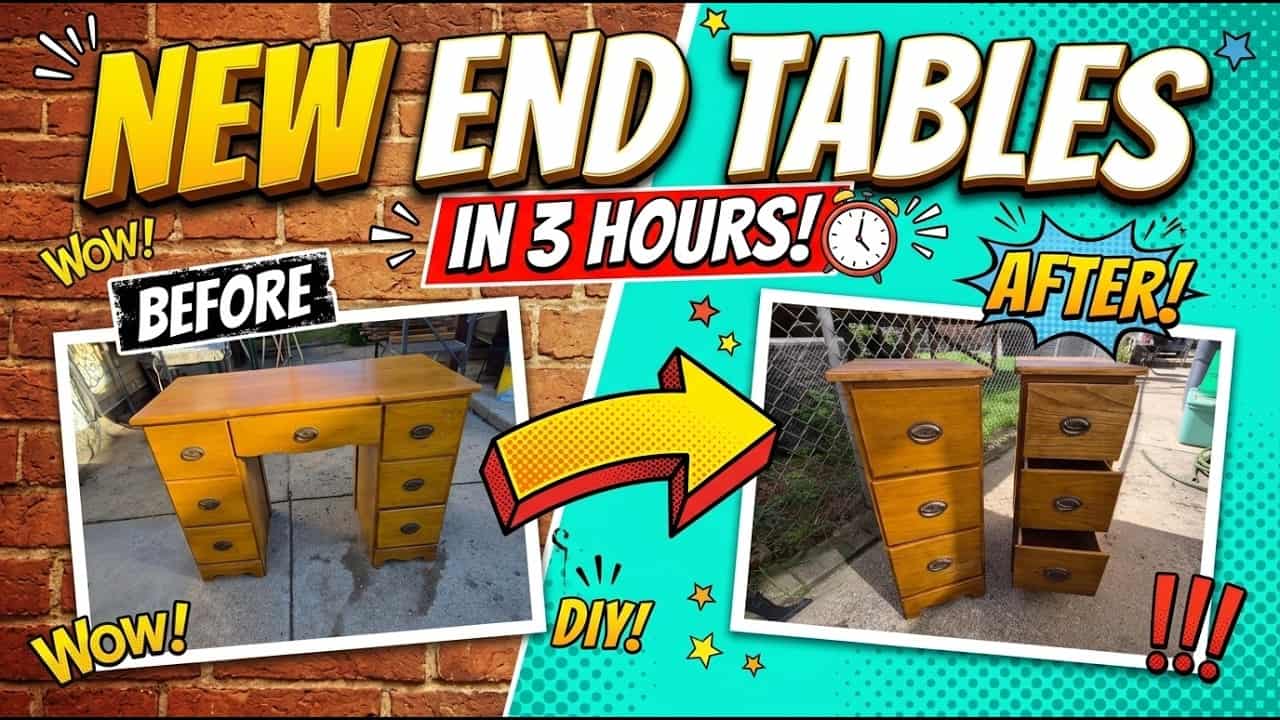
This project was built and designed by Tom from Alley Picked.
Tom took on a challenge from a local antique shop owner: turn an old wooden desk that wasn’t selling into something that would. The solution was splitting the desk into a pair of end tables, with leftover pieces repurposed into a surprise storage cabinet featuring a laser-engraved farm scene.
Watch the full video and subscribe to Alley Picked:
Spotting Potential in an Old Desk
Tom visited an antique shop and learned that old desks simply weren’t moving, while smaller furniture pieces like side tables sold quickly. The shop owner proposed a deal: if Tom could turn the desk into something sellable, like side tables, nightstands, or storage cabinets, they would split the profit.
The desk itself was decades old and made entirely of solid wood, which made it a strong candidate for reuse. Older furniture like this tends to be built with better materials than many modern pieces, giving the wood a solid foundation to work with even after cutting it down into smaller components.
Sanding and Surface Prep
Breaking the desk down into two separate end tables left behind rough edges and scratches that needed attention before any finish could go on. Tom relied heavily on an orbital sander, which he considers one of the most useful tools in his shop alongside a drill.
Rather than sanding every surface down to bare wood, Tom took a more selective approach. Only the tabletops and one drawer front, which had deep scratches (including a name someone had carved into the wood years earlier), were sanded completely. The rest of the surfaces were only scuffed enough to remove damage and prep them for new finish, which preserved some of the original character of the piece.
Matching Stain and Choosing a Finish
Because some sections were sanded to raw wood while others kept traces of the original finish, matching stain color took a bit of extra care. Tom explained that he prefers staining and topcoating over full paint jobs since it’s quicker for him and keeps more of the original piece intact.
He also pointed out that leaving some original character means a future buyer can always paint or refinish the piece however they like. To control how dark or light the stain turned out, Tom adjusted sandpaper grit, diluted the stain, or added extra coats. He even mentioned a trick of scraping leftover pigment from the bottom of a stain can for a noticeably darker effect.
For the topcoat, Tom used a water-based polyurethane, which dried fast in warm shop conditions. While he noted that an oil-based polyurethane typically gives a smoother final look, the water-based option let him finish the entire project in just a few hours as a personal challenge.
Turning Leftover Parts into a Bonus Cabinet
While cleaning up extra desk parts, Tom came across a middle drawer and a center section of the tabletop that he hadn’t planned on using. Instead of discarding them, he spent time in the garage sanding, staining, and brainstorming a new purpose for the pieces.
The original center drawer became the base of a new piece, while a leftover section from underneath the desk was trimmed down to serve as a decorative top. A scrap offcut was shaped into a small shelf, and another panel was turned into a door using a laser engraver to add a detailed farm scene design.
With hinges, a magnetic closure, and a polished original handle added, the once-overlooked desk parts came together as a standalone storage cabinet. Tom suggested it could work equally well as a medicine cabinet, jewelry box, or general storage piece depending on where it ends up.
Bringing the Finished Pieces Back
Once everything was finished, Tom returned the completed end tables and the bonus cabinet to the antique shop, a building with its own history as a former licorice factory. The pieces went right back to the same space they came from, just transformed into something buyers were actually looking for.
This project is a good example of how old furniture doesn’t need to be thrown out just because its original form isn’t practical anymore. By breaking a single piece down and refinishing the components separately, Tom was able to create multiple usable items, plus an unexpected bonus piece, all from wood that might have otherwise gone to waste.
Watch the full video and subscribe to Alley Picked:

Matt’s Take
These are my personal thoughts and tips based on my own experience in the shop. This section is not written, reviewed, or endorsed by the original creator of this project.
I love projects like this because they show what’s possible when you stop thinking of old furniture as a fixed object and start thinking of it as a pile of good material. Solid wood desks from decades back are often built with thicker stock and real joinery, so once you break them down, you’re left with pieces worth salvaging instead of a stack of veneer and particle board. If you’re hunting for a similar project, check for solid wood construction before you commit — a quick look at the drawer sides or an edge where the finish has worn through usually tells you what you’re dealing with.
On the sanding side, going selective instead of stripping everything to bare wood is a smart move, especially on a piece with age and character. It also just saves time. An orbital sander with graduated grits (something like 120 up to 220) will get you a clean surface without going overboard. Just keep in mind that uneven sanding means uneven stain absorption, so test scraps or hidden spots before committing to a full coat.
Water-based poly drying fast is great for a quick turnaround, but it can be less forgiving if you’re brushing it on versus spraying, since it sets up before you have much time to work it. Oil-based gives you more open time and a slightly warmer look, but the trade-off is longer dry times and more cleanup. Either way, good ventilation and a dust-free area matter more than people think when it comes to getting a smooth final coat.
The bonus cabinet is a nice reminder that scraps are worth holding onto for a bit before tossing them. You never know what a leftover drawer front or trimmed panel might become once you’ve got a finished project giving you ideas.