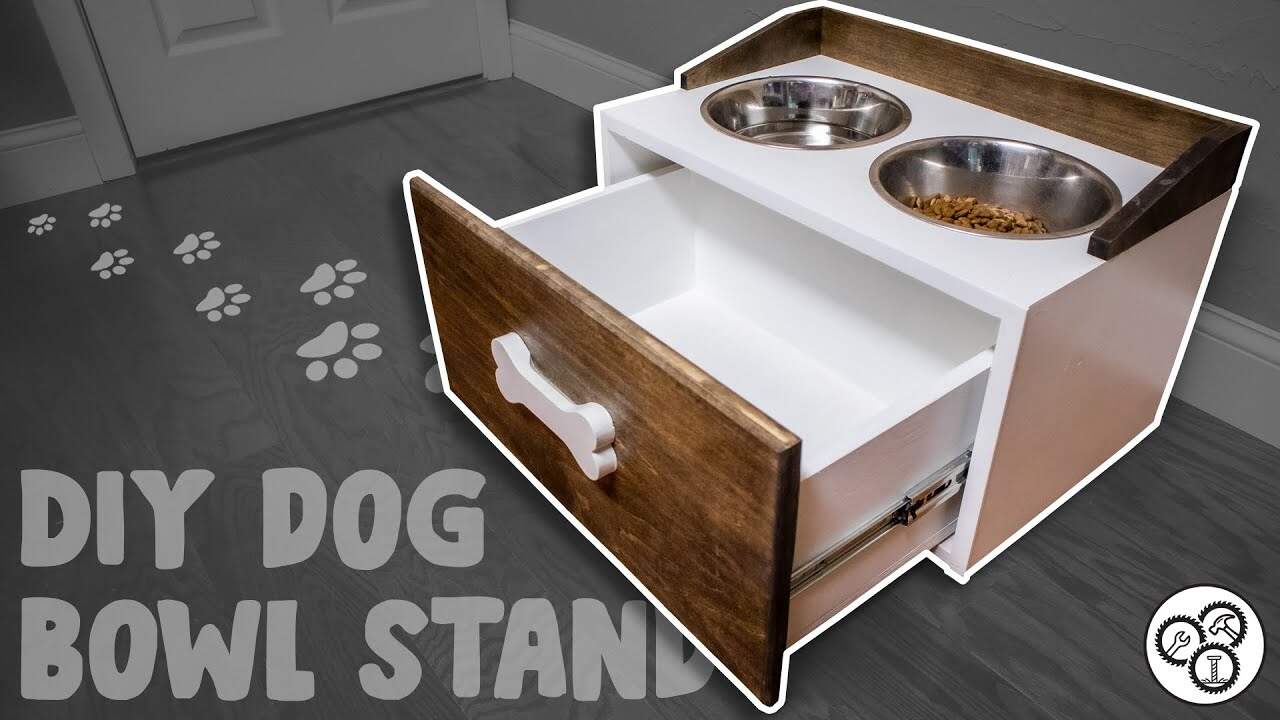
This project was built and designed by Tim from Casual Builds. It’s a practical and stylish raised dog feeding station that includes a storage drawer for keeping pet food and accessories neatly tucked away.
Perfect for medium to large dogs, this feeding station makes mealtime more comfortable while adding a clean, custom look to your space. With a mix of plywood, poplar, and a few essential tools, it’s a great project for beginner and intermediate woodworkers alike.
Watch the full video and subscribe to Tim’s channel:
Why Build a Raised Dog Feeding Station?
Elevated feeding stations can reduce strain on a dog’s neck and joints, especially for larger breeds. They also tend to be cleaner, keeping bowls off the floor and helping to prevent spills.
Tim adds extra functionality by including a drawer beneath the bowls. This storage space is ideal for food, treats, leashes, or toys, helping pet owners stay organized while giving the project added utility.
Materials and Tools
The build uses plywood for the main cabinet structure and poplar for some structural and decorative parts. These materials are easy to work with and provide a good balance of strength and appearance.
Tools required include a circular saw, jigsaw, biscuit joiner, and a drill. A miter saw can be helpful for angled cuts, but is not absolutely necessary. Wood glue, clamps, and a sander round out the basic tool list.
Sizing the Station to Your Dog
Before cutting any wood, Tim recommends adjusting the dimensions to suit your dog’s size. A good rule of thumb is to place the bowls at chest height, which for medium or large dogs is usually around 12 inches from the ground.
Bowl size matters too—measure the diameter of your pet’s bowls so they fit securely in the top panel. Planning these details up front ensures a more custom, comfortable fit.
Cutting and Preparing the Panels
The plywood is broken down into panels for the sides, top, bottom, and back of the feeding station. Tim opts for miter joints at the corners to give the cabinet a cleaner, more finished look.
While miter joints are slightly more advanced than simple butt joints, they result in tighter seams and stronger edges. Each end is cut at a 45-degree angle using a miter saw or circular saw with a guide.
Cutting the Bowl Openings
To create the bowl cutouts, circles are drawn on the top panel based on the bowl measurements. A drill is used to make a starter hole, and a jigsaw cuts the remainder of the opening.
Any rough edges are cleaned up with sanding. It’s important that the bowls sit snugly in the holes without falling through, but a little room around the edges allows for easy removal and cleaning.
Assembling the Cabinet
After pre-sanding all parts, Tim uses a biscuit joiner to align the panels during glue-up. This technique helps keep everything square and makes the structure stronger overall.
Glue and clamps are used to hold the frame in place during drying. Brad nails can also be used for the back panel, securing it cleanly and quickly. Any nail holes or imperfections are filled before finishing.
Building and Fitting the Drawer
The drawer is built using basic box construction, with pocket hole screws and glue for durability. Measuring carefully ensures it fits smoothly within the cabinet and allows for the drawer slides to operate properly.
Tim recommends using full-extension drawer slides for easy access. A plywood bottom is added to support dog food or accessories without flexing over time.
Finishing Touches and Decorative Details
Before finishing, all surfaces are sanded smooth again to remove any mill marks or sharp edges. Tim applies primer and paint to give the piece a clean, professional look that fits well in any home.
For added personality, consider using a decorative drawer pull—perhaps one shaped like a bone or paw. A unique backing board or patterned stencil could also make this piece stand out even more.
Installing Hardware and Final Assembly
The drawer slides are installed after painting, following the manufacturer’s instructions for proper spacing. The drawer face is aligned using double-sided tape, then secured from the inside with screws for a clean appearance.
To seal and protect the finish, Tim recommends a few coats of water-based polyurethane. This final step makes the piece more durable and easier to wipe clean after spills or messes.
Ready for the Taste Test
With the station complete, it’s time to let your dog try it out. The elevated bowls and extra storage make feeding more convenient, and the clean design looks great in any room.
Tim’s approach shows how woodworking projects can be both practical and rewarding. With a thoughtful layout and a few simple tools, this is a great weekend build for any pet-loving DIYer.
Please support Tim by visiting his website: https://www.casualbuilds.com/.

Matt’s Take
These are my personal thoughts and tips based on my own experience in the shop. This section is not written, reviewed, or endorsed by the original creator of this project.
The height consideration Tim mentions is spot-on — getting those bowls at the right level makes a huge difference for your dog’s comfort. I’d add that if you’re unsure about the exact height, err on the slightly lower side since you can always add a small platform underneath later. It’s much easier than rebuilding the whole top.
Those miter joints really do elevate the look of the piece, but don’t stress if your first attempts aren’t perfect. A little wood filler and careful sanding can hide minor gaps, and the paint finish is forgiving. The biscuit joiner is a nice touch for alignment, though you could also use dowels or even just careful clamping if that’s what you have in the shop.
For the drawer slides, spending a few extra dollars on quality hardware pays off here. Pet food can be heavy, and cheap slides will start binding after a few months of use. Full-extension slides like Tim uses are worth it — being able to access the entire drawer makes loading and unloading much easier, especially with larger bags of food.
One thing I really appreciate about this design is how it scales. Whether you’ve got a Great Dane or a smaller dog, the same basic construction approach works — you’re just adjusting the overall dimensions and bowl spacing to match your pet’s needs.