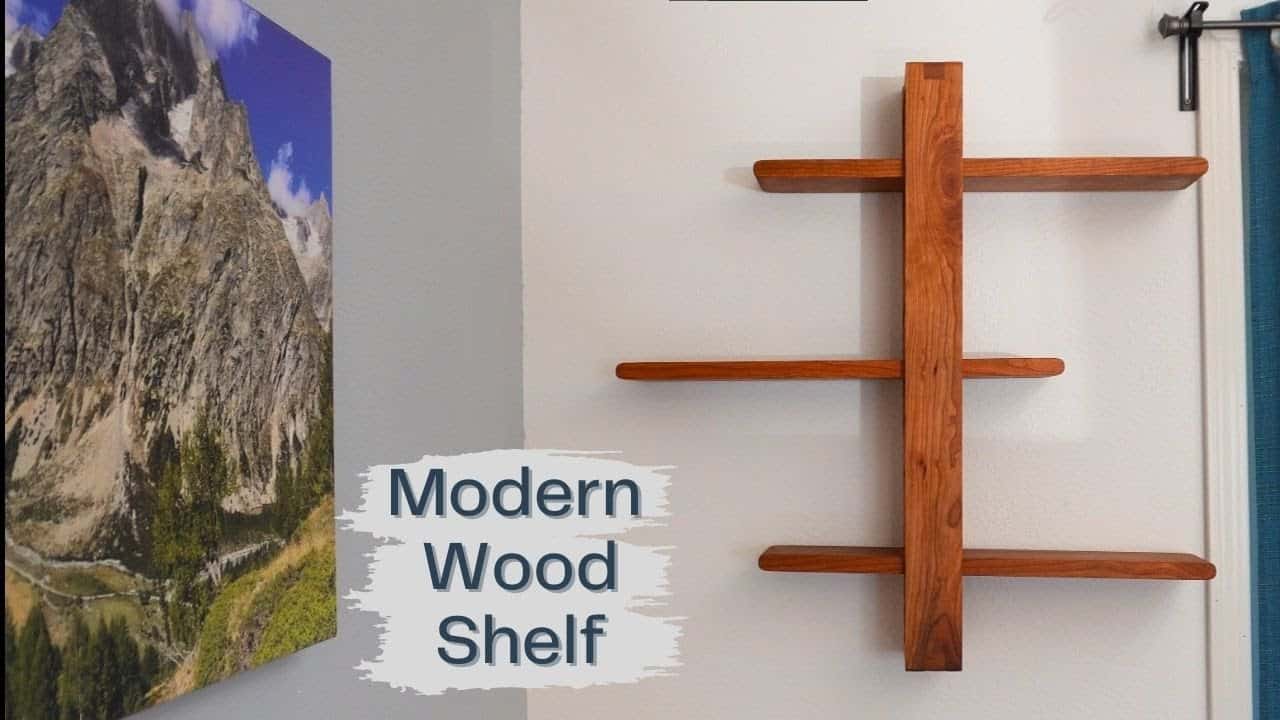
This project was built and designed by Kelley from Waterfall Woodworking. It features a clean, modern wood shelf made from cherry and designed with rounded edges, notched joinery, and thoughtful proportions that make it both practical and visually striking.
Whether you’re a beginner or an experienced woodworker, this build is approachable and rewarding. The shelf offers both decorative appeal and everyday functionality, with a strong focus on precise joinery and attention to detail.
Watch the full video and subscribe to Kelley’s channel:
Planning the Build
The design for this shelf was inspired by a reference photo shared by a family member. It features open shelving with rounded front edges and notched supports that give the piece its clean, geometric style.
Before beginning, Kelley outlines the layout based on the dimensions of the wall and the desired shelf spacing. A visual reference is a great starting point for any project, especially one that blends form and function as seamlessly as this.
Selecting and Milling the Material
Cherry wood was selected for this project due to its warmth, natural grain, and ability to take finish beautifully. While cherry adds a premium feel, other hardwoods or even softwoods can work depending on the look you’re after.
The boards are milled down to uniform thickness and width using a planer and jointer. Milling is a key step that ensures consistency across all parts and prevents fitment issues during assembly.
Shaping the Shelves
The shelf boards are first cut to length and width. Then, Kelley rounds over the front and side edges using a router with a round-over bit. This subtle profile adds comfort and a finished look, making the shelves easier to handle and softening the overall appearance.
Each edge is then lightly sanded to remove any sharp corners left by the router. These details go a long way in making the final piece feel intentional and well-crafted.
Building the Frame
The shelf frame consists of two vertical side pieces and horizontal front and back rails. These rails include carefully positioned notches where the shelves will rest. The result is a structure that locks everything together with clean, visible joinery.
Kelley uses a table saw to cut the notches, making careful adjustments to get the depth and width just right. Consistency is key, so test cuts are made before committing to the final pieces.
Cutting Joinery with a Simple Jig
To join the frame pieces together, Kelley builds a simple jig to guide vertical cuts. This jig ensures clean and accurate lines, allowing the frame to be assembled with minimal gaps and strong corners.
A dry fit is performed after cutting to make sure all parts align. Clamps are used to check for square and make sure everything goes together as expected before moving on to final assembly.
Final Assembly and Adhesive Tips
Before glue-up, all parts are sanded to a fine finish. Kelley uses 220-grit paper to smooth surfaces and soften edges. Small cracks or knots are filled with an adhesive that cures quickly, creating a strong and clean repair.
Glue is applied to each joint, and the frame is clamped tightly using a square to maintain proper alignment. Because of the cold working conditions in the shop, Kelley reinforces the joints with a brad nailer—an optional step that adds peace of mind and extra stability.
Any gaps that appear during glue-up are filled with a mixture of wood glue and sawdust, which blends nicely with the surrounding cherry. Once dry, the patch is sanded flush to create a seamless finish.
Rounding and Sanding the Final Form
After assembly, the frame edges are given another round-over treatment with a router. This helps unify the look with the shelves and makes the piece feel smooth and finished all around.
An orbital sander is used on flat surfaces, followed by hand sanding on corners and tight spots. Attention is paid to grain direction and surface quality, preparing the piece for a durable and attractive finish.
Finishing with Walrus Oil
To bring out the natural character of the cherry, Kelley applies Walrus Oil—a food-safe finish that enhances color and provides lasting protection. It’s easy to apply and leaves a matte sheen that works well in modern interiors.
The oil penetrates quickly, enriching the tone of the wood and highlighting grain without adding unwanted gloss. Several coats are applied for even coverage and deeper tone.
Mounting the Shelf to the Wall
Mounting the shelf securely is an important final step. Kelley drills pilot holes into the frame, then uses a flexible drill bit extender to install screws in hard-to-reach areas.
This clever tool allows the shelf to be anchored without interfering with the aesthetics of the front face. Once mounted, the shelves slide into their notches and can be adjusted as needed for spacing or display.
A Stylish and Functional Result
The finished shelf offers a blend of modern design and traditional woodworking techniques. Its notched joinery, clean lines, and warm cherry finish make it suitable for living rooms, bedrooms, or offices.
This project is a great opportunity to improve your precision and layout skills while producing something that’s both beautiful and useful. Kelley’s thoughtful approach and clear process make the build approachable and satisfying from start to finish.
Please support Kelley by visiting her website: https://www.waterfallwoodworking.com/.

Matt’s Take
These are my personal thoughts and tips based on my own experience in the shop. This section is not written, reviewed, or endorsed by the original creator of this project.
Cherry is such a rewarding wood to work with — it starts off fairly light but darkens beautifully over time with exposure to light. The natural aging process means this shelf will keep getting richer in color for months after it’s hung. If you’re working with cherry for the first time, don’t be surprised if freshly cut surfaces look almost blonde compared to the deeper tones you’ll see in finished pieces.
The notched joinery approach here is brilliant for a wall-mounted piece. Those notches do double duty — they create clean lines visually while also providing positive stops for the shelves during installation. When you’re working solo (which most of us are), having the shelves essentially self-locate makes mounting so much easier than trying to hold everything in place while wrestling with a drill.
That brad nailer reinforcement in cold shop conditions is smart thinking. Wood glue definitely doesn’t cure as reliably when temperatures drop, and those tiny brads act like clamps until the adhesive can do its job properly. For anyone working in an unheated shop, keeping some CA glue around for gap-filling is another cold-weather trick — it’ll cure regardless of temperature and mixes great with sawdust for invisible repairs.