This project was built and designed by Josh Wright.
It combines practical storage with the elegance of Kumiko, a traditional Japanese woodworking technique that transforms functional furniture into visual art.
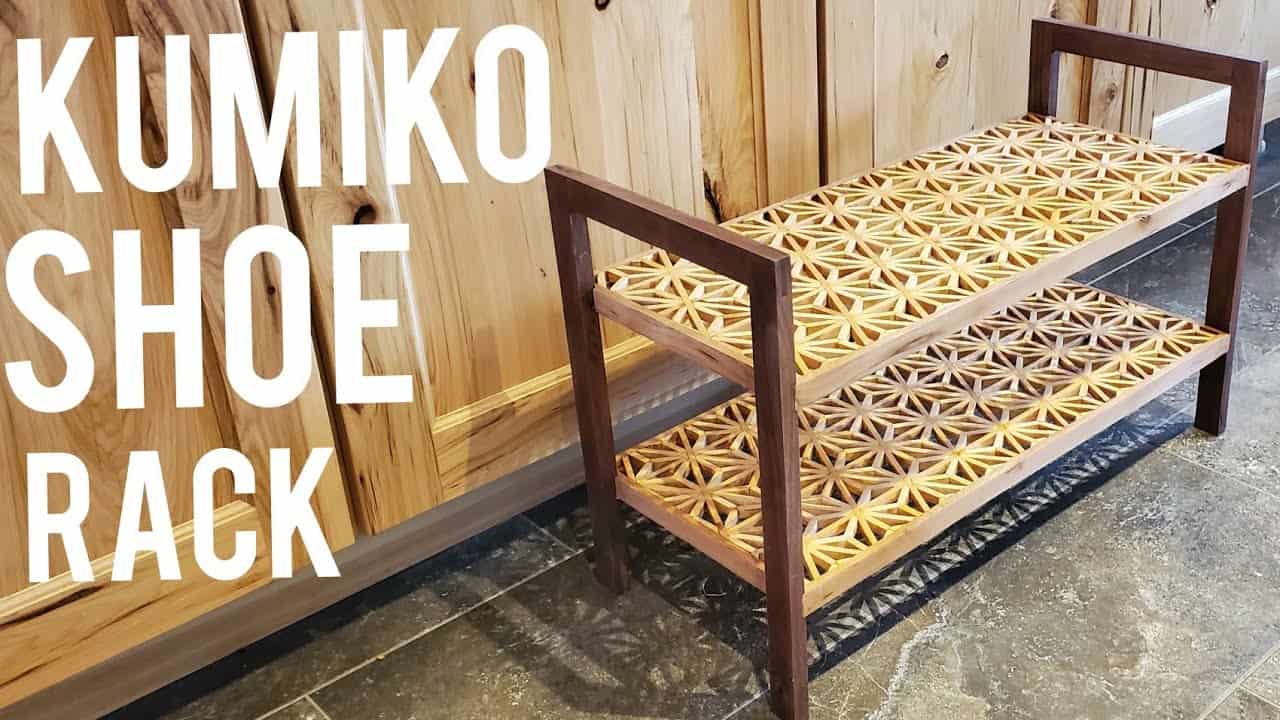
The result is a beautifully detailed shoe rack that’s as much a display piece as it is a storage solution.
With careful joinery, custom jigs, and thoughtful material choices, Josh creates something that highlights both precision and creativity.
Watch the full video and subscribe to Josh’s channel:
Where the Idea Began
Josh was inspired to tackle this build after watching Kumiko-focused content, especially from Pask Makes. He wanted to create something useful while also diving into the challenge of a detailed pattern.
The result is a compact shoe rack featuring a diamond-style Kumiko grid, designed to elevate a typical entryway with handcrafted artistry.
It’s a rewarding build for anyone interested in traditional joinery and detailed pattern work.
Choosing Materials
Cedar was chosen for the Kumiko pattern due to its lightweight nature, resistance to moisture, and ease of cutting.
It’s an ideal wood for fine detail work, and its natural aroma is a bonus for an item designed to hold footwear.
The frame and legs are made from walnut, selected for contrast and strength. The warm tones of the walnut frame complement the light color of the cedar grid, adding to the overall visual balance of the piece.
Laying the Groundwork
Josh starts by breaking down cedar boards into thin strips. These are used to form the Kumiko grid, which involves cutting dozens of smaller pieces to precise lengths and angles.
To maintain consistency and speed up the process, Josh prepares multiple blanks ahead of time.
These are sliced down to the correct thickness and width before any beveling begins.
Making the First Bevel Cuts
The table saw is set to a 30-degree angle to create the first set of bevels. To cut efficiently, Josh tapes multiple cedar strips together and runs them through in groups, improving consistency and saving time.
Once beveled, each strip is cut into the smaller elements that will form the diamond-shaped Kumiko design.
These are further divided into thirds to create an intricate triangular interior pattern.
Cutting at Precise Angles
To achieve the 60-degree bevels needed for the inner pattern, Josh creates a wedge to extend the table saw’s capabilities beyond the usual 45 degrees.
This kind of workaround is essential when working with advanced patterns without specialty machines.
The opposite edges of each triangle are beveled at 30 degrees, allowing the pieces to fit together precisely. This dual-angle technique ensures a snug fit and clean look across the entire panel.
Building the Kumiko Grid
Once all the tiny pieces are ready, Josh begins assembly of the Kumiko pattern.
The diamonds come together with careful placement, and the overall effect is striking once the grid is complete.
It’s a slow and methodical process, but each section builds on the last until the pattern becomes fully realized. This is where the preparation pays off—pre-cut pieces speed up the layout while maintaining a high degree of precision.
Framing the Panels
With the Kumiko panel complete, Josh cuts it into two sections that will serve as the shelves for the shoe rack.
These are fit into walnut frames that were prepared in advance and glued together to hold the delicate grid in place.
This step not only adds structure to the Kumiko sections but ensures the weight from stored shoes won’t damage the delicate components inside.
Adding the Legs
The shoe rack’s legs are made from solid walnut and cut to match the proportions of the framed Kumiko panels.
Josh uses bridal joints to connect the legs securely to the rest of the frame, offering stability while maintaining a sleek silhouette.
To support the shelves, notches are cut into each leg. These recesses allow the shelves to drop in securely and stay locked in place during use.
Final Assembly and Finish
After dry-fitting all components, Josh glues the shelves into the notches and clamps everything together.
The final structure is balanced, lightweight, and visually distinct.
For the finish, he applies a few coats of spray lacquer. This enhances the natural contrast between cedar and walnut and protects the surfaces from wear while adding a subtle sheen.
Why This Project Stands Out
This Kumiko shoe rack is more than a woodworking project—it’s an exercise in detail, patience, and design.
By merging a centuries-old technique with modern function, Josh has created a piece that adds lasting value to any space.
It also serves as a reminder that woodworking is both art and craft.
For anyone looking to stretch their precision and layout skills, a Kumiko-style project offers both challenge and reward.
Support Josh by visiting his Etsy Store.

Matt’s Take
These are my personal thoughts and tips based on my own experience in the shop. This section is not written, reviewed, or endorsed by the original creator of this project.
Working with Kumiko patterns is one of those techniques that really tests your precision and patience in the shop. The beauty of this traditional Japanese joinery is that it relies entirely on the accuracy of your cuts — there’s no hardware or glue to hide mistakes. When you’re dealing with dozens of tiny pieces that all need to fit together perfectly, having consistent setups and sharp tools becomes absolutely critical.
That table saw wedge trick for getting beyond 45 degrees is clever shop problem-solving at its best. Not everyone has access to specialized machinery, so finding ways to work with what you have is a valuable skill. When you’re making repetitive cuts like this, take your time setting up jigs and stops — the extra prep work up front saves hours of frustration later and keeps everything uniform.
Cedar is a smart material choice here for more than just the pleasant smell. Its stability and workability make it forgiving when you’re learning these techniques. The contrast with walnut creates that classic look, but don’t overlook the practical side — cedar’s natural properties actually make sense for an entryway piece that might encounter moisture from wet shoes.
Safety reminder: when you’re working with small pieces and angled cuts, keep your hands well clear of the blade and use push sticks religiously. Those tiny offcuts can become projectiles, and fingers get uncomfortably close to spinning steel when you’re focused on precision work.