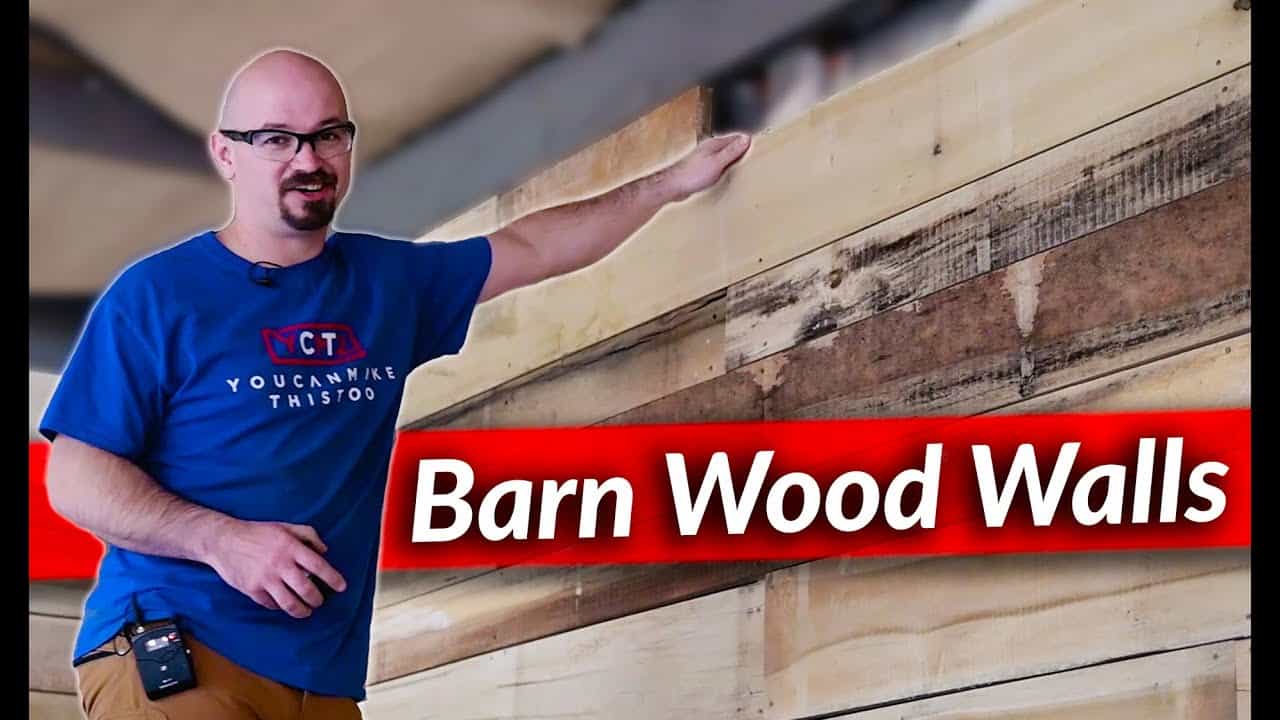
This project was built and designed by Caleb from YouCanMakeThisToo. It documents the process of installing barn wood walls throughout his woodworking shop, using rough sawn yellow poplar for a space that’s both durable and visually impressive.
With roughly 1400 board feet of wood processed and installed over the course of two weeks, the result is a functional, rustic backdrop that enhances the shop’s usability and character.
Watch the full video and subscribe to Caleb’s channel:
Choosing and Preparing the Lumber
Caleb sourced yellow poplar from a local sawyer and transported the stacks to the shop using a tractor. Each board was evaluated for flatness and structural soundness, with cupped or uneven pieces ripped down the center to improve usability.
Instead of planing everything smooth, the boards were kept rough to preserve their character and grip. Function was prioritized over perfection, keeping the rustic look intact while ensuring the boards were still suitable for installation.
Sorting by Width for Efficiency
Once the boards were reviewed, they were sorted by width. This was a key step for setting up the Wood Master planer in gang saw mode—a process that allowed multiple boards to be ripped consistently and efficiently in one go.
Caleb marked each board based on usable width, even noting tapered pieces to avoid misclassification. This careful planning ensured the material was used fully, with little to no waste during processing.
Ripping Boards with the Wood Master Planer
The Wood Master tool acted as both a planer and a gang saw. By adjusting blade spacing, Caleb was able to cut multiple boards to uniform widths in one pass.
This saved considerable time compared to ripping each board individually and allowed him to maintain consistent sizing throughout the installation. Even boards with slight imperfections were prepped and included, thanks to his organized workflow and attention to usable dimensions.
Framing the Wall Structure
With the boards ready, the wall framework came next. Caleb installed 6×6 posts vertically along the perimeter where the barn wood would be mounted. These structural supports were reinforced with 2x4s and 2x2s for extra rigidity—particularly at corners and load points.
Pressure-treated lumber was used for the bottom plate, which made direct contact with the concrete floor. This choice helps resist moisture damage and extends the life of the framing materials, especially in environments prone to dampness.
Installing T-111 for Style and Strength
For the wall surface itself, Caleb used T-111 paneling to create a barn-style look. This material offered the rustic aesthetic he was aiming for while remaining more affordable than some hardwood plywood options.
The installation involved measuring, cutting, and fitting each section tightly against the framing. Off-cuts and scraps were repurposed as bracing pieces, helping to reinforce corners and reduce material waste.
Reusing Material and Minimizing Waste
One of the strengths of Caleb’s approach was how efficiently he reused leftovers from earlier cuts. Any usable board was trimmed, reshaped, and reinserted into the build as blocking or filler, keeping the project both economical and sustainable.
By doing this, he not only conserved resources but also added extra support to sections of the wall where more structural integrity was needed.
Considering the Finish
With the walls nearly complete, Caleb evaluated how the raw wood looked in place. He considered applying a light gray stain to tone down the blonde tones of the poplar but ultimately chose to leave the boards unfinished.
The natural grain and color of the wood added to the shop’s charm and character. Future plans include minor spot treatments, but the main structure remains raw, giving the shop a clean but rugged atmosphere.
Benefits of Solid Wood Walls in a Shop
Beyond the aesthetic value, these barn wood walls provide solid backing throughout the workspace. This makes it easy to hang tools, shelves, or hardware without the need to locate studs or add furring strips.
It also creates a cohesive and inviting environment—important for anyone spending long hours in a woodworking space. The combination of durability, function, and visual appeal makes this a practical upgrade for any serious workshop.
Final Thoughts on the Build
This project demonstrates how thoughtful planning and efficient use of materials can lead to great results. From sourcing the lumber to installing the final panel, Caleb balanced form and function at every step.
The barn wood walls now serve as a central feature of the shop, blending rustic design with modern practicality. It’s a great example of how woodworking can enhance not just what you build—but the place where you build it.
Please support Caleb by visiting his website: https://www.ycmt2.com/.

Matt’s Take
These are my personal thoughts and tips based on my own experience in the shop. This section is not written, reviewed, or endorsed by the original creator of this project.
Working with rough sawn lumber like this yellow poplar really shows the beauty of keeping things natural. That decision to skip planing and preserve the texture was smart — you get better grip for hanging things and way more character than you’d ever get with smooth boards. Plus, rough lumber hides minor imperfections that would stand out on a perfectly smooth surface.
The gang ripping setup with that Wood Master is brilliant for a project this size. Processing 1400 board feet one board at a time would take forever. When you’re dealing with volume like this, having consistent widths really speeds up the installation process. That sorting step beforehand is crucial — it’s one of those things that feels like it slows you down at first, but saves hours later.
Using pressure treated for that bottom plate is a must. Even in a heated shop, concrete can wick moisture, and regular lumber sitting directly on it will eventually have problems. The solid wood backing throughout is going to be incredibly practical for tool storage and organization. No more hunting for studs or dealing with hollow spots when you need to hang something heavy.
The natural poplar color will mellow and darken over time, especially with shop dust and handling. Sometimes the best finish is just letting the wood age naturally in its environment.