This project is by Keaton Beyer. If you’re looking to restore a well-used cutting board, Keaton walks through several techniques that can bring it back to life—whether you’re a beginner with no tools or a seasoned woodworker with a full shop.
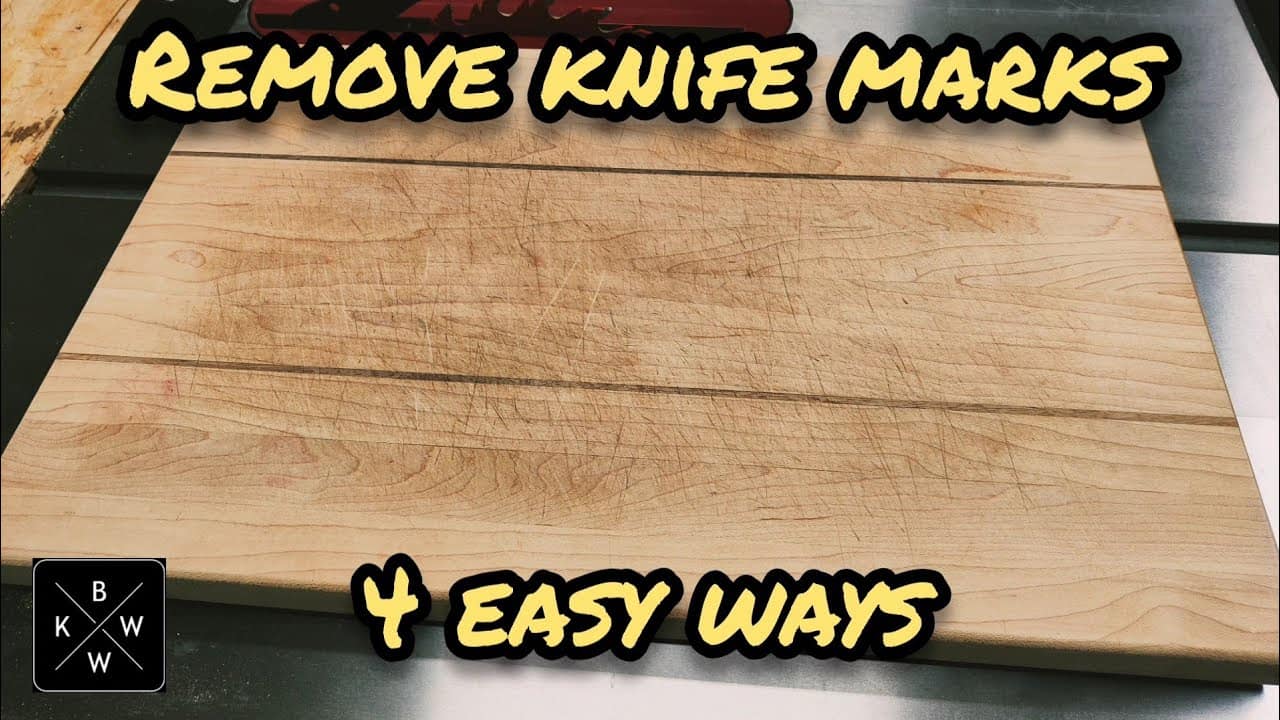
Over time, even the most durable wooden cutting boards get scratched, worn, and stained. With a little effort and the right method, you can renew yours and keep it in service for years to come.
Watch the full video and subscribe to Keaton’s channel:
What Refinishing Really Means
Refinishing a wooden cutting board means removing knife marks and smoothing the surface so it’s safe and pleasant to use again. The final step is applying a food-safe oil or conditioner to protect the wood and highlight its natural grain.
Keaton outlines four different methods, each suitable for different skill levels and tool access. Whether you’re working by hand or using shop equipment, there’s a method here that fits your situation.
Method 1: Hand Sanding
This is the most accessible approach—no power tools required. Start with a coarse sandpaper like 80 or 100 grit to remove the worst of the scratches.
Sand with the grain to avoid creating more marks, and gradually move through finer grits like 120 and 220 until the surface feels smooth. Clean off dust between each step to avoid scratching with debris.
It takes a bit of time, but hand sanding is inexpensive, straightforward, and effective for most boards. It’s a great choice if you’re just getting started or want a more tactile approach.
Method 2: Sheet Sander
If you want to cut down on time and effort, using a sheet sander is a big help. These sanders are relatively affordable and make quick work of surface cleanup.
The sanding process stays the same—start coarse and finish fine. You can cut regular sandpaper into quarters to fit the sander and save money on specialty sheets.
Keaton points out that this is a solid option for occasional DIYers who want a faster result without investing in a full shop setup.
Method 3: Hand Planing
For those who already have a hand plane, this method can be even faster than sanding. A sharp smoothing plane removes material cleanly and can level out knife marks without dust.
Take light passes and avoid digging too deep. With a little practice, planing can leave a silky-smooth finish while preserving more of the wood’s thickness.
It’s ideal for woodworkers who enjoy traditional tools and want a quiet, controlled way to refine a board’s surface.
Method 4: Planer or Drum Sander
For woodworkers with access to power tools, this is the most efficient option. A pass through a planer or drum sander can restore a board’s surface in under a minute.
Important note: this method only works safely on edge-grain cutting boards. If your board is end grain, avoid using a planer and opt for a drum sander instead to prevent damage.
This method is fast and leaves a pristine surface but does require proper equipment and care.
Water Popping the Grain
Before applying finish, Keaton recommends “water popping”—a step where you lightly dampen the board with water to raise the grain. Once it dries, you can knock down the raised fibers with one last light sanding using 220 grit.
This step ensures the smoothest finish possible and helps the oil penetrate evenly across the board.
Applying Oil and Conditioner
After sanding, clean the board thoroughly to remove any dust. Then, apply a generous coat of mineral oil, which is food-safe and easy to find at most grocery stores.
Let it soak for 20 to 30 minutes, then wipe off any excess. To boost the board’s durability, apply a food-grade conditioner on top—often a mix of mineral oil and beeswax—and buff it in.
Reapply oil and conditioner every couple of months, depending on how often the board is used and cleaned.
A Simple Project That Makes a Difference
Refinishing a cutting board is one of those woodworking projects that combines practicality and satisfaction. It’s easy to overlook how much of a difference a refreshed surface can make until you see and feel it firsthand.
Keaton’s video offers helpful insights into each method, whether you’re working with sandpaper or dialing in a drum sander. The flexibility of approaches makes this a great project for anyone interested in taking better care of their kitchen tools.
Please support Keaton, but visiting his website: https://www.keatonbeyerwoodworking.com/.

Matt’s Take
These are my personal thoughts and tips based on my own experience in the shop. This section is not written, reviewed, or endorsed by the original creator of this project.
The beauty of cutting board restoration is that it’s one of those projects where you can see immediate, satisfying results regardless of which method you choose. I really appreciate how Keaton breaks down options for every skill level and tool situation—there’s no wrong approach here, just different paths to the same goal.
One thing worth emphasizing is that water popping step. It might seem like an extra hassle, but it makes a noticeable difference in the final result. The grain raises when the board gets wet during normal use anyway, so addressing it during refinishing prevents that rough feeling after the first wash. Just make sure the board is completely dry before that final light sanding.
Safety-wise, remember that planer warning about end-grain boards. End grain can tear out badly in a planer and potentially kick back. If you’re unsure about your board’s construction, the hand methods are always the safer bet. And whatever method you use, take your time with the oil application—rushing that final step after all the prep work would be a shame.
These restored boards often end up looking better than when they were new, with all that character from use still showing through the refreshed surface. It’s a perfect example of how a little shop knowledge can extend the life of something you use every day.