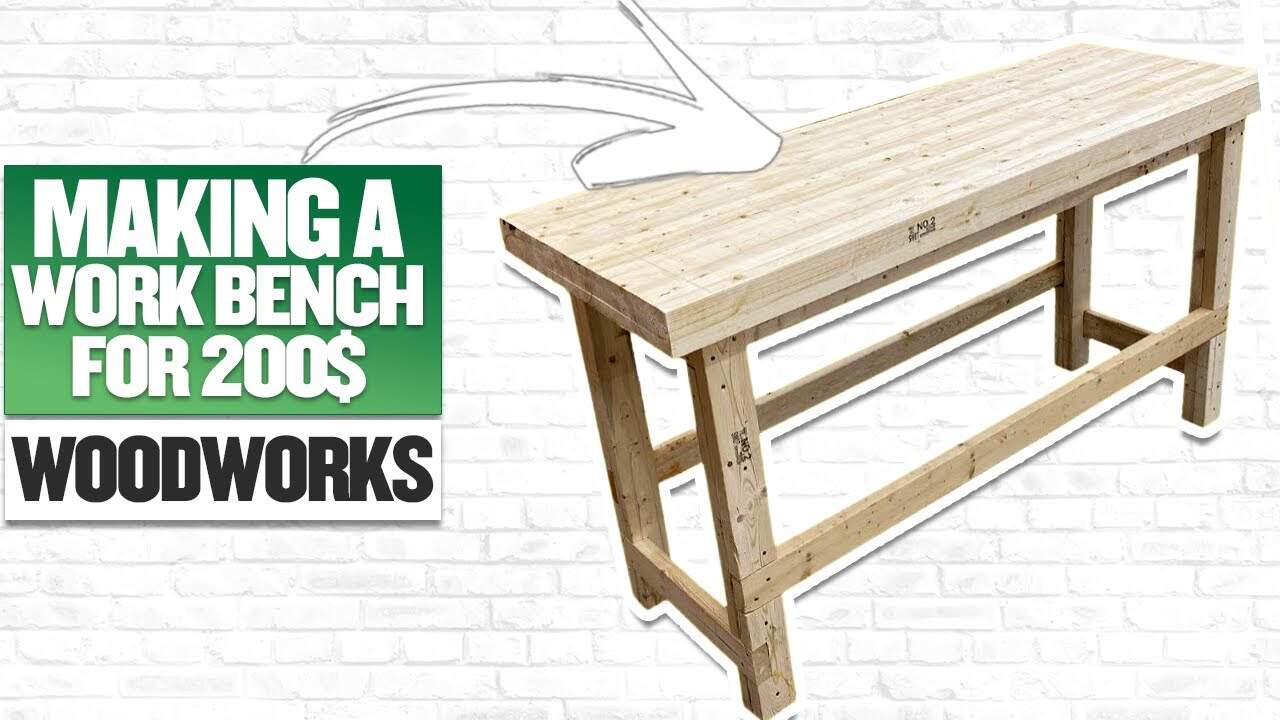
This project was built and designed by Nick from Rocky River Woodworks. It’s a sturdy, budget-friendly workbench made from standard materials—an ideal foundation for any home woodshop.
Designed with practicality in mind, this build uses common 2x4s and repurposed parts to keep costs low without sacrificing strength. Whether you’re upgrading your current bench or starting fresh, this is a project that delivers solid value.
Watch the full video and subscribe to Nick’s channel:
Why a Proper Workbench Matters
Many woodworkers start with temporary setups—old tables, sawhorses, or scrap plywood clamped together. But a dedicated workbench changes everything. It adds stability, space, and a solid surface that can take a beating.
Nick’s build focuses on strength and simplicity. It’s the kind of bench that can support large projects, hold tools, and stand up to years of use without sagging or shifting.
Reusing What You’ve Got
The first step in this build involved salvaging usable material from an old outfeed table. Repurposing existing wood not only saved money but also kept good lumber from going to waste.
Nick dismantled the previous build and sorted through the pieces, setting aside usable 2x4s and solid leg components. This mix of reused and new lumber forms the foundation of the workbench’s frame.
Building a Solid Base
With materials sorted, the frame is assembled using a mix of screws and wood glue. This combination provides both immediate hold and long-term strength, preventing wobble under pressure.
The legs are connected with half-lap joints for added stability—a great upgrade from simple butt joints. These interlocking joints distribute weight better and help keep the bench steady during heavy work.
Cross supports are added both lengthwise and widthwise. These act as braces that resist racking and reinforce the structure from all sides.
Laminating the Workbench Top
The top of the workbench is made by laminating multiple 2x4s together. This creates a thick, durable surface capable of absorbing impacts and supporting clamping pressure during builds.
Nick glues the boards in manageable sections, then runs each section through a planer to get a consistent thickness. Once flattened, the sections are joined together to form a full-length benchtop.
To ensure a smooth surface, Nick uses a belt sander to remove glue lines and high spots. While a CNC machine could flatten the top, this approach keeps the build accessible with basic shop tools.
Finishing and Attaching the Top
After sanding the top smooth, the corners are squared and edges cleaned up for a more finished look. The top is then secured to the base with screws driven through the cross supports.
A few coats of shellac are applied to protect the surface. This finish adds a bit of sheen while guarding against glue spills, moisture, and tool marks that come with daily shop use.
Shellac is a good choice for shop furniture—it’s easy to apply, dries fast, and can be refreshed without stripping the surface down.
Tools That Help Along the Way
Several basic tools made this project smoother from start to finish. Clamps are essential for holding sections during glue-ups, while a depth gauge helps dial in accurate settings for any dado work.
Nick also uses a random orbital sander for final surface prep. This tool is great for blending edges and achieving a smooth finish before applying shellac.
During the build, Nick stresses the importance of using hearing protection when working with noisy tools. He opts for Bluetooth-enabled ear protection, which allows him to listen to music or take calls while keeping his hearing safe.
Built to Last on a Budget
One of the highlights of this workbench is its price. By using construction-grade 2x4s and reusing old materials, the entire bench comes in around the $200 mark—far less than many pre-made options with similar durability.
Even better, this design can be adapted. Want it longer, taller, or mobile? Just adjust the measurements and add locking casters. The core structure is flexible and beginner-friendly.
A Worthwhile Shop Upgrade
Nick’s workbench proves that you don’t need a huge budget or a massive shop to build something durable and useful. With smart joinery, thoughtful material choices, and a little patience, anyone can build a work surface that makes future projects easier and more enjoyable.
Whether you’re building your first dedicated bench or replacing an old one, this is a practical and rewarding woodworking project that pays off every time you step into the shop.
Please support Nick by visiting his website here: https://www.rockyriverwoodworks.com/.

Matt’s Take
These are my personal thoughts and tips based on my own experience in the shop. This section is not written, reviewed, or endorsed by the original creator of this project.
Building a workbench is one of those projects that immediately improves everything else you do in the shop. The stability difference between a proper bench and a makeshift setup is night and day—suddenly your cuts are cleaner, your assembly work is easier, and you’re not chasing your project around the shop floor.
The laminated 2×4 top approach is really smart here. Construction lumber gets a bad rap sometimes, but for a workbench, those softer fibers actually work in your favor. They’ll absorb tool impacts better than hardwood and won’t ding your chisels as easily. Plus, if you ever beat up the surface too badly, you can always sand it down and refinish it without breaking the bank.
That half-lap joint construction for the base is a nice touch—those interlocking joints create a much more rigid frame than simple corner brackets. When you’re planing boards or doing heavy assembly work, that extra stability really shows. The cross braces are crucial too; without them, even the strongest joints will eventually rack under side loads.
For anyone considering this build, remember that shellac plays well with wood glue—if you get squeeze-out on the surface later, it won’t interfere with glue adhesion like some other finishes might. That makes this bench ready for years of project work right out of the gate.