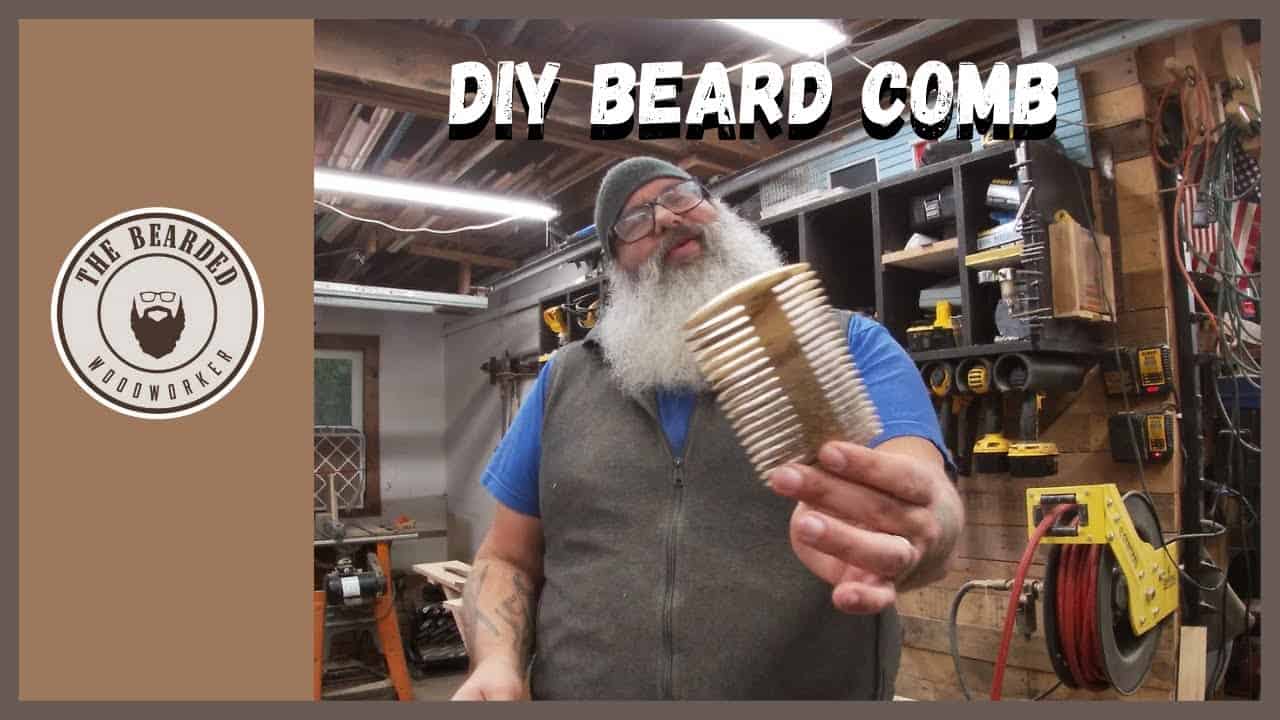
This project was built and designed by Gary Herd, known online as The Bearded Woodworker. Using a striking piece of Myrtle wood, Gary creates a functional and refined beard comb that combines thoughtful design with careful craftsmanship.
This project serves as a great example of how even a small woodworking item can showcase technique, planning, and attention to detail. With the right tools and approach, Gary turns a simple block of wood into a practical grooming tool and a unique gift.
Watch the full video and subscribe to Gary’s channel:
Myrtle Wood and Its Qualities
Myrtle wood, native to the Oregon coast, is known for its tight grain and rich, varied color. Its durability and visual appeal make it ideal for smaller, handheld woodworking items that benefit from both form and function.
For this comb, the wood’s strength and smooth finish are essential. Gary selects the material carefully, paying close attention to grain direction so that the teeth of the comb remain strong and resistant to breakage.
Design Goals for a Comfortable Comb
The design of the beard comb prioritizes both appearance and usability. Gary aims for a shape that fits comfortably in hand, making the comb easy to use for everyday grooming.
The teeth are laid out with a combination of coarse and fine spacing. This allows the comb to work well for various beard types and gives users flexibility whether they’re detangling or shaping.
Cutting the Comb Blank
The process begins with crosscutting the Myrtle wood into a manageable size. A crosscut sled on the table saw helps ensure precision, which is important when working with fine dimensions for a handheld object.
As the blank is squared and dimensioned, Gary begins to outline the rough shape of the comb. This includes the handle area and the width and depth needed to accommodate a range of tooth sizes.
Shaping and Tooth Layout
Initially, Gary uses a bandsaw to rough out the teeth, following marked lines that vary in width for a more versatile tool. Partway through the process, he switches to a table saw for finer control and cleaner cuts.
Being flexible with tools is part of what makes the project successful. Each step is guided by how the wood responds and how best to preserve clean lines and structural integrity.
Sanding Each Surface and Tooth
Once the shape is cut, the real refining work begins. Gary uses both a belt sander and disc sander to shape and smooth the outside edges of the comb. Each edge is softened for comfort and safety.
The most detailed sanding is done by hand, especially along the individual teeth. This ensures there are no sharp edges and that the comb glides through hair without snagging.
This careful attention also highlights the natural patterns in the Myrtle wood. As the sanding progresses, the grain becomes more visible and the overall appearance of the comb improves significantly.
Applying a Safe and Functional Finish
With the comb fully shaped and sanded, Gary applies mineral oil to condition the wood. It’s a safe choice for skin contact and helps preserve the look and feel of the comb over time.
To enhance the user experience, a few drops of cedar oil are added. This gives the comb a light, pleasant aroma without overwhelming the natural scent of the wood.
Allowing the oil to fully soak in deepens the color and protects the surface, making the comb not only functional but also long-lasting. The finish also highlights the natural tones and shifts in the Myrtle wood grain.
A Personal and Practical Woodworking Project
The final product is both visually striking and highly usable. It’s shaped to fit the hand, cut to accommodate different grooming needs, and finished with care.
Gary’s build shows that even small woodworking projects can offer big returns. In this case, the result is a beard comb that feels great in the hand, looks polished, and makes an excellent gift or personal tool.
Simple Tools, Lasting Results
This project doesn’t require an elaborate setup. With standard workshop tools like a bandsaw, table saw, sander, and a few hand tools, Gary demonstrates that you can produce high-quality results without needing a full shop of equipment.
His calm, methodical approach makes this a great project idea for intermediate woodworkers looking to build something meaningful in an afternoon.
Watch the full video and subscribe to Gary’s channel:

Matt’s Take
These are my personal thoughts and tips based on my own experience in the shop. This section is not written, reviewed, or endorsed by the original creator of this project.
Working with Myrtle wood is always a treat — that tight grain Gary mentions really does make all the difference when you’re cutting fine details like comb teeth. The grain stability helps prevent those delicate pieces from snapping during the cutting process or with regular use. If you’re considering this project but can’t find Myrtle, hard maple or cherry work well too, though you’ll miss out on those beautiful natural color variations.
The tool flexibility Gary shows here is worth noting. Starting with the bandsaw for rough cuts and switching to the table saw for precision is a smart approach. When cutting teeth this fine, I’d suggest taking your time with blade selection — a fine-tooth blade on the table saw will give you cleaner cuts and reduce tear-out, especially on the cross-grain cuts.
That hand-sanding phase is where the magic really happens. Each tooth needs individual attention to eliminate any roughness that could snag hair. A small sanding block wrapped with 220-grit paper works great for getting into those tight spaces between teeth. The mineral oil finish is perfect for this application — food-safe, non-toxic, and it really brings out the wood’s natural character while providing the protection needed for daily use.