This project was built and designed by Caleb from YouCanMakeThisToo. It’s a refined finger-jointed wooden box made from white oak, complete with a laser-engraved lid and a striking epoxy inlay for added flair.
Combining traditional joinery with modern decorative touches, this build is ideal for woodworkers looking to create a meaningful gift or elevate their skills. Caleb walks through each step with precision, from the initial cuts to the final finish.
Watch the full video and subscribe to Caleb’s channel:
Starting with Strong Materials
White oak is the material of choice for this box, valued for its durability and clean grain. Caleb mills the boards to just under half an inch thick, which makes them manageable for cutting joints and still strong enough for daily use.
If you don’t have access to a jointer or planer, pre-milled hardwood from your local home center can work just as well. The key is to ensure each board is flat and square before moving forward.
Cutting and Sizing Each Panel
Once the boards are prepped, they’re cut to final dimensions using a table saw and miter saw. For those working with fewer tools, a circular saw and straight edge can accomplish the same cuts with some extra care.
Finger joints form the corners of this box, chosen for their strength and visual interest. Caleb uses a jig to cut these joints consistently, ensuring a tight mechanical bond with plenty of surface area for glue.
Dry Fitting and Glue-Up
Before committing to glue, a dry fit is done to make sure the joints align perfectly. Slight sanding or trimming may be needed at this stage, especially if the wood has moved slightly since being cut.
Glue is applied sparingly to avoid squeeze-out, and Caleb uses an acid brush to reach deep into each finger. Once assembled, clamps are applied across all corners to distribute pressure and pull the joints together tightly.
Sanding and Surface Prep
After the glue dries, Caleb uses a belt sander to level out the joints. A medium-grit belt makes quick work of any uneven edges while still being gentle enough for thin panels.
Minor gaps or splinters are filled with wood putty to improve the finish. This prep work lays the foundation for a clean final surface and helps hide any imperfections from assembly.
Attaching the Plywood Bottom
To support the contents of the box without stressing the sides, a plywood bottom is added using a rabbet cut along the interior edges. This lets the plywood sit flush with the bottom and keeps pressure off the side walls.
Plywood is used here because it resists expansion and contraction, which helps maintain the box’s shape over time. Caleb sizes and cuts the panel to fit snugly, securing it with glue and clamps.
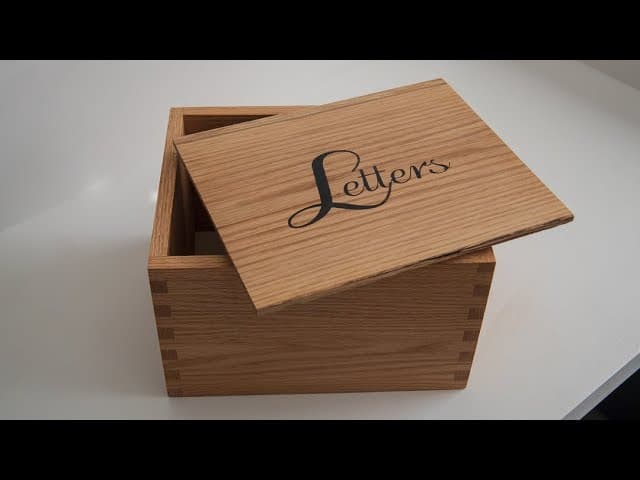
Making the Custom Lid
The lid is made from matching white oak and features a personalized design, engraved by a friend with a laser machine. This engraved artwork becomes the focal point of the box, tying the craftsmanship to a unique visual element.
To enhance the engraving, Caleb pours a colored epoxy into the recesses. He mixes in a natural dye to achieve a warm tone, then carefully pours it into the design, using a toothpick to release air bubbles and help the resin settle.
Refining the Fit and Appearance
After the epoxy cures, the lid is sanded flush, which reveals the full contrast between the inlay and the wood. A rabbet cut is added to the underside so the lid nests securely in the box without shifting around.
The lid’s fit is tested and adjusted with light sanding, ensuring that it feels both snug and easy to open. It’s a small detail, but one that elevates the function and feel of the finished piece.
Applying the Final Finish
To protect the wood and bring out the grain, Caleb applies multiple coats of General Finishes Arm-R-Seal. Between coats, he sands lightly with fine-grit paper to keep the surface smooth and professional.
The result is a box with depth, character, and a glossy finish that highlights both the craftsmanship and the personalized inlay. It’s a durable piece that feels high-end and heartfelt.
A Creative and Useful Gift
This finger-jointed box is a great example of how a simple form can be elevated with care and creativity. The combination of precision joinery and epoxy detailing makes it ideal for gifting or as a personal keepsake.
With accessible tools and a thoughtful process, Caleb makes it clear that even complex-looking builds can be approachable. The end result is a box that feels custom, clean, and built to last.
Please support Caleb by visiting his website: https://www.ycmt2.com/.

Matt’s Take
These are my personal thoughts and tips based on my own experience in the shop. This section is not written, reviewed, or endorsed by the original creator of this project.
White oak is an excellent choice for this type of project. It’s forgiving to work with and has that beautiful grain that really pops under a good finish. The half-inch thickness strikes a nice balance — thick enough for structural integrity but not so heavy that the box feels clunky. If you’re just getting into finger joints, this scale is perfect for learning the technique without wrestling with massive boards.
That epoxy inlay work really takes this from a basic box to something special. The key with colored epoxy is working in thin layers if you’re doing multiple pours, and definitely take your time with bubble removal. A heat gun on low can help too, just keep it moving. The contrast between the oak and that warm-toned epoxy creates such a nice focal point on the lid.
The rabbet for the plywood bottom is smart engineering. Solid wood bottoms can be tricky with seasonal movement, so plywood eliminates that headache entirely. Same thinking applies to that lid rabbet — it’s those little details that make a box feel professionally made rather than just functional.
Arm-R-Seal is a solid finish choice for a piece like this. It builds nicely and gives you that depth without being too fussy to apply. Just remember to give each coat proper cure time, especially if you’re working in humid conditions.