This project was built and designed by Tyler from DIYTyler. It walks through a clean, efficient method for building plywood drawers that are sturdy, simple to assemble, and adaptable for various storage needs.
Whether you’re updating kitchen cabinetry or organizing a workspace, this drawer design delivers solid function with minimal fuss. Tyler’s approach focuses on accurate prep, clean joinery, and smart techniques to save time in the shop.
Watch the full video and subscribe to Tyler’s channel:
Drawer Construction Basics
A standard drawer consists of four vertical sides and a bottom panel. Getting these components right—especially their fit and alignment—is key to a drawer that glides smoothly and holds up to daily use.
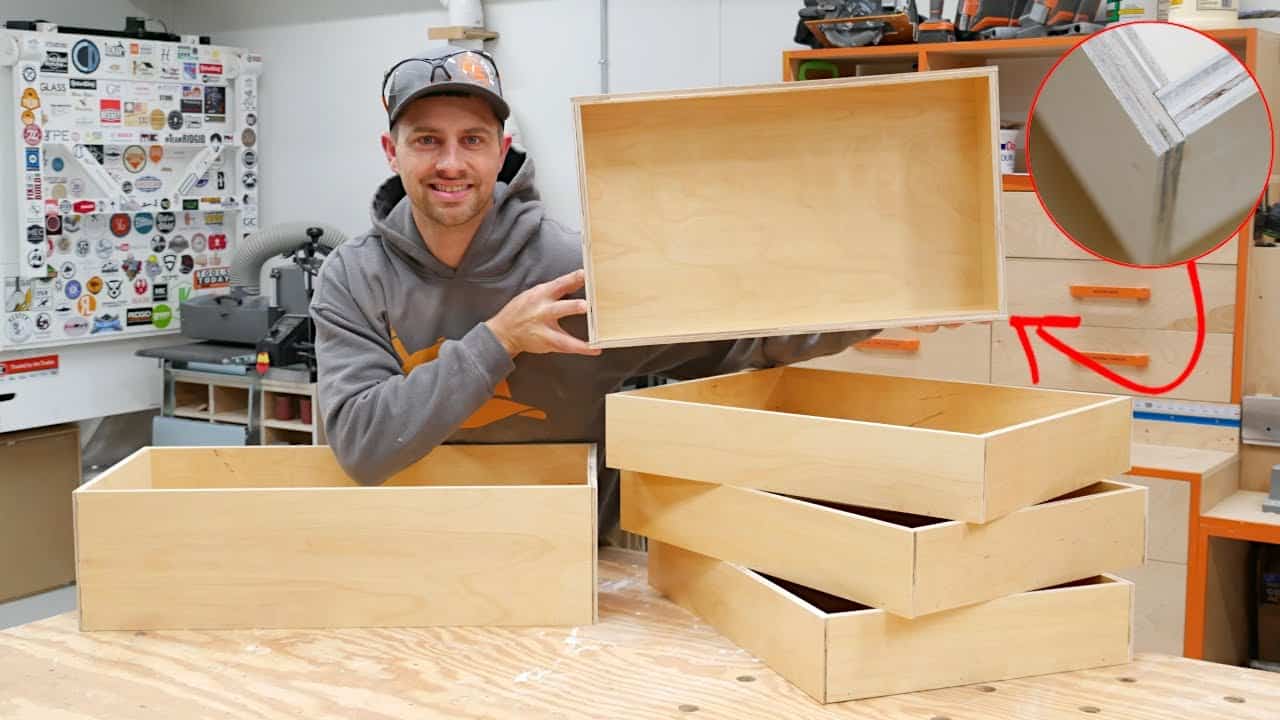
For this build, Tyler uses pre-finished plywood, which adds durability and saves finishing time. The finish also provides a slick surface inside the drawer, making it ideal for household storage.
Choosing and Preparing Materials
Thickness is an important factor when choosing plywood. Thicker panels offer more strength, especially for large or heavily used drawers.
Tyler recommends pre-finished plywood to streamline the process. But when gluing joints, the finish should be sanded or scraped back slightly on the contact points to ensure strong adhesion.
Accurate Measuring for Fit
Before cutting anything, the cabinet opening is measured precisely. Drawer width must account for the hardware being used—typically full-extension metal slides that require about 1″ of total clearance (½” per side).
Height and depth are measured based on available space and how the drawer will be used. Taking the time to plan at this stage avoids alignment issues later.
Cutting the Drawer Parts
Tyler uses a table saw to cut all drawer parts. Consistent, square cuts are essential for drawers that sit flush and glide smoothly.
If dado or rabbet joints are used, switching to a dado stack on the saw makes the process faster and more accurate. Tyler makes all cuts in batches to maintain uniformity across drawers.
Making Strong Dados
To seat the drawer bottom securely, dados are cut into the sides of the plywood box. This groove provides support and a clean inset look.
Because the plywood is pre-finished, Tyler removes the finish inside the groove using a light sanding block. This small step helps the glue bond properly and prevents long-term joint failure.
Assembly with Glue and Pin Nails
With all parts cut and dados ready, Tyler assembles the drawers using wood glue and pin nails. The glue provides long-term strength, while the nails hold everything in place as the adhesive sets.
Each corner is checked for square during assembly. Fast, clean assembly means the drawers are ready to move onto the next stage without delay.
Cutting and Insetting the Drawer Base
The drawer bottom is cut to size and inset into a rabbet joint along three sides of the drawer box. This makes the bottom look clean while reinforcing the structure.
Tyler uses a power feeder during this part of the process to keep the pressure even and feed rate smooth. This tool isn’t required, but it speeds things up for repetitive builds.
Installing the Drawer Slides
Once assembled, each drawer receives its slides. Tyler uses full-extension metal drawer slides, which allow access to the entire depth of the drawer.
A drawer slide jig helps align the hardware perfectly. By installing the slides on the drawer before attaching them to the cabinet, he avoids awkward positioning and reduces the need for extra hands.
Fitting the Drawers Into Place
With slides installed, the drawers are inserted into their cabinet openings. They’re tested for smooth motion and adjusted as needed to ensure everything is square and level.
Sometimes minor tweaks are needed depending on the tolerance of the slides or slight variations in the cabinet opening. Tyler walks through how to make small adjustments for a precise fit.
A Reliable Method for Custom Drawers
This drawer-building process is repeatable, scalable, and designed for real use. Whether you’re building one or twenty drawers, Tyler’s system makes the process fast without sacrificing durability.
The end result is a clean, professional-looking drawer that fits flush, operates smoothly, and holds up to wear and tear. The combination of dado joinery and full-extension slides strikes the right balance between strength and function.
Build With Confidence
With straightforward techniques and attention to detail, these drawers can be added to kitchens, workshops, or anywhere you need custom storage. Tyler’s walkthrough helps demystify the process and provides a clear framework for success.
For woodworkers looking to improve shop organization or tackle their first cabinet project, this is a great place to start.
Please support Tyler by visiting his website here: diytyler.com

Matt’s Take
These are my personal thoughts and tips based on my own experience in the shop. This section is not written, reviewed, or endorsed by the original creator of this project.
Tyler’s approach to plywood drawers hits all the right marks — it’s the kind of straightforward system that works whether you’re building your first drawer or your fiftieth. The pre-finished plywood choice is smart, especially for workshop storage where you want something that cleans up easily and looks decent without extra finishing steps.
One thing that really stands out is the emphasis on measuring the cabinet opening first, then working backwards to determine drawer dimensions. This seems obvious, but I’ve seen plenty of projects where someone builds the perfect drawer only to discover it doesn’t fit their hardware clearances. That ½” per side rule for full-extension slides is pretty standard, but it’s worth double-checking your specific hardware specs since some brands vary slightly.
The dado setup for the drawer bottom is solid engineering. Those grooves distribute the load much better than just nailing or screwing the bottom on, plus they keep everything looking clean. Just remember to go easy when sanding out that pre-finish in the dados — you want good glue adhesion without creating a sloppy fit.
For anyone following this method, take your time with that initial square-up during assembly. A drawer that’s even slightly out of square will fight you every time you open it, and it only gets worse under load. Pin nails and glue make for bombproof joints if you give the glue time to properly cure before stressing the assembly.