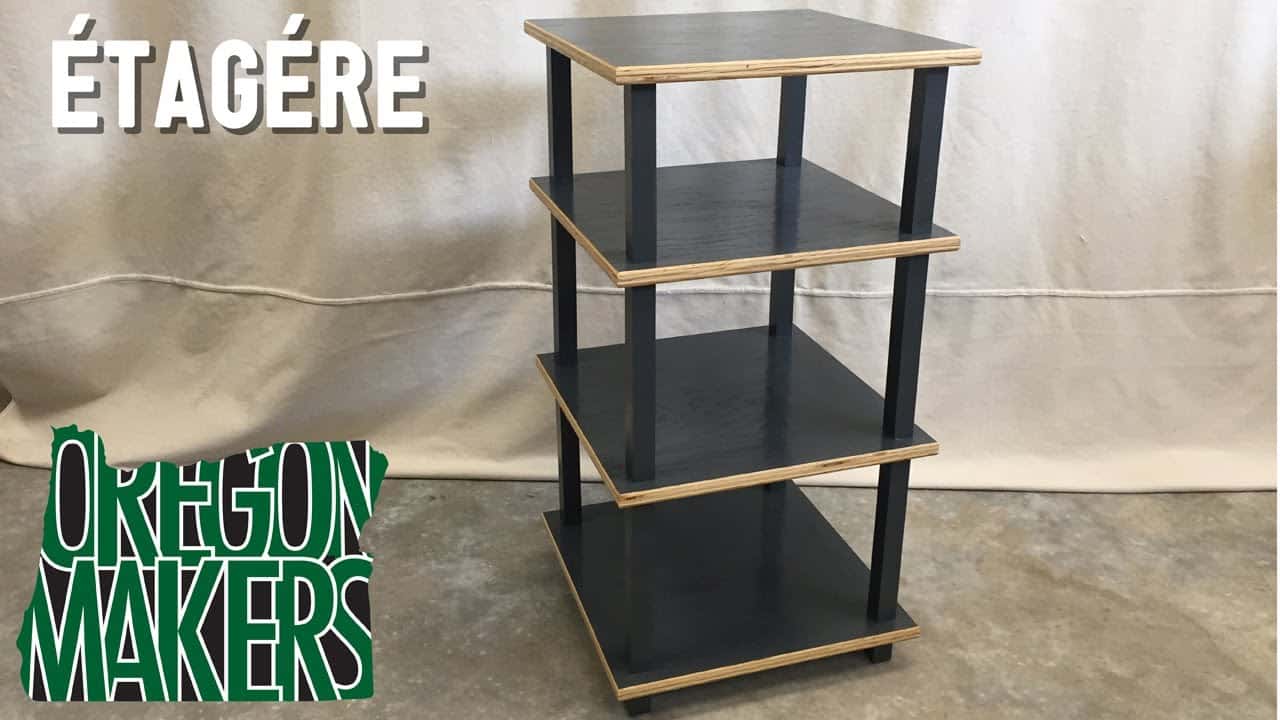
This project was built and designed by Mike from Oregon Makers. It’s a refined, open-style bookcase that blends mid-century modern design with industrial flair, featuring exposed plywood edges, rich finishes, and clean geometry.
Originally inspired by a prior project—his mid-century hairpin tables—this custom étagère was developed for a client who loved the mix of stained oak veneer and blonde plywood accents. The design process emphasized simplicity, elegance, and high-contrast materials.
Watch the full video and subscribe to Mike’s channel:
Planning and Client Collaboration
The project begins with a digital concept drawn in SketchUp. Mike uses the model to lock in proportions and spacing for the shelves, customizing it based on the client’s feedback and preferred dimensions.
The client specifically wanted a design that showcased the same dark-stained oak plywood and exposed edge treatment found in the hairpin tables. This input helped define the structure and finish decisions throughout the build.
Pre-Finishing Before Assembly
Rather than waiting to apply finish at the end, Mike stains and treats the wood before cutting and assembling. This approach allows him to fully coat all surfaces evenly while keeping the finish clean and consistent.
The plywood is broken down into panels using a track saw, and each sheet is cleaned with denatured alcohol to remove fine dust from sanding. A pre-stain conditioner is applied first, followed by a charcoal stain that brings out a deep, rich tone without hiding the wood grain.
Wiping off excess stain and smoothing the surface is a key part of achieving a consistent result. This careful attention to prep ensures the veneer soaks up color evenly and keeps a professional appearance.
Shaping and Cutting the Shelves
Once the panels are stained and dried, Mike cuts them into individual shelves. Although he considered using a table saw, the track saw gives him cleaner results on large panels.
Instead of traditional roundovers, he uses the router to create a pillowed edge on each shelf. This rounded-yet-flat treatment softens the edges and draws attention to the natural blonde stripe along the plywood.
Milling and Preparing the Legs
For the supports, Mike uses five-quarter oak boards, which are milled to just over an inch thick for strength. These boards are then ripped and planed, making them easier to manage before shaping them into legs.
Grain orientation is considered carefully so that the legs match visually. Each leg undergoes the same staining process used for the shelves to ensure color consistency across the full structure.
Before stain, Mike sands the surfaces thoroughly to help the finish adhere evenly and avoid blotchiness. The dark charcoal stain gives the legs a dramatic tone that pairs well with the plywood’s lighter edge detail.
Shelf Attachment Using Dowels
Assembly begins with a dowel-based joinery system. Mike drills matching holes in the legs and shelf edges, using a homemade jig to keep spacing consistent and the angles precise.
This method creates strong joints without the need for hardware, preserving the clean lines of the design. Mike uses wood glue along with a small amount of CA glue to hold the pieces firmly while the clamps apply pressure.
Keeping everything square during assembly is critical. Mike checks alignment and levels the frame as he adds each shelf, allowing the glue to cure fully before moving on to the next.
Drying, Top Coat, and Assembly Tricks
Once assembled, the final touches include a clear topcoat on the legs and feet. This adds a protective layer and softens the finish while keeping the natural grain visible through the stain.
To avoid issues with freshly finished surfaces sticking, Mike sets up a scrap plywood platform where parts can dry elevated and clean. It’s a simple but effective trick that saves time and frustration.
Throughout the build, Mike uses clamps strategically and avoids rushing the glue-up process. These small habits contribute to the clean final look and structural integrity of the piece.
Final Result and Takeaways
The finished étagère is a striking example of design clarity. Its deep charcoal shelves, exposed edge banding, and cleanly stained legs give it a modern yet handcrafted look.
The project balances aesthetic decisions—like edge treatments and finish selection—with practical woodworking methods that are repeatable for other builds. It’s a great example of how digital planning, finish-first workflows, and thoughtful joinery can elevate a simple bookshelf.
Whether you’re building for a client or looking to improve your shop skills, this project offers several useful takeaways. From edge routing techniques to dowel joinery and finishing tips, there’s something here for woodworkers at every level.
Watch the full video and subscribe to Mike’s channel:

Matt’s Take
These are my personal thoughts and tips based on my own experience in the shop. This section is not written, reviewed, or endorsed by the original creator of this project.
I really appreciate how Mike approaches the finishing process here. Pre-finishing the plywood before assembly is one of those techniques that can make a huge difference in your final result. It’s so much easier to get even coverage on flat panels than trying to brush or spray finish into assembled corners and joints. Plus, you don’t have to worry about getting finish buildup in the joinery areas where it could interfere with glue adhesion.
That pillowed edge treatment is a nice touch that really makes the plywood construction shine. When you’re working with plywood, those exposed edges can either be your enemy or your friend — here, they become a design feature. The contrast between the dark stained face and that blonde plywood stripe creates visual interest that you’d never get with solid wood.
The dowel joinery approach keeps things clean and strong without visible hardware. If you’re thinking about trying this method, having a reliable drilling jig is crucial. Even small variations in hole placement can throw off your alignment, and there’s not much wiggle room once those dowels are in place. Taking time to make a solid jig up front will save you headaches during assembly.
One thing I always remind folks about when working with oak and dark stains: that pre-stain conditioner step isn’t optional. Oak can be notorious for blotchy stain absorption, and conditioner helps even things out. The payoff in consistency is worth the extra step.