This project was built and designed by Nick from Rocky River Woodworks. It’s a straightforward and effective push stick build that improves safety and control at the table saw.
Whether you’re just getting started in woodworking or upgrading your shop tools, a well-made push stick is a small project that makes a big difference. Nick’s design offers better ergonomics than the plastic versions that often come standard with saws.
Watch the full video and subscribe to Nick’s channel:
Why Push Sticks Matter
Push sticks are essential for guiding material through a table saw safely. By keeping your hands away from the blade, they reduce the risk of injury while maintaining pressure on the workpiece.
Many factory-included push sticks are long, awkward, and uncomfortable to use. Nick talks about how the one that came with his saw felt clumsy and didn’t offer the control he wanted. That led him to design his own version—one that fits comfortably in the hand and performs better on rip cuts.
A Simple Design That Works
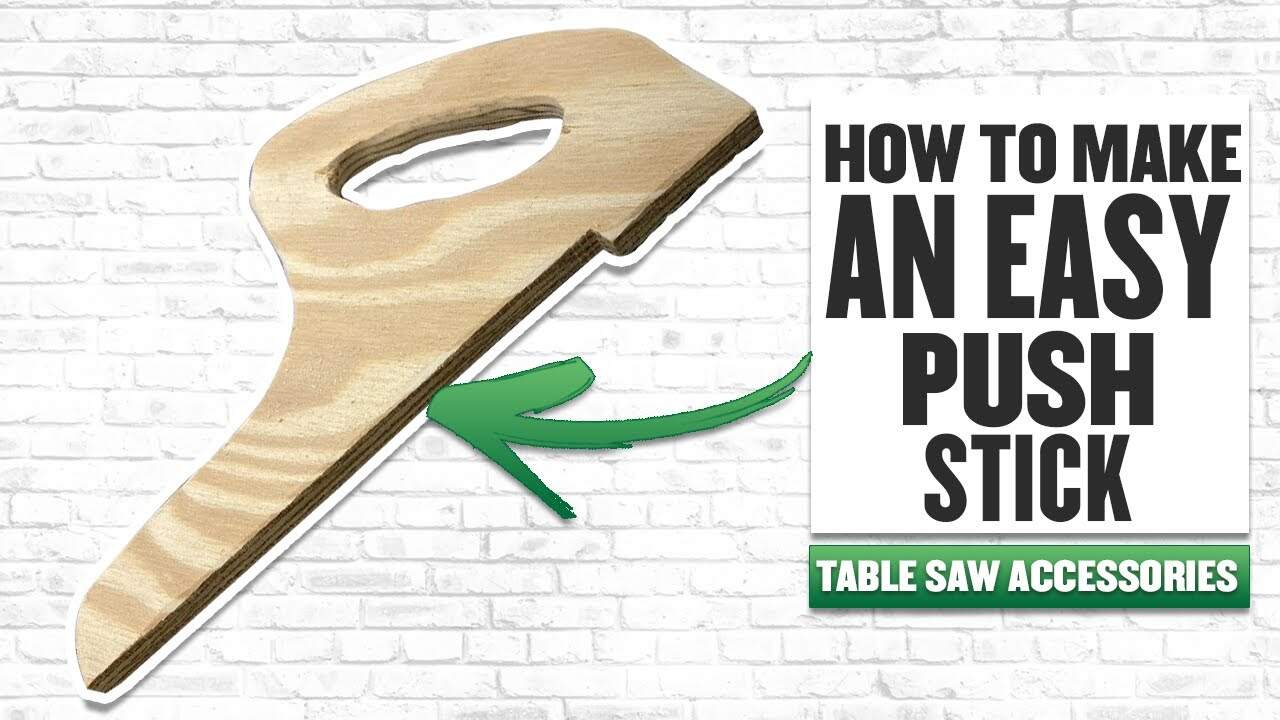
Nick’s approach begins with sketching out a custom push stick that suits his grip. He shares a printable template for this design on his website, which includes a rounded handle, an angled body, and a built-in catch lip.
This catch lip helps hold the workpiece in place as it’s fed through the blade, keeping pressure steady without needing to lean over the saw. The design strikes a nice balance between comfort and safety.
If you prefer a different shape or size, you can easily adjust the design to fit your needs. That’s one of the benefits of making your own tools—customization is built in.
Choosing the Right Material
For this build, Nick uses 1/2-inch pine plywood. It’s strong enough to hold up under repeated use, but light and easy to cut for a quick project.
While pine plywood is a great starter option, other choices like hardwood or MDF could also work depending on availability. The key is choosing something that’s sturdy but easy to work with using your available tools.
Transferring the Template
Once the template is ready, Nick uses carbon paper to trace it onto the plywood. This allows him to get a clean outline for cutting.
If carbon paper isn’t handy, gluing the paper directly to the wood is another good method. Either way, the goal is to get an accurate shape on the board so it can be cut cleanly.
Cutting the Shape
Nick uses a bandsaw to cut out the exterior lines of the push stick. For the interior cutouts, like the finger hole and notches, he drills pilot holes and uses a jigsaw to make clean inside cuts.
These tools allow for tight curves and precise shaping, which is important for keeping the push stick comfortable and reliable. The result is a clean cutout that just needs some refinement.
Smoothing the Edges
After cutting, the push stick is sanded to remove sharp edges and splinters. Nick uses a spindle sander to smooth the curves and bevel the handle, making it more comfortable to hold.
You could also use a router with a round-over bit to soften the edges further, but Nick keeps it simple with sanding. The goal is to make the tool comfortable in the hand and safe to use regularly.
Testing and Fine-Tuning
Once the shape is complete, Nick tests the push stick at the saw to make sure it performs well. He notes that it may take a few uses to find out what changes (if any) you want to make.
The design is intentionally easy to replicate or adjust. If something feels off or if the catch lip wears down over time, it’s easy to modify or make a new one. Building a few extras is a good idea if you work with different board thicknesses.
Why This Project Pays Off
This push stick project is quick, inexpensive, and genuinely useful. It’s also a good opportunity to practice safe tool handling and improve your shop setup with something you made yourself.
Nick’s design emphasizes both comfort and function, making it easier to control material during cuts without sacrificing safety. For woodworkers looking to reduce risk at the table saw, this is a smart project that pays off immediately.
A Small Project That Makes a Big Impact
Creating your own shop accessories adds a personal touch to your workspace while improving your workflow. This push stick fits well into that category—easy to make, satisfying to use, and safer than many store-bought alternatives.
With just a bit of plywood and a few tools, Nick shows how anyone can upgrade their shop with a tool that’s reliable, repeatable, and uniquely theirs.
Please support Nick by visiting his website here: https://www.rockyriverwoodworks.com/.

Matt’s Take
These are my personal thoughts and tips based on my own experience in the shop. This section is not written, reviewed, or endorsed by the original creator of this project.
Push sticks are one of those shop accessories that seem simple until you try to find a good one. The plastic versions that come with most saws are often too long, too light, or just awkward to grip. When you’re making repetitive cuts, comfort really matters — an uncomfortable push stick is one you won’t want to use, which defeats the whole purpose.
The catch lip on Nick’s design is a smart feature that’s worth highlighting. It helps maintain consistent pressure on the workpiece without having to hover over the blade area. This kind of positive control is especially helpful when ripping narrow strips where blade proximity becomes a real concern. The angled body also lets you apply downward pressure while keeping your hand in a natural position.
For material choice, 1/2-inch plywood strikes a good balance between durability and weight. You want something substantial enough that it won’t flex under pressure, but light enough that it doesn’t tire your hand during longer cutting sessions. Pine plywood is also easy to replace when the catch lip eventually wears down from use — and it will wear down over time, which is actually a good sign that you’re using proper technique.
Making your own push sticks is also a great way to have backups ready. I like keeping a couple different styles around the shop for different situations. Nick’s template approach makes it easy to reproduce this design whenever you need a fresh one.