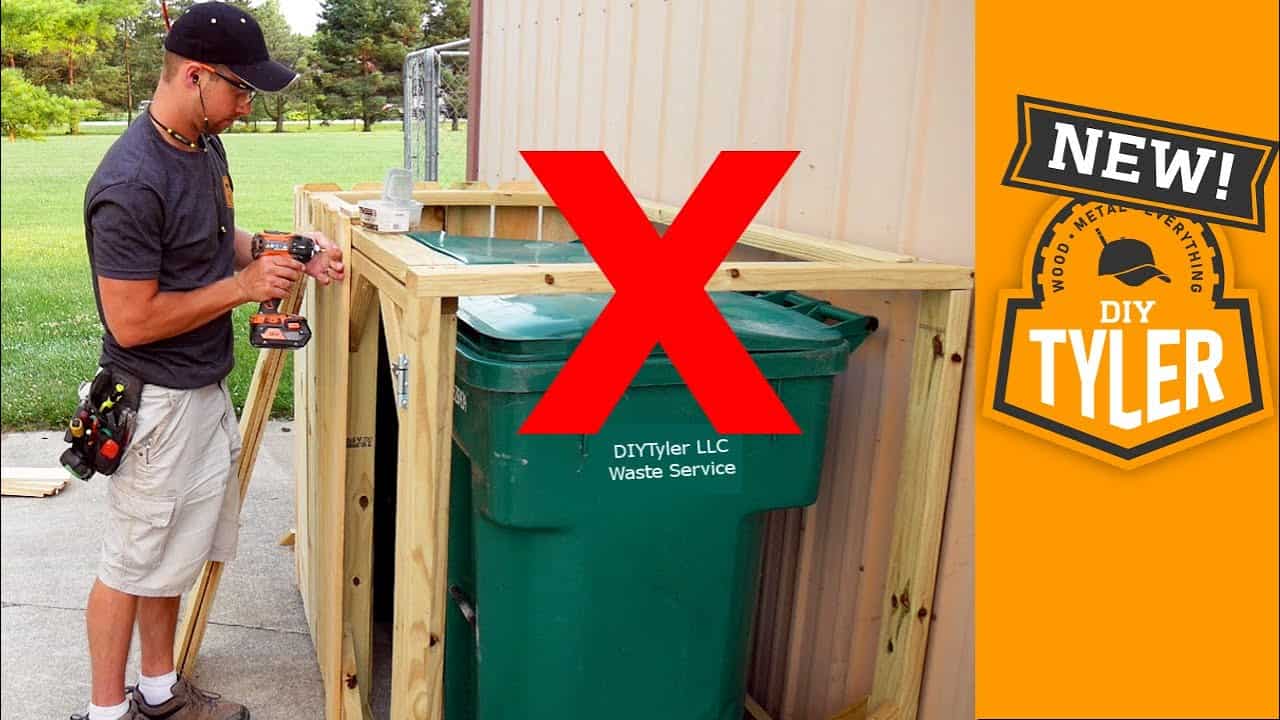
This project was built and designed by Tyler from DIYTyler. It’s a smart and straightforward solution for hiding large trash cans behind a well-built wooden hutch that blends into your outdoor space.
Designed to fit two 96-gallon trash cans, this build is ideal for anyone looking to improve curb appeal without sacrificing function. With just a few materials and an afternoon of work, the result is a cleaner, more polished backyard setup.
Watch the full video and subscribe to Tyler’s channel:
Why Hide Your Trash Cans?
Trash bins are an everyday necessity, but they rarely complement a backyard or side-yard layout. Their large, brightly colored bodies often stand out in the worst ways.
Tyler tackles this common problem by creating a durable hutch that conceals the bins while still allowing easy access. It’s a practical project that improves aesthetics without adding unnecessary complexity.
Materials and Hardware
While Tyler doesn’t outline a full cut list in the video, the materials used are easy to find:
- Pressure-treated 2x4s for framing
- Fence pickets to clad the exterior
- Deck screws for joinery
- Gate hinges and a barrel latch for the doors
Using pressure-treated lumber ensures the hutch can stand up to outdoor moisture and daily wear. Tyler also recommends salvaging or repurposing hardware if available—keeping the cost down while staying functional.
Cutting and Preparing the Wood
The first step involves cutting all wood components to size. Tyler takes care to drill pilot holes and countersink screws, a simple but important step to prevent cracking and increase strength at the joints.
Exposed end grains are kept off the ground and protected where possible. Even in a simple project like this, small touches like that go a long way toward extending the life of the build.
Assembly and Framing
Tyler keeps the framing process simple and effective by using butt joints secured with deck screws. While some might opt for pocket holes or brackets, the straightforward method works well and results in a solid frame.
Optional hardware like L-brackets can be added for additional strength. Tyler ultimately found that a minimalist approach provided the best balance between stability and ease of construction.
Designing for Function
The enclosure is built specifically to house two full-size trash cans. For those with more than two bins, Tyler recommends building a separate hutch instead of making the doors longer—which can lead to sagging or binding issues.
The fence boards act as both siding and a decorative feature. Their vertical placement gives the hutch a clean, finished look that fits with most backyard designs.
Adding Doors and Latches
Each door is attached using standard gate hinges, which are easy to install and adjust. A barrel latch is added to secure the doors and prevent animals or wind from opening them unintentionally.
Tyler’s door layout allows for easy swing-out access while keeping the structure firmly anchored to the ground. This is especially useful when taking bins in and out multiple times a week.
Stability and Anchoring
To prevent shifting or tilting, the hutch is anchored near the deck. Depending on your setup, it can be screwed into a nearby structure or staked into the ground for added security.
This helps ensure that the doors remain square and the unit doesn’t wobble—even when the bins are being moved in and out.
Improving the View from Home
One of the biggest motivations for the project was the view from the house. Tyler wanted to replace the eyesore of visible trash bins with something more intentional and complementary to his deck.
Once the hutch is in place, the yard looks tidier and more cohesive. It’s a good reminder of how even functional builds can make a big visual impact.
A Worthwhile Weekend Project
This is the kind of project that’s achievable in just a few hours but delivers benefits for years. It doesn’t require advanced joinery or specialized tools, and it’s highly customizable for different yard layouts or bin sizes.
Tyler’s walkthrough keeps things clear and approachable, making it a great first build for someone just getting into woodworking—or a quick win for seasoned DIYers.
Please support Tyler by visiting his website here: diytyler.com

Matt’s Take
These are my personal thoughts and tips based on my own experience in the shop. This section is not written, reviewed, or endorsed by the original creator of this project.
This type of outdoor storage project is a great introduction to working with pressure-treated lumber if you haven’t done much of it before. The material can be a bit more challenging to work with than standard dimensional lumber—it’s often wetter, heavier, and can be prone to warping as it dries. Taking time to select straight boards at the lumber yard will save you headaches during assembly.
The pilot hole approach Tyler uses is especially important with pressure-treated wood and outdoor builds in general. The treatment chemicals can make the wood more likely to split, and the moisture content means screws can bind up if you’re not careful. A countersink bit that combines drilling and countersinking in one step can speed things up considerably on a project like this.
One thing I really appreciate about this design is how it prioritizes function over complexity. Those gate hinges are workhorses—they’re designed to handle weight and weather, unlike lighter cabinet hinges that might struggle in an outdoor environment. The barrel latch is another smart choice since it’s simple, reliable, and won’t jam up with dirt or debris like more complex latching mechanisms might.
For anyone considering a similar build, think about your local climate and how much sun the hutch will get. Even pressure-treated lumber benefits from some kind of finish if it’s going to be in direct sunlight all day. A simple deck stain can help prevent checking and keep the wood looking good longer.