This project was built and designed by Jason from PatriotDIY. It’s a clever, multipurpose jig made for tapering and jointing boards using a standard table saw—perfect for those without a jointer or anyone looking to make angled cuts with greater accuracy.
The jig is built primarily from scrap plywood and simple hardware, making it an affordable and highly useful shop upgrade. With thoughtful design and adjustable parts, this jig provides both control and repeatability.
Watch the full video and subscribe to Jason’s channel:
Why Tapered Cuts Matter
Tapered cuts are common in woodworking, especially in furniture projects. For example, when building Adirondack chairs, the back supports and legs often require angled cuts for comfort and style.
Without a jig, achieving these tapers can be frustrating and inconsistent. A well-built tapering jig helps guide the workpiece through the saw at a set angle, creating smooth, identical cuts every time.
What a Tapering Jig Does
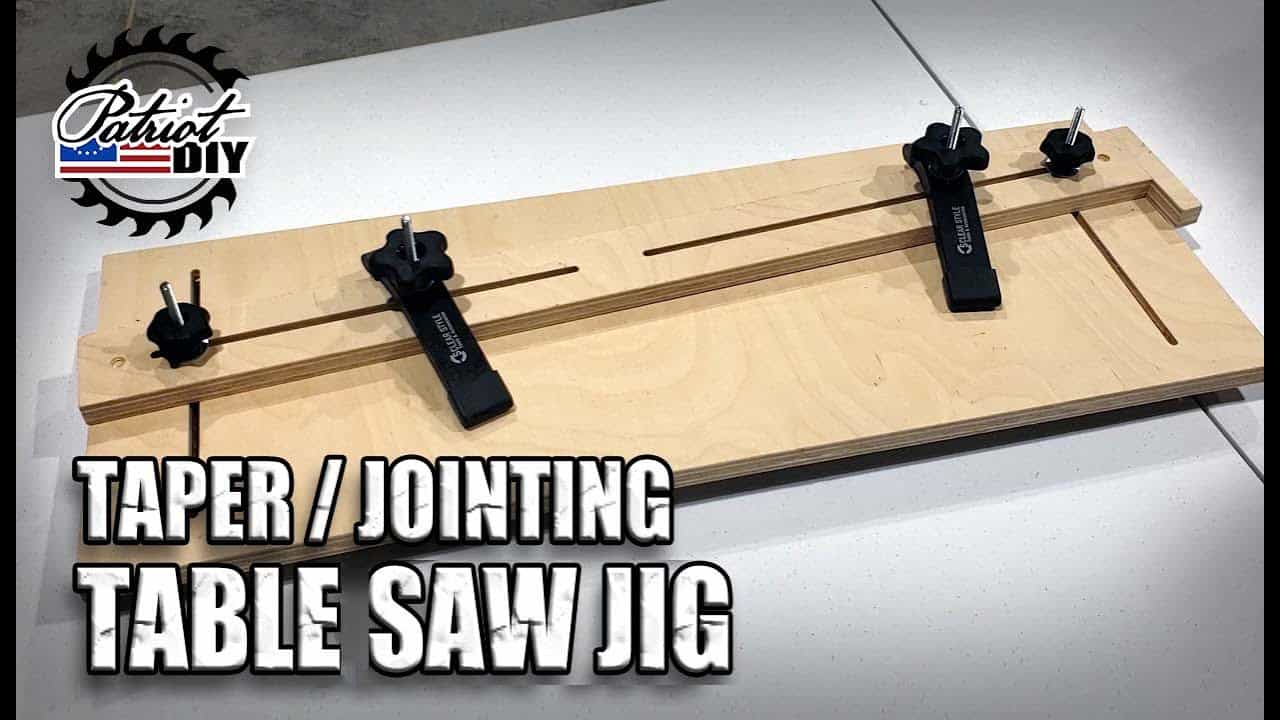
A tapering jig rides in your table saw’s miter slot and allows you to guide your board at an angle across the blade. This creates a gradual taper rather than a straight cut.
In this design, Jason also incorporates a jointing function. By running a board through the saw with one edge secured against the jig, you can straighten that edge—essentially simulating the job of a jointer. This is especially helpful for woodworkers who don’t have space or budget for dedicated jointer equipment.
Building the Base
The project starts with cutting a sturdy piece of plywood to serve as the jig’s base. Jason recommends using a material that’s both flat and strong, as this will serve as the foundation for all other parts.
Using a router, shallow grooves are cut into the plywood to accept t-track bolts. These grooves allow the hardware to sit flush and stay in place during operation. Accuracy in this step helps keep everything aligned later.
Making the Adjustable Arm
The adjustable arm is a key feature of this jig. It allows for custom taper angles depending on your project needs.
Jason cuts a long strip of plywood and uses a router or jigsaw to create a center slot, allowing the arm to slide and pivot. A small push block is then attached to the end of the arm to help hold the workpiece in place as it’s guided through the saw.
This push block not only improves safety but also adds a second point of contact, preventing the board from lifting or shifting mid-cut.
Creating the Sliding Bar
To ensure compatibility with a table saw, Jason adds a sliding bar that fits into the saw’s miter slot. This bar is either made from hardwood or UHMW plastic—materials that slide smoothly but resist wear.
Getting the fit right here is critical. The bar should glide freely but without any slop. A snug, stable fit allows the jig to move consistently without wobbling, which keeps your cuts accurate.
Final Assembly and Hardware
Once the arm and bar are in place, the jig is assembled using knobs, bolts, and clamps. These pieces allow the user to secure boards at different angles and adjust the jig quickly between cuts.
Jason emphasizes the value of good hardware in this step. While it’s tempting to save on clamps and bolts, investing in reliable components ensures the jig will function smoothly and hold up over time.
Using the Jig in the Shop
With the jig assembled, Jason walks through how to use it on real boards. The tapering setup is great for chair legs, table aprons, or any angled cut you want to repeat with consistency.
To joint a board, simply clamp the crooked edge against the straight jig arm and run it through the saw. This gives you a clean, straight edge—an especially useful trick for working with rough-sawn or warped lumber.
Design Tips and Safety Notes
Jason recommends customizing the size of the jig based on the kind of projects you build most often. If you’re regularly cutting long tapers for chair parts or table legs, a longer base will help guide the workpiece more easily.
He also stresses the importance of safety. Always wear safety gear, use push sticks when appropriate, and ensure your saw blade is set to the correct height. The jig improves control, but awareness and setup are still key.
A Practical Addition to Any Workshop
This tapering and jointing jig offers a lot of versatility for minimal investment. It’s built from scrap, requires only basic tools, and replaces the need for more expensive equipment in many cases.
Jason’s design is easy to replicate, and the video walkthrough offers a helpful visual guide for each step. For any woodworker looking to step up their precision, this is a jig worth adding to the shop.
Please support Jason by visiting his Etsy Store: https://www.etsy.com/shop/patriotdiy.

Matt’s Take
These are my personal thoughts and tips based on my own experience in the shop. This section is not written, reviewed, or endorsed by the original creator of this project.
This kind of shop-made jig really shows how thoughtful design can multiply your table saw’s capabilities. The combination of tapering and jointing functions is smart — you’re essentially getting two specialized tools for the cost of some plywood scraps and hardware.
When building jigs like this, I always pay extra attention to that miter bar fit Jason mentions. Take your time here and test-fit frequently. A bar that’s too loose will give you wandering cuts, while one that’s too tight will bind up mid-cut. I like to sneak up on the final dimension with light passes on the table saw until I get that smooth, no-play fit.
The jointing capability is particularly valuable if you’re working with rough lumber or don’t have space for a full-size jointer. Just remember that this technique works best on boards that aren’t severely warped — you’re limited by your saw blade height, so plan accordingly. For safety, always keep your hands well clear of the blade and use proper push sticks, especially on narrower stock.
Good hardware really does make the difference between a jig you’ll reach for regularly and one that sits gathering dust. Invest in quality knobs and bolts — your future self will thank you when adjustments are quick and secure.