This project was built and designed by Jason from PatriotDIY. It’s a simple exterior upgrade that adds charm and character to any home, using basic tools and materials for a clean farmhouse look.
These shutters are decorative rather than functional, but they make a big visual impact. The build process is straightforward and beginner-friendly, making it a great weekend project for DIYers at any skill level.
Watch the full video and subscribe to Jason’s channel:
Why Farmhouse Shutters Work
Farmhouse shutters offer a rustic, timeless touch that pairs well with nearly any home exterior. Whether you’re updating your main house or trying to match a shop, shed, or garage, they provide a consistent and polished appearance.
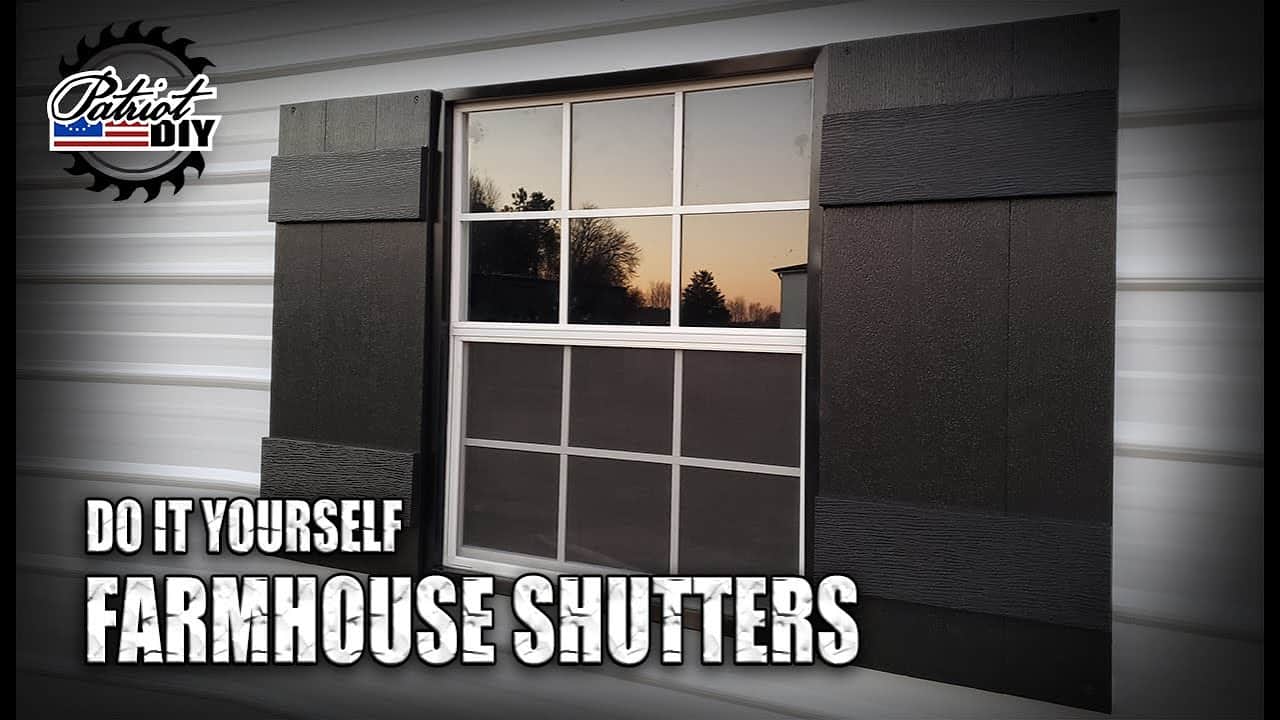
Even when non-operational, these shutters frame windows beautifully and enhance the sense of symmetry and design. Jason built his to complement a metal shop, helping the structure blend better with the surrounding house.
Material Choices That Last
Jason walks through two common material options: pressure-treated wood and PVC boards. While treated wood is readily available and affordable, PVC offers better longevity outdoors since it won’t rot over time.
Either option works depending on your budget and local climate. If you’re in an area with heavy moisture, PVC may be worth the investment. For dryer climates or temporary upgrades, treated wood works just fine when properly painted.
Measuring Windows Correctly
The first step is taking accurate window measurements. A good rule of thumb is to make each shutter half the width of the window, so that a pair would fully cover it if closed.
This proportional sizing keeps the shutters from overwhelming the trim and helps maintain a balanced appearance. Jason recommends tailoring the height and width to your exact window dimensions for best results.
Cutting Clean and Straight
Once measurements are locked in, boards are cut to length using a miter saw. Each shutter consists of vertical slats for the main structure and horizontal cross pieces that tie everything together.
Jason cuts multiple boards to the same size by measuring one piece and using it as a guide for the rest. This saves time and helps keep all shutters uniform, especially if you’re building several sets.
Shutter Assembly Step by Step
To assemble the shutters, Jason begins by laying out the vertical and horizontal boards. He clamps the pieces in place to check alignment and avoid shifting during screw installation.
Screws are driven in from the back, hiding fasteners from the visible side. Jason uses black drywall screws, which blend well with darker paint or stain. Clamping before screwing ensures square corners and tight joints throughout the build.
Painting for Protection and Style
Once assembled, the shutters are sanded and painted. Jason uses a white exterior-grade paint, but any color that suits your home’s palette can be used.
Painting before installation makes the job easier and helps seal the wood or PVC from moisture. Two coats are recommended for better coverage and longer-lasting protection.
Planning for Tricky Siding
Since Jason installs these shutters on a metal-sided building, he runs into a common challenge: ribbed siding creates gaps that prevent a flush fit.
His solution is simple—add scrap wood spacers to the back of each shutter. These are cut to match the depth of the metal ribs and provide a stable surface for mounting.
Installing the Shutters Securely
When it’s time to install the shutters, Jason uses self-tapping screws designed for metal. These fasteners eliminate the need for pre-drilling, making installation quicker and easier.
Stud locations are marked to ensure a secure hold. The shutters are then aligned carefully and attached over the spacers, creating a professional, level finish that sits properly against the siding.
Final Touches Make the Difference
After installation, Jason checks for any visible screw holes or paint scuffs and touches them up as needed. This last step helps give the shutters a finished, high-quality look.
Optional decorative hardware can be added for more detail, but the clean lines of the build hold up well on their own. The end result is a set of shutters that elevate the structure and tie it in visually with the rest of the home.
A Simple Project with High Visual Impact
Jason’s farmhouse shutters are a great example of a DIY project that’s low on complexity but big on results. They’re cost-effective, fast to build, and instantly boost your home’s curb appeal.
Whether you’re working on a home, workshop, or detached garage, this is a flexible project that adapts to different materials, siding types, and color schemes.
Please support Jason by visiting his Etsy Store: https://www.etsy.com/shop/patriotdiy.

Matt’s Take
These are my personal thoughts and tips based on my own experience in the shop. This section is not written, reviewed, or endorsed by the original creator of this project.
What I really appreciate about this build is how Jason addresses the reality of working with different siding types. That metal siding spacing issue is something you’ll run into on all kinds of exterior projects, and those simple wood spacers are a perfect solution. It’s one of those practical details that separates a clean installation from one that looks off.
The material choice between pressure-treated lumber and PVC is worth thinking through based on your specific situation. PVC runs about 2-3 times more than treated wood, but if you’re in a climate with serious moisture or freeze-thaw cycles, that extra cost pays for itself in longevity. Either way, taking time with the paint job is crucial — it’s your main defense against the elements.
I’d add that when you’re cutting multiple pieces to the same length, a stop block clamped to your miter saw fence makes the process even more consistent. And those self-tapping screws Jason uses for metal siding are a game-changer — just make sure you’re hitting solid framing behind the siding when possible, not just the thin metal itself.
This is exactly the kind of weekend project that gives you maximum visual impact for the time invested. Even purely decorative shutters like these create that finished, intentional look that makes any structure feel more polished.