This project was built and designed by Caleb from YouCanMakeThisToo. It’s a simple yet high-quality clipboard project using hardwood scraps and careful craftsmanship to produce items that are both functional and beautiful.
Designed with customization in mind, these clipboards are easy to batch out for personal use, craft shows, or gifts. They’re a great way to use up smaller offcuts while experimenting with decorative edge banding and finishes.
Watch the full video and subscribe to Caleb’s channel:
Selecting the Materials
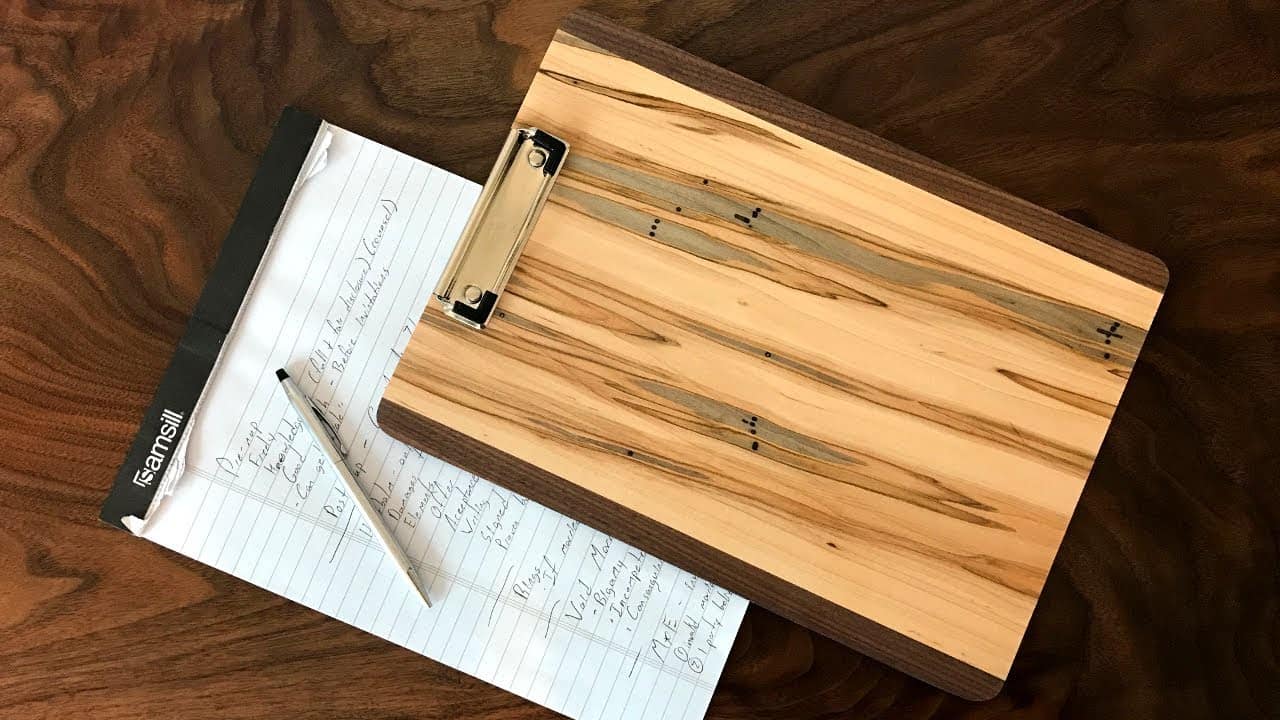
Caleb begins the project by choosing a mix of attractive hardwoods, including ambrosia maple for the main body and walnut and purpleheart for the edge banding. These woods are known for their strong contrast and distinct grain patterns.
The mix of warm tones and rich character makes the clipboards stand out, even with a minimalist design. By using thinner boards and leftover materials, this project keeps waste low and output high.
Breaking Down the Lumber
The first step is to joint one edge of the ambrosia maple boards to create a reference surface. From there, the boards are ripped to width at the table saw to create clean, square edges.
With the base pieces prepped, Caleb lays out the sizes of the clipboards he wants to make. Each board is cut to approximate length to keep them manageable during the rest of the process.
Preparing the Edge Banding
Walnut and purpleheart strips are measured and cut for use as decorative edge banding. Caleb makes sure each strip is slightly oversized to allow for trimming and planing later.
Proper prep here helps ensure the edge banding glues up flush and clean, which saves time during sanding and finishing. This also allows for a tight visual balance when the boards are trimmed down to final size.
Gluing and Clamping
Once everything is dry-fitted, the pieces are glued up. Caleb applies glue carefully to avoid excessive squeeze-out, then clamps each board to secure the edge banding in place.
Attention is given to aligning grain direction for better performance in the planer. Misaligned grain can cause tear-out, so orientation is checked before and during clamping.
Addressing Grain Direction and Surface Prep
Grain direction becomes even more important once the boards are glued. Caleb uses the planer to flatten the boards, but takes light passes and watches for signs of tearing, especially where purpleheart and maple meet.
If a board shows twist or warping after glue-up, it’s addressed before proceeding with layout and shaping. Clean, flat stock is key to getting a polished finished product.
Shaping the Clipboards
With the boards prepped, each one is cut down to final size. Caleb carefully measures and trims each piece, keeping the edge banding balanced and even on both sides.
To round over the corners, he moves to the bandsaw. While this step requires a steady hand, especially on a stack of finished boards, the payoff is smooth, professional corners that improve comfort and visual appeal.
Smoothing and Sanding
After the corners are shaped, each clipboard is sanded using a random orbit sander. Caleb uses multiple grits to remove tool marks and prep the surface for finish.
Extra attention is given to edges and the seam lines between the main board and the banding. Any uneven transitions are smoothed out so the entire piece feels seamless.
Adding the Finish
Once sanding is complete, the clipboards are ready for finish. Caleb applies a durable topcoat that enhances the grain and provides protection from everyday wear.
The finish also helps the natural colors of the wood pop, especially in boards like ambrosia maple where streaking and spalting add extra visual interest. The result is a smooth, sealed surface that’s ready for clip hardware.
Prepping for Craft Shows
With a batch of clipboards finished, Caleb begins prepping for an upcoming craft show. He lays out the inventory, prices the items, and considers how to display them attractively to draw interest from passersby.
Selling at craft shows is a great way to get real-time feedback, build customer relationships, and turn a small woodworking project into a side income. Projects like these—affordable to make but high in perceived value—are ideal sellers.
A Fun and Repeatable Project
These clipboards are quick to make once the process is dialed in. They’re perfect for experimenting with edge details, new wood species, or even laser engraving for customization.
Caleb’s build is approachable yet polished, showing how attention to small details can elevate a simple item into something people enjoy using every day.
Please support Caleb by visiting his website: https://www.ycmt2.com/.

Matt’s Take
These are my personal thoughts and tips based on my own experience in the shop. This section is not written, reviewed, or endorsed by the original creator of this project.
What I love about this project is how it demonstrates that high-end craftsmanship doesn’t require exotic materials or complex joinery. These clipboards punch way above their weight class in terms of visual appeal, and that comes down to thoughtful wood selection and clean execution. The contrast between the ambrosia maple and those darker accent strips creates drama without being over the top.
The grain direction awareness during planing is crucial here, especially with that purpleheart edge banding. Those tropical hardwoods can be unforgiving if you’re not paying attention to grain changes. Taking light passes and keeping your cutters sharp makes all the difference when you’re dealing with mixed species in the same glue-up.
From a shop efficiency standpoint, this is exactly the kind of project that makes sense for batch production. Once you dial in your process and have your stops set up, you can knock out a dozen of these in an afternoon. The key is being methodical about your setup—measure twice, cut once definitely applies when you’re trying to keep edge banding consistent across multiple pieces.
For anyone considering craft shows, clipboards like these are goldmines. They’re functional, affordable to produce, and people immediately understand their value. Plus, they’re light and compact for transport—always a consideration when you’re loading up the truck at 6 AM.