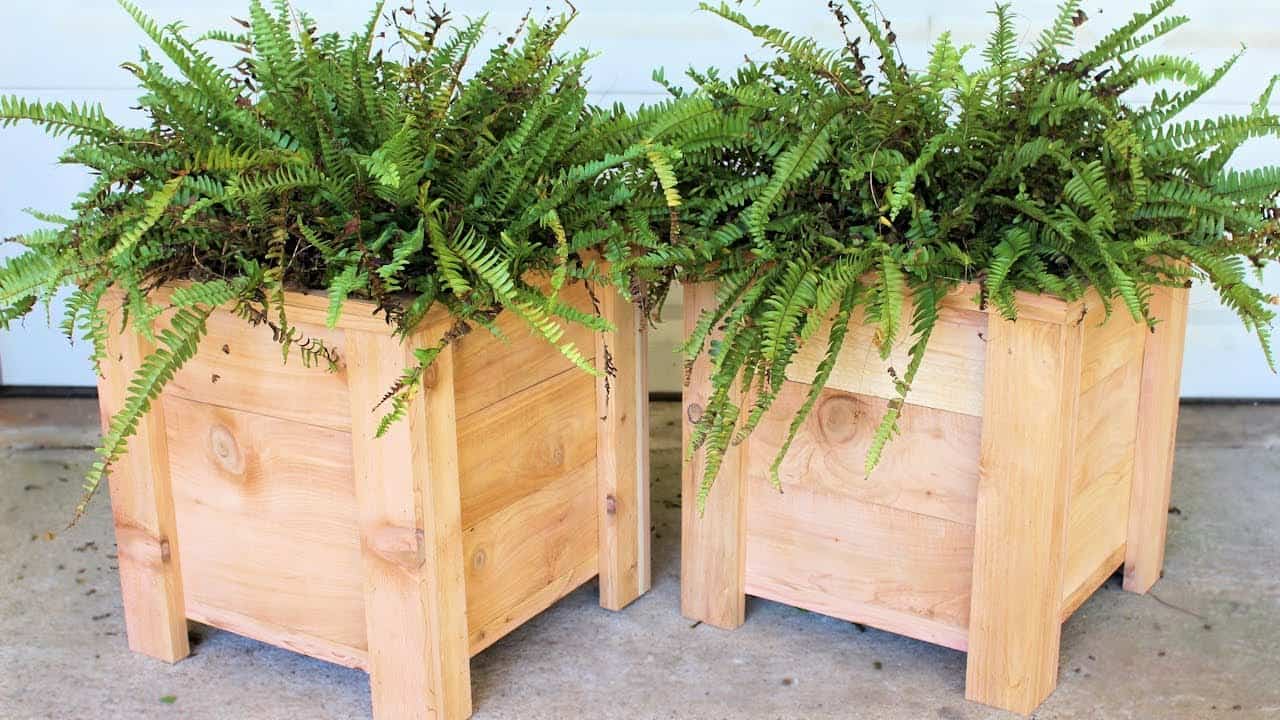
This project was built and designed by Clinton from Specific Love Creations. It’s a clean, modern cedar planter box that blends affordability, function, and style—perfect for gardens, patios, or as a handmade gift.
Using cedar fence posts and basic joinery techniques, Clinton walks through the process of building a sturdy, weather-resistant planter in a single weekend. The design focuses on practicality while keeping the look timeless and polished.
Watch the full video and subscribe to Clinton’s channel:
Why Cedar Makes a Smart Choice
Cedar is naturally resistant to moisture, insects, and decay, making it a favorite for outdoor woodworking projects. It’s lightweight yet durable, and its grain pattern and color hold up well over time.
Clinton uses cedar fence posts, which are widely available and budget-friendly. The material choice keeps the build cost low—under $25—while still delivering a product that lasts.
Prepping the Fence Boards
The project starts with prepping the cedar boards by sanding off rough edges and trimming them to manageable lengths. This improves both appearance and safety during handling.
To add thickness to the components, Clinton glues boards edge-to-edge to form laminated panels. Once the glue dries, these panels are trimmed square and cut down into the legs, sides, and rails of the planter.
This method not only adds strength but also allows for more consistent grain and color selection. It’s a smart way to work around the irregularities in fence-grade lumber.
Building the Planter Frame
The frame begins with the legs, which are built from glued-up cedar strips cut to the desired height. These legs are then joined with side panels using wood glue and finishing nails.
Clinton assembles the longer sides first, aligning the boards to form clean corners. The shorter sides are attached last, creating a stable rectangular structure.
Careful attention is given to alignment, ensuring that everything is square and flush before moving on. It’s a straightforward process, but one that benefits from patience and dry fitting as needed.
Strengthening with Cedar Rails
To reinforce the box and support the planter base, Clinton adds cedar rails near the top and bottom edges. These rails are ripped from leftover material and glued in place beneath the side panels.
The top rails also serve a dual purpose: they help hold the base slats and give the planter a cleaner, more finished edge. These details improve both the strength and visual appeal of the finished piece.
Assembling the Planter Base
For the bottom of the planter, Clinton uses cedar offcuts to create slats that rest loosely across the lower rails. This allows for natural drainage and makes replacement easy if the base boards ever wear out.
Leaving the base slats unattached is a thoughtful detail—it improves airflow, prevents water buildup, and makes maintenance simpler down the road.
Supporting Healthy Drainage
Drainage is a key part of any planter design. Clinton suggests using a liner inside the box to keep soil contained while still allowing water to pass through.
Gardeners can choose from plastic liners with drilled holes, landscape fabric, or perforated weed barrier. Each option helps prevent root rot while keeping the planter tidy and functional.
Clinton leaves this interior setup up to the end user, allowing the box to be customized for different climates and planting styles.
Applying a Protective Finish
Although cedar is weather-resistant, applying a clear outdoor finish helps prolong its life and maintain its appearance. Clinton recommends a coat of urethane or polyurethane to protect against UV rays and moisture.
This extra layer helps prevent fading, cracking, and warping over time. It also brings out the warm tones in the wood grain, giving the planter a more refined look.
Why This Planter Is a Great DIY Option
This project checks all the boxes for a satisfying DIY build: it’s simple, affordable, and practical. The cost stays low thanks to fence-grade cedar, and the joinery is basic enough for anyone with minimal tools and some patience.
Clinton’s design is adaptable, making it easy to customize for different heights, widths, or aesthetics. Whether you’re building one for yourself or gifting it, the end result is a sturdy planter that feels professionally made.
Extra Tips for Customization
To make this planter your own, Clinton offers a few additional ideas:
- Add stain or paint for color matching or extra protection
- Modify leg height to suit ergonomic needs or taller plants
- Drill drainage holes in the slats or liner for improved water flow
- Decorate with brackets or carvings for a more decorative finish
These upgrades help make the design more versatile without changing the core structure.
A Weekend Project with Long-Term Benefits
This cedar planter box is a strong example of what makes woodworking so rewarding. With just a few tools and a handful of materials, you can build something useful, beautiful, and durable.
Clinton’s clear process and thoughtful design choices make the project ideal for beginners while still offering plenty of room for personalization. It’s the kind of build that can improve your garden and sharpen your woodworking skills at the same time.
Watch the full video and subscribe to Clinton’s channel:
