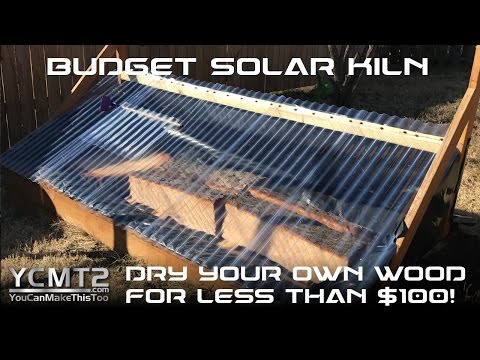
This project was built and designed by Caleb from YouCanMakeThisToo. It’s a simple, low-cost solar kiln that helps dry green lumber quickly and efficiently, making it a smart addition for woodworkers looking to process their own material at home.
Drying wood properly is a key step in getting usable boards for furniture, cabinetry, or craft projects. Caleb’s setup shows that you don’t need an expensive commercial kiln to get results—just some sun, a solid plan, and a few affordable materials.
Watch the full video and subscribe to Caleb’s channel:
Why Drying Wood Matters
Green wood has a high moisture content, which makes it unstable for joinery and finish work. As it dries, it tends to warp, crack, or split if not managed carefully. That’s why it’s important to bring the moisture content down to a workable level before milling or building with it.
While air drying is a popular option, it’s often slow and unreliable—especially in regions with high humidity. A solar kiln offers a more controlled environment, using the sun to heat and dry the wood more evenly and efficiently.
Picking the Right Spot
Location is everything when it comes to solar kilns. Caleb recommends placing the kiln so it faces south, maximizing daily sun exposure. For this build, he repurposed an old raised garden bed, making use of space and materials he already had on hand.
This approach helped save both time and money while keeping the build compact and manageable. It’s a good reminder that the best solutions often start with what you already have available.
Prepping the Ground
To begin, Caleb dug out a shallow recess in the center of the garden bed. This allowed the lumber to sit below the ground level, where surrounding soil helps insulate the load and hold heat longer.
He also added cardboard along the base to stop weeds or grass from growing up through the stack. It’s a small detail that keeps the kiln clean and functional over time.
Building the Moisture Barrier
Next, a thick plastic liner was laid down to keep ground moisture from seeping into the lumber. Caleb used 3 mil plastic, folded for extra thickness and durability.
This step is especially important when drying wood outdoors, as moisture from the soil can defeat the whole purpose of the kiln if not blocked effectively. The plastic barrier keeps the drying process on track.
Stacking the Wood
Caleb used 2x4s as spacers—or “stickers”—between each board. These create airflow channels that allow heat and moisture to move through the stack evenly.
Thinner stickers could work for lightweight lumber, but because he was drying heavier material, the larger size added more stability. It’s a reminder to match your materials to the size and weight of the boards you’re working with.
Building the Cover Frame
The kiln roof was made using a basic wooden frame to support corrugated clear plastic. This material allows sunlight to pass through while keeping rain out, which is critical for maintaining a warm, dry environment inside.
Since Caleb didn’t have a truck to transport full-size panels, he had them cut to size at the store. This is a helpful tip for anyone working on a tight budget or without access to large vehicles.
Roof Assembly Tips
The roof pieces were layered from bottom to top to prevent leaks. By overlapping the sheets, rainwater runs off the surface instead of dripping into the kiln.
Caleb marked out the support positions and notched the wood where needed so everything fit cleanly. Plastic washers were used on the nails to seal around the fasteners and prevent water from entering through screw holes.
Ensuring Proper Ventilation
Drying wood releases a lot of moisture, so ventilation is key. Caleb created a simple vent along the back using overlapping boards to let air escape while keeping rain out.
This feature prevents mold and helps maintain even drying conditions throughout the stack. It also keeps the inside of the kiln from getting too humid during the day.
Future Upgrades to Consider
While the kiln works well as-is, Caleb points out a few upgrades that could improve its performance. Insulated walls would help hold in heat more effectively, especially during cooler months.
Adding a fan could also improve airflow and accelerate drying, making the setup behave more like a traditional kiln. These are simple enhancements that can be added over time without redoing the entire structure.
A Cost-Effective Way to Process Lumber
This solar kiln is a practical way to dry wood on a small budget. With a few sheets of plastic, some 2x4s, and basic tools, it’s possible to build a reliable drying system that makes your green lumber ready for the shop.
Caleb’s approach is all about making woodworking more accessible. Whether you’re just getting started or looking for ways to become more self-sufficient, this is a great project to consider.
Please support Caleb by visiting his website: https://www.ycmt2.com/.

Matt’s Take
These are my personal thoughts and tips based on my own experience in the shop. This section is not written, reviewed, or endorsed by the original creator of this project.
Solar kilns are one of those game-changing additions that can really expand what you can do in your shop. The beauty of Caleb’s approach is how he keeps it simple while hitting all the fundamentals—proper drainage, good airflow, and maximum sun exposure. These three elements are really what make or break any drying setup.
One thing I appreciate about this build is the attention to moisture control from multiple angles. That plastic barrier underneath might seem like overkill, but ground moisture is a sneaky problem that can completely undermine your drying efforts. The overlapping roof technique is equally smart—water always finds a way, so thinking through those drainage paths during construction saves headaches later.
The sticker spacing is worth paying attention to. Those 2×4 spacers create the airflow channels that keep everything drying evenly, but they also need to be placed consistently to prevent warping. A good rule of thumb is spacing them every 16-24 inches along the length of your boards, and keeping them aligned vertically through the whole stack.
For anyone considering a similar project, remember that even a basic solar kiln like this can cut drying time significantly compared to air drying alone. The controlled environment helps prevent a lot of the checking and warping that can ruin good lumber, making it a solid investment for anyone working with green wood regularly.