

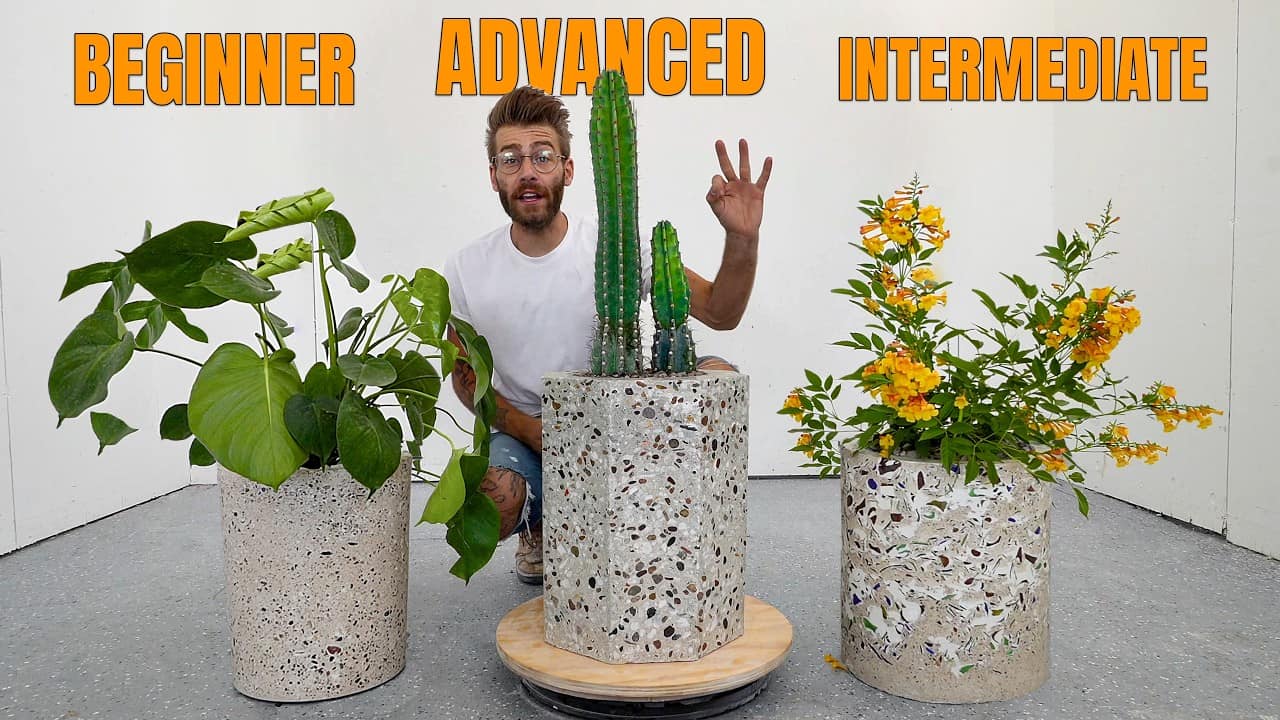
These projects were built and designed by Mike Montgomery from Modern Builds.
This build walks through three distinct terrazzo planters, each made using a different mold-making approach ranging from simple to advanced. The first uses foraged sand and stone straight from the property, the second incorporates crushed glass from beer and wine bottles, and the third relies on store-bought aggregate and pigment for a more polished, professional result.
Along the way, the process covers mold construction, mixing ratios, grinding techniques, and finishing methods that can be adapted for other concrete and terrazzo projects.
Watch the full video and subscribe to Modern Builds:


Planter One: A Simple Bucket Mold with Local Materials
The first planter starts with the easiest mold-making method in the video, using a basic bucket as the outer form and a smaller container nested inside to create the cavity. A piece of plywood clamped across the top helps hold the inner liner in place during the pour. Rigid foam insulation is added to the bottom to create a drainage reservoir, a simple trick that helps prevent water from pooling around plant roots.
For the aggregate, Mike gathers stones from his own property, breaking the larger pieces down with a sledgehammer and washing the material to remove soil and debris. Sand is also collected on-site and rinsed thoroughly, since leftover organic material can weaken the final concrete. The only outside material used is white Portland cement, sourced from a local supplier.
After curing, the mold is removed and the surface is ground back with a diamond disc on an angle grinder to expose the aggregate underneath. A series of diamond polishing pads gradually smooths the surface, followed by a slurry coat of pure Portland cement to fill any voids. A high-gloss masonry lacquer finish is applied last, giving the stones strong contrast and a glossy protective layer.
The result highlights how ordinary materials found around a yard can produce a genuinely unique terrazzo pattern, with the added benefit of a personal, hyper-local touch that store-bought aggregate can’t replicate.
Planter Two: Customizable Height with Recycled Glass
The second mold uses a cylindrical concrete tube form, which allows the height of the planter to be easily customized by trimming the tube. This time, the mold is poured upside down, with the form and a bucket liner attached to a piece of melamine acting as the base. Paste wax is again used as a release agent to help separate the concrete from the mold later.
Instead of natural stone, this planter uses crushed beer and wine bottles as the aggregate. The labels are soaked off and any adhesive residue is removed before the bottles are broken down into smaller pieces. Mixing follows the same basic ratio of aggregate, sand, and Portland cement, though the dry ingredients are combined before adding water this time for better consistency.
Once removed from the mold, the concrete reveals some larger voids where the glass aggregate didn’t pack tightly, but the piece holds together well enough to move forward. A slurry coat helps fill in the gaps before the surface is ground back to expose the glass, which requires a bit more care since it tends to chip more easily than stone. The finished piece shows a noticeable color contrast between the white slurry and the surrounding concrete, something Mike notes as an area for improvement in future pours.
Planter Three: A Wood-Formed Octagon with Pigmented Concrete
The final mold takes a more advanced approach, using angled wood scraps assembled into a multi-sided octagon form. Cutting matching bevels on a table saw allows all the pieces to fit together into a perfect closed shape, and the same basic technique could be used to create molds with more or fewer sides depending on the desired look. Gaffer’s tape holds the panels together while the mold is assembled around a plastic liner packed with rigid foam for drainage space.
This pour introduces colored pigment for the first time, along with a mix of marble chips and river pebbles for the aggregate. The pigment powder used doesn’t show up as strongly as hoped once mixed into the concrete, a lesson in choosing the right type of pigment for opaque materials rather than one designed for more translucent projects like epoxy.
Despite the underwhelming color, the grinding and polishing stages turn out to be the most successful of the three planters. A more aggressive carving disc exposes larger pieces of aggregate, and switching to a wet polishing method for the finer grits produces a noticeably smoother, more refined surface. The finished piece shows off the marble and pebble mix with strong clarity and detail, proving that even with a pigment misstep, the underlying process still delivers a high-quality result.
Comparing the Three Approaches
Looking at all three planters together highlights how mold complexity and material choice both play a role in the final outcome. The bucket mold offers the easiest entry point for anyone wanting to try terrazzo for the first time, while the wood-formed octagon shows how much more customization becomes possible with a bit more setup and planning.
The glass aggregate planter demonstrates how recycled materials can be worked into a similar process, while the marble and pebble planter shows the benefit of using purpose-made concrete pigments over alternatives that aren’t designed for the job. Each mold also reinforces the value of techniques like slurry coats and progressive grit polishing, which help refine the surface regardless of which aggregate or mold type is used.
Taken together, the three builds serve as a practical overview of how far a terrazzo planter project can be pushed, from a simple weekend mold to a more considered, professional-style form.
Watch the full video and subscribe to Modern Builds:

Matt’s Take
These are my personal thoughts and tips based on my own experience in the shop. This section is not written, reviewed, or endorsed by the original creator of this project.
Terrazzo work is one of those projects that looks intimidating until you break it down into stages, and this video does a nice job showing that progression. A few things worth keeping in mind if you want to try this yourself: dust control matters a lot more here than in typical woodworking. Grinding cured concrete with a diamond disc kicks up fine silica dust, and that’s not something you want to breathe in over a long session. A respirator rated for silica, plus wet grinding when possible, goes a long way toward keeping the process safer.
On the mixing side, ratios and water content make or break these pours. Too much water weakens the final cure and leads to more of those voids you see with the glass aggregate planter. Mixing dry ingredients first, like Mike does in the second build, is a good habit since it helps distribute the cement evenly before water starts affecting workability.
Pigment is worth a quick note too. Concrete is an opaque, alkaline material, so pigments made for clear-cast resins or epoxy often just don’t behave the same way once they’re buried in cement. Look for pigments specifically labeled for concrete or mortar if color saturation matters to you.
Lastly, paste wax as a release agent works fine for simple molds, but for anything with tight details or multiple panels like the octagon form, a dedicated concrete release agent can save you some frustration when it’s time to pull the piece free.