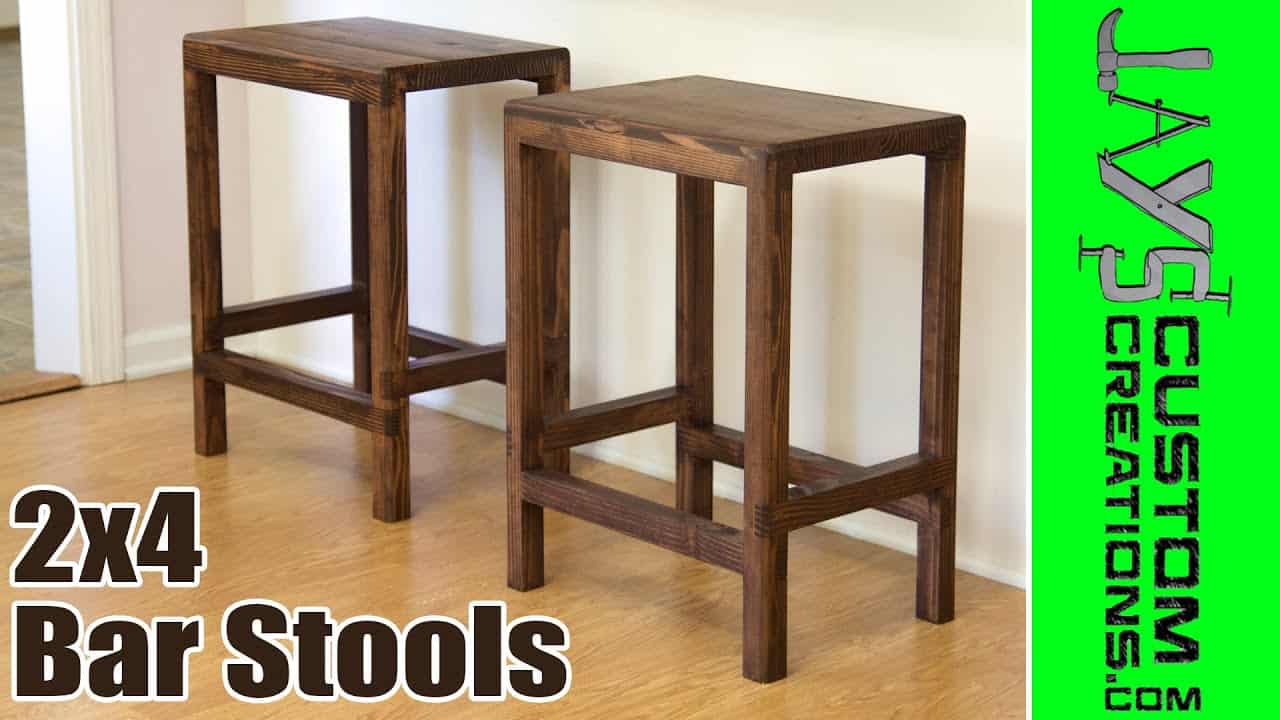
This project was built and designed by Jay Bates. It’s a practical, sturdy bar stool design made entirely from standard 2×4 lumber using half lap joinery for clean lines and lasting strength.
Jay walks through the full process in his detailed video, showing how careful planning, good grain orientation, and solid joinery make a big difference—even in a simple shop project.
Watch the full video and subscribe to Jay’s channel:
Why Grain Orientation Matters
One of the most important details in this build is choosing the right wood grain direction. Jay orients all vertical pieces so the grain runs up and down, which reduces side-to-side wood movement as humidity changes.
This decision helps prevent legs from twisting over time, which is especially important for bar stools that need to remain level and stable. Choosing straight-grained boards with minimal knots also adds to the overall integrity of the design.
Milling and Cutting the Wood
The build starts with breaking down 2x4s into rough lengths using a miter saw. From there, the boards are planed to a uniform thickness to make sure every joint fits snugly and accurately.
Jay marks each half lap location before cutting, a step that prevents mistakes later and speeds up the process. Being consistent at this stage helps make assembly easier and more precise.
Making the Half Lap Joints
Half lap joints are the backbone of this project. They’re cut where two pieces meet—both ends and internal sections—by removing half the thickness of each board so they fit together flush.
Jay uses a dado stack on the table saw to cut these joints quickly and cleanly. If you don’t have a dado blade, multiple passes with a circular saw or standard blade will also work, though it takes more time.
To stay organized, he sets up a stop block on the saw and uses a sacrificial backer board to reduce tear-out and control dust. The result is a smoother cut and a safer working area.
Assembling the Frames
With all joints cut, Jay moves on to dry fitting and then gluing up the frames. Each half lap receives a coat of wood glue, then the pieces are clamped tightly and allowed to cure.
He recommends wiping away excess glue immediately to avoid sanding extra buildup later. Once the glue dries, the frame becomes strong enough to support full body weight—no additional hardware needed.
Leveling the Tops
One standout technique in this build is trimming the top of the stool legs after glue-up. Jay clamps both leg assemblies together and runs them across the table saw to flatten the tops evenly.
This small step makes a big difference in the final product. Level tops mean your seat attaches flush, reducing wobble and giving the stool a clean, professional look.
Final Sanding and Finishing
After the glue is dry and the tops are flush, the entire stool is sanded smooth. Jay rounds over sharp edges slightly to improve comfort and eliminate splinters.
For finish, a dark stain was applied—but Jay notes it may not have been the best fit visually. Regardless of the color, the structural quality remains, and the stools are fully functional and long-lasting.
This also highlights a good lesson: always test your stain on a scrap piece first to avoid surprises. Even experienced woodworkers run into this from time to time.
Strong Design with Simple Materials
What makes this project stand out is how much strength and style can come from basic construction lumber. By using half lap joints and solid design principles, Jay builds stools that are both good-looking and extremely durable.
There’s no complicated hardware, no exotic materials—just 2x4s, glue, and a solid plan. It’s the kind of project that proves you don’t need a fancy shop or expensive tools to make quality furniture.
A Great Project for Any Skill Level
Whether you’re new to woodworking or just looking for a straightforward shop build, these bar stools offer a great opportunity to practice joinery and precision.
Jay’s teaching style makes it easy to follow along while picking up useful tips on layout, cutting, and finishing. The result is a project you’ll actually use and be proud of—functional, sturdy, and built to last.
Please support Jay by purchasing his plans here: Jay’s Custom Creations.

Matt’s Take
These are my personal thoughts and tips based on my own experience in the shop. This section is not written, reviewed, or endorsed by the original creator of this project.
Half lap joints are one of those techniques that really show their worth in furniture projects like this. The joint removes material from both pieces so they nest together perfectly, creating a strong mechanical connection that’s enhanced by glue. What I appreciate about Jay’s approach is how he uses the table saw with a dado stack to make consistent, clean cuts. The stop block setup is key here — it ensures every joint is exactly the same depth and position.
That grain orientation tip is spot-on and something worth paying attention to in any project where stability matters. When you orient the grain vertically on the legs, you’re working with the wood’s natural movement patterns instead of fighting them. Quartersawn boards are ideal if you can find them, but even with plain-sawn lumber, picking boards with straight, consistent grain makes a real difference in long-term performance.
The technique of trimming the leg tops after assembly is brilliant and something I’d recommend for any four-legged project. No matter how careful you are during construction, getting four legs perfectly even by measurement alone is tough. Clamping the assemblies together and running them through the table saw guarantees a level surface — just make sure your saw fence is perfectly parallel to the blade and take light passes.
Construction lumber gets overlooked sometimes, but projects like this prove you can build quality furniture without breaking the bank. The key is selecting your boards carefully and using techniques that maximize their strength. At around $20-30 in materials, these stools deliver serious value.