

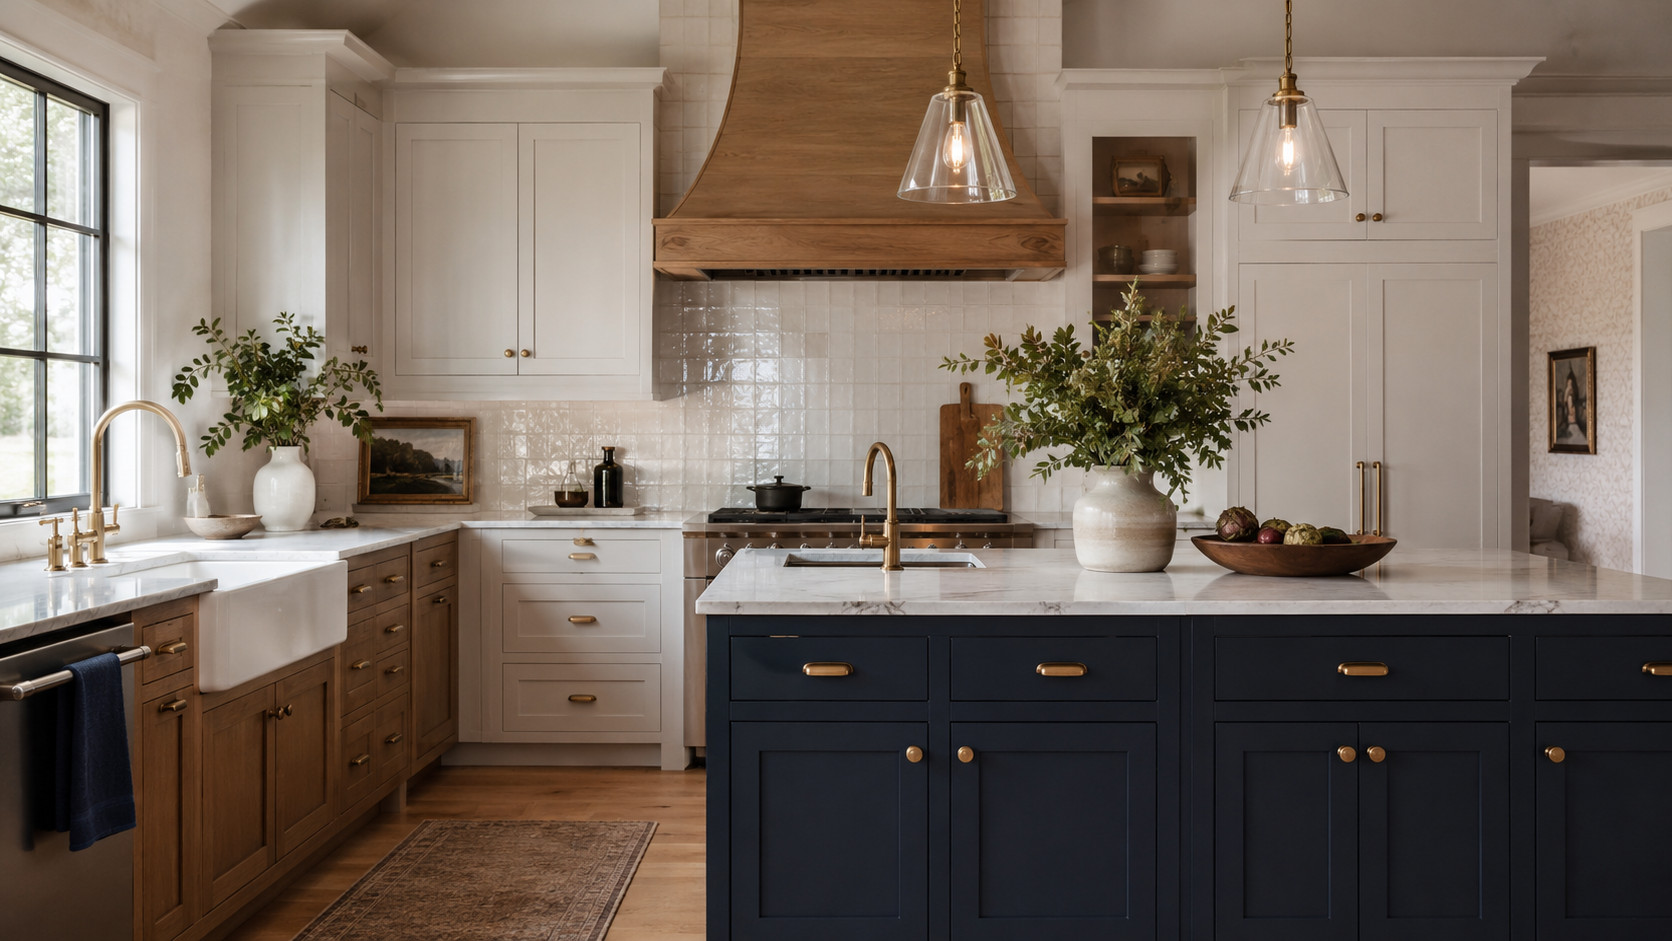
Walk into a spec home and you can feel it before you can name it.
Flat doors. Chrome faucets. A single glaring flush-mount light in the middle of every ceiling. Trim so thin it barely casts a shadow.
None of it is broken. That’s the trap. Builder-grade is competent and completely forgettable — the architectural equivalent of beige.
The good news is that almost every tell is fixable, and most of the fixes are things a homeowner can do over a weekend with a caulk gun, a screwdriver, and a little nerve. Custom doesn’t mean expensive. It means intentional.
Here are 33 ways to strip the spec-home fingerprints off your house and make it look like someone actually chose it.
1. Add crown molding
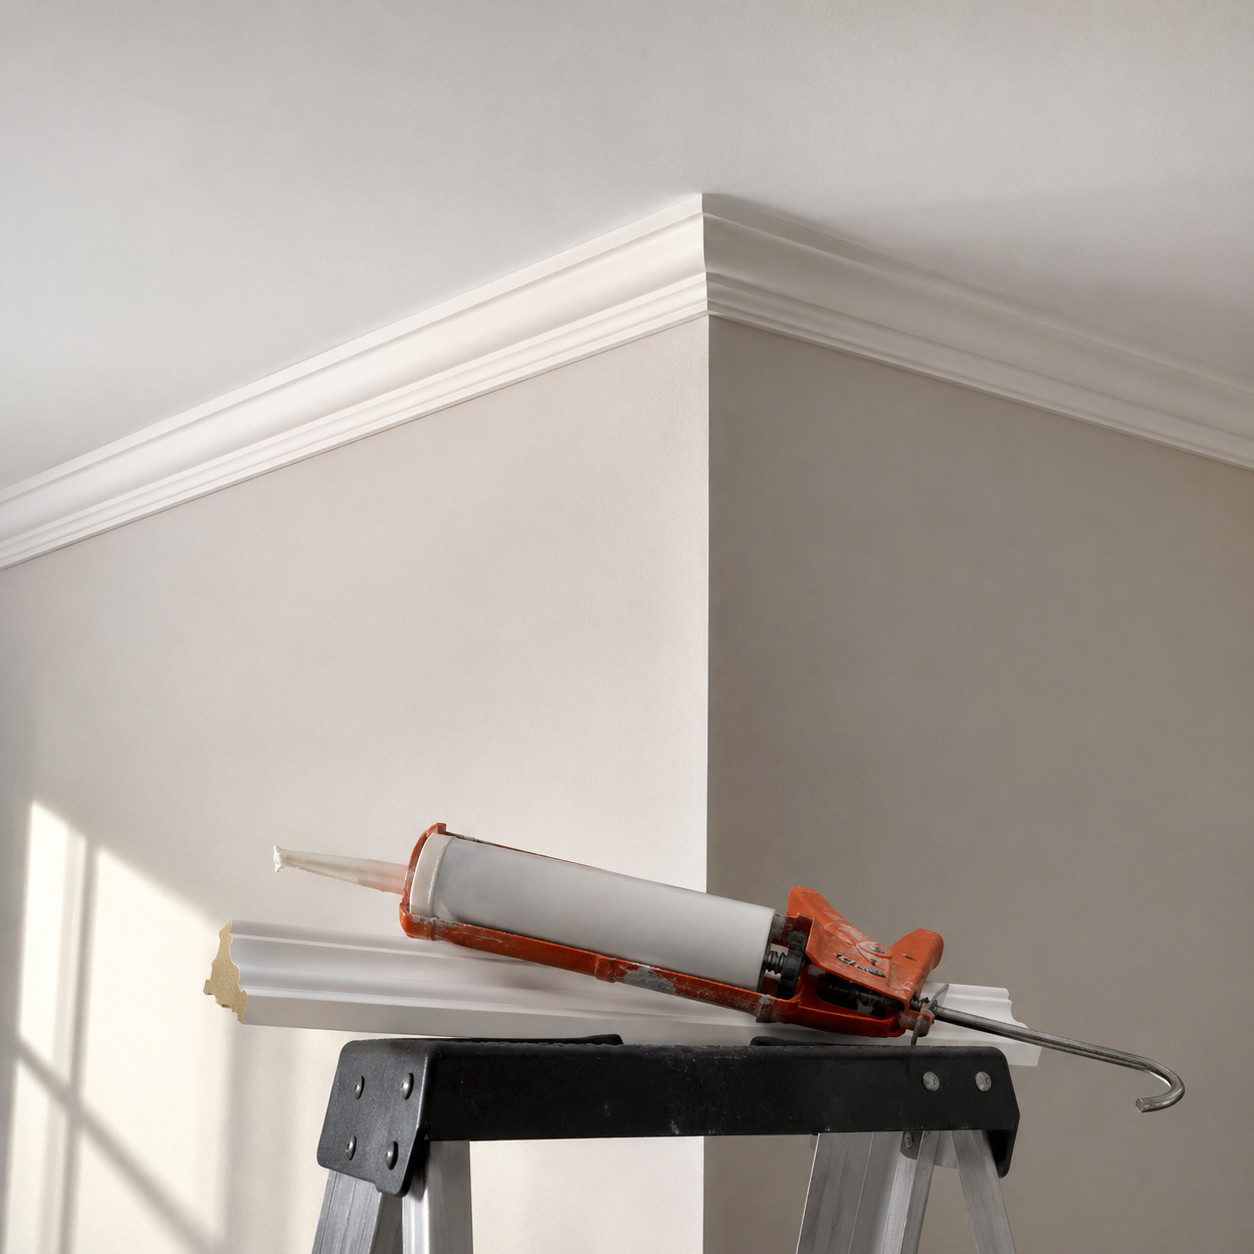
Crown is the fastest way to whisper “custom” without saying a word.
It softens the hard line where the wall meets the ceiling and pulls the whole room together. Builders skip it because it’s labor, and labor is the one thing a spec budget guards hardest.
You don’t need an elaborate profile. Even a simple three-inch crown, cut and coped clean, changes how a room reads. Miters at the corners are the tricky part — but there’s a simple way to nail the extreme miter cuts without a math degree.
Paint it the same color as the ceiling and it disappears into the architecture, which is exactly the point.
2. Swap the builder-grade light fixtures for something with presence
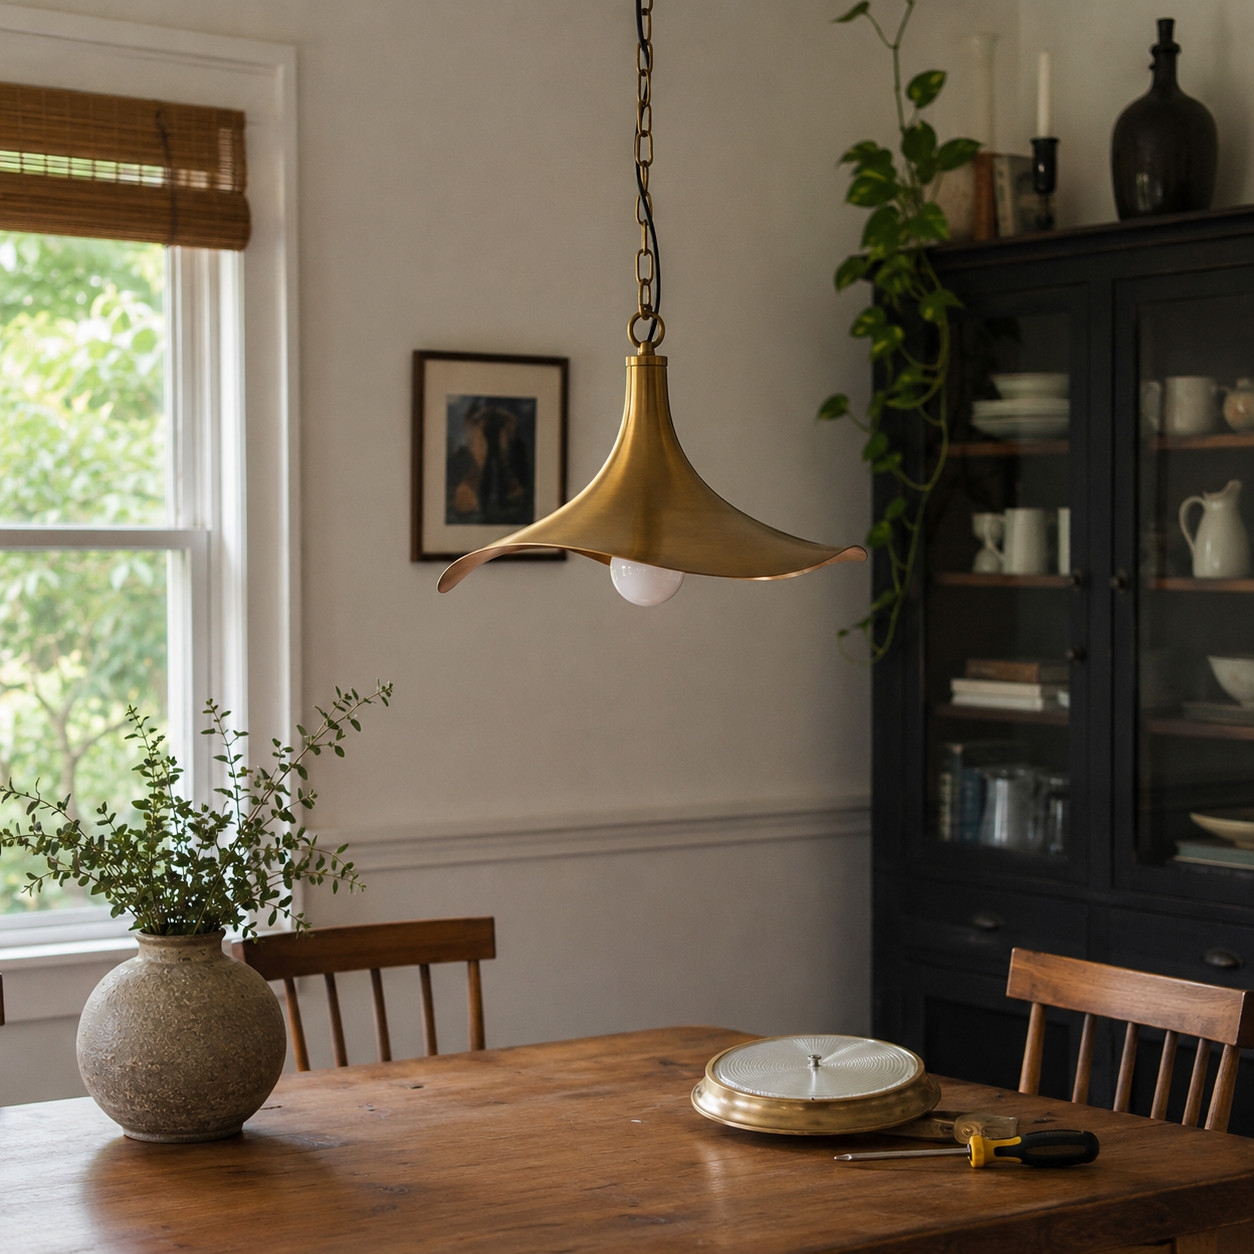
Ask a designer what gives a spec home away first, and most of them will say the lighting.
Flat flush mounts. A ceiling peppered with recessed cans and nothing else. It reads cold, flat, and unfinished — like the builder ran out of budget at the last box.
Swapping in a properly scaled pendant, a real chandelier over the dining table, or a pair of sconces changes the entire mood of a room in an hour. Designers consistently rank lighting as the single biggest signal of a home someone cared about.
Go one size bigger than you think you need. Undersized fixtures are their own kind of tell.
3. Paint the interior doors (and their casing) a color
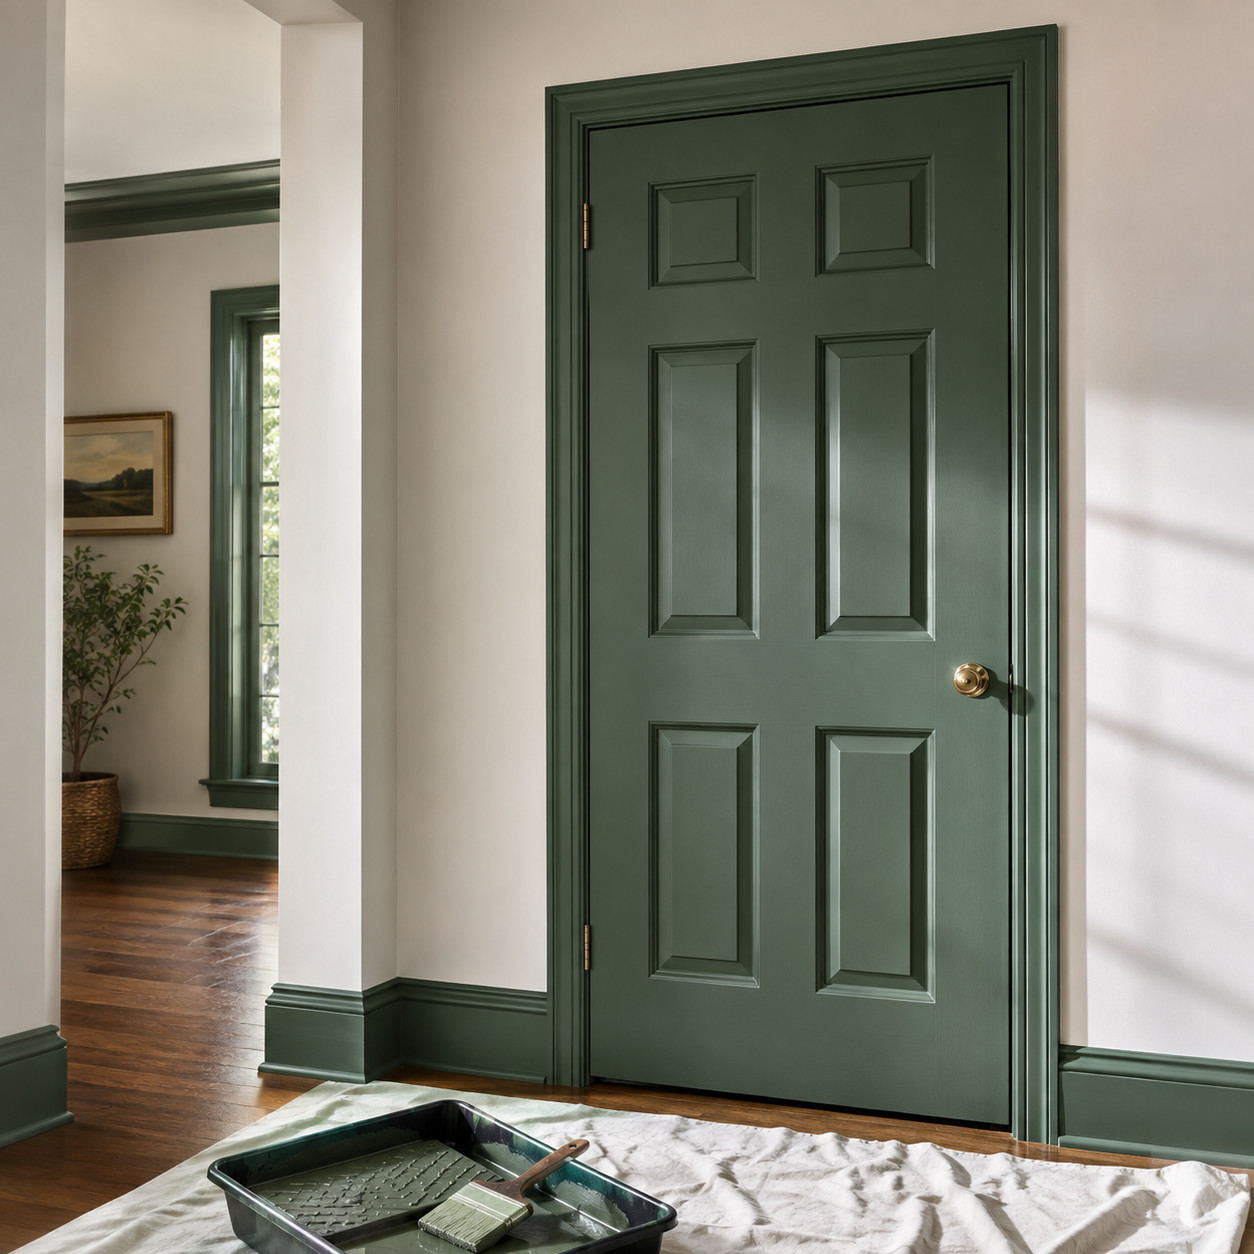
White hollow-core doors are the wallpaper of tract housing — everywhere, and invisible.
Paint them. A warm greige, a moody green, a soft black. Do the casing too, so the whole opening reads as one deliberate move.
It costs a quart of paint and an afternoon. Suddenly a builder hallway looks like a design decision instead of a default.
Spec builders never bother with this. That’s exactly why it works.
4. Layer the lighting with sconces and dimmers
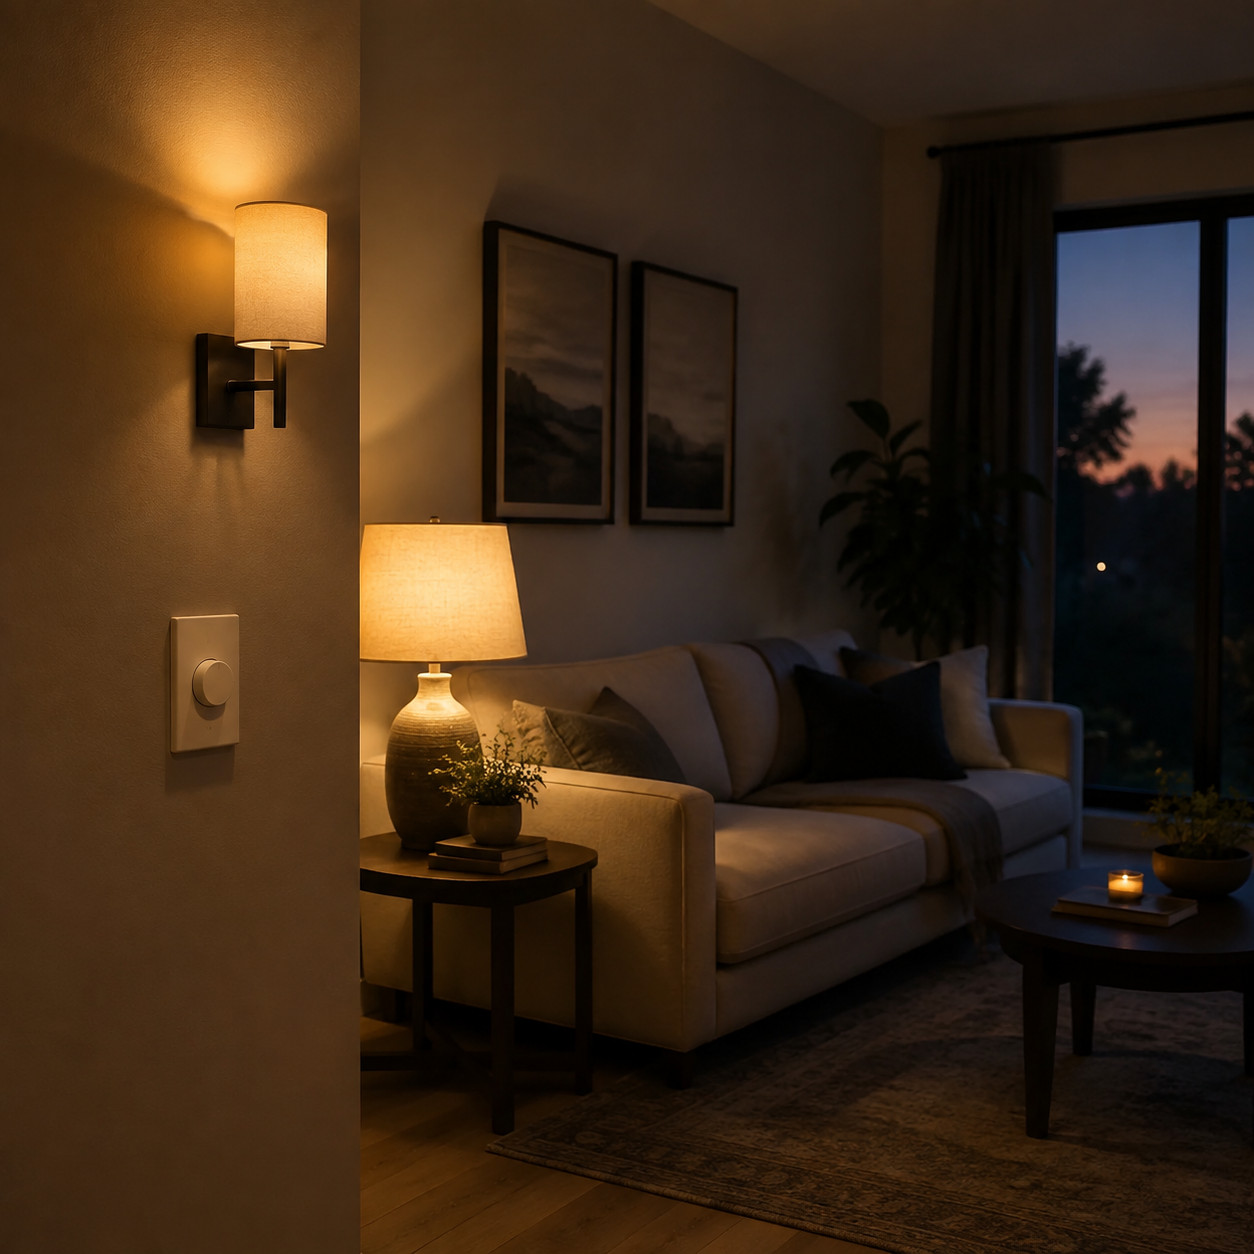
Custom homes never lean on one overhead source.
They stack it. Ambient light overhead, task light where you work, accent light to catch a corner — and dimmers on all of it.
A dimmer is a ten-dollar part that changes a room from harsh noon to warm dusk with a thumb. Hardwiring sconces means calling an electrician, but the payoff is the exact quality that separates “builder” from “designed.”
Put dimmers everywhere. You’ll never miss the flat, flip-on glare.
5. Change every knob, pull, and door handle
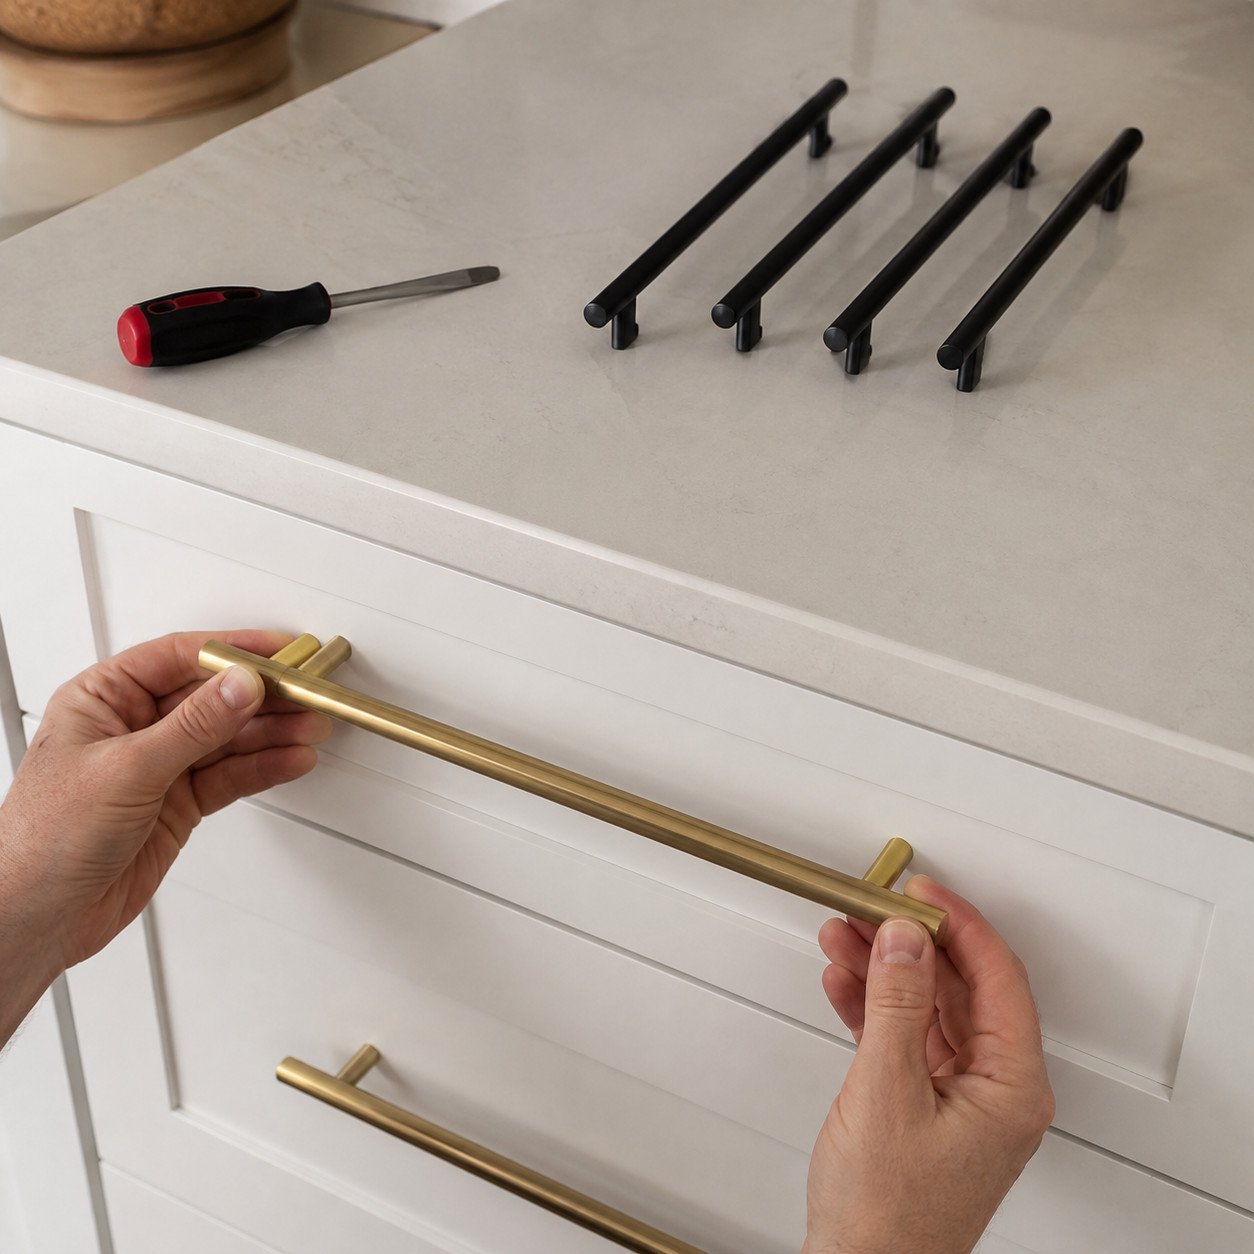
Grab a screwdriver. This is the cheapest custom upgrade in the house.
Plenty of new builds ship with no cabinet hardware at all, which reads as unfinished the second you notice it. Even the ones that come with hardware ship with the flimsiest possible option.
Swap in longer pulls in unlacquered brass, matte black, or aged bronze. Stock shaker cabinets suddenly look chosen. There are three clean methods for installing cabinet hardware so the holes actually line up.
Do the interior door handles while you’re at it. Those builder levers are a giveaway too.
6. Treat faucets like jewelry
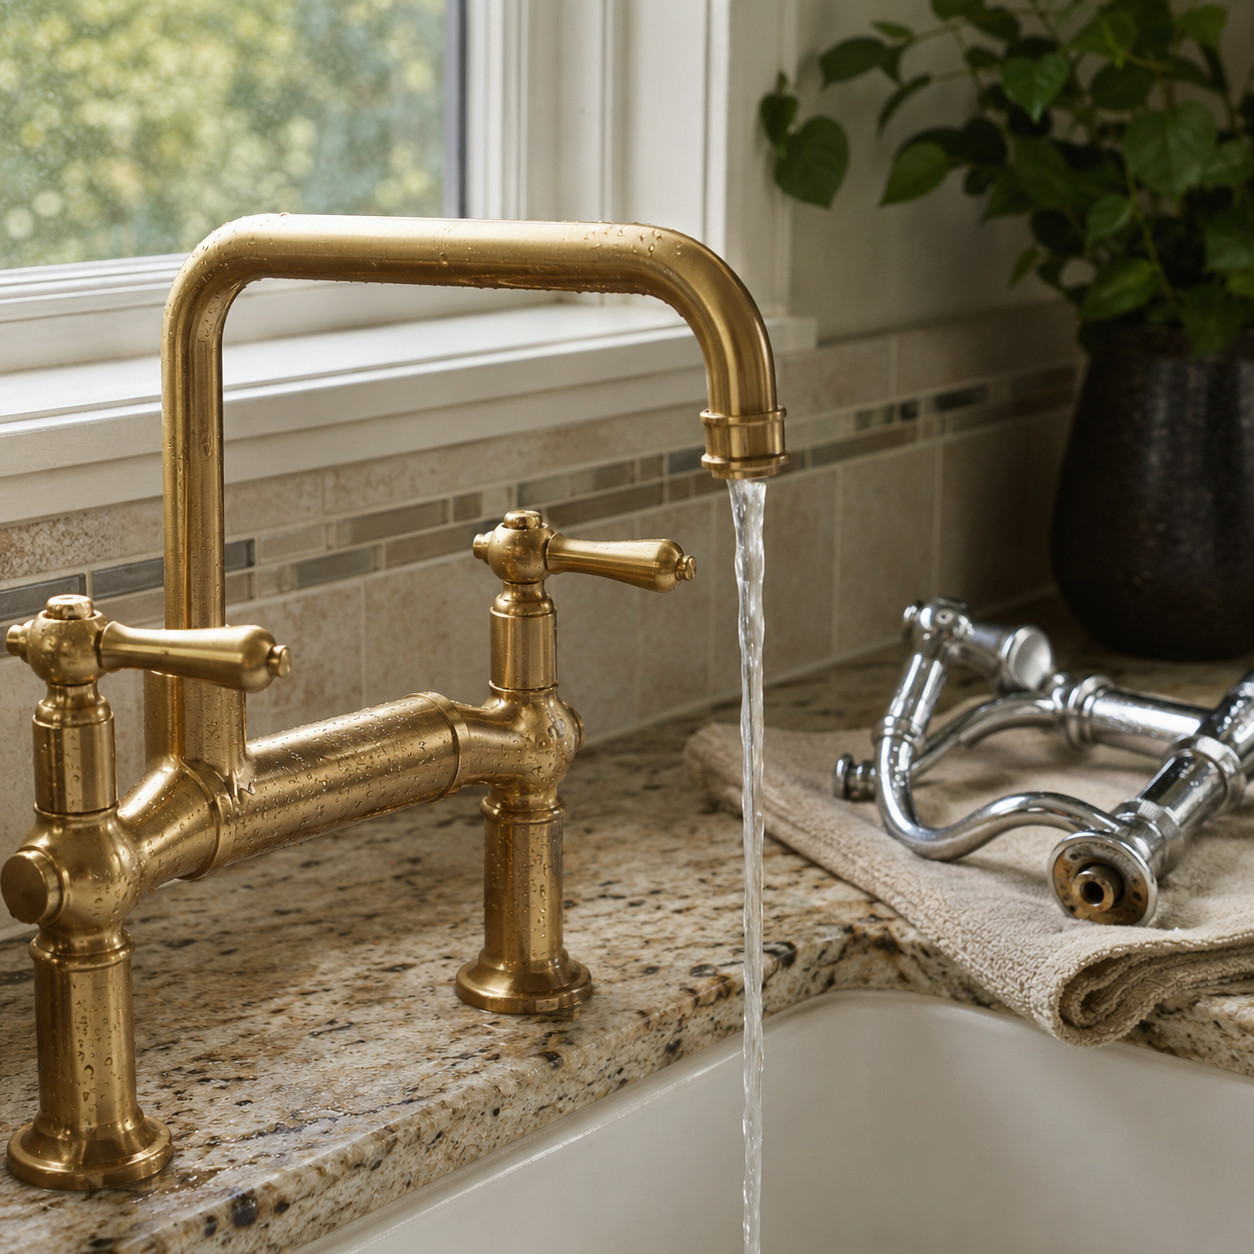
Faucets are the jewelry of a kitchen or bath. Builders hand you the plastic-bead version.
That basic chrome mixer does its job and nothing else. Trade it for a sculptural bridge faucet or something in a warm brushed finish, and the whole sink area levels up.
Dollar for dollar, it’s one of the highest-impact swaps you can make. A good faucet reads expensive even sitting on a laminate counter.
7. Frame or replace the frameless bathroom mirror
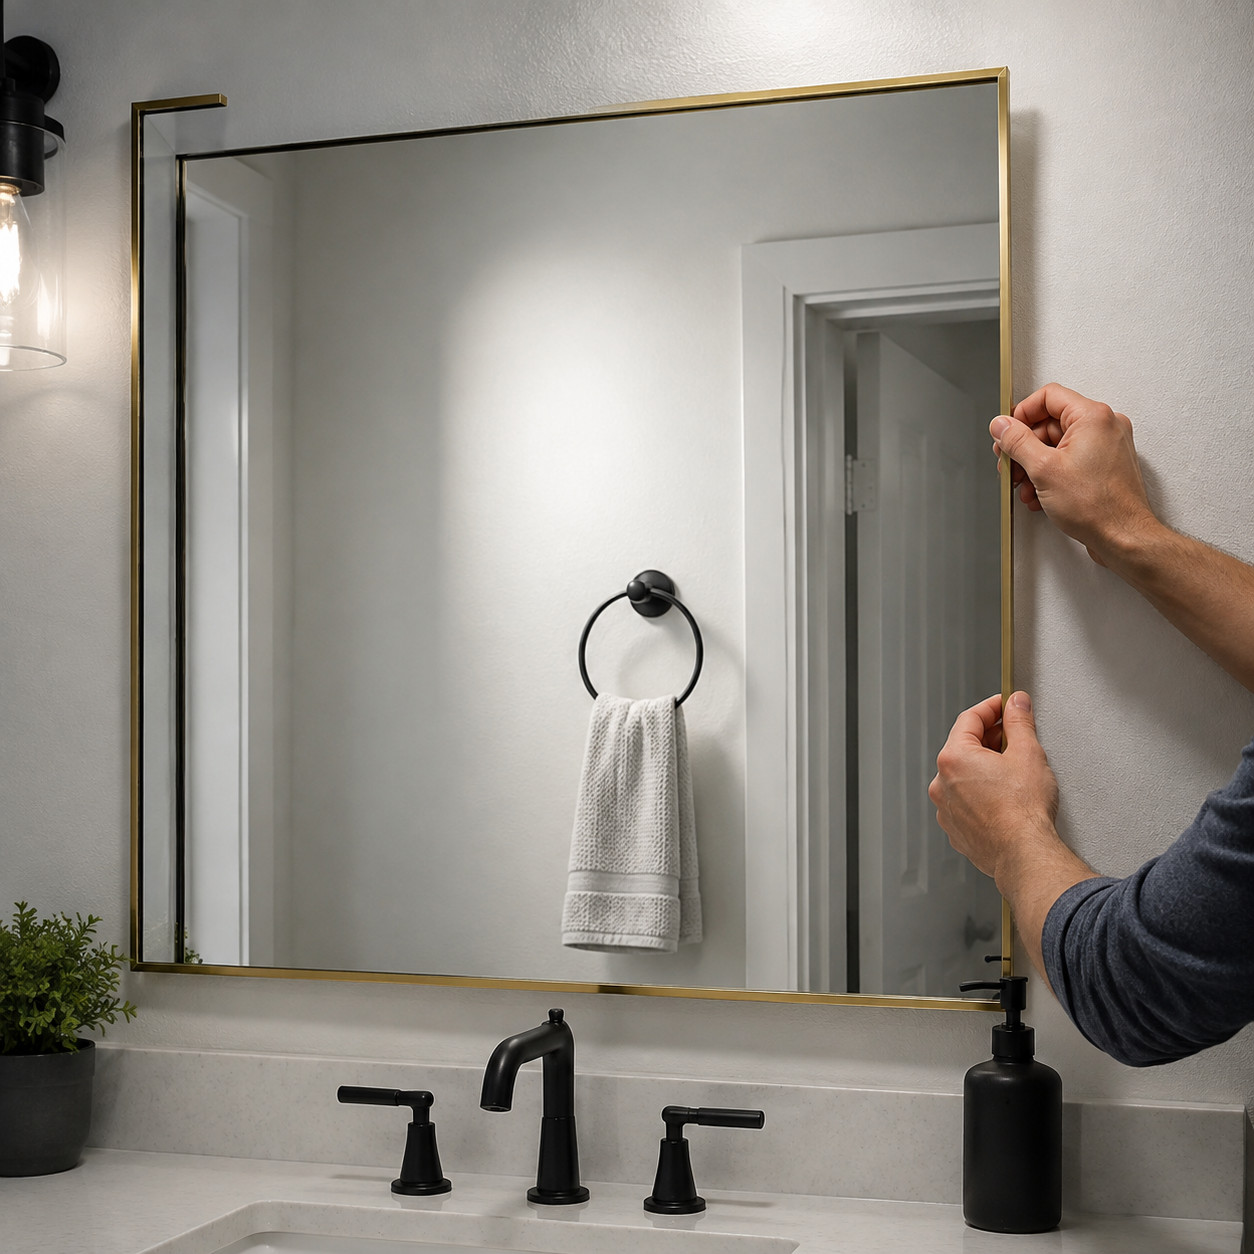
That giant frameless slab glued over the vanity is the most builder thing in the bathroom.
It reflects light and has zero personality. A stick-on frame kit fixes it in under an hour, or you swap in a framed mirror entirely.
Pick a finish that plays off the faucet. Better yet, create tension — a warm gold mirror over black fixtures is the kind of intentional mismatch designers charge for. If you want a real project, a curved mirror with integrated LED lighting takes it further still.
8. Repaint in a smarter color and a durable sheen
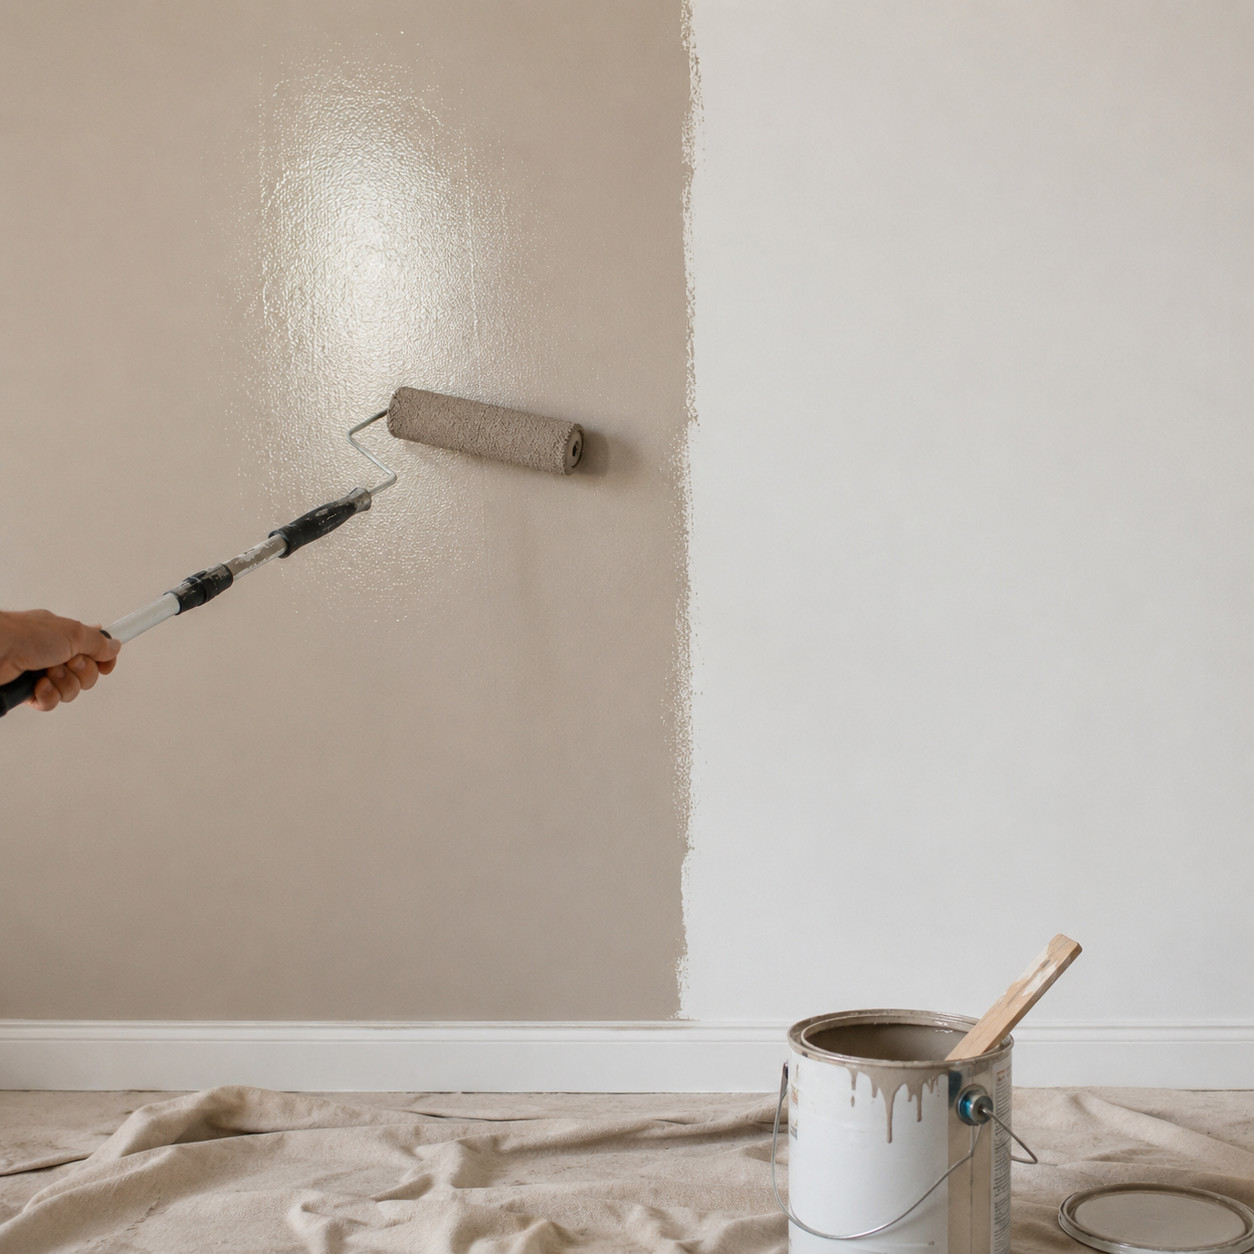
The number-one complaint about new builds? The paint.
Flat, chalky contractor white that scuffs if you look at it and won’t wipe clean when a kid drags a crayon across it.
Repaint in a considered color and a satin or eggshell sheen. It cleans up with a damp rag and reads far more finished than that dusty matte film.
Same wall. Better paint. Completely different room.
9. Replace the plastic vent and return-air covers
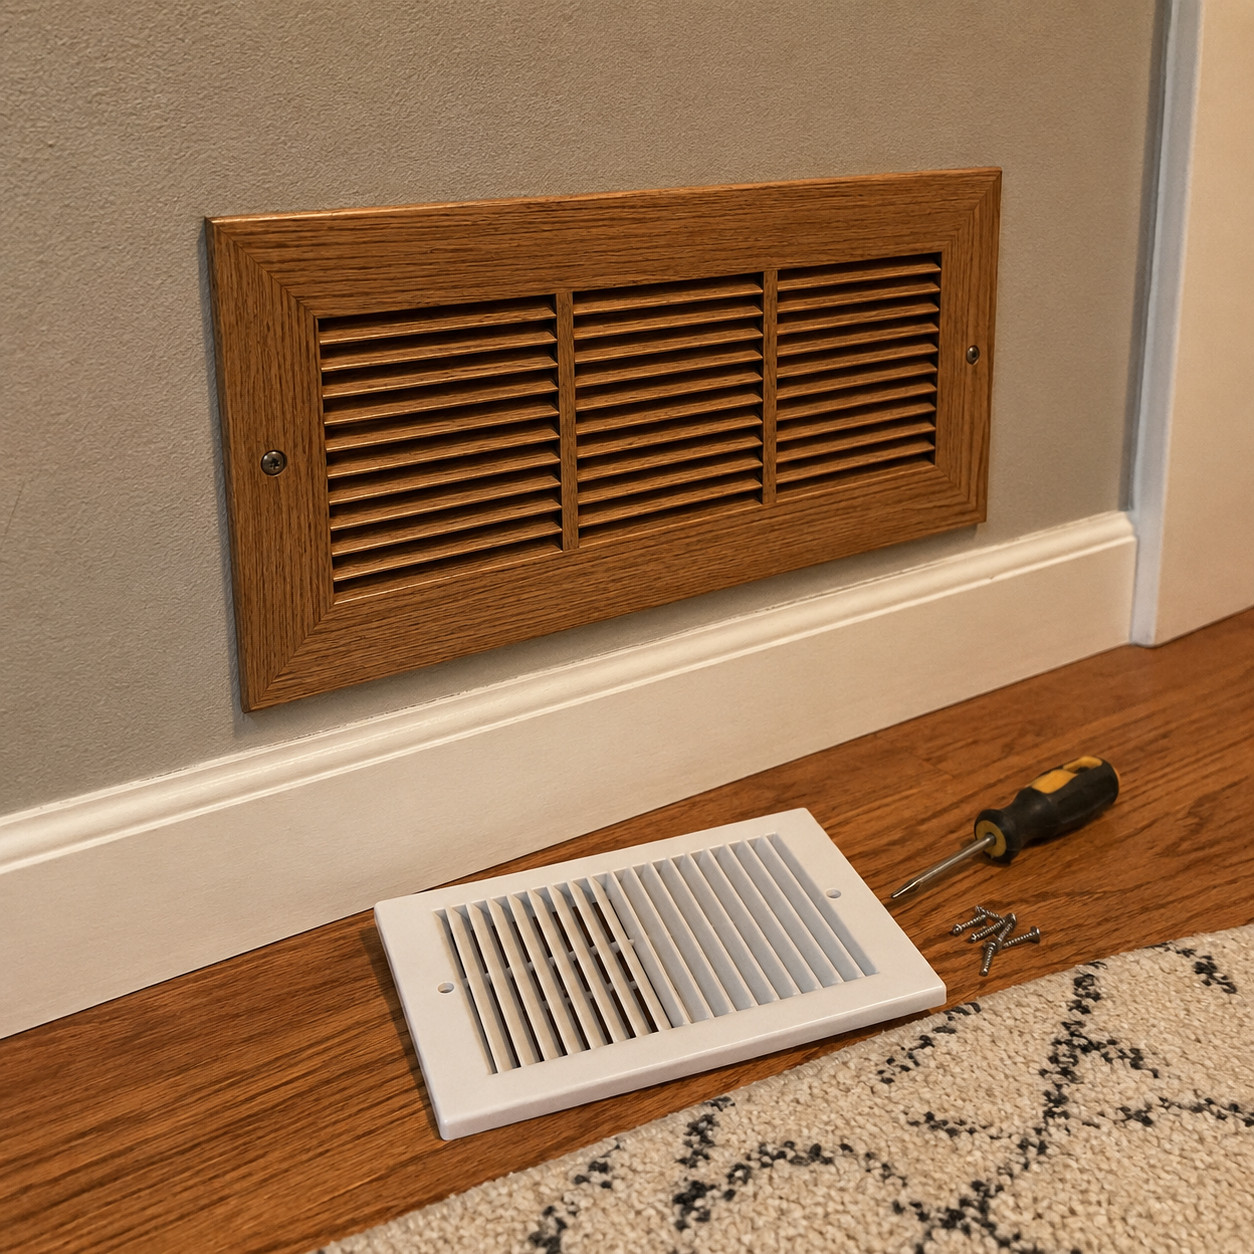
Look up. Those stamped-metal and plastic HVAC grilles are a tell almost nobody consciously registers — but everybody feels.
Cheap vents cheapen everything around them. Swapping in flush wood covers or decorative metal grilles costs a few dollars each and reads instantly more custom.
It’s the kind of detail that insider guides love, because it’s nearly free and nobody expects it.
Start with the returns in your main living spaces. Those are the ones guests see.
10. Beef up the baseboards
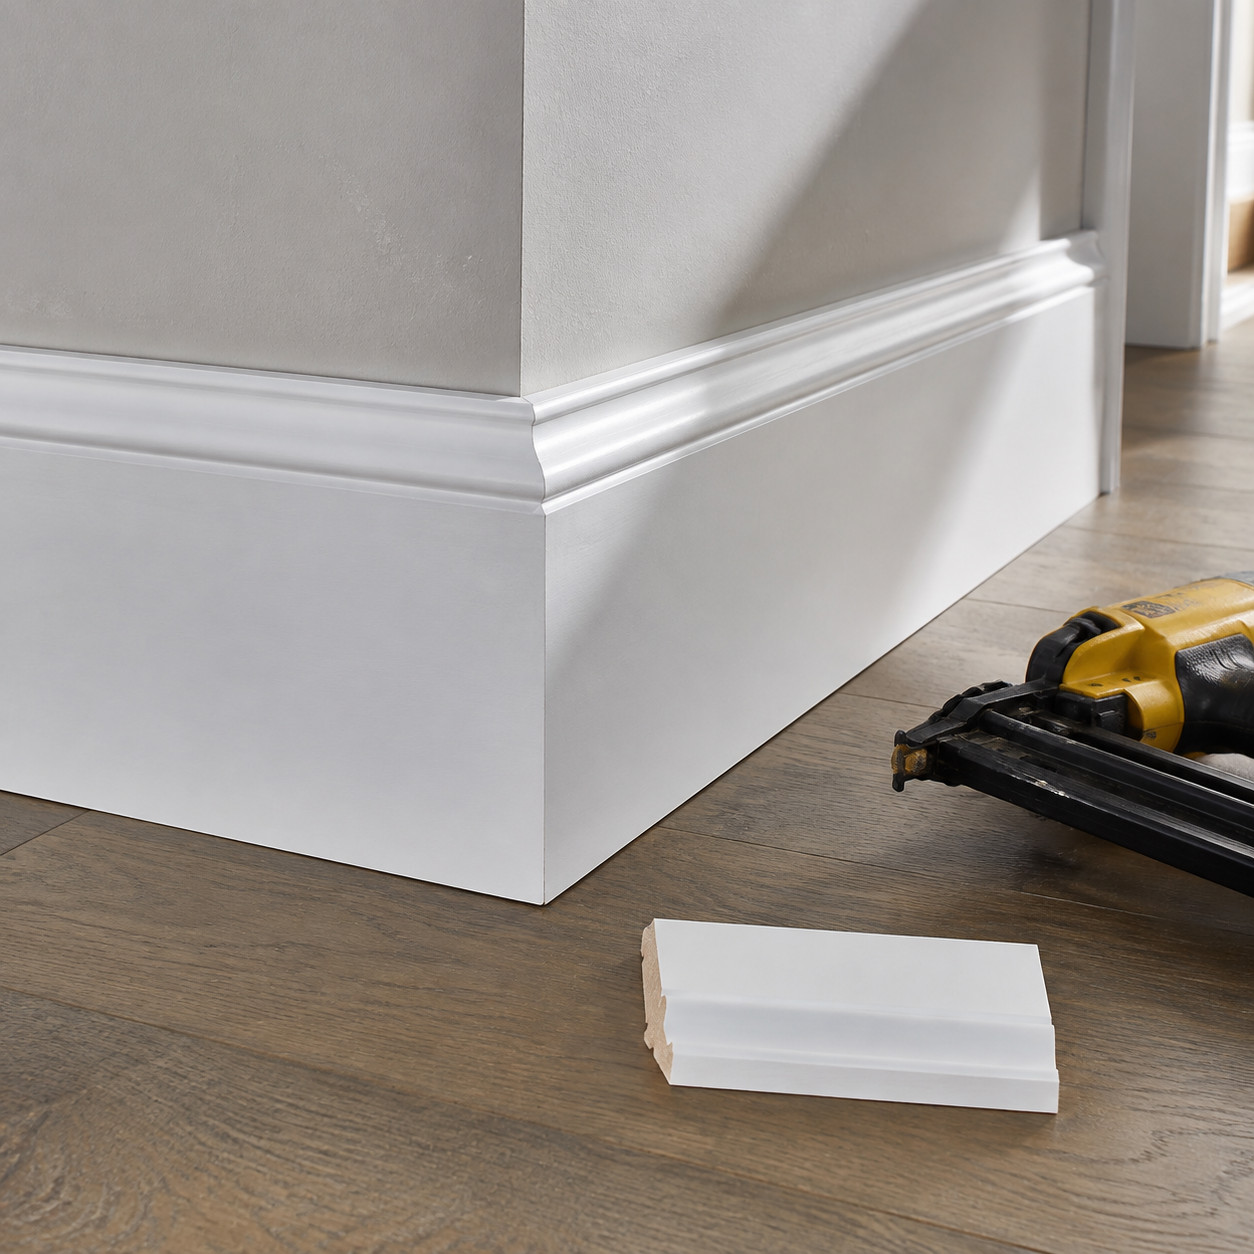
The two-and-a-half-inch colonial baseboard went into nearly every builder home in America.
It’s so anemic most people never consciously notice it — they just feel the room is a little flat. Taller, chunkier base fixes the proportion immediately.
If you don’t want to rip out what’s there, cheat it. Nail a thin strip an inch above the existing base, caulk the gap, and paint it all one color. From across the room it reads as one substantial board. The visual payoff of upgraded trim is wildly out of proportion to the cost.
11. Widen the door and window casing
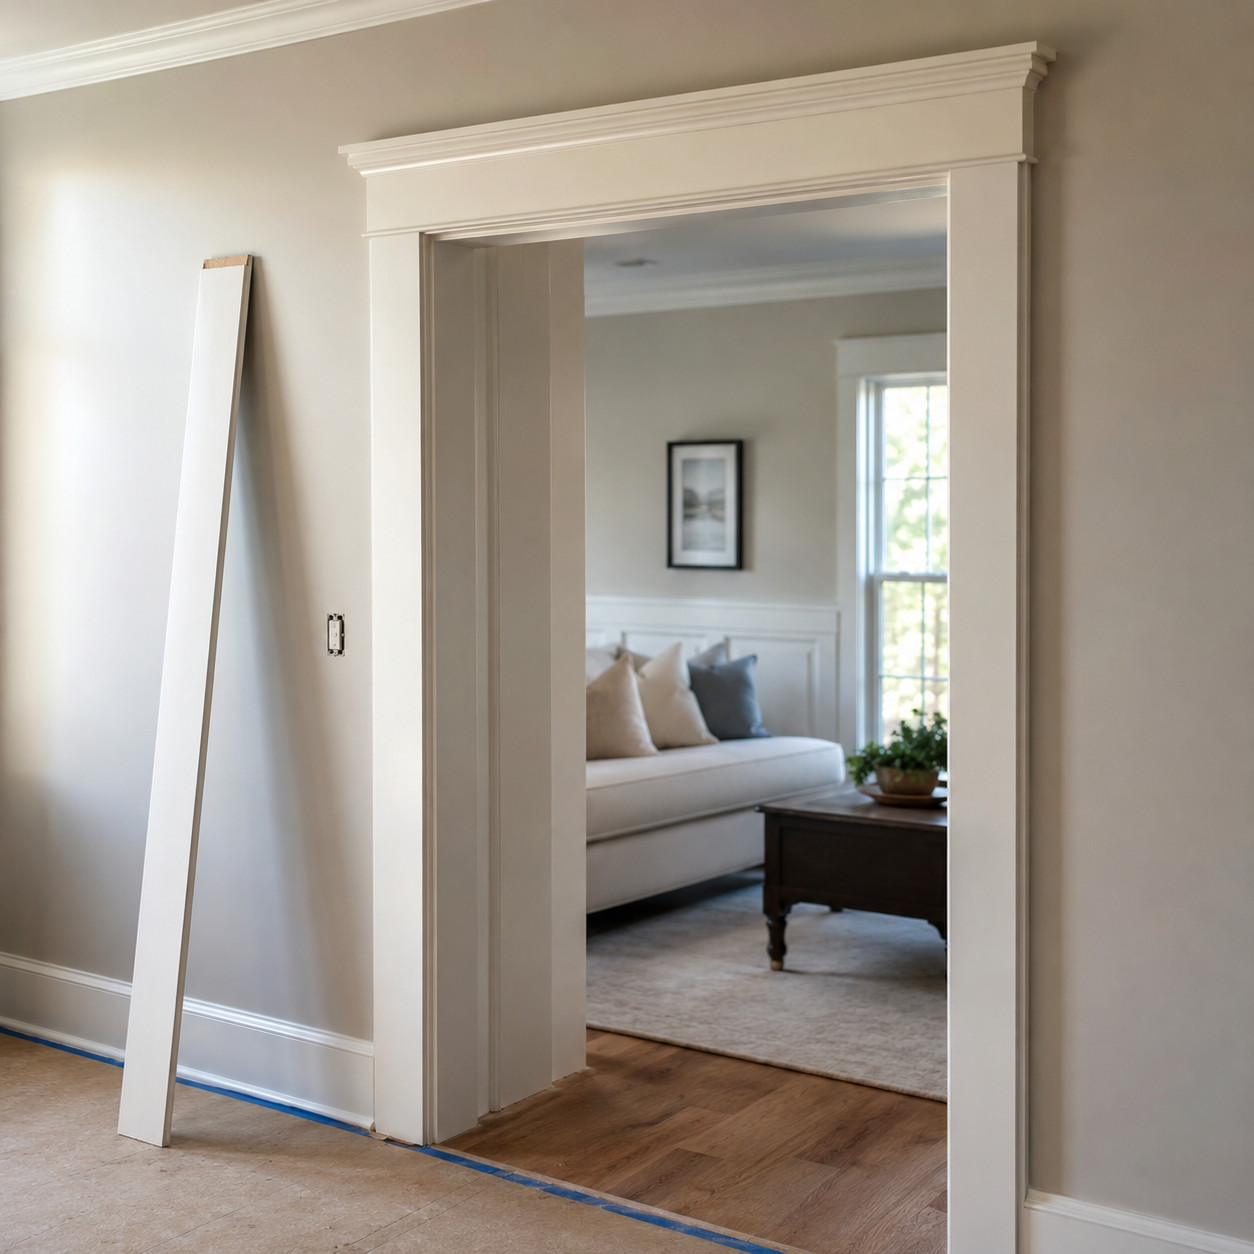
Builder homes wrap openings in flat, narrow casing that lies dead against the wall.
Swap it for wider craftsman-style trim. Suddenly the doorway has weight, dimension, shadow.
Light catches the edges. The opening reads as built, not stamped out of a catalog. Pair it with the beefier baseboard from the last entry and the whole room feels older and more solid.
12. Install picture-frame or panel molding
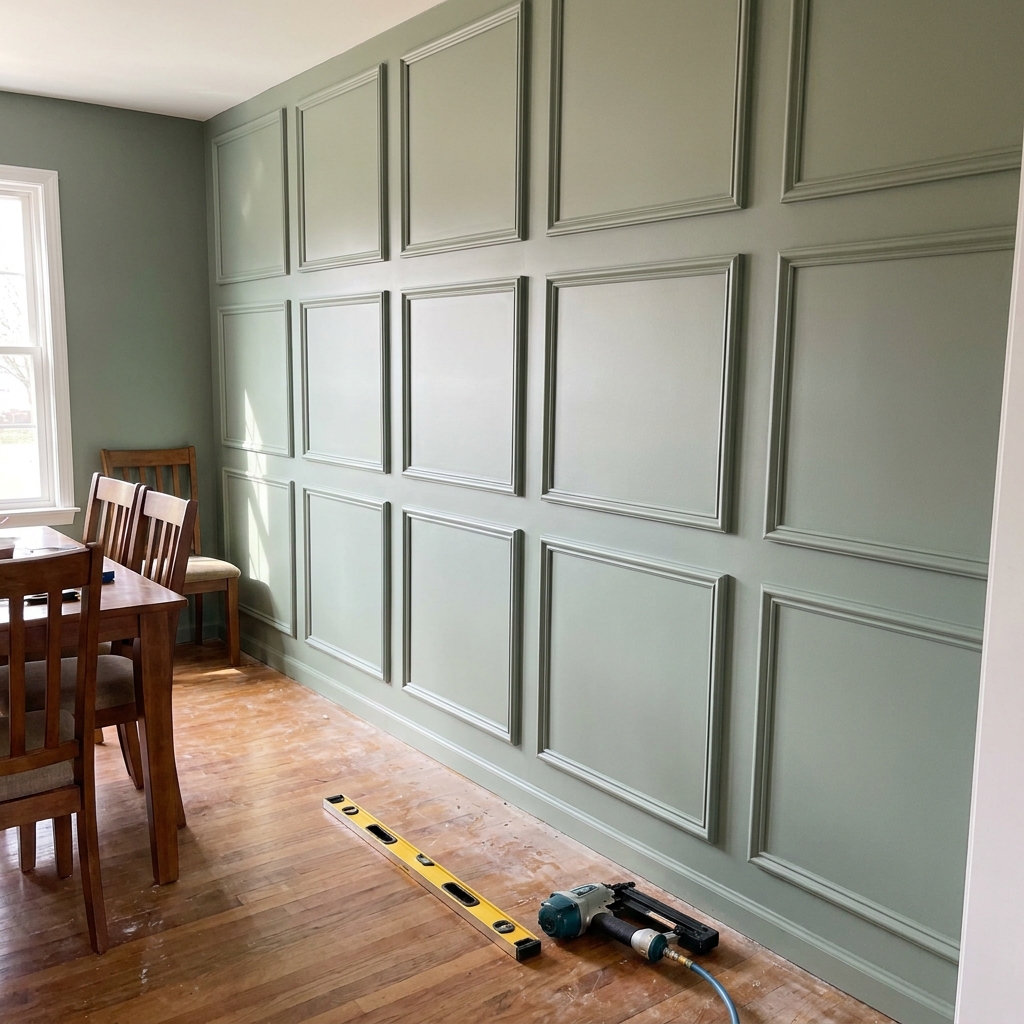
Applied box trim is the upgrade bloggers keep crediting with making a plain room look expensive.
It’s a grid of thin molding glued and nailed to a bare wall, forming panels. That’s it. And it’s genuinely beginner-friendly — the most-cited single move for turning a blank wall into something that looks architected.
Prime the boards first. Caulk every seam. Paint the wall and the trim the same color for that seamless, built-in look.
A dining room goes from spec to stately for the price of some primed lattice.
13. Run board and batten up the wall
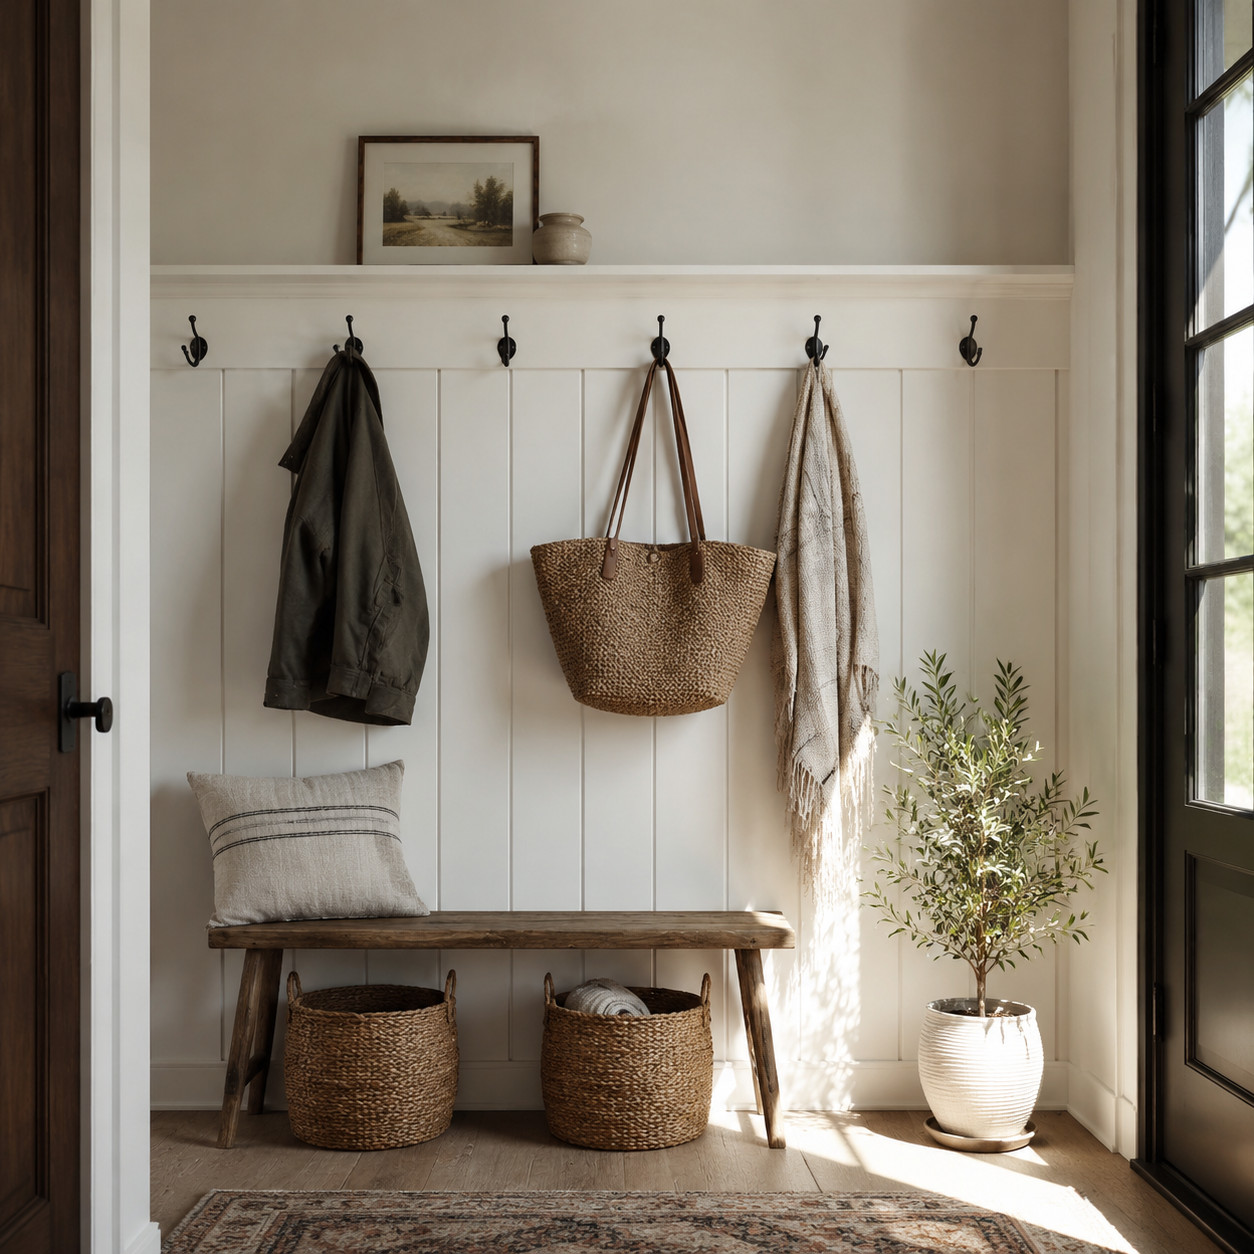
Board and batten adds rhythm and fake depth for the cost of a few primed boards.
Vertical battens, a horizontal cap rail, painted uniform — it gives a big blank wall texture and structure. Entryways and dining rooms love it.
Run it about two-thirds up the wall and cap it with a ledge. Now you’ve got somewhere to lean art and a wall that looks considered instead of forgotten.
14. Add wainscoting or beadboard
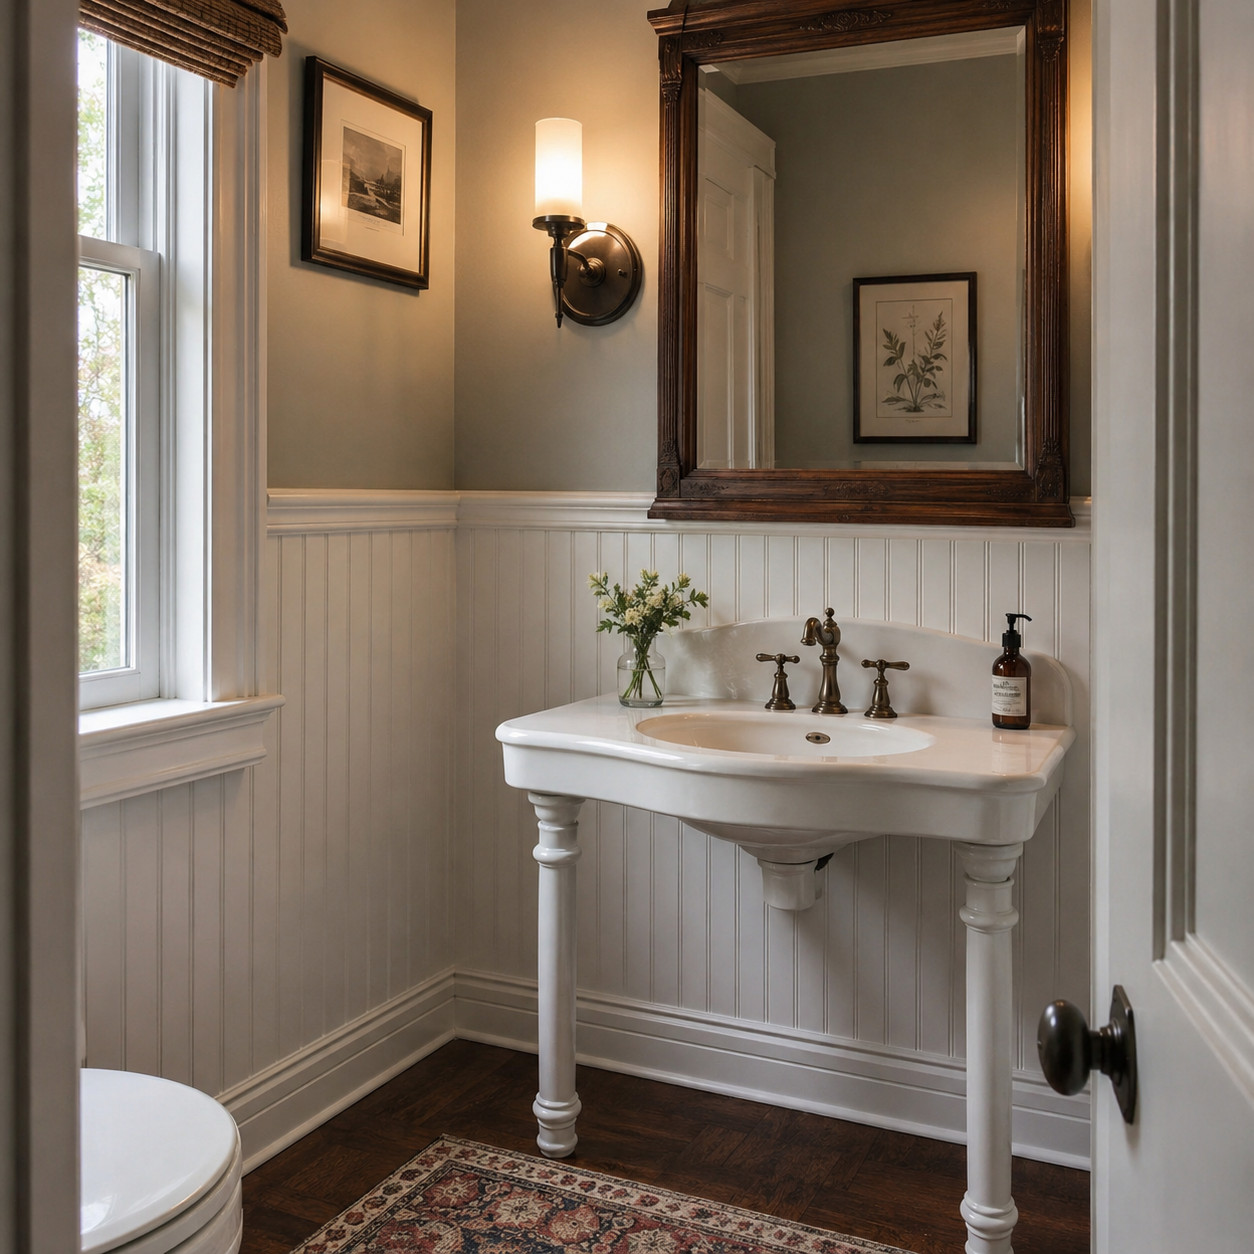
Paneling that runs partway up the wall brings a formality builders never pay for.
Capped on top, based on the bottom, it reads like old-house craftsmanship. Powder rooms and stairwells are prime targets — the spots where spec builders leave the drywall completely bare.
Beadboard for a cottage feel, flat-panel wainscot for something more formal. Either one makes a small room feel finished and deliberate.
15. Plank a wall (the tasteful way)
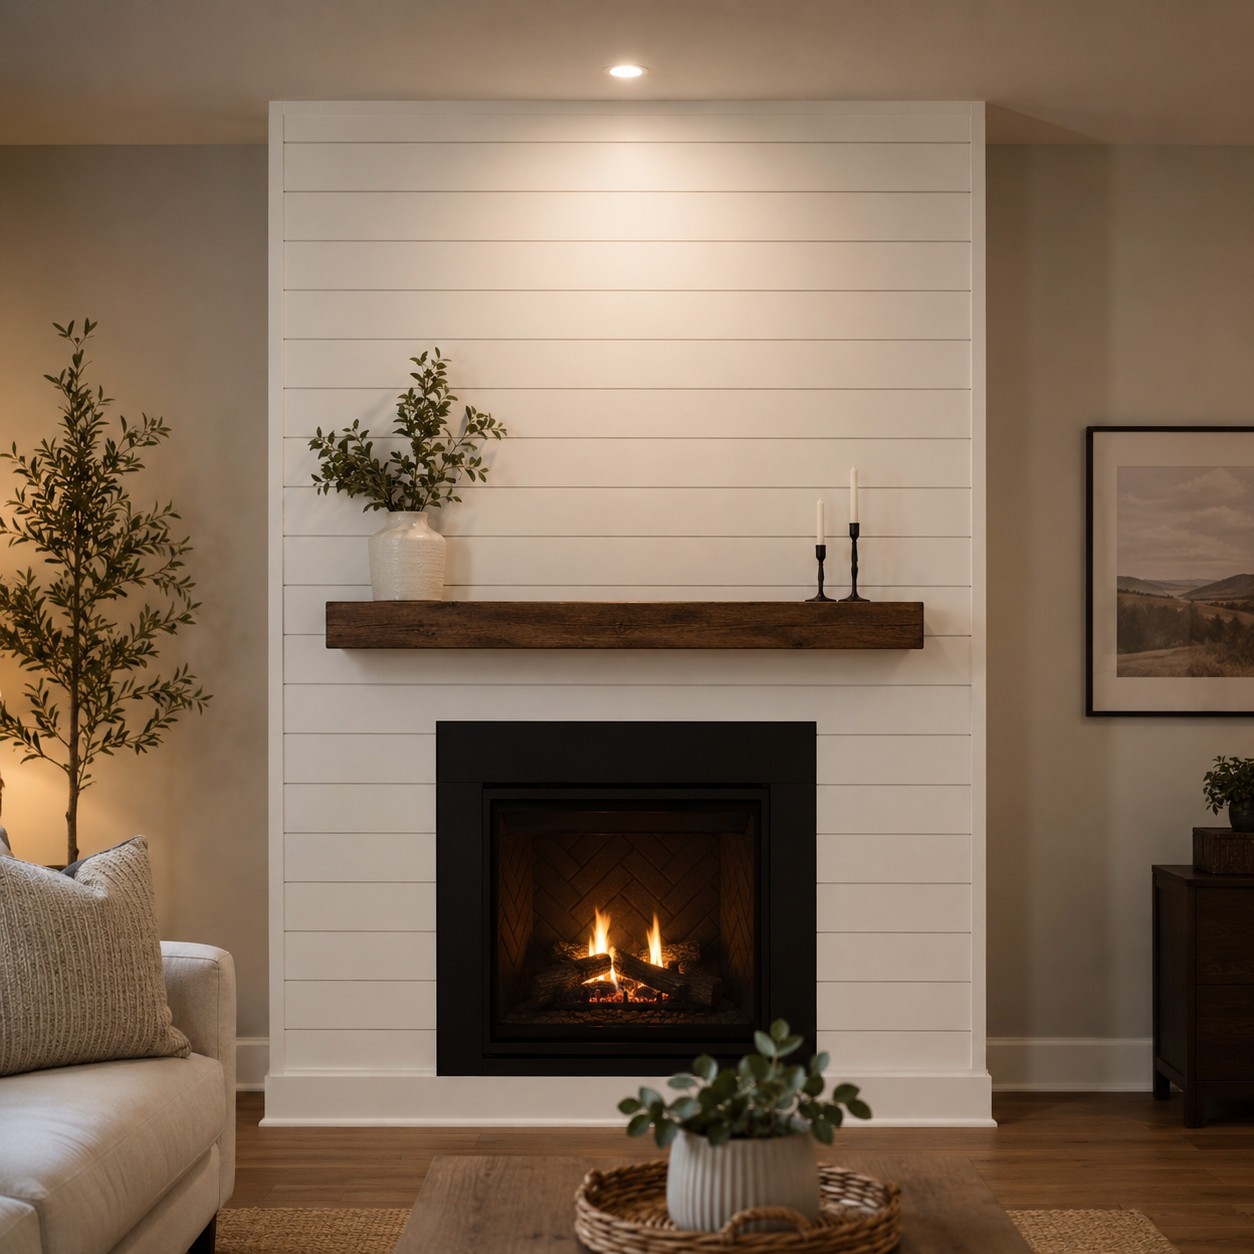
A word of caution on this one.
Shiplap and planked accent walls add real texture to a plain expanse — but this is also the treatment most likely to date badly and fastest. Nail boards to every hallway and you’ve traded one builder look for a trend that’ll read “2016” in a few years.
Use it once, with intent. A fireplace wall. A single feature wall in a room that can carry it. There are plenty of shiplap projects that stay tasteful precisely because they’re restrained.
Restraint is the whole game here. Design forums are full of regret over planking everything in sight.
16. Put wood beams on the ceiling
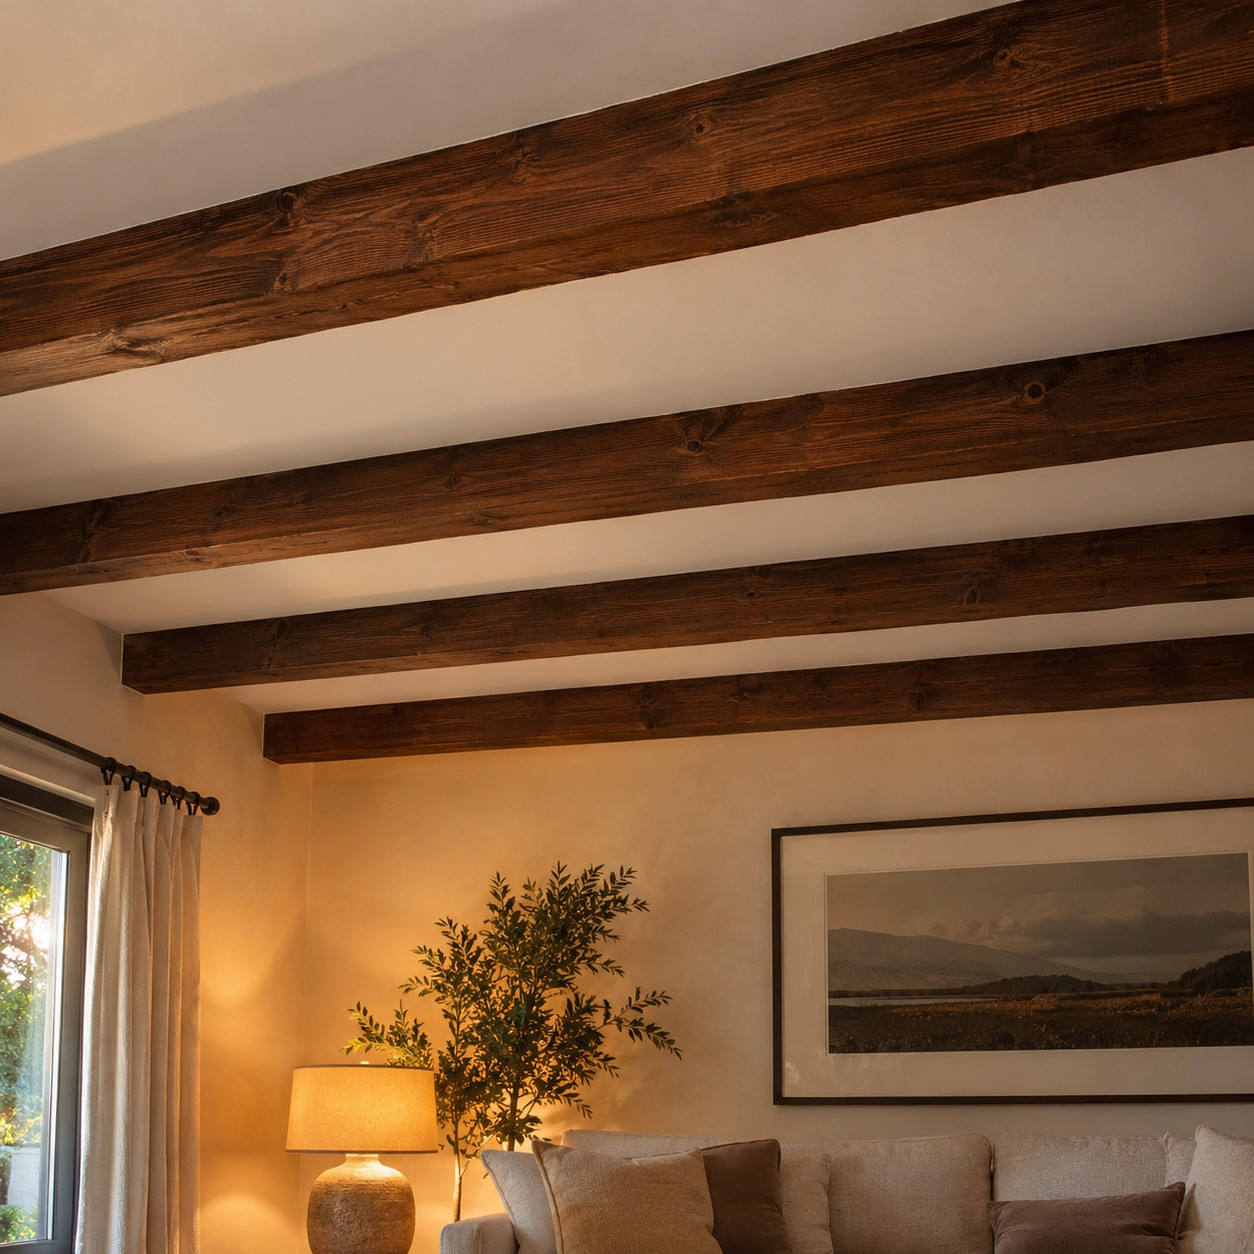
Beams pull the eye up and add a warmth a flat white ceiling can’t touch.
Stain them for rustic. Paint them for contemporary. Either way they give a room a spine.
The best part: faux box beams are hollow and lightweight, built from three boards mitered into a U and screwed to a cleat on the ceiling. The faux beam build looks like a structural timber and weighs almost nothing.
Effort: one weekend. Payoff: the room looks like it was framed by someone who cared.
17. Coffer or plank the ceiling
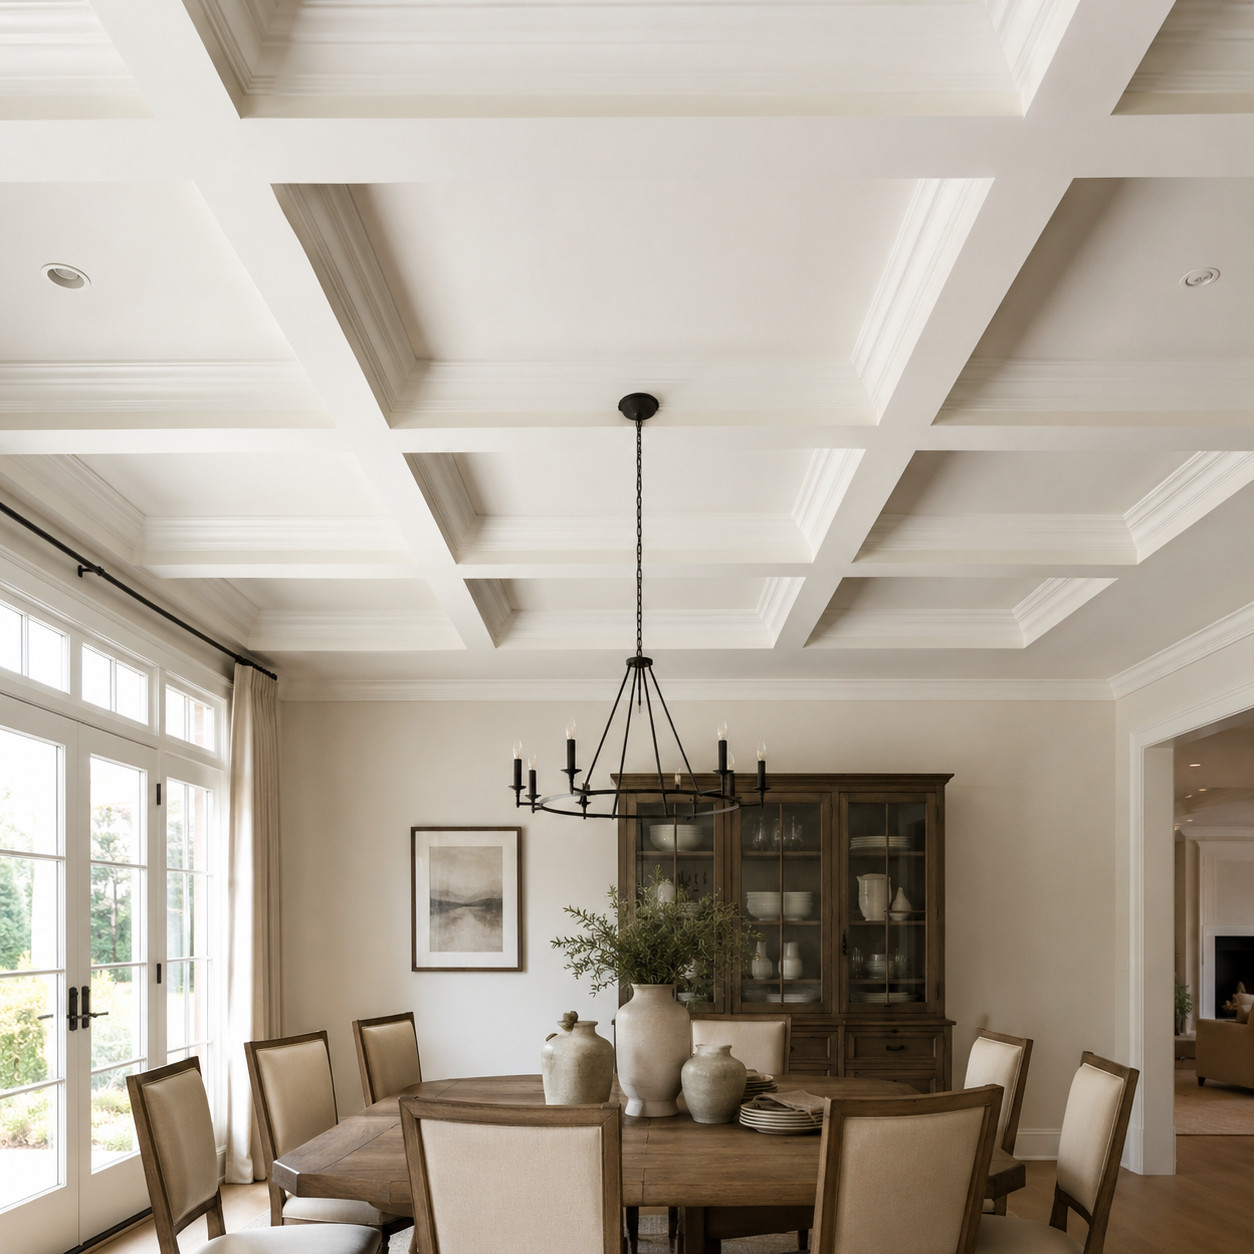
The ceiling is the fifth wall, and builders do the absolute least up there.
Which is exactly why any ceiling detail reads as custom on sight. Coffered millwork, planking, a run of beadboard — all of it signals a home someone invested in.
It’s also a proportion trick. Ceiling detail draws the eye up and makes a standard eight-foot tract ceiling feel taller than it is. Kitchen makeover guides lean on this constantly.
Coffers are ambitious. Planking is a weekend. Both punch far above their weight.
18. Upgrade hollow-core doors to solid-core
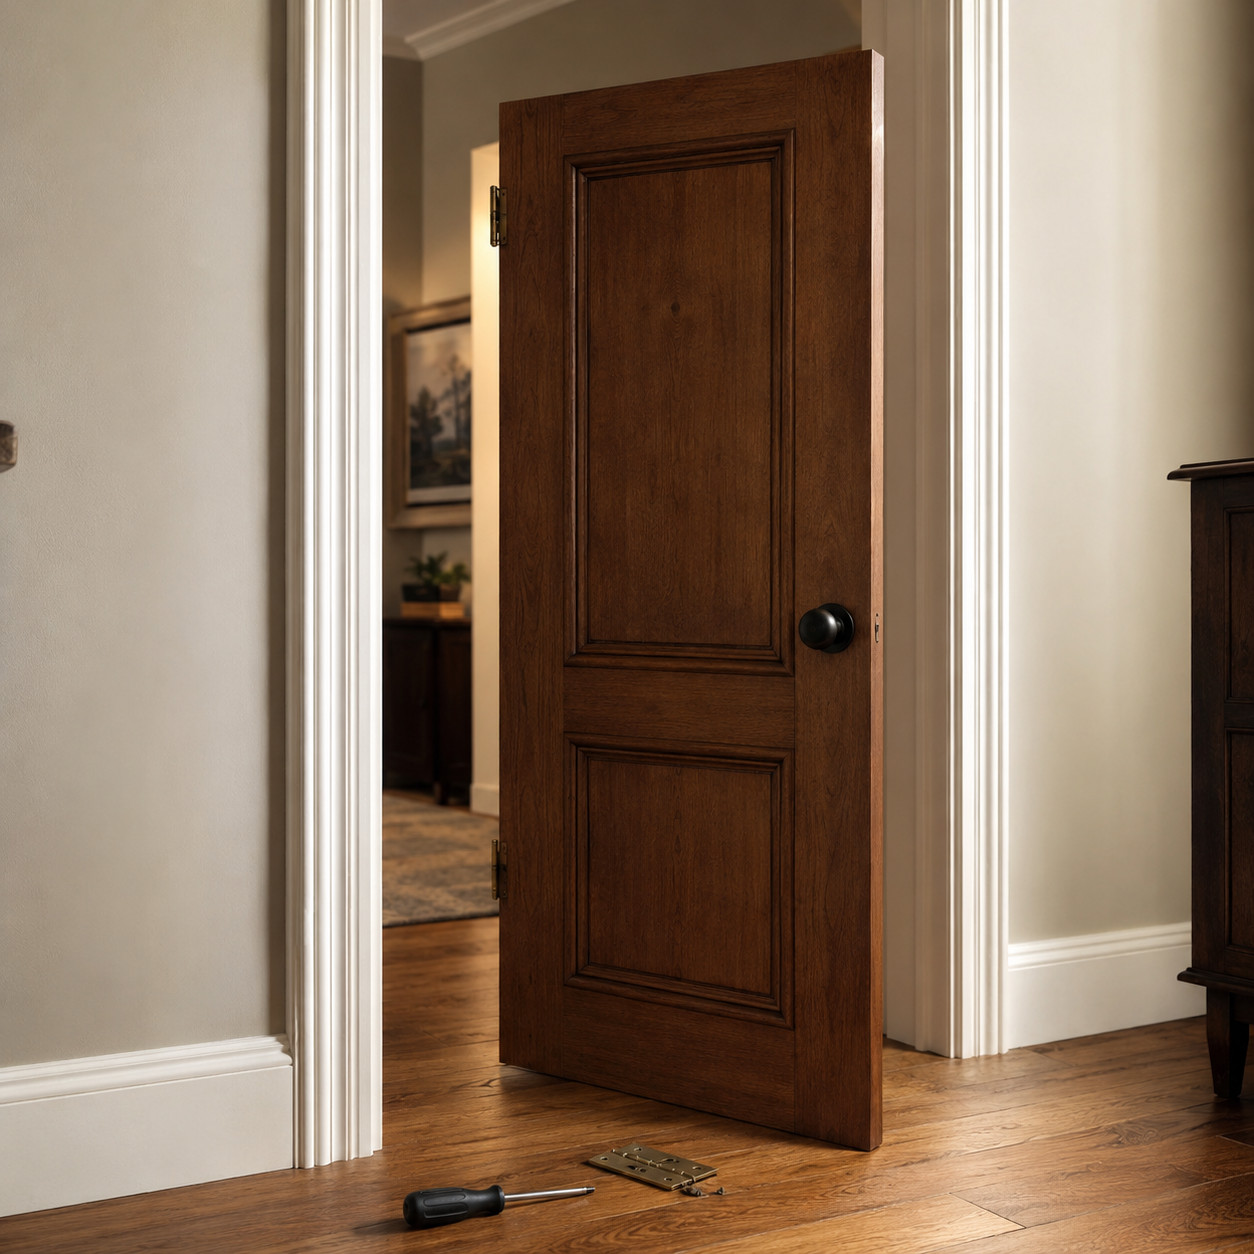
Knock on a builder door. That hollow thunk is the sound of a spec budget.
Solid-core doors add weight, quiet, and a satisfying heft when they close. They make a house feel built.
On a budget, fake it. Glue picture-frame molding onto the flat face of your existing doors to mimic raised panels, then paint. It won’t sound solid, but it’ll look the part for a fraction of the price. If you go all in, learn to build real frame-and-panel doors.
19. Paint the island a contrasting color
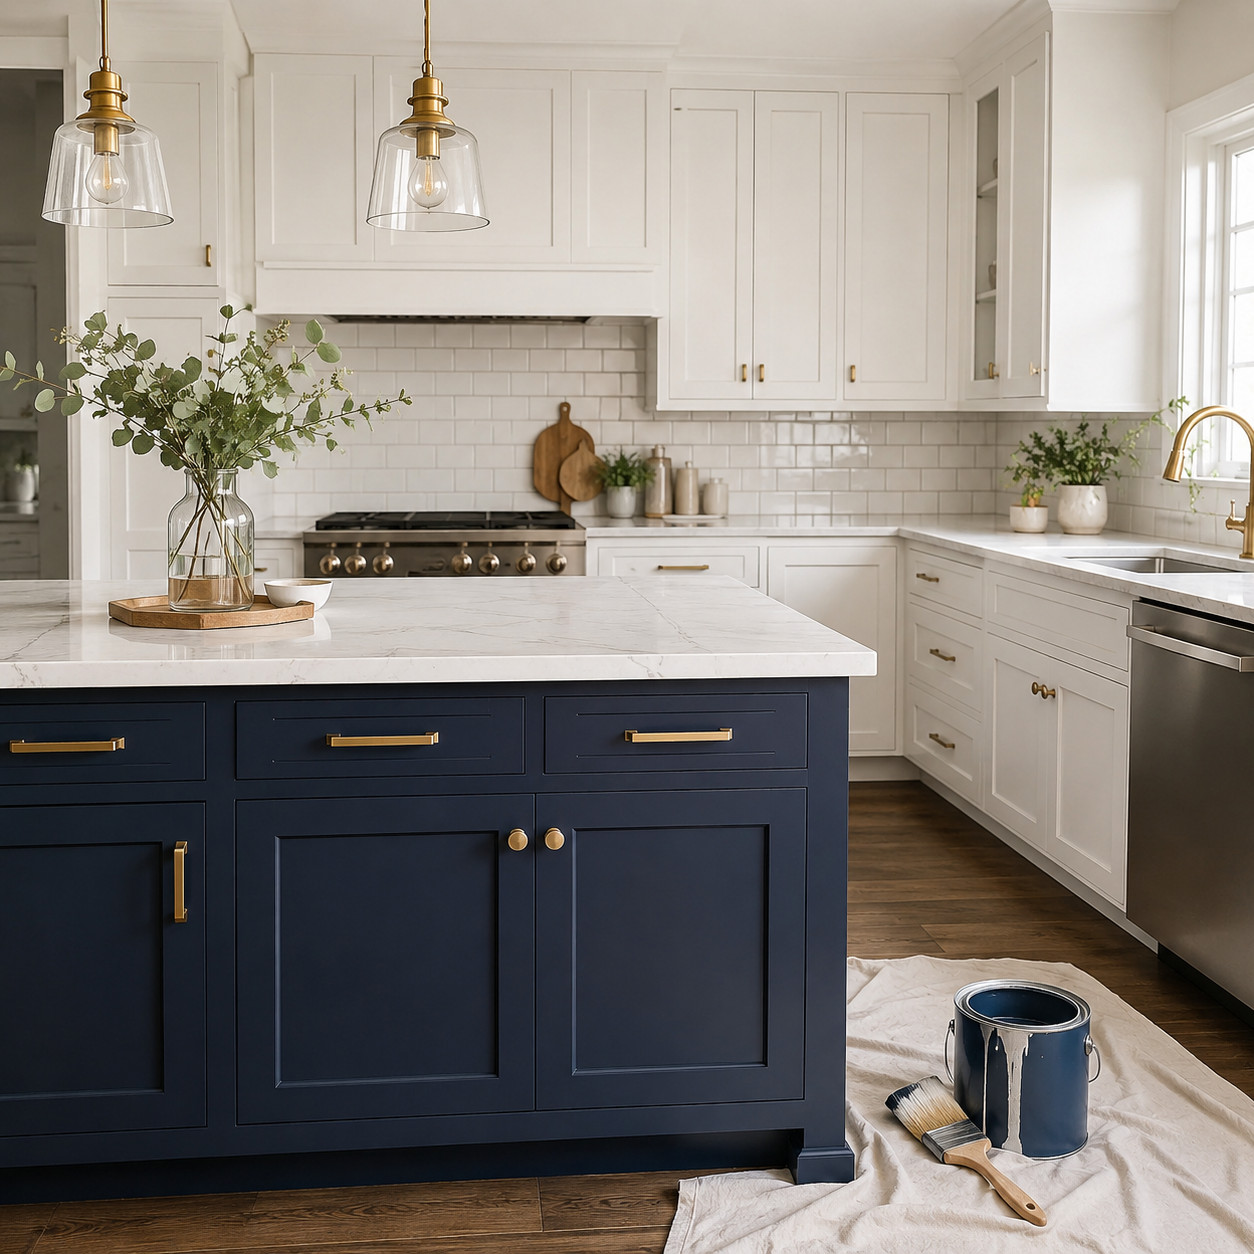
A two-tone kitchen is the fastest way to make stock cabinets look designed.
Perimeter in one color, island in another. It creates a focal point and anchors the space in an open floor plan.
Navy island against white perimeter. Green island against warm wood tones. The contrast trick costs a couple quarts of cabinet enamel and reads like a custom order.
Pick a color for the island you’d never dare use on all the cabinets. That’s the point.
20. Build or add a wood range hood
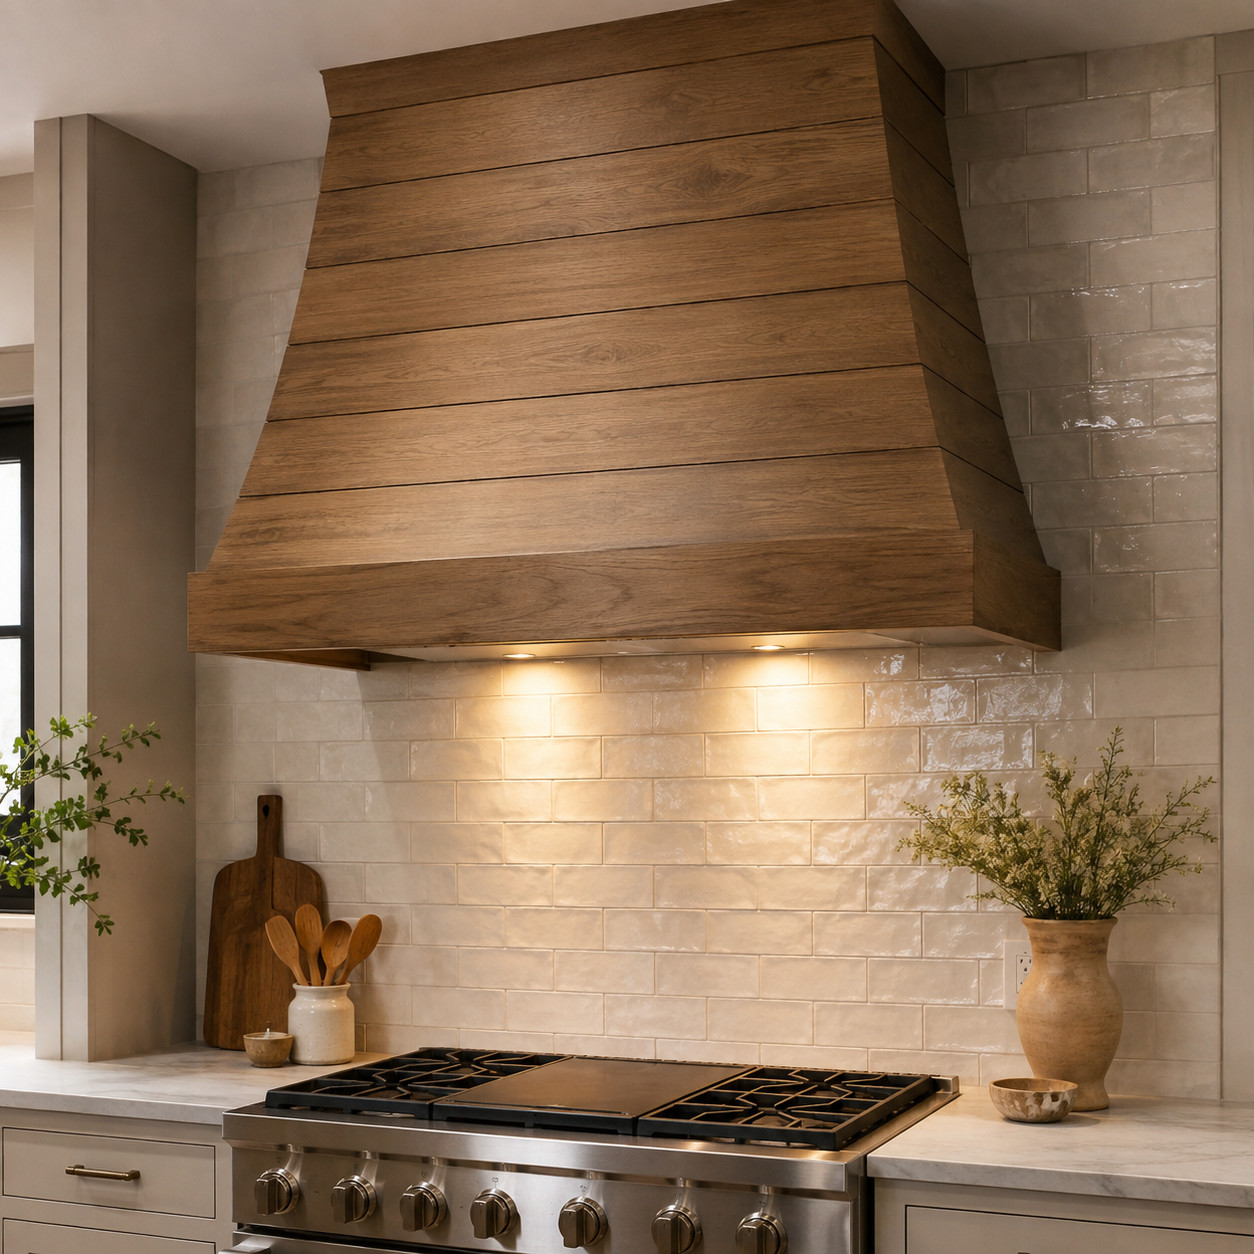
Nothing erases the microwave-over-the-range builder look faster than a real hood.
A custom wood or plaster hood becomes the anchor of the whole kitchen while hiding the blower behind it. And it’s a beloved woodworking project — DIY versions come together for well under a hundred dollars in lumber.
You build a plywood frame, wrap it in trim or shiplap, drop a liner and blower inside, and mount it over the range. Detailed build walkthroughs make it approachable for a confident beginner.
One weekend. The kitchen never looks stock again.
21. Extend the cabinets to the ceiling
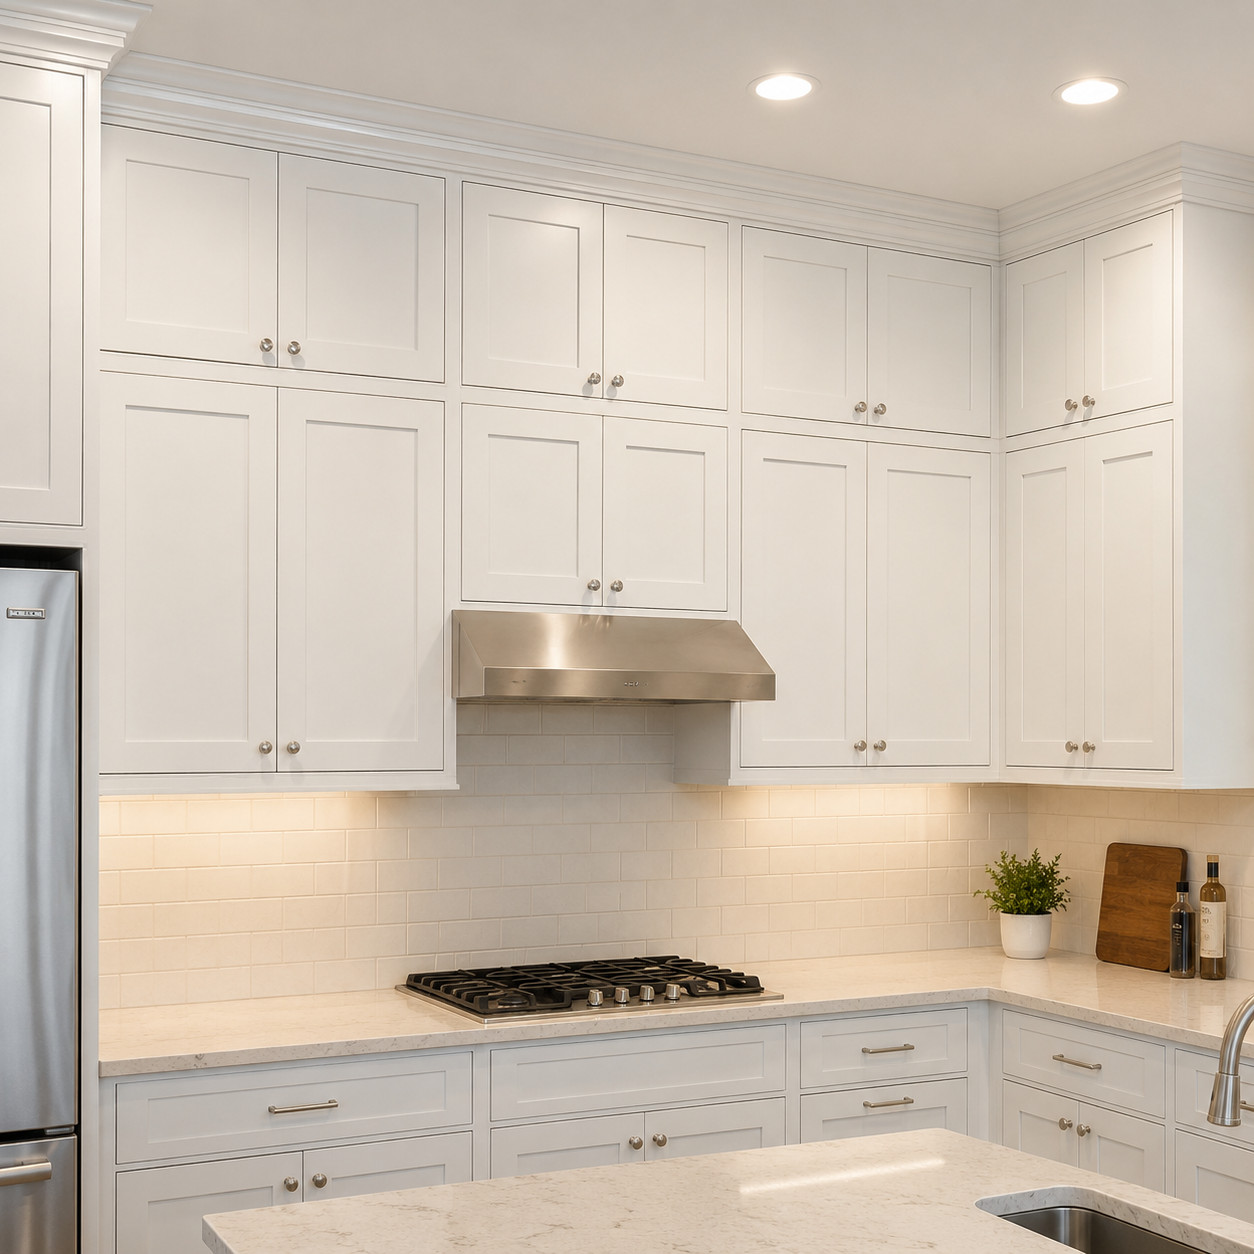
That dusty gap above the upper cabinets is a pure spec-home fingerprint.
Close it. You gain storage and the kitchen suddenly feels architecturally complete instead of cut off mid-thought.
Two paths: add a second row of stacked cabinets, or build a soffit and cap the tops with trim and crown so the run reads as full-height. Either way, that awkward dead space vanishes.
22. Replace the builder backsplash with real tile
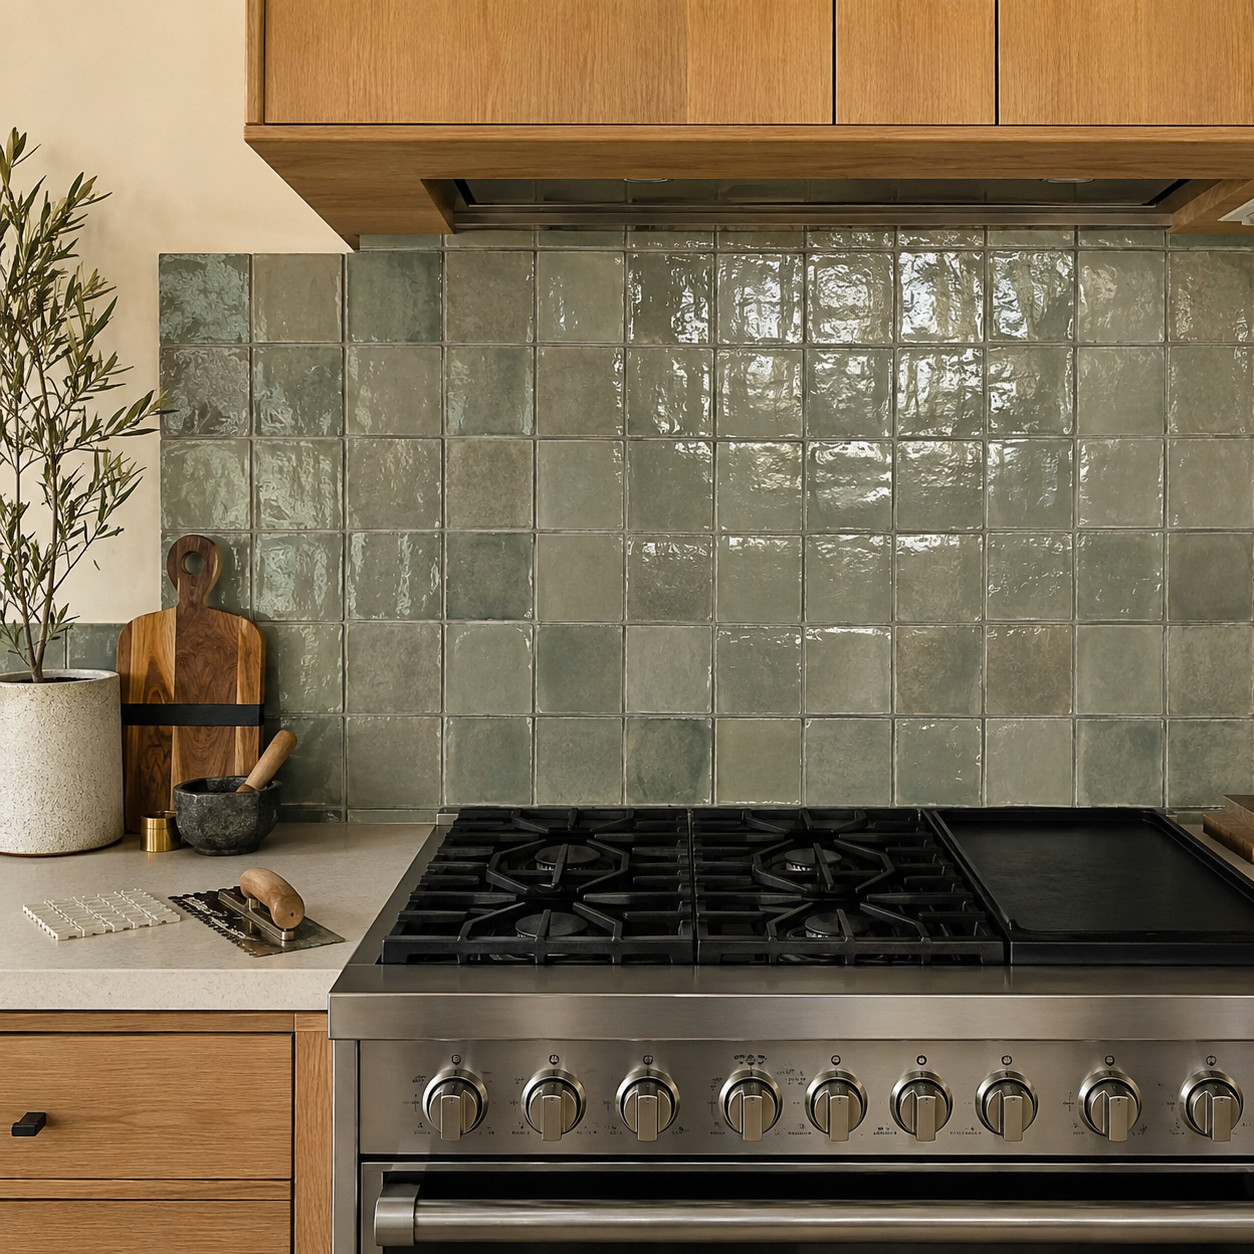
The standard four-inch splash sitting on the counter is a giveaway you can see from the doorway.
Rip it out. Run real tile — zellige, handmade, subway — all the way up to the underside of the uppers, and full-height behind the range.
Taking it to the ceiling removes the awkward transition line entirely and looks bespoke. Designers call full-height tile one of the biggest custom shifts you can make in a kitchen.
Handmade tile with its slight irregularities reads especially expensive. Machine-perfect tile reads builder.
23. Upgrade the countertops to stone or quartz
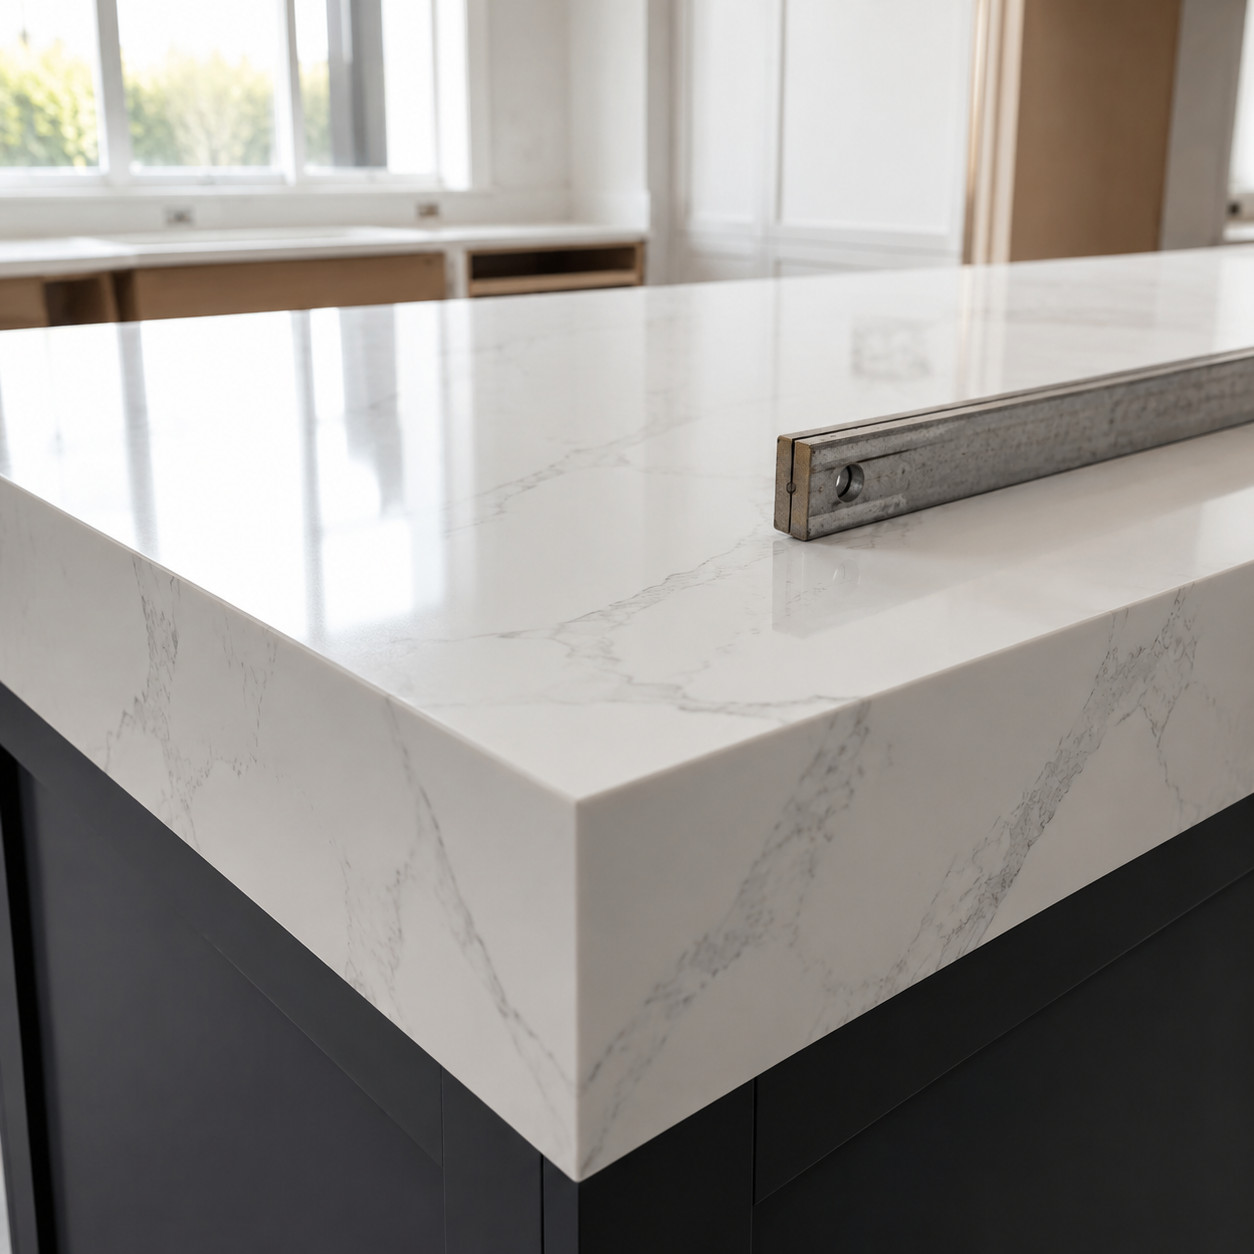
Countertops are one of the largest visual surfaces in the house, and one of the most impactful things you can change.
Builders default to laminate or a thin, cheap slab that chips at the edges and telegraphs “spec” the moment you set a glass down. Trading up to real stone changes the entire feel of a kitchen or bath.
Quartz is the workhorse choice. It’s engineered stone — ground quartz bound in resin — so it’s nonporous, never needs sealing, and shrugs off wine and coffee. Expect roughly $50 to $100 per square foot installed, depending on the brand and edge profile.
Granite runs a similar range and gives you natural stone with real geological variation, though it needs sealing once a year or so. Marble is the splurge — that soft, veined luxury look — but it’s porous, etches with lemon juice, and asks for babying. Butcher block is the budget custom move if you want warmth and can live with periodic oiling.
Watch the edge detail and the thickness. A mitered, built-up edge that reads two or three inches thick looks dramatically more custom than the standard skinny profile — and it’s a small upcharge for an outsized effect.
Countertops also hold their value at resale better than almost any other kitchen upgrade, which is why designer roundups keep them near the top of every list. It’s a bigger check than a can of paint. It’s also the one strangers compliment.
24. Tile the whole vanity wall
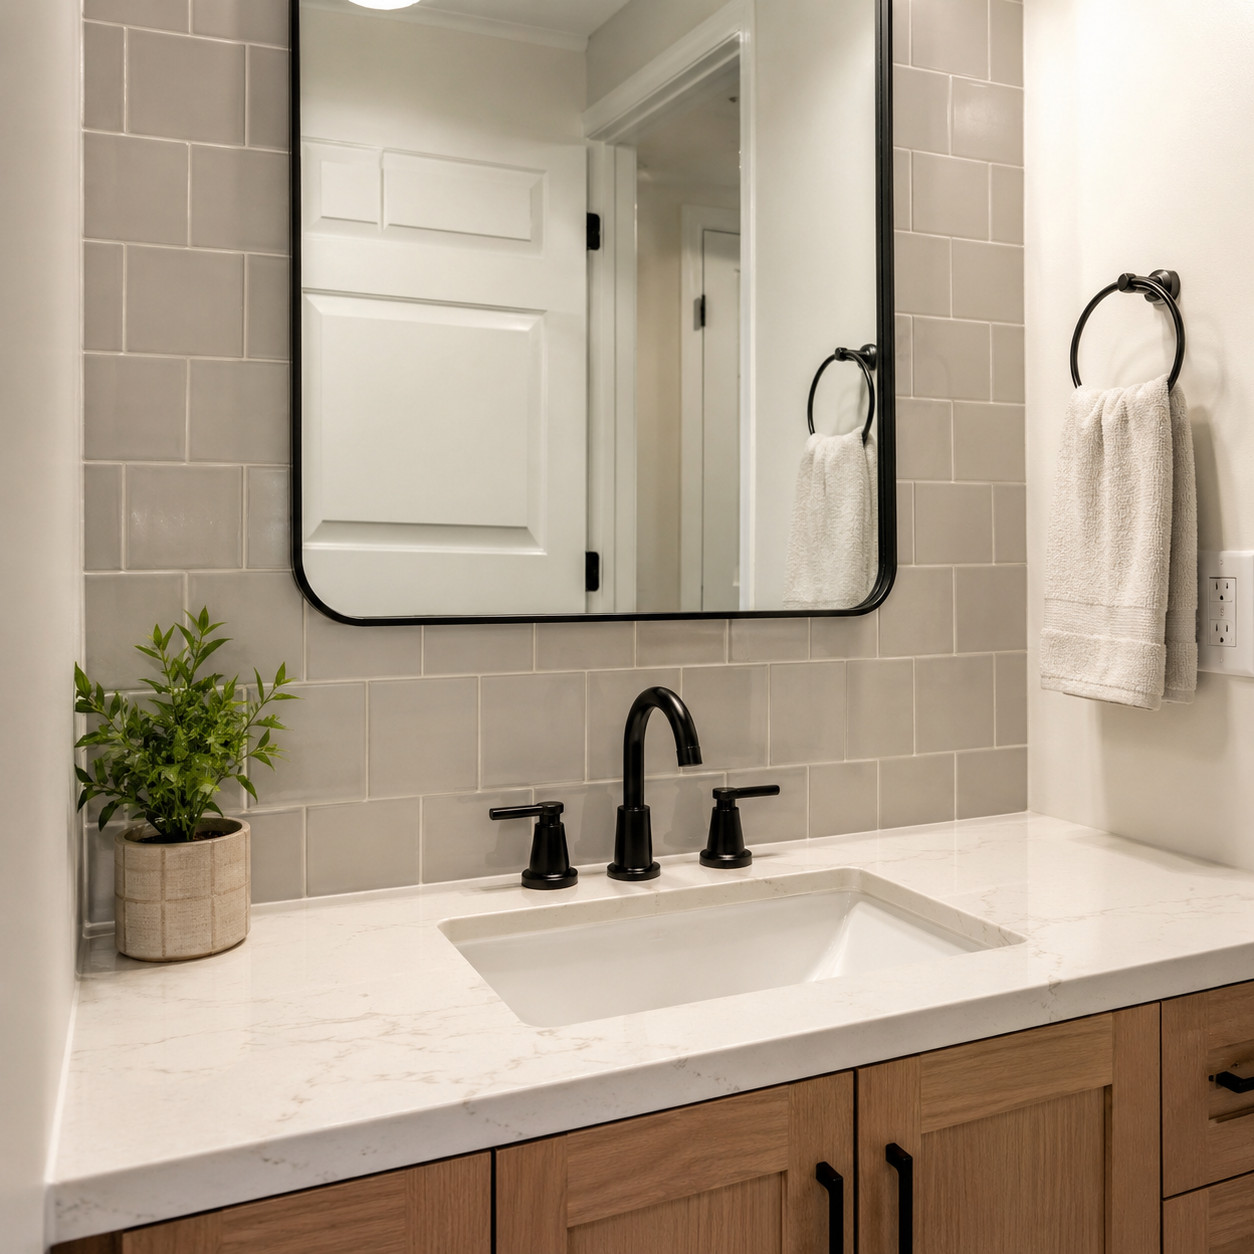
Those short slab side- and back-splashes on a bathroom vanity are a dead giveaway it came ready-made off a shelf.
Pop them off and tile the whole wall instead — ideally from the counter up to the mirror. It reads custom and it does something the builder splash never could.
It protects the drywall. Water splashing off a sink soaks into unprotected drywall over the years, and damp drywall behind a vanity is exactly where mold sets up shop, unseen, until it’s a real problem. Tile plus a proper waterproof grout and a bead of silicone at the counter seam gives you a moisture barrier that lasts.
Use a mold-resistant grout and seal it. Caulk — not grout — where the counter meets the wall, since that joint flexes. Do it right and you get the custom look plus a wall that won’t quietly rot behind your toothbrush cup. Vanity makeover guides walk through the full tear-off.
25. Rip out the carpet for hardwood or luxury vinyl plank
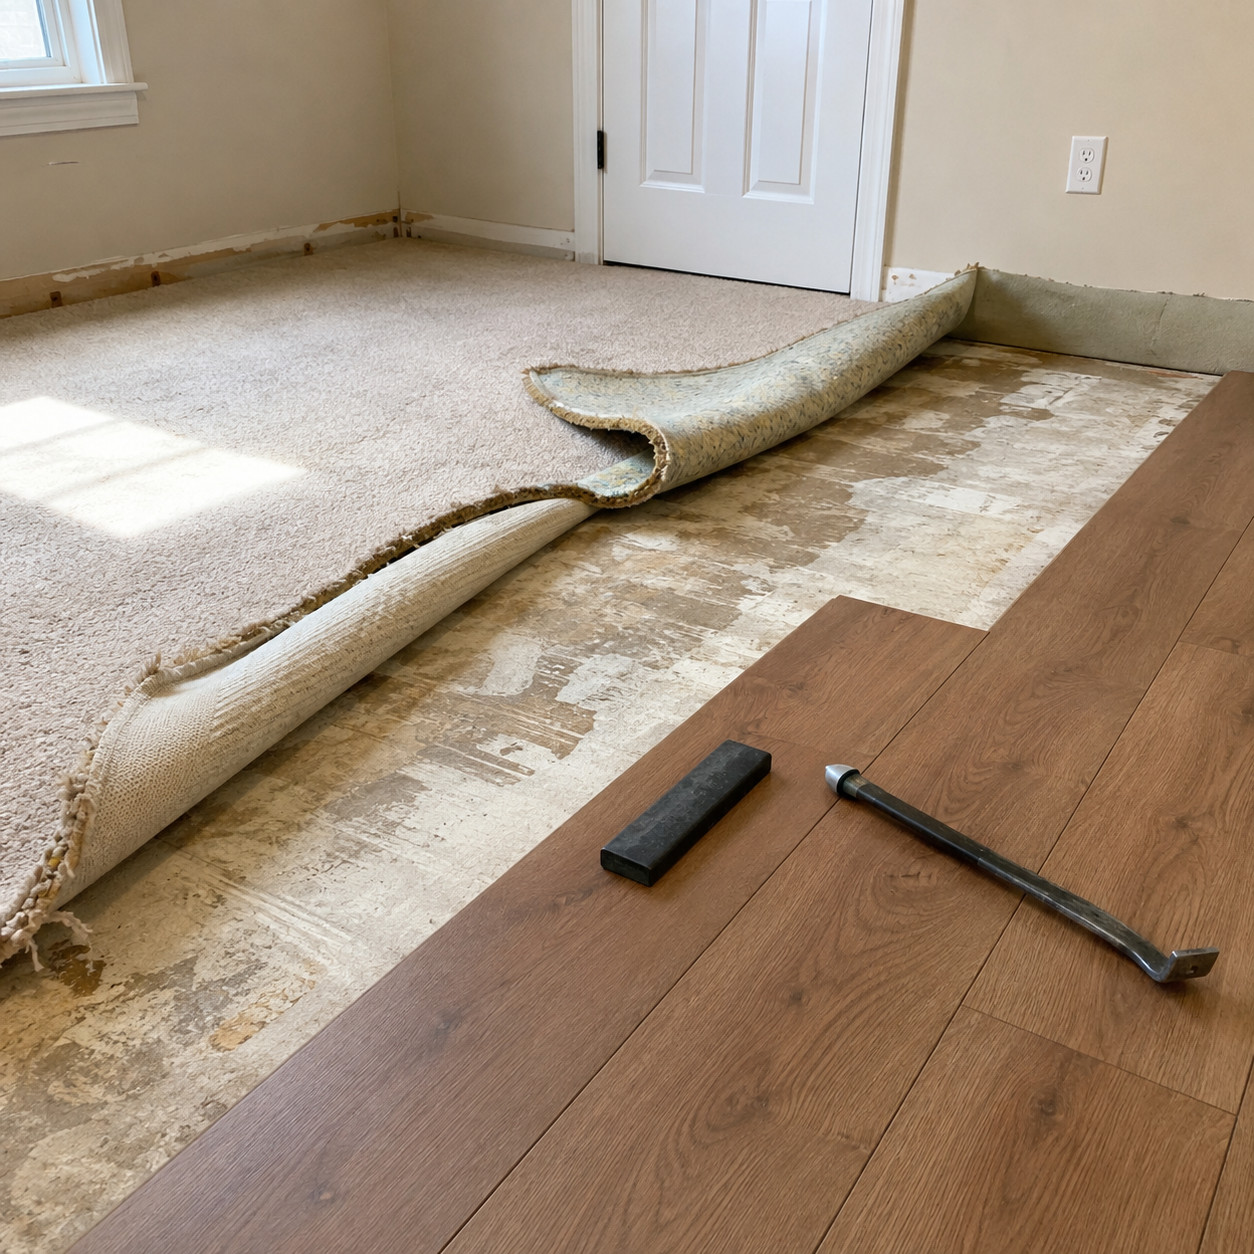
Cheap wall-to-wall carpet is where builders save the most money, so pulling it is one of the most transformative moves you can make.
You’ve got two strong options, and they serve different goals.
Real hardwood is the resale play. It reads timeless, refinishes for decades, and appraisers and buyers both reward it. It costs more and it’s a bigger install, but nothing else quite matches solid wood underfoot.
Luxury vinyl plank is the DIY-friendly play. It clicks together as a floating floor with no glue or nails, handles moisture in ways real wood won’t, and a motivated homeowner can do a whole room over a weekend. It won’t add value the way hardwood does, but it won’t hurt your resale either — and it buries that carpet stain forever.
Here’s the quick side-by-side.
| Hardwood | Vinyl Plank | |
|---|---|---|
| Resale value | Adds real value | Neutral |
| DIY-friendly | Harder install | Very easy |
| Moisture | Sensitive | Handles it well |
| Lifespan | Refinish for decades | 15-25 years |
| Cost | Higher | Budget-friendly |
Pick hardwood if you’re staying and want value. Pick LVP if you want a fast, affordable win. Either one beats the beige.
26. Make over the stair railing
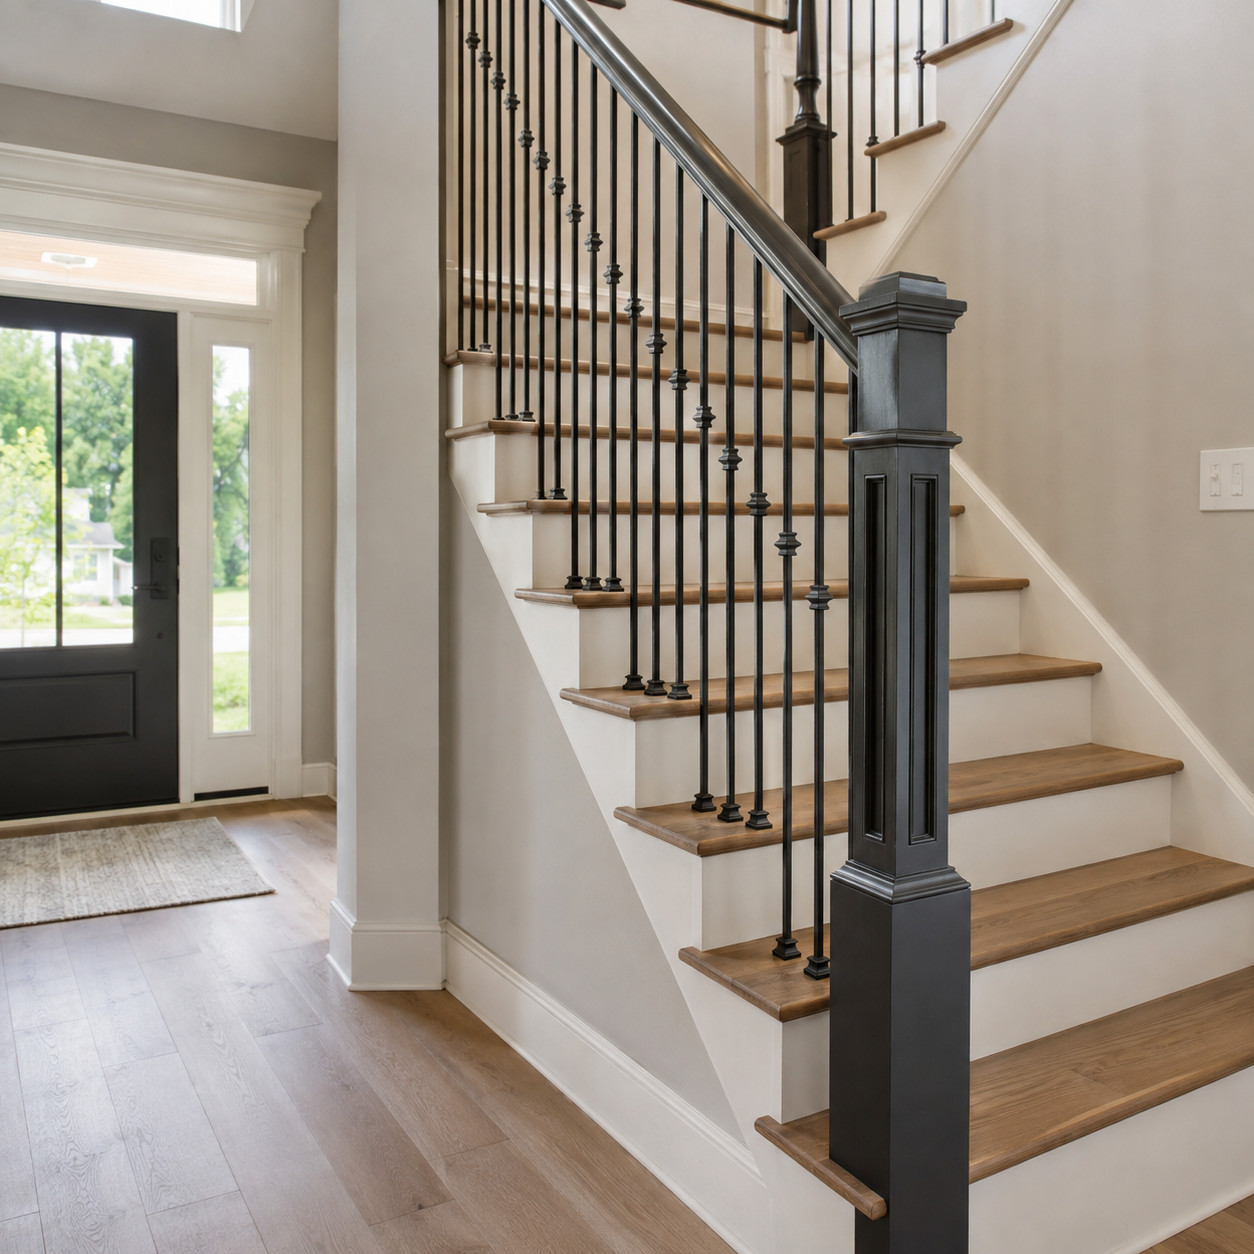
The staircase is the first thing guests see, and the builder version is pure basic.
Thin metal or turned spindles, a skinny handrail, a stock newel post. It all reads flimsy.
A contractor might bid around $900 to redo it. You can do it for a fraction by replacing just the balusters — swap the spindly ones for clean square iron or wood — and boxing out the existing newel with trim to make it substantial. Spindle-swap tutorials make it a very approachable weekend.
Big architectural payoff, right where everyone lands.
27. Wrap the fireplace in a custom surround and mantel
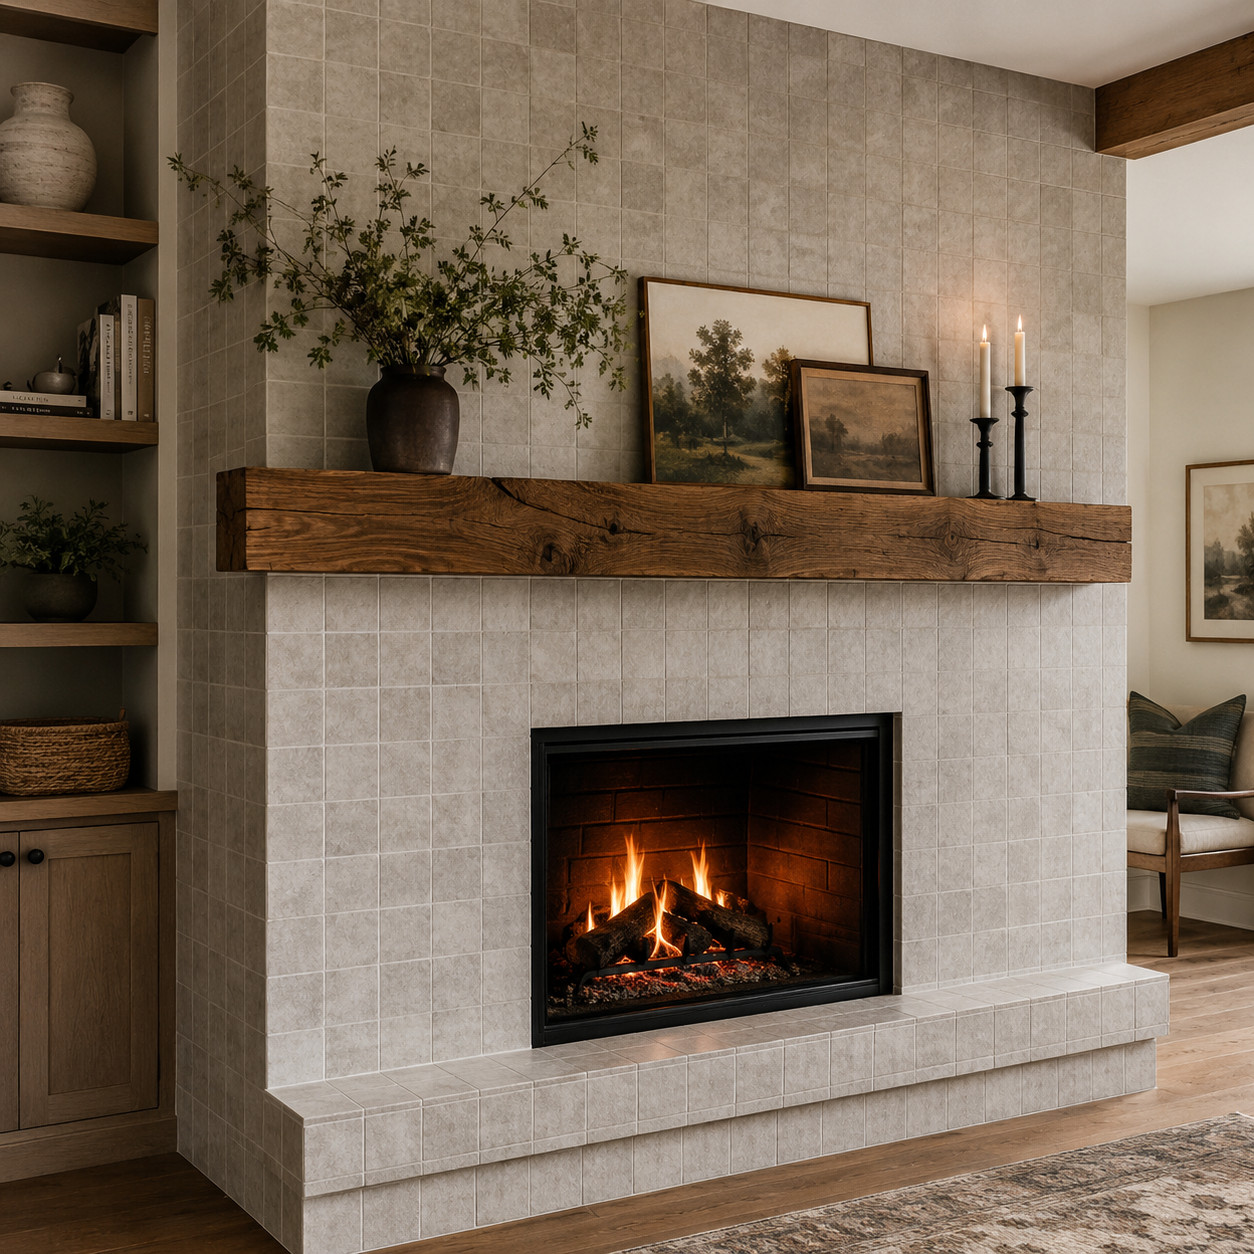
A stock builder fireplace is a blank drywall box with a firebox punched into it.
Wrap it. Millwork, tile, stone, and a substantial mantel turn that box into the anchor the whole room was missing.
A chunky beam mantel and a tiled surround gives you a sense of built-in permanence — the room finally has a center of gravity. Some builds even integrate storage, like a custom entertainment center with the fireplace built in.
Whatever you do, get that firebox out of the bare drywall.
28. Add built-in bookcases and cabinetry
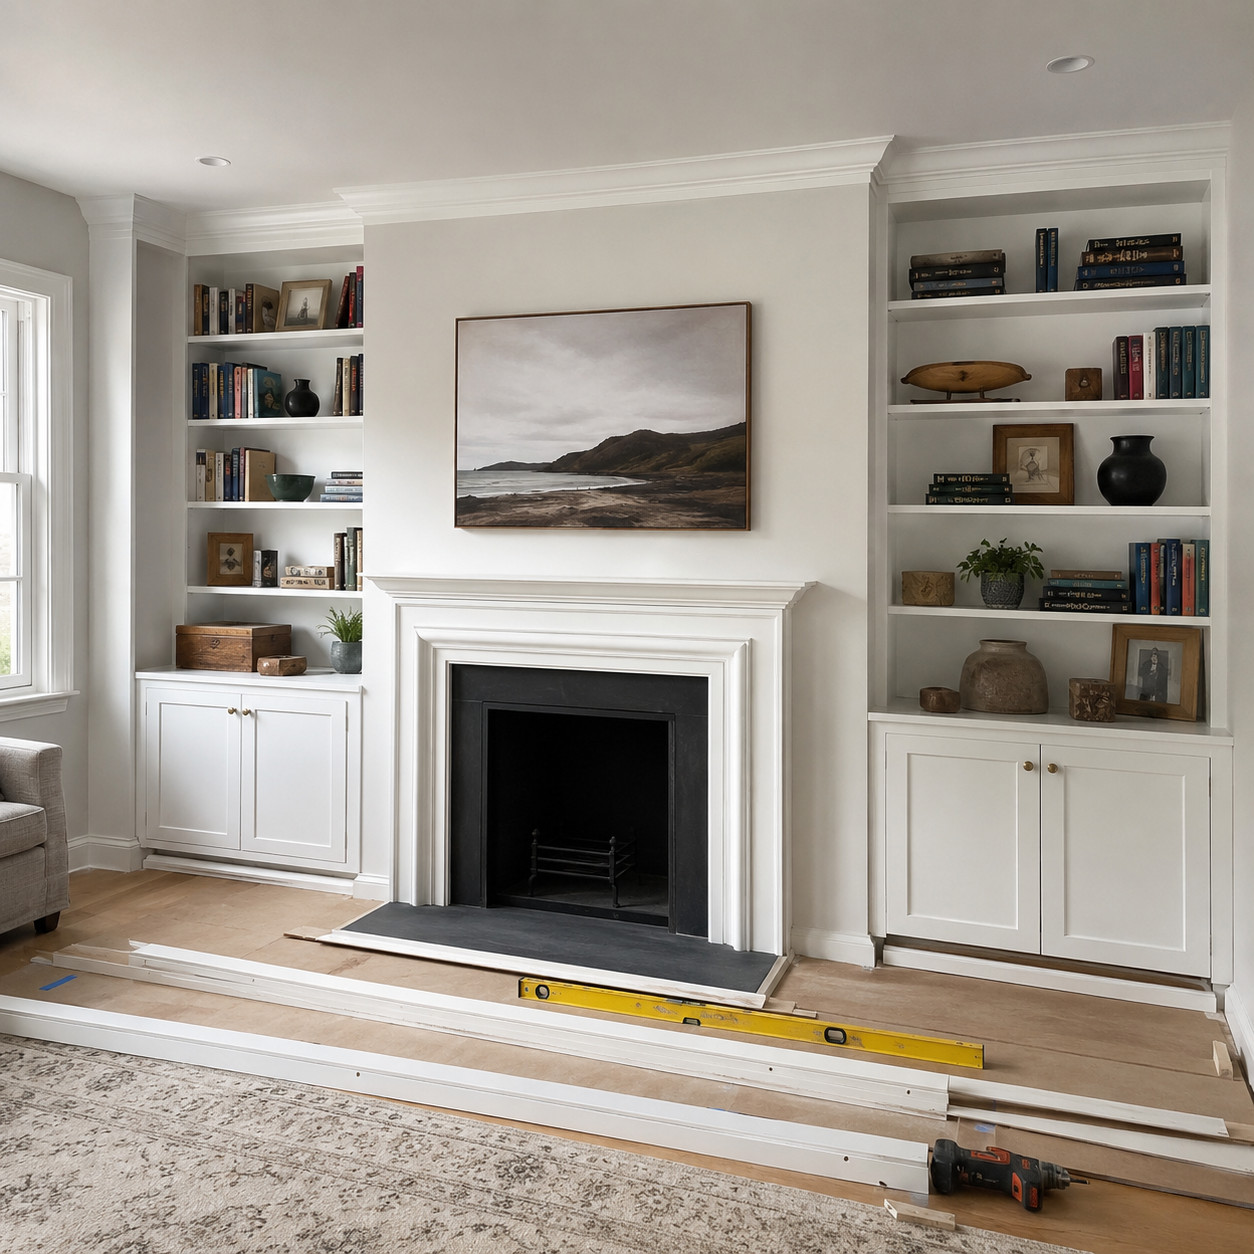
Nothing says “custom home” like built-ins flanking a fireplace or filling an awkward nook.
They add storage, craftsmanship, and that architected feel a house full of freestanding furniture never quite reaches.
The trick most people don’t know: you can fake it with stock base cabinets as the foundation, then add shelving, trim, and a painted finish on top so the whole thing reads fully bespoke. Start with the custom cabinet basics and build up from there.
Scribe them tight to the wall. That seamless fit is what sells the built-in.
29. Dress the windows with real treatments
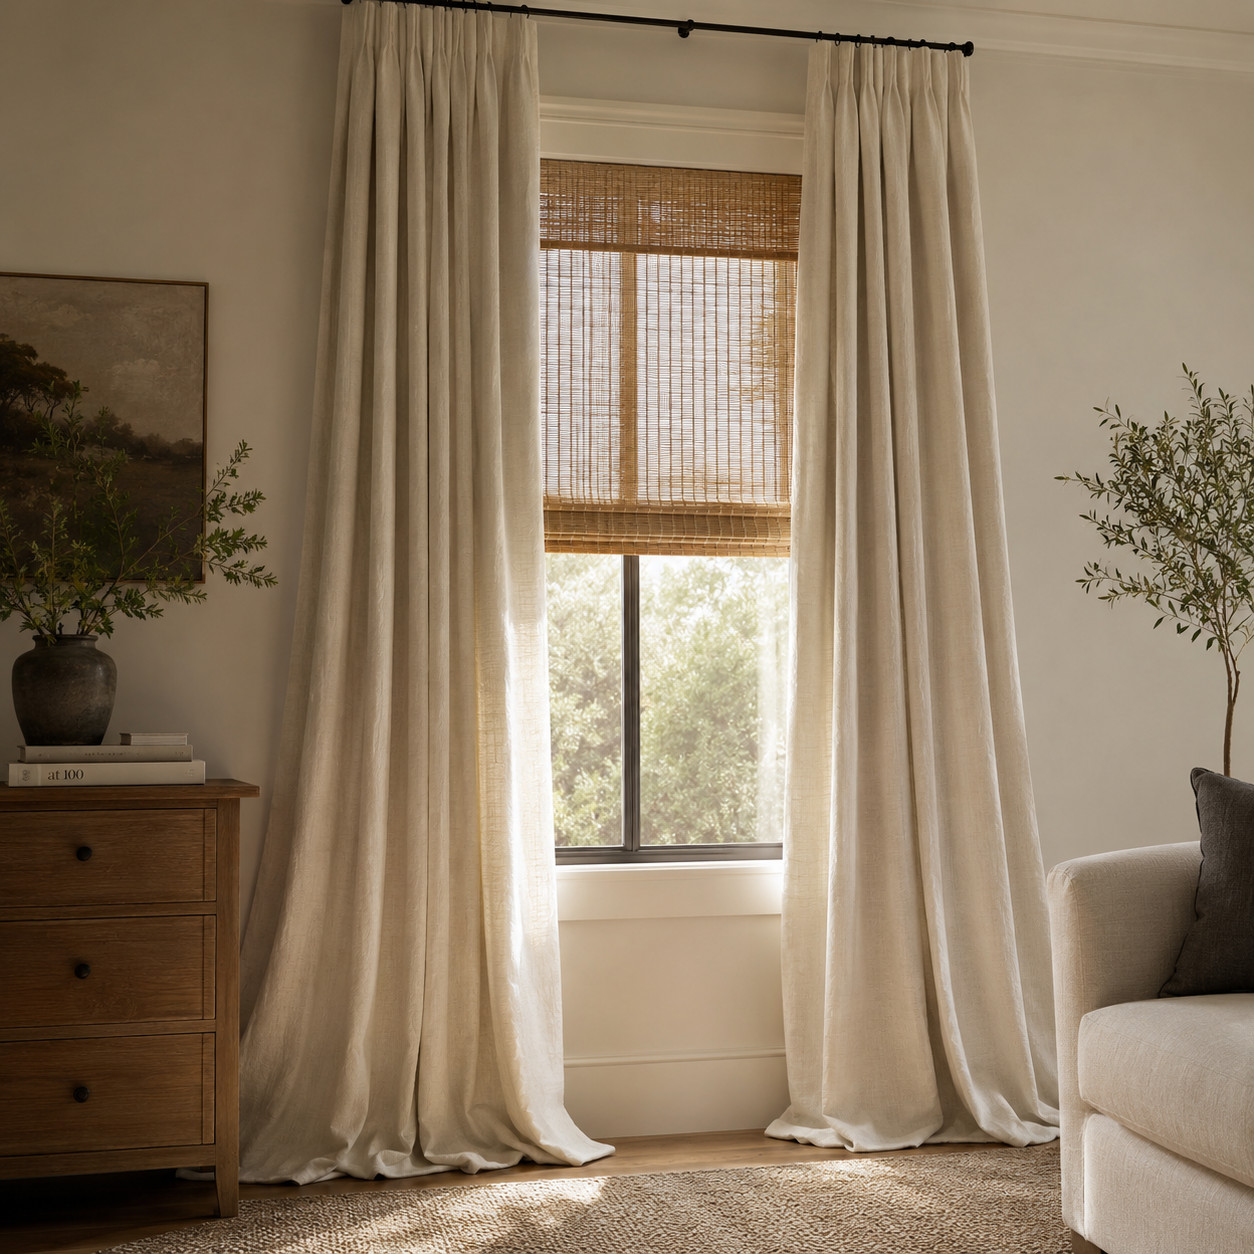
Naked windows or cheap two-inch plastic blinds are an instant tell.
Real treatments fix it fast. Floor-length drapes hung high and wide add height and softness. Woven-wood shades add warmth and texture. Plantation shutters add a tailored, permanent look.
The height trick matters most: mount the rod near the ceiling, not just above the frame, and let the panels break at the floor. It makes the window — and the whole wall — feel taller. Layering treatments gives you that finished, custom look for a fraction of designer prices.
30. Upgrade the front door
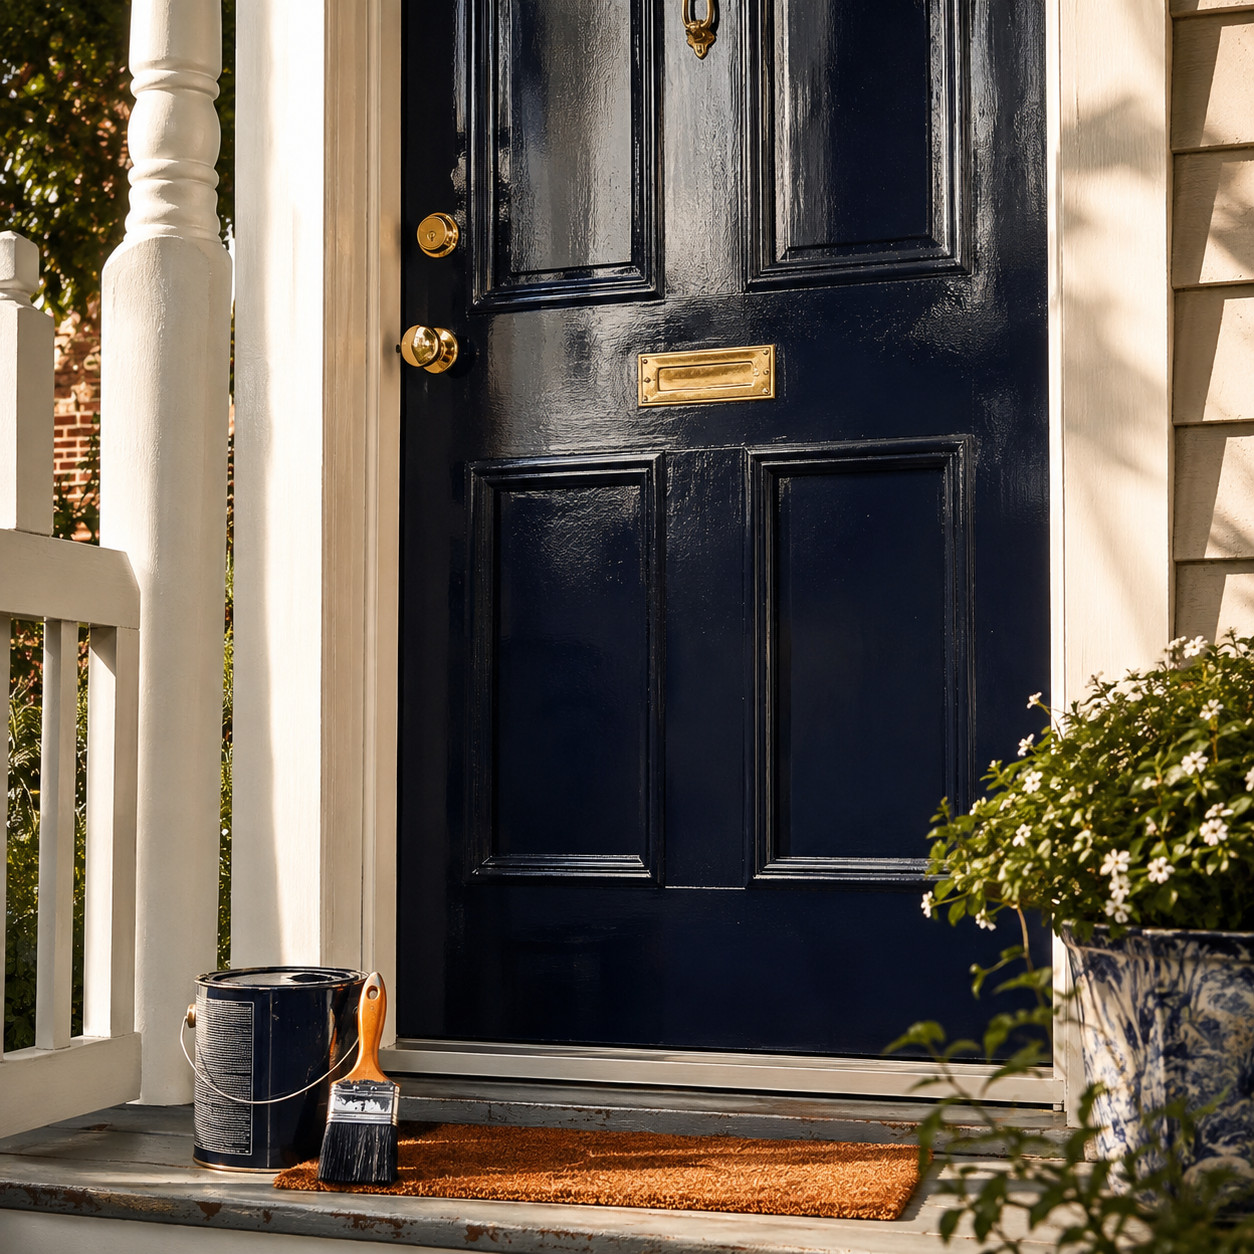
Designers zero in on the front door first, because it sets the tone for everything behind it.
The cheapest version costs almost nothing: a glossy coat of paint in a rich color. A Zillow analysis found that black, gray, or navy front doors can fetch meaningfully more at sale than the builder default — a nearly free move that pays you back.
If the door itself is a flat, hollow builder slab, replacing it is a bigger job with a real return. A solid fiberglass or wood entry door with some glass or panel detail changes the whole face of the house, and entry-door replacement consistently posts one of the strongest returns on investment in remodeling.
Get it hung right. A door that binds, sticks, or shows daylight around the frame undoes the whole effect — professional installation earns its cost here. Entry-door specs vary a lot, so match the material to your climate.
Paint first. Replace when the budget allows.
31. Replace the flat garage door
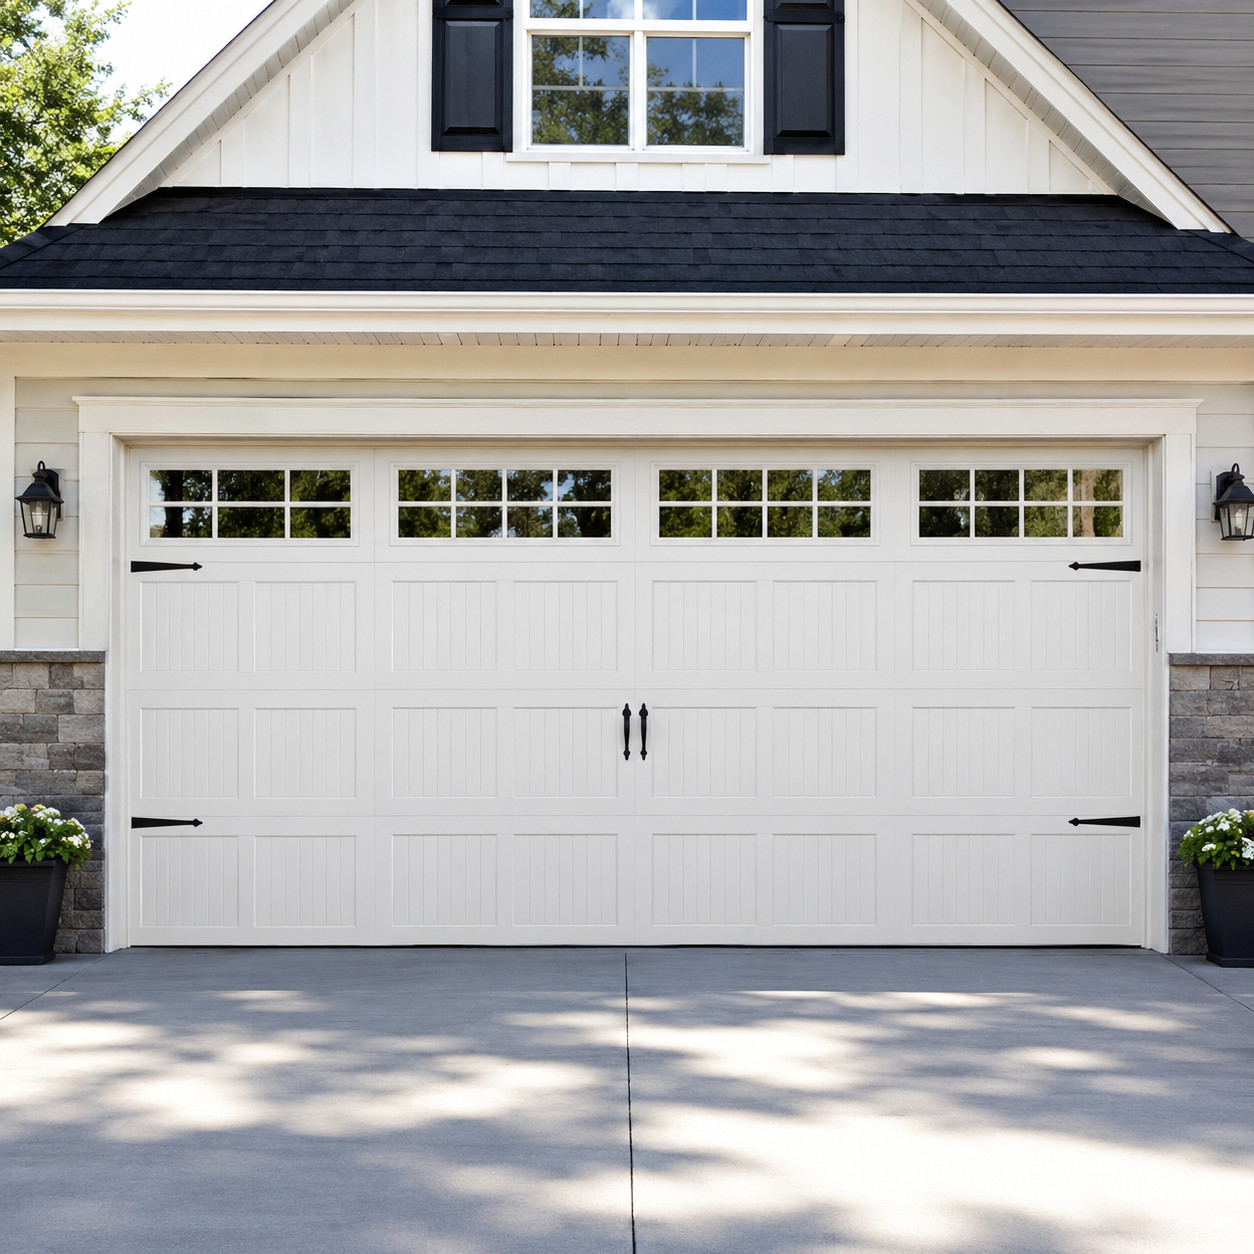
On a lot of homes, the garage door is 30 to 40 percent of the entire front facade.
Think about that. A flat, ribbed builder panel is undercutting everything else you do to the exterior, and it’s usually the single biggest visible surface out front.
Carriage-style panels or a row of window inserts across the top transform it. Expect somewhere in the range of $1,000 to $4,000 installed for a quality insulated door, depending on style and size — and garage-door replacement is one of the best-documented curb-appeal investments there is.
The 2025 Cost vs. Value Report puts garage-door replacement near the very top of projects that recoup their cost at resale, year after year. Insulation is a bonus — a warmer garage and quieter operation. Remodeling guides rank it a top-tier upgrade for a reason.
It’s the improvement everyone driving by actually sees.
32. Go black on the exterior windows
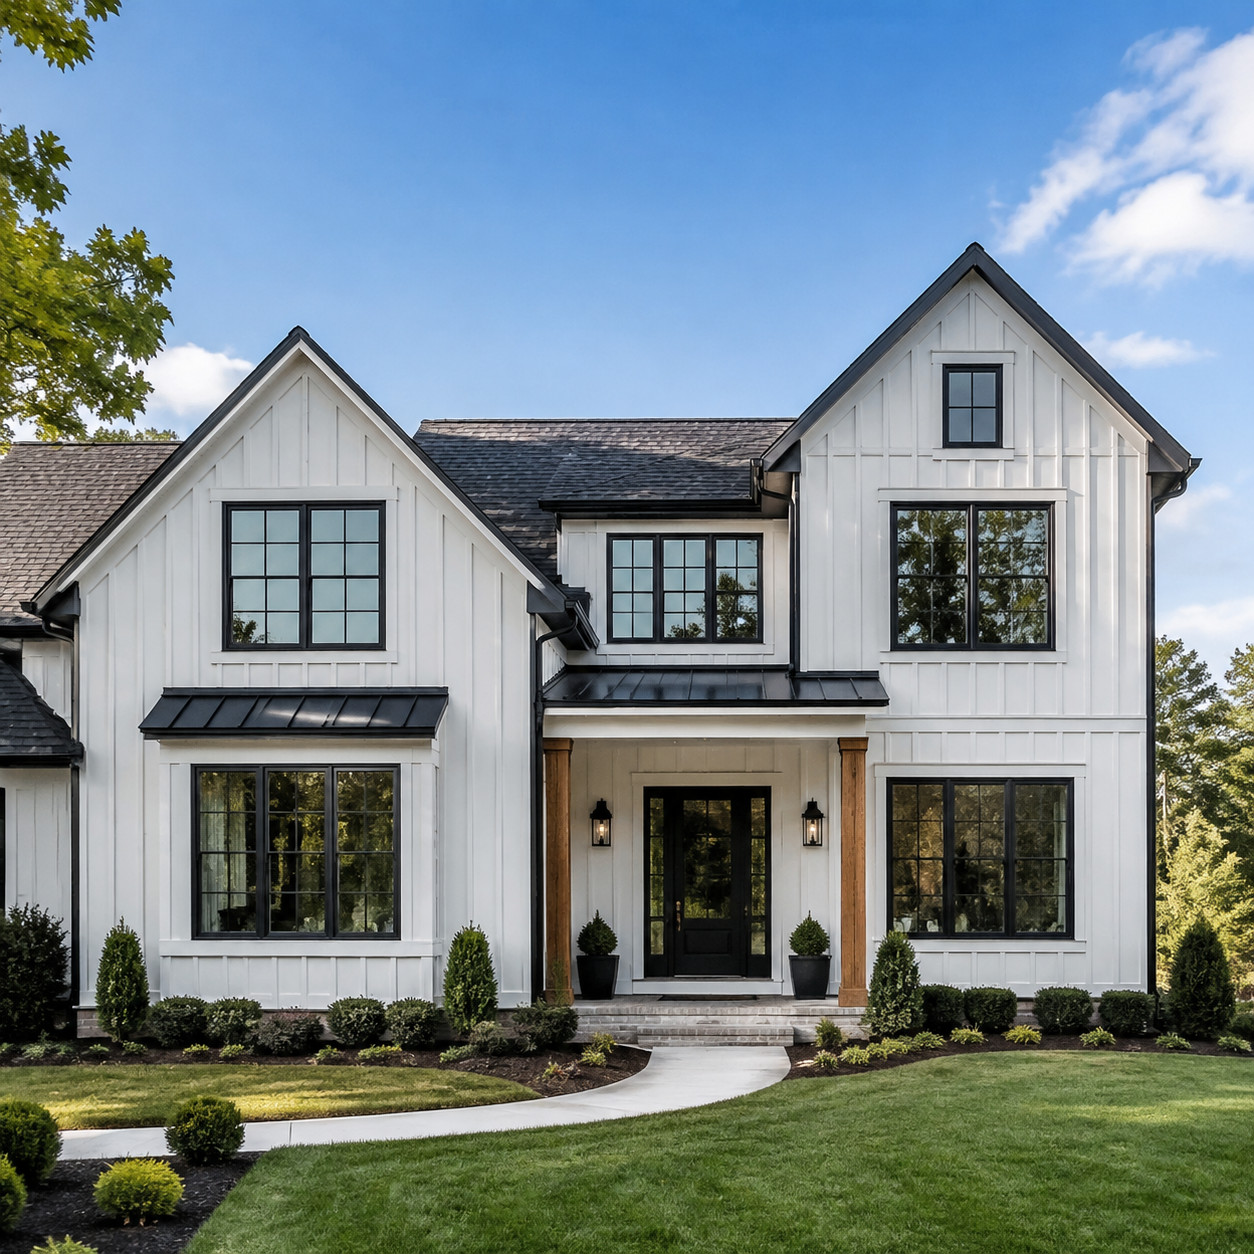
Black window sashes modernize a plain tract facade dramatically, and the cost surprises people.
One remodeler found black vinyl ran only about $125 more per window than white — roughly $1,000 for a whole house — for a curb-appeal jump that reads far more expensive than that.
The contrast is what does it. Dark frames against light siding sharpen the whole elevation and make the house look intentional, almost architect-drawn. On the inside, black sashes frame the view like a picture.
If you’re already replacing windows, spec the black exterior — window replacement is a high-value upgrade with real energy savings on older single-pane units, so you’re gaining efficiency and looks in one move. If you’re not ready to replace, exterior-grade paint or a factory-finish trim can approximate the look for less. Before-and-afters make the case better than any pitch.
33. Add a stone or brick accent (fireplace or exterior)
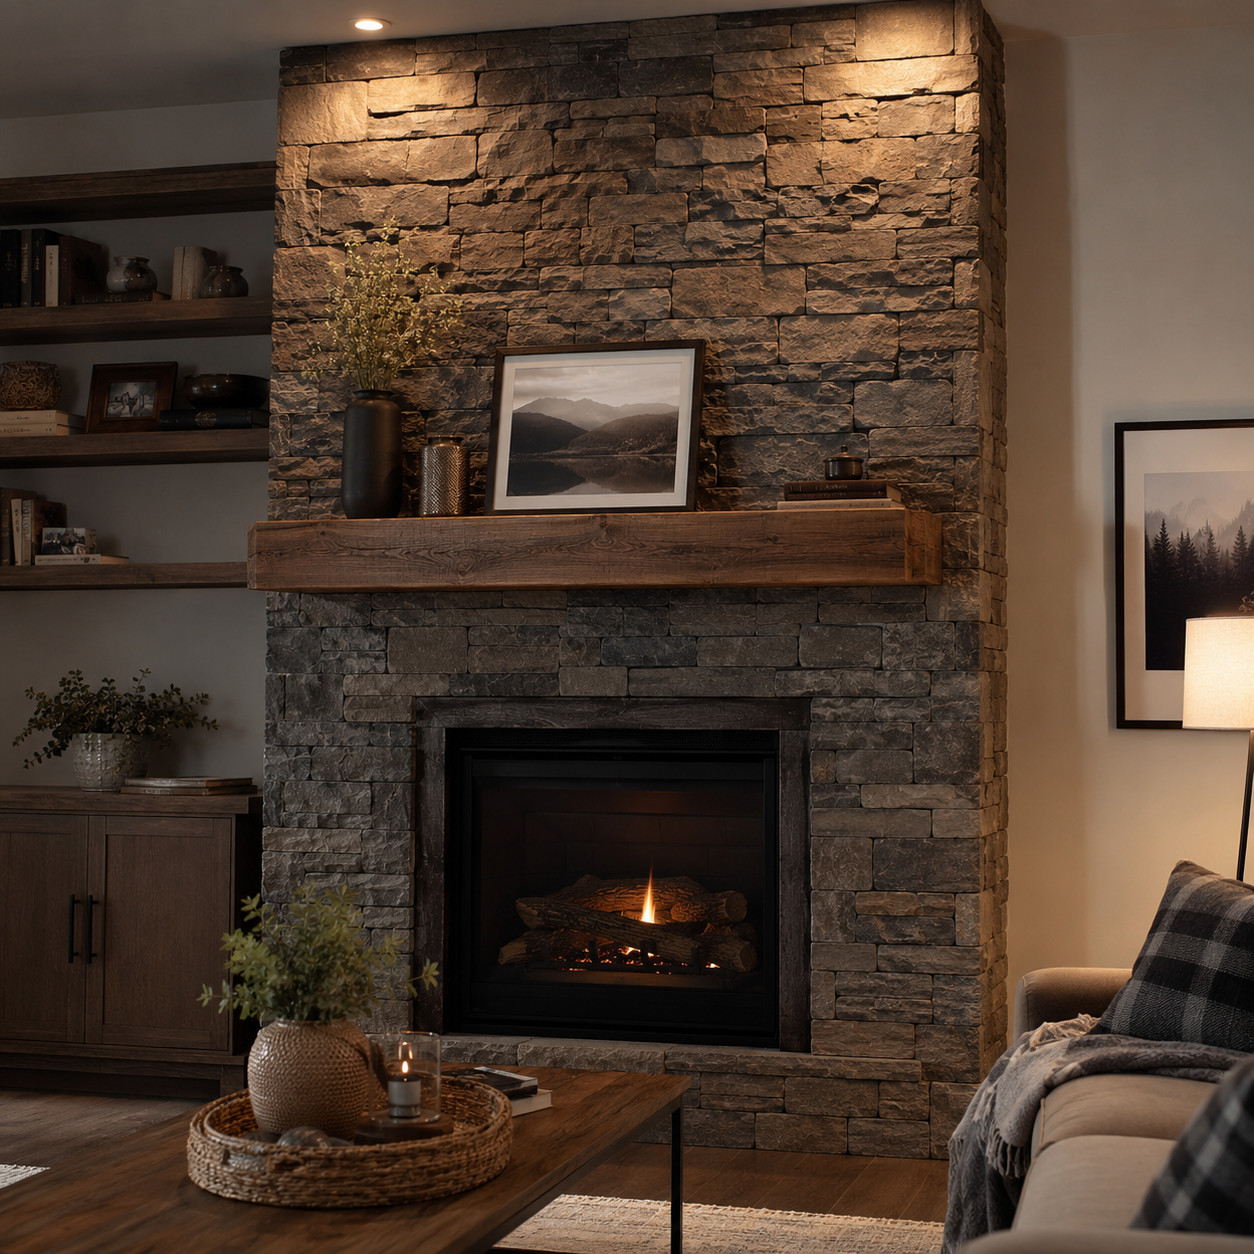
Custom homes lean on material richness, and nothing delivers it like real stone or brick.
Stacked stone up a fireplace. Limewashed brick on an exterior. A stone veneer accent framing the entry. It adds a texture and permanence that paint and trim alone can’t reach.
Veneer stone is lighter and more DIY-friendly than full masonry, though the fussy cuts and mortar work push most people toward a pro. A stone fireplace with a timber mantel shows how far the effect goes.
It’s the last layer — the one that makes a spec house look like it grew somewhere instead of getting stamped out on a plat map. Custom was never about money. It was always about the details a builder was in too much of a hurry to add.