
We’ve measured and cut the wood for our project; glued, attached, and assembled the wood according to the project plans; and it’s now time to prepare the wood for our chosen finish. We all know this drill and the progression of steps along the way to completion.
We know the wood surface needs to be sanded to a smooth finish so it can be stained or painted.
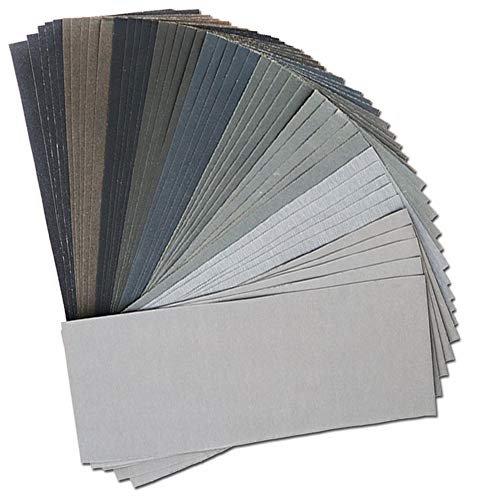
Key Points:
- The sandpaper is wetted, not the wood, soaked for between 30 minutes and overnight.
- High-grit paper is essential for wet sanding process.
- It’s a great technique when repairing or sprucing up finished furniture that has taken on a bit of grime or dirt, or is showing its age, and to get the piece back to a smooth surface.
When it comes to sanding, we have two choices: wet sanding and dry sanding. We have a question for you, though: how many of you are familiar with and have used wet sanding for your woodworking projects? We all know dry sanding and certainly have done a lot of it, whether by hand or by using our orbital sander. But wet sanding?
As smooth a sanding as we think we have achieved dry, you will actually get a much smoother finish from wet sanding. Surprised? Let’s see what we can learn about this method of preparing wood for its finish.
What is Dry Sanding in Woodworking?

Dry sanding is the process of sanding wood without the use of water. It is typically used to shape and smooth wood and to prepare it for finishing. Dry sanding can be done by hand or with a power sander.
When using dry sandpaper, it is important to use the correct grit of sandpaper for the job. Coarse sandpaper is used to remove large amounts of material, while finer sandpaper is used to smooth out the surface. It is also important to sand in the direction of the wood grain.
Sanding against the grain can cause the wood to tear or become scratched.
Dry sanding can be a dusty process, so it is important to wear a dust mask to protect yourself. It is also a good idea to work in a well-ventilated area.
Here are some tips for dry sanding:
- Use the correct grit of sandpaper for the job.
- Sand in the direction of the wood grain.
- Wear a dust mask to protect yourself.
- Work in a well-ventilated area.
Dry sanding is a common woodworking technique that can be used to shape, smooth, and prepare wood for finishing. By following these tips, you can sand wood safely and effectively.
Here are some additional things to consider when dry sanding:
- Use a sanding block to help you sand evenly.
- Change the direction of your sanding strokes frequently to prevent the sandpaper from loading up with wood fibers.
- Wipe down the surface of the wood frequently to remove dust and debris.
- Finish sanding with a fine-grit sandpaper to create a smooth, even surface.
We all know pretty much all of this and practice it regularly in our shop; no surprises here. But consider the second method, too.
What Is Wet Sanding in Woodworking?
Wet sanding is a woodworking technique that uses water to lubricate the sandpaper and prevent the buildup of wood dust. This helps to create a smoother, more even finish.
To wet sand, simply dampen a piece of sandpaper with water and sand the wood in the direction of the grain. You may need to use a sanding block to help you sand evenly.
Using wet sandpaper is a good way to smooth out rough spots and prepare the wood for finishing. It is also a good way to remove scratches that have been caused by dry sanding.
Here are some tips for wet sanding:
- Use a fine-grit sandpaper (200 grit or higher).
- Sand in the direction of the wood grain.
- Use a sanding block to help you sand evenly.
- Wipe down the surface of the wood frequently to remove water and debris.
- Finish sanding with a dry piece of sandpaper to remove any water marks.
How Long Should Sandpaper Soak in Water For Wet Sanding?
- Wide Variety of Grit – Perfect selection of different grits, Including 5 sheets of each grit…
- Suits Your Needs Perfectly – Wet and dry sandpaper, great assortment of fine to superfine sandpaper…
- Handy Sizes – Silicon carbide sandpaper size 9 x 3.6 inches, It can be easily cut and folded to fit…
The amount of time that you should soak sandpaper in water for wet sanding depends on the type of sandpaper and the desired finish. For general-purpose wet sanding, it is typically sufficient to soak the sandpaper for 15-30 minutes. For a smoother finish, you may want to soak the sandpaper for longer, up to an hour or more.
In our research for this article, we found a number of experienced woodworkers who report to soaking sandpaper overnight before using it for wet sanding. That will certainly give you wet sandpaper, but they report an even better result by soaking for so long.
Here are some general guidelines for wet sanding:
- Use a fine-grit sandpaper (180 grit or higher).
- Sand in the direction of the wood grain.
- Use a sanding block to help you sand evenly.
- Wipe down the surface of the wood frequently to remove water and debris.
- Finish sanding with a dry piece of sandpaper to remove any water marks.
If you are using a power sander, and we’ll get to that in a little bit, it is important to use a low-speed setting and to keep the sander moving in a consistent direction. Over-sanding can cause the wood to become damaged.
Sanding Wet Wood
As you now know, wet sanding is not sanding wet wood; it’s the sandpaper that is wet. In fact, it’s not a good idea to sand wet wood.
Sanding wet wood can cause the wood to swell and warp. It is best to let the wood dry completely before sanding.
Here are some reasons why you should not sand wet wood:
- Wet wood is more likely to swell and warp.
- The water can cause the sandpaper to clog and become ineffective.
- The water can also cause the finish to be uneven or blotchy.
If you need to sand wood that is still wet, you can try using a damp cloth to dampen the surface of the wood. This will help to prevent the wood from swelling and warping. However, it is still best to let the wood dry completely before sanding for the best results.
No special sandpaper is needed for wet sanding, either, nor are any special wet sanding techniques required.
What Is The Ideal Moisture Content For Wood?
The ideal moisture content for wood depends on the type of wood and its intended use. For most indoor applications, the ideal moisture content is between 6 and 8%. For outdoor applications, the ideal moisture content is between 10 and 12%.
Wood that is too wet is more likely to warp and crack. Wood that is too dry is more likely to shrink and split. By keeping wood at the ideal moisture content, you can help to ensure that it will last for many years.
Here are some tips for keeping wood at the ideal moisture content:
- Store wood in a cool, dry place.
- Use a moisture meter to check the moisture content of the wood.
- If the wood is too wet, let it dry slowly in a well-ventilated area.
- If the wood is too dry, humidify the air around it.
What Is A Moisture Meter?

A moisture meter is a tool that is used to measure the moisture content of wood. It is an important tool for woodworkers because it can help to ensure that the wood is at the correct moisture content for the intended use. Wood that is too wet or too dry can be damaged, so it is important to check the moisture content before starting a woodworking project.
There are two main types of moisture meters: pin-type and pinless. Pin-type moisture meters have two prongs that are inserted into the wood. The prongs measure the electrical resistance of the wood, which is an indication of the moisture content.
Pinless moisture meters use a sensor that is held against the surface of the wood. The sensor measures the electrical capacitance of the wood, which is also an indication of the moisture content.
Moisture meters are relatively inexpensive and easy to use. They are a valuable tool for any woodworker who wants to ensure that their projects are successful.
Here are some of the benefits of using a moisture meter in woodworking:
- It can help to prevent damage to wood. Wood that is too wet or too dry can be damaged, so it is important to check the moisture content before starting a woodworking project.
- It can help to ensure that the wood is at the correct moisture content for the intended use. For example, wood that is used for furniture should be at a lower moisture content than wood that is used for outdoor projects.
- It can help to improve the quality of the finished product. Wood that is at the correct moisture content is more likely to be smooth, even, and free of defects.
- It can save time and money. By checking the moisture content of wood before starting a project, you can avoid having to make repairs or replace damaged wood.
Should You Use A Power Sander for Wet Sanding?

We said we would return to this subject and answer the question.
Technically, yes, you can use a power sander for wet sanding, but there are some things to keep in mind. First, it is important to use a low-speed setting. This will help to prevent the sandpaper from clogging and the wood from becoming damaged and leading to an uneven surface.
Second, it is important to keep the sander moving in a consistent direction. Over-sanding can cause the piece of wood to become damaged. Finally, it is important to use a fine-grit sandpaper, something 200-grit or higher. This will help to create an even and smooth finish.
Here are some additional tips for wet sanding:
- Wipe down the surface of the wood frequently to remove water and debris.
- Finish sanding with a dry piece of sandpaper to remove any water marks.
By following these tips, you can wet sand with a power sander safely and effectively.
Here are some of the benefits of using a power sander for wet sanding:
- It can save time. Power sanders can sand wood much faster than hand sanding.
- It can create a smoother finish. Power sanders can create a smoother finish than hand sanding because they can apply more pressure and remove more material.
- It can be more precise. Power sanders can be more precise than hand sanding because they can be held more steady, and they can sand in a consistent direction.
However, and this is why we lean strongly toward hand-sanding, there are also some potential drawbacks to using a power sander for wet sanding:
- It can be more dangerous. Power sanders can be more dangerous than hand sanding because they can move more quickly and they can apply more pressure.
- It can create more dust. Power sanders can create more dust than hand sanding, which can be harmful to your health.
- If you over-sand with a power sander, you can damage the wood.
Overall, whether or not you should use a power sander for wet sanding depends on your individual needs and preferences. If you are comfortable using a power sander and you are careful to avoid the potential drawbacks, then using a power sander can be a way to save time and create a smooth, even finish.
More Suggestions About Wet Sanding and The Importance of Dry Wood

Let’s keep in mind the point of the exercise: a smooth finish. We know it’s getting the sandpaper wet; we don’t want the wood wet. You can achieve a smooth finish with both dry and wet sandpaper, but not with wet wood. You need dry wood to get that smooth finish, and wet sanding will get you a smoother finish than dry sanding.
A few more suggestions for you to consider:
- Use fine-grit sandpaper (200 grit or higher).
- Sand in the direction of the wood grain.
- Use a sanding block to help you sand evenly.
- Wipe down the surface of the wood frequently to remove water and debris.
- Finish sanding with a dry piece of sandpaper to remove any water marks.
You need dry wood before applying a finish, completely dry wood. This will help to ensure that the finish adheres properly and that the wood is not damaged.
Here are some additional tips for wet sanding:
- If you are using a power sander, it is important to use a low-speed setting and to keep the sander moving in a consistent direction. Over-sanding can cause the wood to become damaged and lead to deep scratches. We would suggest you use hand power, not an electric sander, for this, however. It will give you greater control of the sanding and the amount of material being removed. With enough attention, hand sanding will still take care of any deep scratches in the wood and give you the smooth finish you want. There is always wood filler for scratches that are too deep, too.
- If you are working with a large piece of wood, it may be helpful to use a fan to help the wood dry more quickly.
- Be patient! Wet sanding can take some time, but it is worth it to get a smooth, even finish.
Here are some additional tips for allowing wood to dry:
- Allow the wood to dry in a well-ventilated area. Support the wet wood such that the air will circulate all around it to speed along the drying process. You want the moisture level to reduce to the 8%- 10% range we mentioned earlier.
- Do not place the wood in direct sunlight or near a heat source. You want the wood to dry at an even pace throughout its thickness to avoid warping or twisting.
- If the wood is still damp after several days, you can use a heater of some sort to raise the temperature of the room – raising temperature and lowering humidity – to help it dry more quickly.
- Be careful not to overheat the wood, as this can damage it; the damage can be caused by the wood not drying evenly and lead to the warping and twisting we warned about above.
Can You Use A Wet Sanding Technique on Finished Wood?
Yes, you can use wet sanding on finished wood. In fact, it is a great way to revive old or damaged finishes. Wet sanding will help to remove any dirt, grime, or deep scratches that may have accumulated on the surface of the wood. It will also help to smooth out the finish and make it look new again.
Follow these suggestions:
- Use fine-grit sandpaper (200 grit or higher).
- Sand in the direction of the wood grain.
- Use a sanding block to help you sand evenly.
- Wipe down the surface of the wood frequently to remove water and debris.
- Finish sanding with a dry piece of sandpaper to remove any water marks.
Allow the wood to dry completely before applying a new finish. This will help to ensure that the finish adheres properly and that the wood is not damaged.
Here are some additional tips when working with wood that has been previously finished, like old furniture:
- If you are using a power sander, it is important to use a low-speed setting and to keep the sander moving in a consistent direction. Over-sanding can cause the wood to become damaged.
- If you are working with a large piece of wood, it may be helpful to use a fan to help the wood dry more quickly.
- Be patient! Wet sanding can take some time, but it is worth it to get a smooth, even finish.
By following these tips, you can wet sand finished wood safely and effectively.
Here are some of the benefits of using wet sanding on finished wood:
- It can remove dirt, grime, and scratches.
- It can smooth out the finish.
- It can make the wood look new again.
- It is a relatively easy process.
However, there are also some potential drawbacks to using wet sanding on finished wood:
- It can damage the finish if you over-sand.
- It can take some time to complete.
- It can create more dust than dry sanding.
Overall, whether or not you should use wet sanding on finished wood depends on your individual needs and preferences. If you are comfortable with the potential drawbacks, then using wet sanding can be a great way to revive old or damaged finishes.
Wet Sanding on Video
Want to see wet sanding an already-finished piece of wood? Watch this video.
Some woodworker swear by wet sanding. We see and understand its benefits, and in the right circumstances and in the right manner, it can work wonders on wood.
Last update on 2026-07-13 / Affiliate links / Images from Amazon Product Advertising API