Rob from Let’s Make Things shared the woodworking tip featured in this video.
This tip shows how to add a pivoting, sliding reference to a miter bar so long stock can be supported and short crosscuts made safely and repeatably without relying on a zero stop.
Watch the full video and subscribe to Let’s Make Things:


Design and Purpose
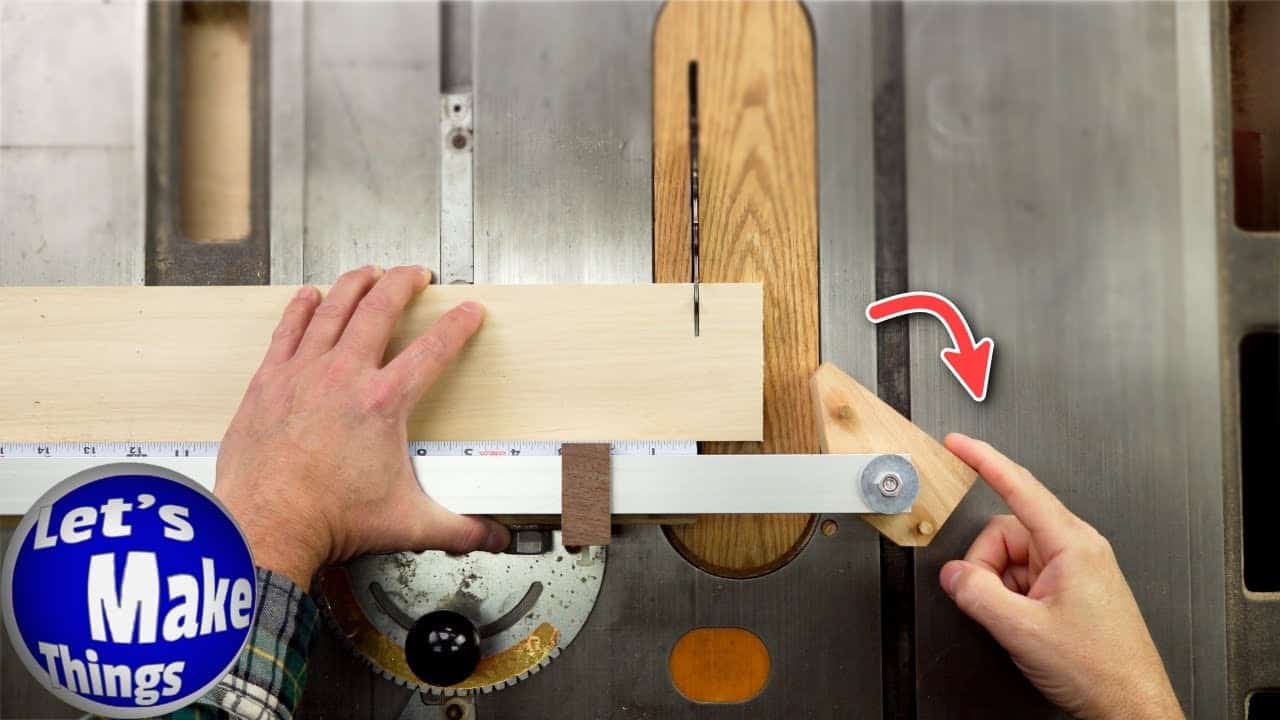
The sliding reference arm is designed to work from the far side of the miter bar so long boards stay supported while short pieces are cut from the end.
This approach prevents trapped cutoffs, reduces the chance of kickback, and gives the operator better leverage and control when crosscutting short parts from long stock.
Materials and Key Choices
The build uses a simple block on a miter track, a pivot fastener, and a loose stop system made from dowels or similar shop-made parts.
Rob recommends using compressible fiber washers at the pivot so the arm holds its position without wearing the metal parts, and simple hardware that can be locked down and left in place.
Layout and Drilling
Layout focuses on aligning the arm to the edge of the blade and creating registration points so the sliding arm can be indexed off a measurement block on the miter track.
Holes are located to allow the pivot to swing clear of the saw blade and so the arm can be shortened or notched where it would otherwise interfere with the workpiece.
Assembly and Tuning
Assembly is straightforward: stack the track, washers, and fasteners so the pivot has a slight resistance and the arm stays where it’s placed while still swinging freely when needed.
Rob lets thread locker cure and checks that the pivot doesn’t bind, then trims and fits the reference block so the arm registers cleanly against the miter bar without touching the workpiece during the swing.
Using the Sliding Reference
To make repeatable cuts, the reference is set with the blade edge as the primary register so blade thickness is irrelevant whether using a thin-kerf, full-kerf, or a dado stack.
The workflow is: set the reference against the blade, index the sliding arm to a known mark on the miter track, lock the track, pivot the reference out of the cut path, and then make the crosscut.
Practical Tips and Limitations
Fiber washers are preferred because they compress slightly and hold position without grinding away aluminum or metal parts over time.
Keep the saw blade below the height of the miter track and be mindful of material thickness; this setup is intended for typical crosscut tasks and may need modification for stock that exceeds the height of the track.
Why This Matters
The sliding miter reference solves a common workflow problem: making accurate short cuts from long stock without fighting leverage or risking trapped cutoffs.
It’s a small, inexpensive upgrade that improves safety and repeatability, and the concept can be adapted to different miter bars, track systems, and shop preferences.
Conclusion
Overall, the sliding reference arm is a practical modification that prioritizes control and safety while preserving accuracy for repeatable crosscuts.
Get Rob’s plans here: https://makethingswithrob.com/miter-bar-reference-guide/.

Matt’s Take
These are my personal thoughts and tips based on my own experience in the shop. This section is not written, reviewed, or endorsed by the original creator of this project.
The pivoting arm approach really shines for those awkward cuts where you’re working with longer stock but need to trim just a few inches off the end. Having that reference swing out of the way keeps your hands in a natural position and eliminates the wrestling match that comes with trying to balance a long board while making precise short cuts.
The fiber washer detail is brilliant. Those little washers make all the difference in how the pivot feels and functions over time. They create just enough friction to hold position without the slop you’d get from loose hardware, but they won’t wear grooves in your aluminum track like metal-on-metal contact would. It’s one of those small touches that separates a quick shop hack from something you’ll actually want to use long-term.
The blade registration method is smart too. Setting up off the blade edge rather than the fence means your measurements stay consistent regardless of kerf width, and you’re not constantly doing mental math when you switch between blades. For anyone building this, take your time with the initial setup and pivot placement. Getting that geometry right the first time saves a lot of fiddling later when you’re trying to use it for actual project work.