This tip video was created by Jodee from Inspire Woodcraft. It challenges the idea that more clamps always equal better results and instead offers a smarter, more efficient way to think about clamping in your shop.
Jodee walks through practical techniques to get strong glue-ups without needing a mountain of clamps. For woodworkers trying to save space, money, or simply work more efficiently, his advice can lead to better outcomes with fewer tools.
Watch the full video and subscribe to Jodee’s channel:
Rethinking the “More Clamps” Rule
You’ve probably heard the saying that you can never have too many clamps. While there’s truth in that—clamps are essential for many builds—Jodee makes a convincing case that we may be overusing them more than we realize.
The key is not just how many clamps you use, but how you use them. A smaller number of well-placed clamps can deliver better pressure, cleaner glue-ups, and a more efficient workflow than loading every joint with hardware.
Understanding Clamping Pressure
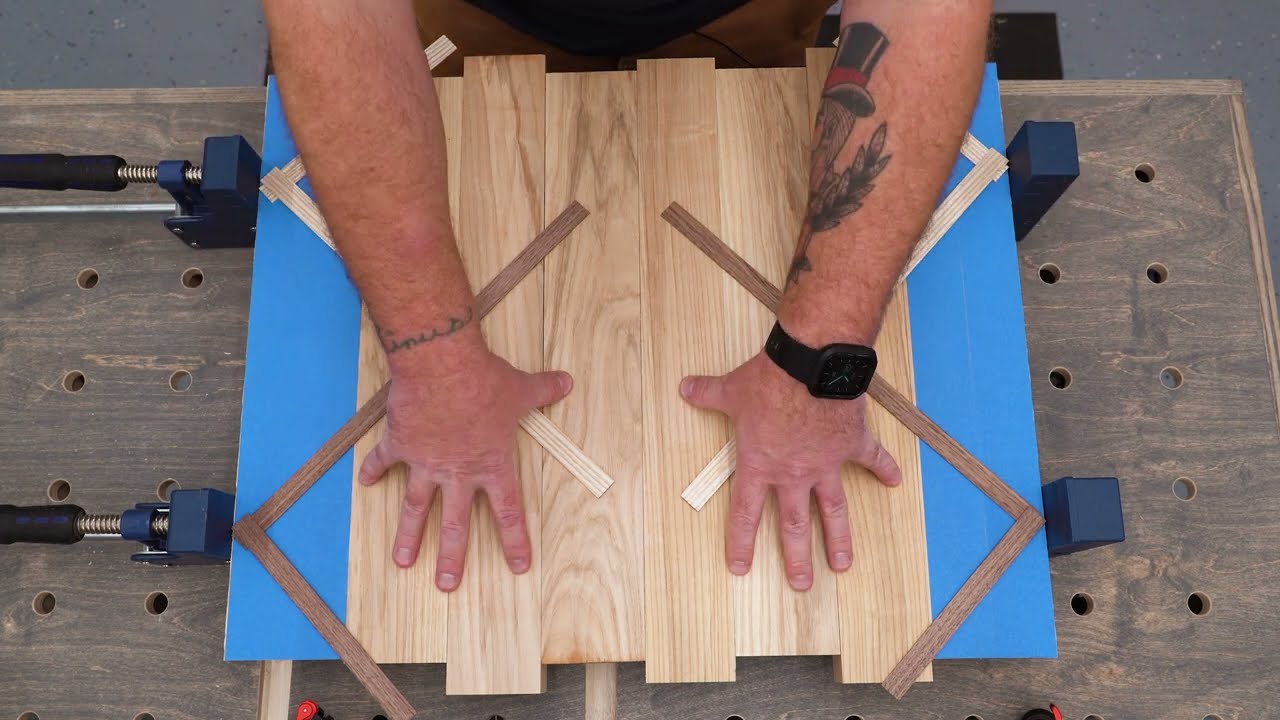
When clamps apply pressure to wood, that pressure radiates out from the clamp’s head and foot. This creates a diamond- or square-shaped zone of effectiveness.
That means the area directly around the clamp gets the best compression, while the outer zones gradually lose pressure. If you’re clamping a panel and see glue squeeze-out, that doesn’t always mean the joint is tight—it may still have gaps if the pressure wasn’t evenly distributed.
How Many Clamps Do You Actually Need?
Jodee uses a common scenario: gluing up a panel of boards. Many woodworkers instinctively reach for four or five clamps to make sure everything holds together. But with a bit of planning, you can reduce that number significantly.
Instead of clamping at every seam, you can use just two clamps, spaced correctly, and add scrap cauls to distribute the pressure. This creates an even hold without needing one clamp per board. It’s a small change that can free up tools for other tasks.
The Role of Flat and Square Boards
Before you even touch a clamp, your wood needs to be properly prepared. Clamps are not designed to force warped boards into alignment. They’re meant to hold already-square, already-flat pieces together while the glue does the work.
Jodee emphasizes that glue-ups should start with flat boards and tight seams. That way, your clamps aren’t fighting the material—they’re simply reinforcing a bond that’s already aligned and well-fitted.
Clamp Smarter, Not Harder
One of the smartest moves Jodee demonstrates is using board edges and scrap blocks to extend clamp pressure. When boards are properly milled, you can rely on just two clamps—one on each end—and still get a solid hold across the full surface.
He also talks about the importance of clamping speed. The fewer clamps you have to adjust, the faster you can move through each project. This is especially useful when you’re working solo or under time constraints.
Real-Life Shop Benefits
Cutting back on clamp use doesn’t just help your current project—it improves your entire shop workflow. Fewer clamps mean less clutter, fewer tripping hazards, and faster setup times for each assembly.
It also means you can delay or skip buying extra clamps, which saves money and storage space. For beginner woodworkers or those in small shops, that’s a big win.
When More Clamps Are Helpful
Jodee isn’t saying you’ll never need more clamps—some projects do benefit from extra pressure or complex clamping setups. But the takeaway is this: don’t make more clamps your default solution.
Instead, assess the project, understand where pressure is really needed, and clamp accordingly. This gives you more control over your process and results in cleaner, more consistent work.
A Better Way to Work
This tip from Jodee at Inspire Woodcraft is a reminder that woodworking is as much about problem-solving as it is about tools. By understanding how clamps actually work and thinking through each step, you can get stronger glue-ups with less hassle.
It’s not just about having a well-equipped shop—it’s about using what you have wisely. Whether you’re just starting out or have years of experience, this approach makes every clamp count.
Support Jodee by visiting his online store here: https://inspirewoodcraft.com/collections/all.

Matt’s Take
These are my personal thoughts and tips based on my own experience in the shop. This section is not written, reviewed, or endorsed by the original creator of this project.
This really hits home for me. Early on, I definitely fell into the “more clamps equals better results” trap, loading up every glue-up like I was building a bridge. What Jodee’s sharing here is spot-on — it’s about working smarter, not just throwing more hardware at the problem.
That pressure distribution concept is crucial to understand. I’ve seen too many glue-ups where someone used a bunch of clamps but still ended up with gaps because the pressure wasn’t evenly applied. Using cauls to spread that clamping force is one of those simple tricks that makes a huge difference. A straight piece of scrap lumber can do the work of two or three additional clamps when positioned correctly.
The preparation point can’t be overstated either. If your boards aren’t flat and your edges aren’t clean, no amount of clamps will save that glue-up. I always remind folks that clamps hold things in place — they don’t fix poor milling. Take the extra time to get your pieces square and your joints tight before you even think about clamping pressure.
From a shop efficiency standpoint, this approach is a game-changer. Fewer clamps means faster setup and teardown, plus you’re not constantly hunting around for that one clamp that’s always missing when you need it most. Your workflow becomes cleaner when you’re not wrestling with a forest of clamp handles.