This woodworking tip was shared by Jodee from Inspire Woodcraft.
It addresses a simple but powerful upgrade to the table saw that improves accuracy and workflow—a permanent reference line etched directly into the saw’s surface.
Many woodworkers rely on temporary guides or visual alignment to line up cuts. But over time, these methods can fall short, especially when waxed surfaces or blade changes throw off consistency.
Jodee’s solution not only solves that issue but offers a technique anyone can adapt in their own shop.
Watch the full video and subscribe to Jodee’s channel:
The Problem with Temporary Markings
To align cuts quickly, Jodee initially drew a reference line on the top of his table saw using a Sharpie. It worked well—until it didn’t.
Waxing the table or even just daily use would cause the line to fade or rub off. Reapplying it was a hassle, and it was never quite as accurate the second time.
Many woodworkers have faced the same issue and offered their own suggestions, which led to a more permanent solution.
Learning from Viewer Feedback
Jodee frequently engages with his audience and takes community feedback seriously. One viewer suggested scribing a line directly into the metal surface of the table saw.
While the idea of permanently altering an expensive tool might seem intimidating, it made sense—and it worked.
The lesson here isn’t just about table saws. It’s about listening, adapting, and improving your workflow with input from others who face the same challenges.
Laying the Groundwork
To make the scribe line accurate, Jodee started by preparing a clean, square reference edge using a piece of plywood.
This guide allowed him to register the far left side of the blade—the point that remains consistent no matter what blade is installed.
Once positioned properly, the plywood served as the foundation for the next step: placing a steel rule along the cut edge to act as a straight edge for scribing.
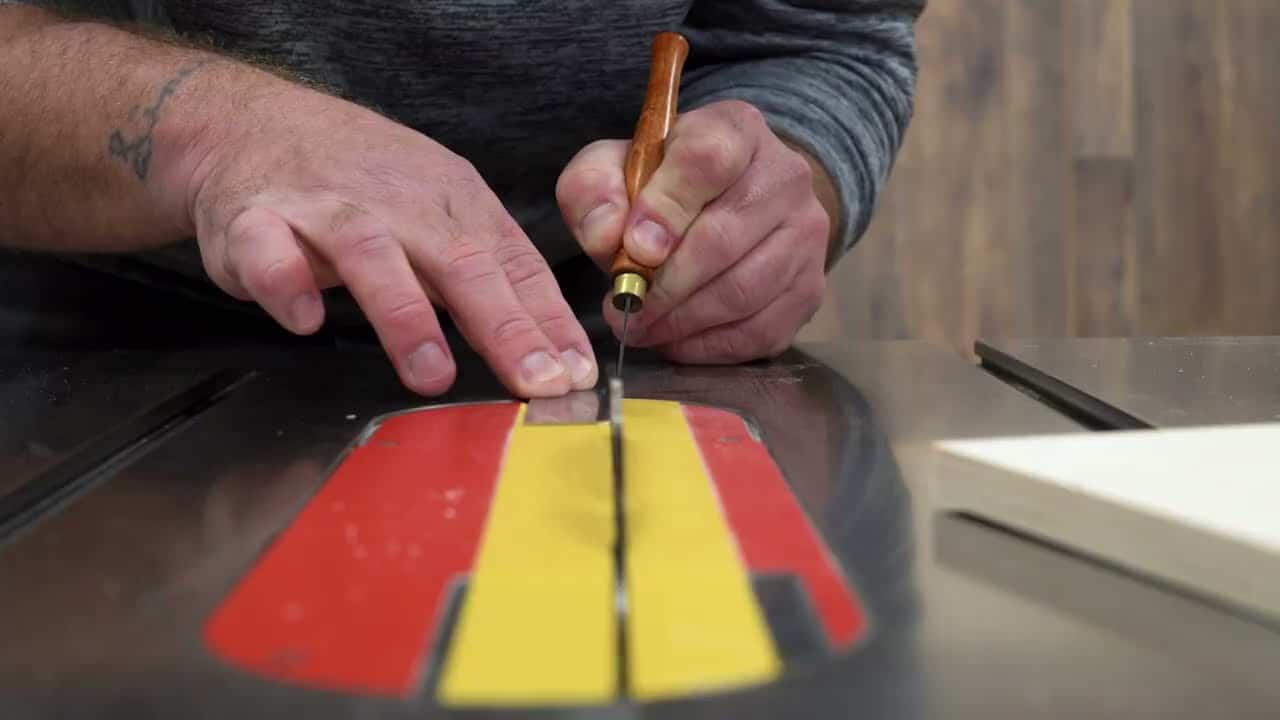
The Scribing Process
Using double-sided tape, Jodee fixed the steel rule to the saw’s surface. He then used a marking knife to carefully etch a thin, clean line along the edge.
This approach created a shallow but permanent groove that wouldn’t wear off with use or cleaning.
It was a simple, one-time task that immediately improved accuracy and reduced the need for visual guessing.
Improving Visibility
Once the scribe line was made, Jodee darkened it with a Sharpie to make it easier to see.
Then he cleaned up any marker residue with adhesive remover, leaving only the darkened groove intact.
This small detail helped the line pop against the metal surface without making the top look messy or marked up.
It’s a practical solution that balances precision with aesthetics.
Why One Line Is Enough
Some woodworkers suggested adding a second line on the right side of the blade. But Jodee decided against it, and for good reason.
The left side of the blade never changes, even when swapping in different blades like dado stacks or thin kerfs.
That consistency makes it the ideal reference point—no matter what’s mounted, you’ll always know where the cut will start.
Alternate Methods: The Sacrificial Fence
While this etched line is a great solution, Jodee also discussed a common alternative: using a sacrificial fence.
By running the blade partially into a temporary fence, you get a visual kerf that stays in place while you work. It doubles as a guide and zero-clearance insert, improving both accuracy and safety.
For woodworkers who prefer not to mark up their tools, this method remains a strong option.
A Small Change with Big Impact
This simple scribe line doesn’t require special tools or expensive upgrades. It’s about making the most of what you already have and improving the way you work.
Whether you’re crosscutting, ripping, or making repetitive setups, having a consistent visual reference reduces error and speeds up production.
And because it’s fixed into the surface, there’s no need to redraw or realign it every time you clean the saw top.
Support Jodee by visiting his online store here: https://inspirewoodcraft.com/collections/all.

Matt’s Take
These are my personal thoughts and tips based on my own experience in the shop. This section is not written, reviewed, or endorsed by the original creator of this project.
This kind of permanent reference line is one of those simple upgrades that makes a huge difference in day-to-day shop work. The beauty is in its consistency — once it’s there, it’s always accurate, no matter how many times you wax the top or swap blades. That reliability becomes second nature after a while, and you’ll find yourself using it for way more than just initial blade alignment.
The scribing technique itself is pretty straightforward, but using that steel rule as a guide is key to getting a clean, straight line. A marking knife works better than something like an awl here because it creates a more controlled cut that won’t wander. If you’re nervous about marking up your saw top permanently, you could always test the technique on a scrap piece of cast iron first to get the feel for it.
Safety-wise, this kind of reference line can actually help prevent some common mistakes. When you’re focused on aligning a cut, having that visual guide means less time hovering over the blade and more confidence in your setup. Just remember to keep the line clean of sawdust and debris so it stays visible when you need it most.