This woodworking tip comes from Jodee of Inspire Woodcraft.
It’s a simple, math-based solution to one of the most common problems beginners face when cutting trim: inaccurate miter angles that lead to visible gaps.
With a clear formula and real-world examples, Jodee explains why the standard “divide the corner angle by two” method often results in frustration—and what to do instead to get tight, accurate joints.
Watch the full video and subscribe to Jodee’s channel:
Why Most People Get Trim Angles Wrong
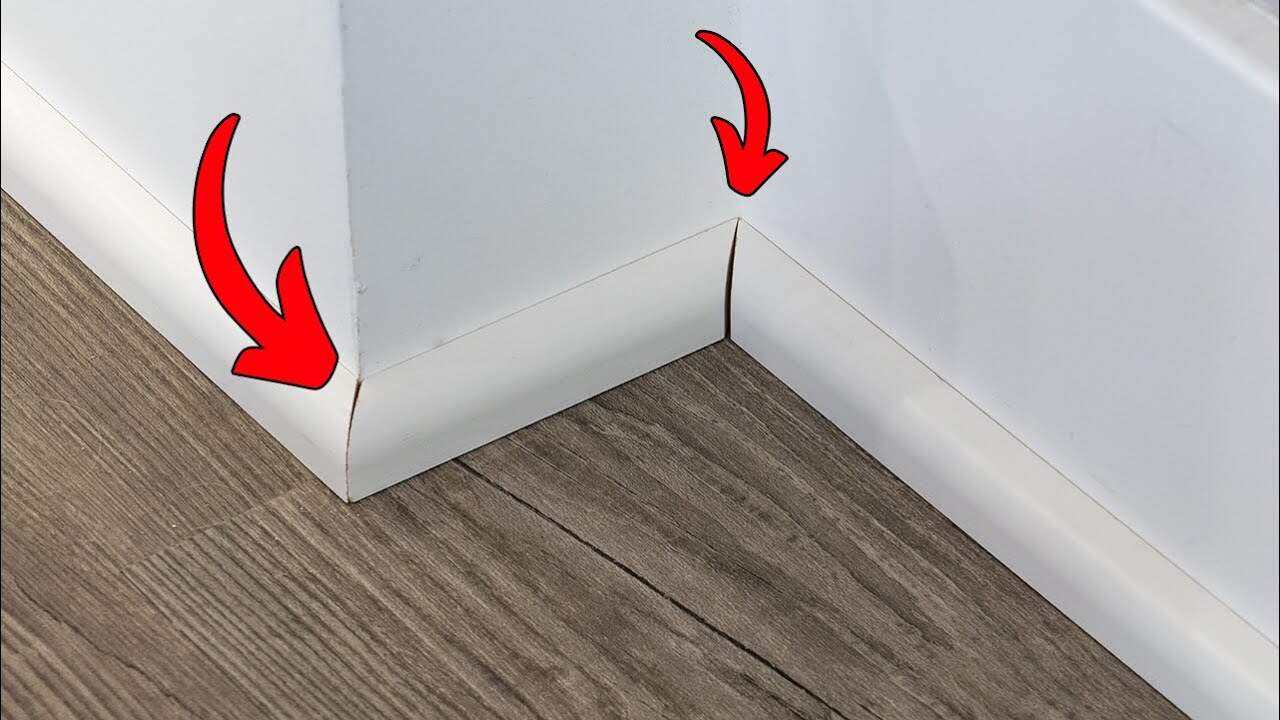
Many beginners measure an inside corner—say 90 degrees—and assume they should simply divide that number by two and set their saw to 45 degrees. But miter saws don’t reference the same angle system as a corner measurement.
The saw’s gauge measures angles relative to the fence, not the included angle between two walls.
That’s where the error begins. A cut made using the “half the angle” method often fits loosely, especially at the back edge, resulting in a gap that reveals the mistake.
The Correct Formula (and Why It Works)
To cut two trim pieces that meet tightly in a corner, the correct method is:
(180 − measured corner angle) ÷ 2 = saw setting
This formula accounts for how miter saws actually operate. By subtracting the measured interior angle from 180, then dividing that by two, you find the blade setting needed to produce two matching cuts that together span the measured angle.
This adjustment is necessary because miter saws cut angles off the reference of a flat fence, not the corner itself. The formula compensates for that and produces tight joints every time.
A Quick Example
If you measure a slightly out-of-square corner and find it’s 88 degrees, don’t set the saw to 44. Instead:
180 − 88 = 92
92 ÷ 2 = 46
The correct saw setting is 46 degrees—not 44. This small difference makes a noticeable improvement in fit.
The formula also works for outside corners and obtuse angles. For example, a 135-degree outside corner becomes:
180 − 135 = 45
45 ÷ 2 = 22.5
Each cut would be set to 22.5 degrees.
What If Your Saw Can’t Cut That Far?
Most saws max out at 45 degrees on either side. That means the most extreme corner you can cut directly with two mitered pieces is:
180 − 2 × 45 = 90 degrees
If your measured corner is less than 90 (such as an 85-degree inside corner), your saw can’t reach the required 47.5-degree cut. In that case, alternatives are necessary.
Here are some workarounds:
- Use coping for inside corners: cut one piece square and cope the second to fit its profile.
- Use a table saw with a sled or jig to cut steeper angles.
- Modify the design: trim one piece square and bevel the other to match.
- Test on scrap and make micro-adjustments if needed.
Practical Tips for Real-World Success
Jodee offers several smart tips to make measuring and cutting trim easier:
- Always use a digital angle finder or high-quality protractor—eyeballing corners is unreliable.
- Label your pieces as you go to avoid mixing up left/right or inside/outside cuts.
- If possible, sand or tune the mating surfaces to fine-tune fit without changing the overall angles.
- Check your saw’s scale—some miter saws read differently depending on workpiece orientation.
- Re-check corners along long walls. Framing shifts, and what started as square may change.
A small test cut on scrap saves time and materials, especially when working with costly trim or long runs.
Inside vs. Outside Corners
The formula works for both types of corners. What changes is how the trim is positioned on the saw.
For inside corners, the faces are usually on the fence. For outside corners, the fence becomes the outer edge of the corner.
In both cases, the math remains the same. The only real adjustment is how you orient the material for the cut.
The Value of Learning the Math
There are digital tools that can calculate these settings for you—but understanding the reason behind the numbers is what makes you a better woodworker.
Knowing how the miter saw relates to measured angles helps you:
- Troubleshoot bad fits
- Predict when saw limits will be a problem
- Feel confident making cuts without guessing
The takeaway: measure accurately, subtract from 180, divide by two, test on scrap, and cut. It’s simple, repeatable, and reliable once you understand the geometry.
Final Thoughts and Where to Watch the Full Demo
This entire explanation and technique come from Jodee of Inspire Woodcraft. His breakdown is easy to follow and backed by clear demonstrations using real trim and real saws.
If you want to see the actual steps in action, watch his full video for a visual walkthrough of the formula and the cutting process.
Support Jodee by visiting his online store here: https://inspirewoodcraft.com/collections/all.

Matt’s Take
These are my personal thoughts and tips based on my own experience in the shop. This section is not written, reviewed, or endorsed by the original creator of this project.
This formula is one of those “lightbulb moments” that separates confident woodworkers from frustrated ones. I see the confusion all the time — people get hung up on corner angles versus saw angles, and it leads to gaps that no amount of caulk can hide gracefully. The key insight here is understanding that your miter saw’s scale references the fence, not the corner itself.
A digital angle finder is worth its weight in gold for this kind of work. Those cheap plastic protractors from the hardware store just don’t cut it when you’re trying to measure a corner to within a degree or two. And here’s something worth noting: always double-check your measurements in a few spots along longer walls. What looks like a 90-degree corner at one end might be 88 degrees at the other due to settling or framing irregularities.
The scrap test piece advice can’t be overstated. Even with perfect math, there are variables like blade kerf, fence alignment, and material compression that can throw things off slightly. A quick test cut tells you immediately if your setup is dialed in. When you’re working with expensive crown molding or hardwood trim, that 30-second test can save you from an expensive mistake.