Jodee from Inspire Woodcraft shared the woodworking tip featured in this video.
The video demonstrates a reliable method for routing juice grooves that follow curved outlines without a CNC, using a simple template and a bearing-guided round-nose router bit.
The approach is designed for makers who want consistent results on irregularly shaped boards and for those who plan to batch multiple pieces with the same profile.
Watch the full video and subscribe to Inspire Woodcraft:
Overview
The shortfall of straight bumper jigs and simple adjustable guides is that they only work well for square or rectangular boards.
Jodee shows how a template-plus-bearing bit setup lets the groove follow any outline, so the cut hugs curves instead of producing straight, mismatched channels.
Making and Sizing the Template
Start with a template that is a scaled-down version of the board outline so the bearing on the bit runs against it while the cutter forms the groove in your workpiece.
The template should be made from stable stock and sized so the bearing clears the material before the cutter contacts the board, which helps prevent tearout on the first pass.
Templates also make batching simple: once one template is right, it can be taped and reused to align many boards quickly. Marking centerlines or crosshairs on both template and workpiece speeds up registration and keeps results consistent across several parts.
Router Setup and Safety
A round-nose bit with a pilot bearing is the heart of the method because the bearing tracks the template while the cutter cuts the groove.
Use a router base large enough to stabilize the tool and consider a sub-base to reduce the tendency for the router to tip when negotiating outside edges.
Practice the movement on scrap before attempting the final piece, since routing the outside edge of a template can feel tip-prone and the router may try to lift or wander at corners.
Good dust collection and a steady two-handed technique both improve control and visibility while routing.
Routing Technique
With the bearing running on the template, plunge for a light initial pass and then deepen the cut with successive passes rather than trying to remove too much material at once.
Drive the router around the curve while applying opposing forces with each hand so the base stays flush and the cutter hugs the template through tight turns.
Take care at corners and transitions: slow, steady motion keeps the bearing engaged and helps avoid the router jumping off the edge. If the bit causes burning on dense species, make additional light passes and watch feed rate to minimize scorch.
Cleanup and Finishing
After routing, remove the template and clean the groove using a scraper or light sanding; small burn marks can usually be sanded out before final shaping.
A quick round-over or chamfer on the board edge and a careful sanding progression will make the board ready for finish and use.
Dust collection is especially helpful during this process because the cutter produces a lot of fine chips and dust that can obscure the line and make cleanup harder. For hard woods that scorch more readily, test on scrap to dial in feed and depth for a cleaner cut.
Practical Tips and Adaptations
The method scales to different groove widths by choosing an appropriately sized round-nose bit with a bearing; smaller bits are useful when a finer channel is desired.
If you plan to make many of the same shape, invest time in a good template and layout marks to speed setup and ensure repeatability.
For alternative setups, adjustable flush-trim bits with removable bearings can offer more options, and double-sided tape or temporary adhesives work well for holding templates in place. Most importantly, practice the motion and setup on scrap so you’re comfortable before committing a finished board.
Why This Tip Matters
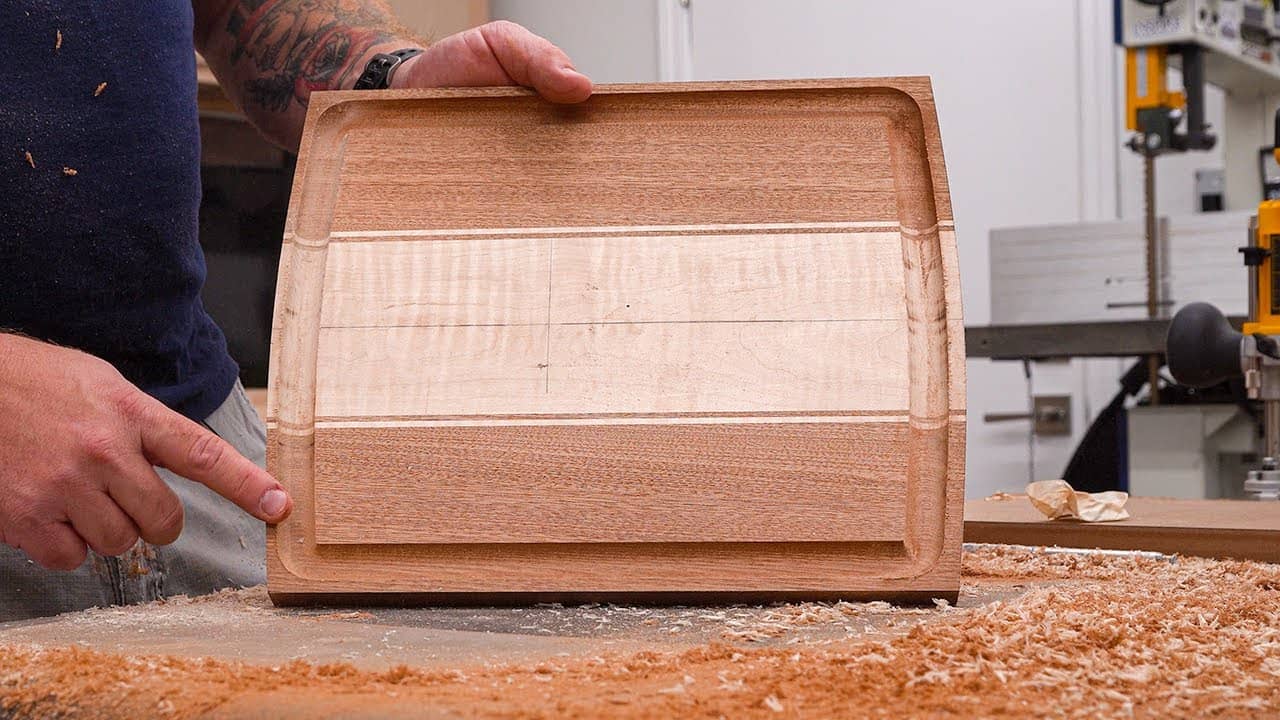
Routing a juice groove that follows a curved outline elevates the quality of custom cutting boards and serving pieces by keeping the groove visually and functionally consistent with the shape.
The template-and-bearing approach gives small shops a low-cost, repeatable way to add a professional detail without CNC equipment.
The technique is adaptable and useful across species and shapes, and it encourages batch thinking: one well-made template saves time and improves uniformity when producing multiple pieces.
For makers who compete on fit and finish, this is a practical trick to add to the shop repertoire.
Support Jodee by visiting his online store here: https://inspirewoodcraft.com/collections/all.

Matt’s Take
These are my personal thoughts and tips based on my own experience in the shop. This section is not written, reviewed, or endorsed by the original creator of this project.
This template approach is brilliant for anyone making curved cutting boards regularly. The key insight here is getting that template sized just right – you want the bearing to contact the template before the cutter hits your workpiece. This prevents that initial grabbing that can cause tearout or send your router wandering off course. I’d add that when making your template, use something stable like MDF or plywood rather than solid wood that might move with seasonal changes.
The safety aspect of using a larger router base really can’t be overstated. Round-nose bits with bearings tend to be on the larger side, and when you’re following curves, that router wants to tip toward the template. A good sub-base gives you more bearing surface and better control. Also worth noting – keep those bits sharp. A dull round-nose bit will burn even the softest woods and make cleanup a real chore.
One thing I really appreciate about this method is how it scales. You can use the same technique for delicate herb boards with tiny grooves or hefty carving boards that need deeper channels. The template does all the thinking for you, which is perfect when you’re trying to keep consistent results across a batch. Just remember to practice the motion on scrap first – there’s a rhythm to keeping that bearing engaged while maintaining steady feed pressure.