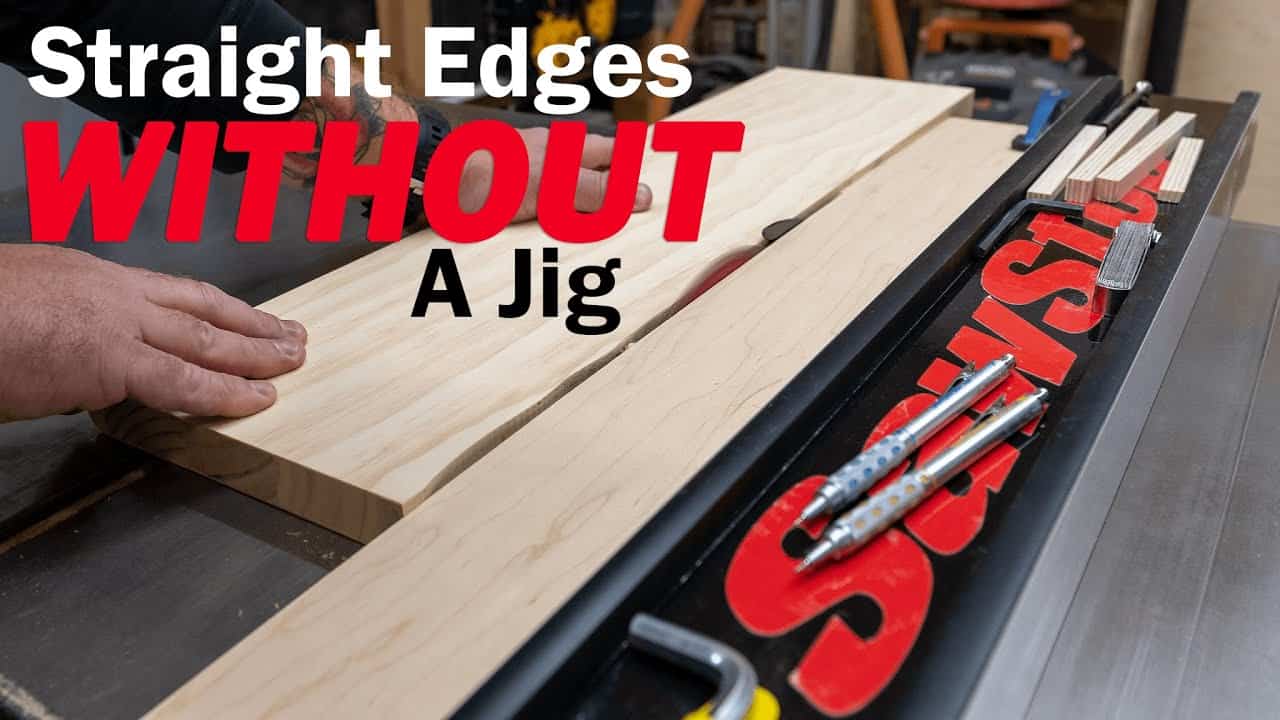
This tip was developed and demonstrated by Jodee from Inspire Woodcraft.
It’s a clever way to joint the edge of a board using just a table saw and a strip of engineered sheet goods—no jointer required.
Designed for woodworkers working in tight spaces or on job sites, this technique is a reliable alternative for creating straight, glue-ready edges without extra machines.
Watch the full video and subscribe to Jodee’s channel:
Why This Technique Matters
Not every shop has a jointer, and even when one is available, it’s not always convenient to use. Jodee’s method uses a temporary fence made from plywood, MDF, or melamine with a factory edge to serve as a guide for cutting.
By using a factory-straight edge as the reference, it becomes possible to get clean results from a table saw—even when dealing with bowed or uneven board edges.
How the Temporary Fence Works
The core of the method involves ripping a strip from a sheet of engineered board and then trimming it slightly so it aligns precisely with the blade’s cut line.
This trimmed strip is then flipped and fastened to the saw’s table, forming a straight edge that can guide workpieces during the cut.
With the strip secured using clamps or double-sided tape, it creates a temporary but precise reference surface that doesn’t rely on the saw’s standard metal fence.
Using Factory Edges for Accuracy
Sheet goods like melamine or MDF are manufactured with extremely straight edges, making them perfect for this kind of setup. These factory edges eliminate the variability that can come from older fences or less precise machinery.
Once aligned correctly, the temporary fence allows repeatable cuts that correct edge bow or belly. It’s a fast and effective way to prepare boards for glue-ups, especially when working with construction-grade lumber or rough sawn stock.
Step-by-Step Highlights
- Rip a strip from a factory-edge sheet. Keep one edge factory straight and cut the width that suits your saw table.
- Trim the strip to match the blade’s kerf. Make a second shallow cut to align the fence with the blade without overcutting.
- Flip and fasten. Turn the strip end-for-end so the freshly trimmed face becomes the cutting guide. Secure it firmly in place.
- Run the workpiece. Place the bowed or uneven board against the fence and feed it through the blade, trimming only the edge for straightness.
Each pass removes high spots and gradually produces a straight edge. With careful setup, it only takes a couple of passes to get a clean, square cut ready for edge joining.
Safety and Setup Tips
Jodee shares several practical considerations to ensure the method works reliably and safely:
- Use push blocks or featherboards for narrow stock or close cuts.
- Set blade height just above the material to reduce kickback risk.
- Avoid blade contact with the temporary fence. Keep the uncut portion just shy of the riving knife for clearance.
- Don’t move the main fence after the second cut—this keeps alignment accurate across multiple boards.
Whether you’re jointing a few edges or preparing a whole panel glue-up, these tips ensure the process goes smoothly without damaging the saw or material.
Where This Method Shines
This approach is ideal for shops with limited space, portable setups, or jobsite work where bringing a jointer isn’t realistic.
It also works well for boards that are mostly flat but have minor edge deformities.
For casual woodworking, it’s a perfect solution that saves space and time. And while it’s not a replacement for a jointer when flattening twisted or cupped boards, it excels in its specific use case—jointing one edge straight.
Adapting It to Your Shop
- Use longer sheet strips to support longer boards more evenly.
- Try different materials like melamine for a slicker glide surface.
- Add featherboards or auxiliary fences for improved safety and consistency.
- Re-use the same strip setup once built to save time on future jobs.
The setup is repeatable, fast to assemble, and easy to tweak based on material or table size. For small shops or occasional use, it’s one of those “why didn’t I try this sooner” solutions.
Support Jodee by visiting his online store here: https://inspirewoodcraft.com/collections/all.

Matt’s Take
These are my personal thoughts and tips based on my own experience in the shop. This section is not written, reviewed, or endorsed by the original creator of this project.
This is such a smart workaround for shops that don’t have the space or budget for a dedicated jointer. I really appreciate how Jodee uses that factory edge as the foundation—those sheet goods come surprisingly straight from the manufacturer, often straighter than what we can achieve with older or less-precise fence systems. The key insight here is that you’re essentially creating a zero-clearance reference that’s perfectly aligned with your blade.
One thing I always emphasize with techniques like this is taking your time with the initial setup. That second trimming cut where you align the fence with the blade’s kerf is critical—rush it and you’ll be fighting alignment issues through the whole process. This method really shines on boards that are relatively flat but just need that one edge cleaned up. If you’re dealing with serious bow or twist, you’ll still want to address that first.
Safety-wise, keeping that blade height conservative is crucial. With any auxiliary fence setup, there’s always the temptation to take heavier cuts, but multiple light passes give you better control and cleaner results. The push block recommendation is spot-on too—your hands should never be anywhere near that blade, especially when you’re focused on keeping the workpiece tight against an unfamiliar fence setup.