This project/tip/jig was built and designed by Jodee from Inspire Woodcraft.
It’s a fast, reliable T-square-style jig that guides a router for squaring panel edges, cutting grooves, and fine-tuning plywood when table saw cuts aren’t ideal.
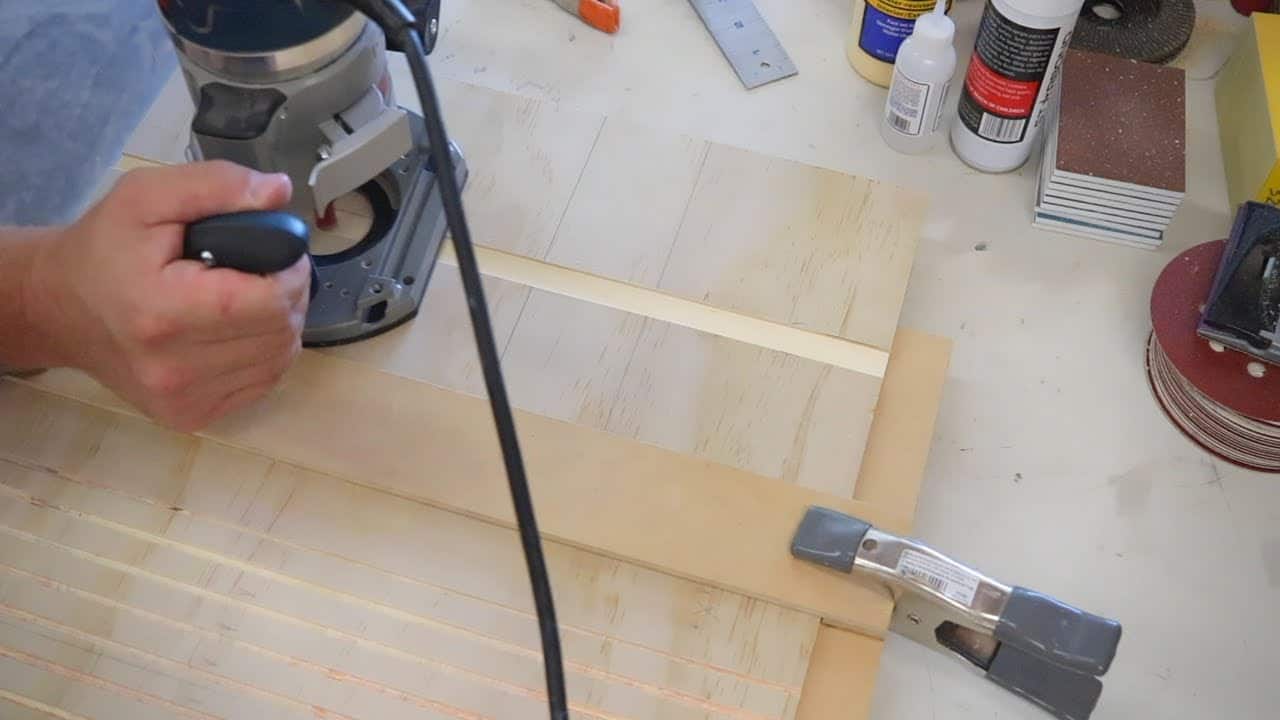
Using just scraps and glue—no screws or hardware—Jodee puts together a simple shop-built jig that’s perfect for straight, repeatable cuts with a router. It’s a clever, low-cost solution that fits neatly into small-shop workflows.
Watch the full video and subscribe to Jodee’s channel:
What the Jig Is and Why It Helps
The T-square jig gives you a long straight edge to guide your router base along. It’s especially useful when plywood panels arrive out of square, when you’re trimming thin edges, or when table saw cuts are overkill for the job.
Rather than relying on improvised fences or sketchy clamping setups, this jig provides accurate guidance along a clean reference surface.
It can be reused anytime straight routing is needed—dados, grooves, rabbets, and edge cleanup are all fair game.
Materials and Build Concept
The jig consists of two main pieces: a long fence made from stiff sheet material and a shorter crosspiece that registers against the workpiece. Jodee uses hardboard (Masonite) for the fence and scrap plywood for the crosspiece.
What makes this jig so approachable is its flexibility. There are no rigid measurements or hardware—just choose flat, stiff materials from your scrap bin and assemble them with care. As long as the crosspiece is glued on square, the jig works.
The Glue-Only Build Method
Jodee uses a clever glue technique to assemble the jig without clamps or screws. He combines regular wood glue with dots of super glue (CA glue) to get the best of both worlds.
Wood glue forms the long-lasting bond, while the super glue grabs instantly and acts as a temporary clamp.
This allows the jig to be aligned precisely and held in place while the slower-drying glue cures underneath.
This hybrid approach is great when clamping is awkward or unnecessary, and it saves time without compromising strength. The trick is using only small dots of CA glue—it’s not the structural adhesive, just the fastener.
How to Set It Up and Use It
Once the jig is assembled, using it takes just a few steps. First, make sure the edge of your workpiece is flat and parallel where the crosspiece will register.
Position the jig so the long fence aligns with where the router bit needs to cut. Clamp the jig to the panel, then run your router with even pressure along the fence.
If the jig is built square and clamped properly, you’ll get a clean, straight cut that’s ideal for joinery or panel squaring. Jodee often follows up by trimming the opposite edge on the table saw to bring everything perfectly in line.
Key Tips for Success
Jodee shares several practical tips that help this jig perform reliably in the shop:
- Check for parallel contact: If the crosspiece doesn’t sit flush on both ends, the cut may end up skewed.
- Round the edges: Light sanding keeps the router base from catching or dragging during the cut.
- Clean up glue quickly: If you get squeeze-out, wipe it away before it sets.
- Don’t over-rely on super glue: It’s there for alignment only—the wood glue is the long-term bond.
- Use sharp bits: The better the bit, the smoother the cut and the less chance of tear-out.
When to Use (and Not Use) This Jig
This jig shines for small projects, one-off setups, and tight shops where hauling out a large straightedge or building a new fence each time isn’t practical.
That said, it’s not the best option when absolute precision over long lengths is required.
For that, a commercial straightedge or router table setup may be a better fit. But in the everyday shop, this jig is a go-to tool that gets regular use.
Ways to Upgrade
While the basic version works well, here are a few small upgrades to consider:
- Replaceable wear strip: Add a sacrificial edge to protect the main fence from wear over time.
- Metal straightedge: Mounting a metal guide along the fence improves accuracy and longevity.
- Add measurements: Marking common offsets or center points can speed up repeatable tasks.
These are completely optional—Jodee’s version stays simple and effective with just glue and scraps.
Real-World Context: Part of a Bigger Project
This jig wasn’t built in isolation—it came out of a need while building a sanding station. Jodee needed a straight, square edge on a plywood panel and didn’t want to use the table saw.
Instead of improvising, he built this jig in minutes and used it to clean up the edge with a router.
The full sanding station project provides great context for how the jig fits into everyday work.
Watch the Jig in Action
Jodee walks through the entire build and setup process in his video, showing how the glue trick works and how to get repeatable cuts with just clamps and a router.
Support Jodee by visiting his online store here: https://inspirewoodcraft.com/collections/all.

Matt’s Take
These are my personal thoughts and tips based on my own experience in the shop. This section is not written, reviewed, or endorsed by the original creator of this project.
This type of T-square jig is one of those shop helpers that seems simple but makes a real difference in day-to-day work. The glue-only assembly approach is particularly smart—that combination of wood glue for strength and CA glue for instant hold eliminates the need for clamps during assembly. Just remember to use the super glue sparingly; it’s really just there to keep everything positioned while the wood glue does its job.
From a safety standpoint, always make sure your workpiece is well-supported and the jig is clamped securely before you start routing. A jig that shifts mid-cut can lead to gouged work or worse. I also like Jodee’s tip about rounding over the fence edges—it’s a small detail that prevents the router base from catching and helps you maintain smooth, consistent pressure throughout the cut.
The beauty of this jig is its flexibility with materials. You can build it from whatever sheet goods you have on hand, as long as they’re flat and reasonably stiff. Hardboard works great for the fence because it’s dense and stays straight, but MDF or plywood work fine too. The key is making sure that crosspiece goes on perfectly square—that’s what determines the accuracy of every cut you make with it.
For shops where space is at a premium, this jig stores easily and handles a surprising range of tasks. It’s not going to replace a full router table setup, but for trimming panels, cutting grooves, or cleaning up rough edges, it’s hard to beat the simplicity and effectiveness of this approach.