Jodee from Inspire Woodcraft shared the woodworking tip featured in this video.
This short tip shows how to use conventional wood glue for a permanent bond while using superglue (CA) as a temporary clamp when clamps or fasteners aren’t practical, such as attaching small trim inside a framed panel.
Watch the full video and subscribe to Inspire Woodcraft:
The trick explained
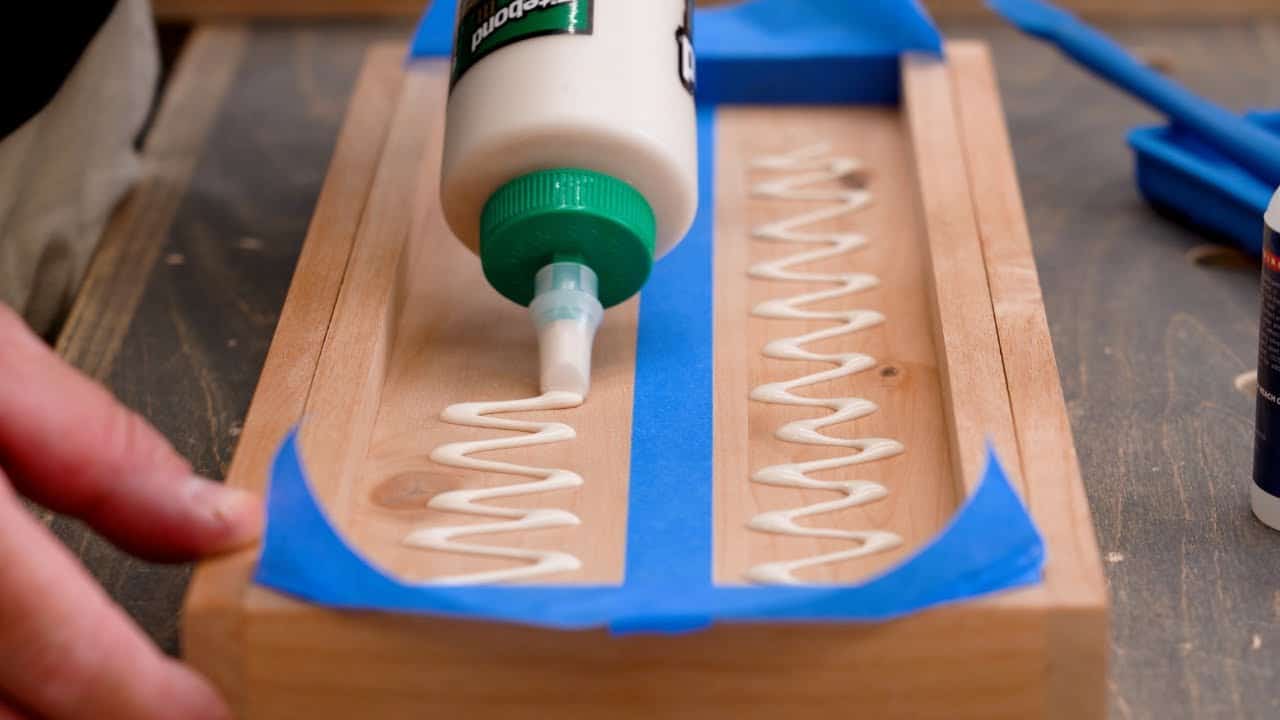
Jodee demonstrates a mockup where small half-round trim pieces need to be glued to a plywood face inside a frame with no good way to clamp or use nails.
The method is simple: apply wood glue where the permanent bond is desired, then use small applications of CA glue on the outside to hold parts in place while the wood glue cures.
This keeps the strengths of both adhesives: wood glue provides a long-lasting structural bond and CA acts like a fast clamp to speed up assembly. Masking or protecting nearby surfaces is optional but helpful for beginners and for easier cleanup afterward.
Why it works
Wood glue soaks into end grain and fibers to make a durable joint, but it usually needs clamping pressure while it dries to form a tight bond. CA sets almost instantly and can hold parts in alignment and pressure long enough for the wood glue to begin curing.
Because CA is used only as a temporary clamp, the long-term performance relies on the wood glue, avoiding the brittleness and poor long-term wood adhesion of CA when used alone.
When to use it
This method is ideal for small trim, beads, or roundovers where clamps would be awkward or where a builder prefers no visible nail holes. It’s also useful when multiple small pieces must be positioned precisely before the wood glue cures.
It is less appropriate for large structural joints that require sustained clamp pressure or for situations where CA could interfere with the main glue line.
Practical tips and cautions
Keep the two glues separate so CA does not contaminate the main glue surfaces; a thin film of CA in the glue line can prevent a good wood-glue bond. Masking tape along adjacent surfaces makes cleanup easier and protects visible faces from CA residue.
Use CA sparingly and consider the CA viscosity: thicker CA is easier to control and less likely to migrate into the joint, while very thin CA can wick into places where it is not wanted.
Remove CA residue by careful sanding after the wood glue has fully cured, and avoid relying on CA as the long-term adhesive for wood-to-wood bonds.
Why this tip matters
The superglue-plus-wood-glue approach gives woodworkers a fast, low-cost way to assemble fiddly pieces without custom jigs or extensive clamping hardware.
The technique is adaptable and keeps projects moving while preserving the integrity of traditional wood-glue joints.
Applied sensibly, it reduces frustration on small assemblies and can be a go-to solution when speed and clean appearance matter more than heavy clamping solutions.
Support Jodee by visiting his online store here: https://inspirewoodcraft.com/collections/all.

Matt’s Take
These are my personal thoughts and tips based on my own experience in the shop. This section is not written, reviewed, or endorsed by the original creator of this project.
This is one of those simple tricks that can be a real game-changer in the shop. I’ve found myself in situations where you need that third hand to hold something in place while wood glue sets up, and CA glue acting as an instant clamp is brilliant. The key insight here is understanding that each adhesive has its strengths — wood glue for long-term structural integrity and CA for that immediate grab.
Safety-wise, keep that CA glue bottle away from your main glue line. I’ve seen folks accidentally get CA into their wood glue joint, and it can seriously compromise the bond. A light touch with the CA is all you need — think of it as spot-welding rather than continuous coverage. Good ventilation is important too since CA fumes can be irritating, especially in a confined space.
The masking tape suggestion is spot-on for protecting finished surfaces. CA can leave a cloudy residue on wood that’s tough to remove without sanding, so a little prep work saves headaches later. This technique works particularly well with PVA glues that have a longer open time, giving you more working time to position everything before the wood glue starts to grab.