This video was created by Jodee from Inspire Woodcraft.
It’s a practical, real-world breakdown of spiral router bits, covering when and why to use upcut, downcut, and compression bits for better routing results.
Jodee walks through bit behavior in both handheld routers and router tables, shares workflow examples, and gives useful tips that help avoid tear-out and overheating.
Whether you’re new to routing or refining your technique, this video simplifies the decision-making process.
Watch the full video and subscribe to Jodee’s channel:
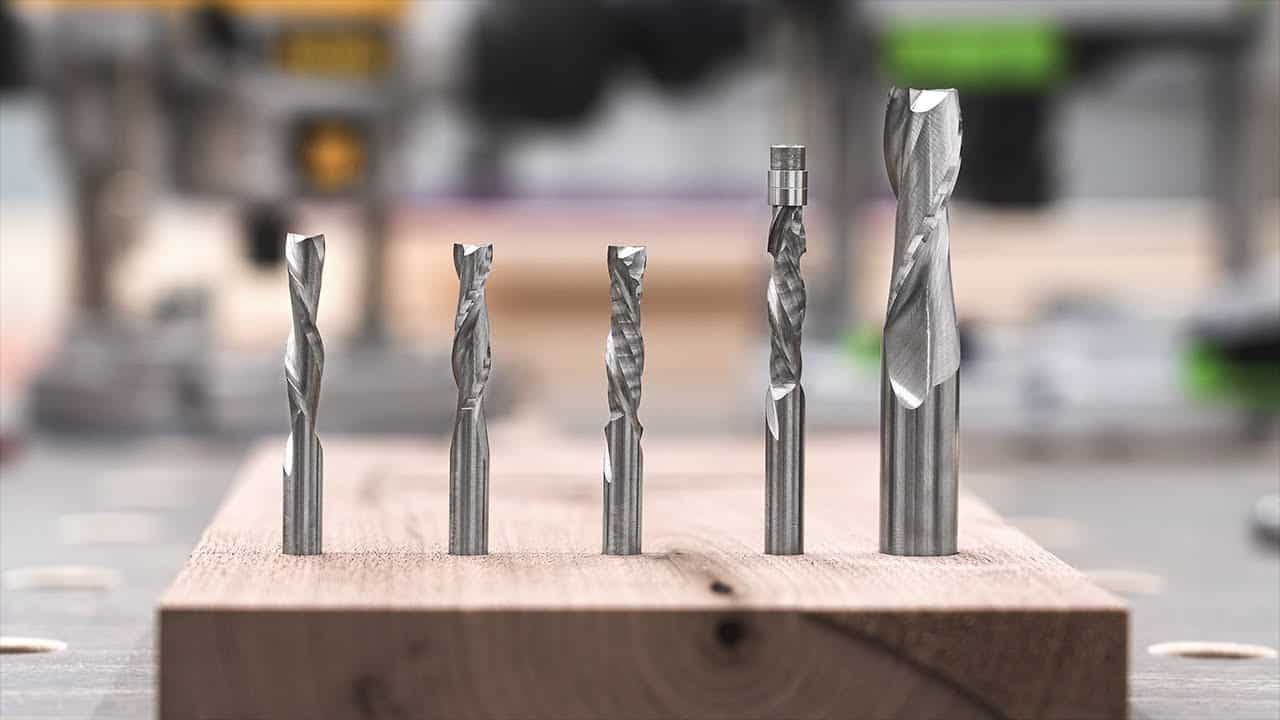
What Spiral Bits Do Differently
Spiral router bits feature helical flutes that move chips either up or down, depending on their orientation. Unlike straight two-flute bits, spiral bits shear the material more cleanly, especially in deep cuts or materials prone to tear-out.
They’re available in different shank sizes and often include optional bearings for use in template routing.
Their cutting direction — either toward or away from the router motor — plays a key role in edge quality and chip evacuation.
Upcut Bits: Better Chip Removal, Rougher Top Edge
Spiral upcut bits pull chips upward and away from the workpiece. That makes them great for plunging into material, clearing mortises, and routing deep grooves.
They leave a clean bottom edge but may lift or fray surface fibers, especially on plywood.
If you’re routing a dado in hardwood or plunging straight down, upcut bits are often the most efficient option.
Best for:
✔️ Mortises
✔️ Deep grooves
✔️ Internal pockets
Watch out for:
✖️ Tear-out on the top face of plywood
✖️ Rough top edges on visible surfaces
Downcut Bits: Cleaner Top Face, Less Chip Clearance
Spiral downcut bits shear fibers downward, leaving a crisp edge on the top face. They’re ideal for trimming or routing along visible edges where appearance matters most.
However, they push chips deeper into the cut, which can cause clogging or heat buildup in deeper slots. In some cases, switching to an upcut after the first pass helps clear chips while preserving the clean top edge established by the downcut.
Best for:
✔️ Veneered plywood
✔️ Shallow edge routing
✔️ Face-first cuts with high visibility
Watch out for:
✖️ Poor chip evacuation in deep cuts
✖️ Tear-out on the bottom face
Compression Bits: Clean Top and Bottom — If Used Correctly
Compression bits combine both helix types — upcut near the tip and downcut toward the top. This hybrid geometry shears both the top and bottom surfaces cleanly when used in full-depth passes.
They’re ideal for through-cuts in plywood, especially when both faces need to remain clean. However, they only perform well if the full flute length is engaged. Shallow passes won’t activate the compression effect and may still lead to tear-out.
Best for:
✔️ Plywood through-cuts
✔️ Laminated material
✔️ Projects without a sacrificial board
Watch out for:
✖️ Incomplete passes that only use part of the bit
✖️ Incorrect pass depth when making multiple passes
Router Table vs Handheld — Orientation Confusion
Jodee explains that upcut and downcut bits behave differently depending on whether you’re using a handheld router or a router table. In a handheld router, an upcut pulls chips upward — away from the material. But in a router table (where the router is upside down), that same bit pushes chips downward.
To avoid confusion, think in terms of chip movement relative to the motor. Upcut bits always pull chips toward the router motor. Downcut bits push them away — regardless of router orientation.
Key tip:
Always ask yourself: “Is this bit pulling toward the motor or pushing away from it?” That keeps your routing direction and expectations clear.
Spiral Bits vs Straight Two-Flute Bits
Spiral bits offer a few key advantages over traditional straight bits:
- They can plunge directly into material without ramping.
- Their cutting motion is smoother and results in cleaner edges.
- They’re better for grain changes and figured wood.
That said, straight two-flute bits are still useful for edge trimming and template routing — and they’re often more affordable. Jodee doesn’t suggest replacing all your bits, just choosing the right tool for each job.
Shop Recommendations from Experience
Jodee recommends keeping a small set of spiral bits to cover most use cases. A practical starter set might include:
- One spiral upcut (for deep mortises and chip clearing)
- One spiral downcut (for visible face routing)
- One compression bit (for clean through-cuts in plywood)
- Optionally, a compression bit with a bearing for templates
These few bits can handle a majority of shop routing tasks. Brands vary in price and quality, but reliable spiral bits are available without breaking the bank.
Extra tips from the video:
- Keep bits sharp — dull spirals cause overheating and poor surface finish.
- For plywood without a compression bit, use a sacrificial backer to reduce tear-out.
- Ensure first passes with compression bits go deep enough to engage both cutting directions.
Why This Guide Matters in the Shop
Jodee’s real-world advice comes from time spent troubleshooting tear-out and bit failure in actual projects. He explains how to use the right bit for each step — like starting a dado with a downcut for clean edges, then switching to an upcut for clearing material.
This approach saves time on sanding, cleanup, and repair work. It’s all about choosing bits based on workflow, not just what’s in the drawer.
Learn Directly from Jodee
This post only summarizes what’s covered in the video — the real benefit comes from watching how each bit behaves during cuts.
Support Jodee by visiting his online store here: https://inspirewoodcraft.com/collections/all.

Matt’s Take
These are my personal thoughts and tips based on my own experience in the shop. This section is not written, reviewed, or endorsed by the original creator of this project.
The confusion between router table and handheld use that Jodee covers is something I see trip up woodworkers all the time. That mental flip when you mount your router upside down can mess with your expectations if you’re not thinking it through. I find it helpful to always visualize which direction the chips are actually moving relative to your workpiece, not just the motor.
One thing worth adding to your spiral bit arsenal is understanding feed rate. These bits can handle more aggressive cuts than straight bits, but they also generate more heat if you feed too slowly. I’ve found that maintaining a steady, confident feed rate prevents that telltale burn mark you get when the bit dwells too long in one spot. This is especially critical with compression bits in plywood where you’re making full-depth passes.
Safety-wise, spiral bits deserve extra respect during plunge cuts. That upcut action wants to pull your router down into the work, which can catch you off guard if you’re used to straight bits. Keep a firm grip and let the bit do the work rather than forcing it. And definitely invest in sharp bits from the start — a dull spiral bit is not only dangerous but will tear out your work worse than a sharp straight bit ever would.