This technique was developed by Jodee from Inspire Woodcraft.
It offers a simple, repeatable way to cut a juice groove in a cutting board using scrap wood—no custom jig required.
Rather than relying on expensive tools or templates, Jodee’s method uses basic materials to guide the router and keep the board locked in place. It’s a beginner-friendly solution that produces clean, consistent grooves every time.
Watch the full video and subscribe to Jodee’s channel:
Why This Method Works
The approach relies on creating two things with scrap wood:
- A “play pen” that locks the board in place
- A set of bumpers that guide the router base
This does two jobs at once—it prevents the board from moving and keeps the router bit consistently aligned with a marked centerline. With no complex fabrication involved, it’s a practical solution for most shops.
Planning the Setup
Before routing, there are three key things to account for:
- The offset from the router bit’s center to the edge of the base
- The thickness of the cutting board
- The depth of each pass you’ll take
By using adjustable bumpers and making multiple shallow passes, Jodee’s setup reduces the chance of tear-out, burning, or routing mistakes.
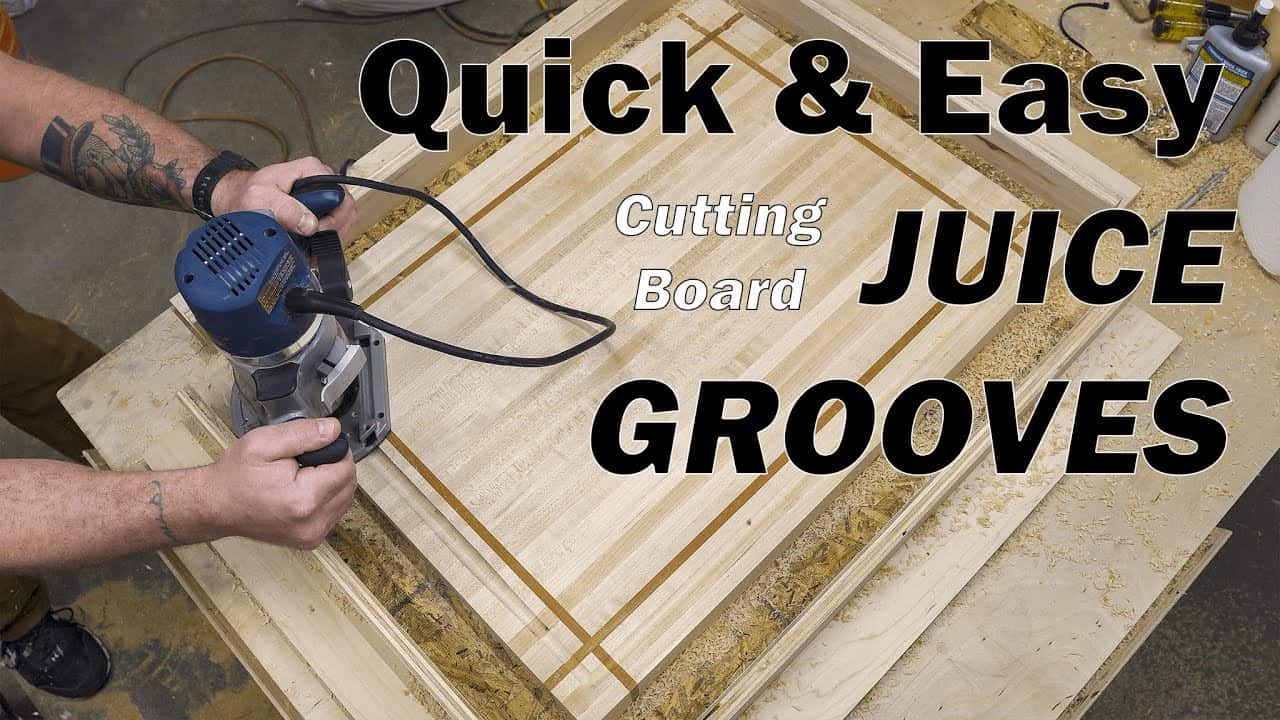
Using Scrap Fencing Instead of a Jig
Jodee skips the complex jig and instead uses offcuts of plywood or other sheet goods to build a temporary routing system. Long scraps act as bumpers for the router base, while shorter pieces keep the cutting board from sliding.
This makes the setup flexible and easy to scale. For thicker cutting boards, you can double up the scrap pieces to raise the fence height so the router base still registers properly.
The beauty of using scrap is that if something gets damaged or misaligned, it’s easy and cheap to replace.
Determining Router Offset and Marking the Centerline
The groove’s location is based on a centerline drawn on the cutting board. The bumpers are placed to match the distance from the router bit’s center to the edge of its base.
To do this, use a straightedge along the centerline, bring the router base up against it, and then place a scrap bumper alongside the router base. This spacing ensures that when the router rides the bumper, the bit follows the groove line.
Check the spacing carefully before attaching anything. Inconsistent distance from the centerline will lead to an uneven groove.
Building the Temporary Fixtures
Cut four scrap strips a little taller than your cutting board. Two longer strips go on the long sides of the board, and two shorter ones go on the ends. These don’t need to form a complete box—just enough to keep the board from shifting.
The bumpers should be flush and straight so the router base rides cleanly along them. Leave a bit of overhang to avoid coming up short when routing around the corners.
Jodee recommends using nails or pins to hold the scrap pieces in place. This keeps the setup secure without permanently altering your benchtop.
Router Setup and Routing Tips
Once the board is secured and the bumpers are in place, set up your router with the bit depth at a shallow starting point. Use a slower speed setting to minimize burning and make several light passes around the board.
Don’t try to cut the full depth in one pass—it’s safer and cleaner to remove material gradually. A final cleanup pass at slightly deeper depth can remove any small ridges or burn marks.
This technique works equally well whether you’re cutting a new groove or refreshing an old one.
Navigating Corners Smoothly
Router base shape affects how the tool behaves in corners. Flat-sided bases can shift the bit off the centerline when you pivot, but a round base keeps the bit centered during rotation.
If your base has flat sections, angle it slightly in the corners and rotate slowly so the round part maintains contact. Practicing this movement with the router turned off helps build confidence.
Safety and Final Checks
Before making the first cut, do a dry run with the router off. This confirms that the bit is tracking properly, the bumpers are solid, and the board is secure.
Watch out for screw or nail heads, and make sure the bit won’t hit any hardware. If you’re working with a burn-prone species like cherry or maple, lower your router speed and take thinner passes.
Common Mistakes to Avoid
- Skipping the dry run
- Cutting too deep in a single pass
- Pivoting on the flat side of the router base in corners
- Leaving the board loosely secured
Each of these can ruin your cutting board or leave an uneven groove. A few minutes of prep can prevent hours of frustration.
Final Thoughts
Jodee’s approach is a great reminder that precision doesn’t always require complicated tools. By using scraps, a marked centerline, and a well-thought-out process, any woodworker can add a professional-looking juice groove with confidence.
The setup is fast, flexible, and perfect for one-off boards or small batches. It’s a smart method that saves time and money—without sacrificing results.
Support Jodee by visiting his online store here: https://inspirewoodcraft.com/collections/all.

Matt’s Take
These are my personal thoughts and tips based on my own experience in the shop. This section is not written, reviewed, or endorsed by the original creator of this project.
This scrap wood approach really highlights how smart setup can beat expensive jigs every time. The key insight here is using your router’s base as the reference point rather than trying to guide the bit directly. Once you understand that offset distance from bit center to base edge, you can apply this principle to all sorts of routing tasks beyond juice grooves.
Safety-wise, those shallow passes are non-negotiable. I’ve seen too many boards ruined by woodworkers trying to hog out a groove in one aggressive cut. The wood tears out, the router bogs down, and you’re left with a wavy mess. Cherry and hard maple are especially unforgiving here—they’ll burn in a heartbeat if you push too hard or run the router too fast.
The corner technique is worth practicing on scrap first. Router bases have their quirks, and understanding how yours behaves in tight turns will save you from that sinking feeling when the bit suddenly veers off your centerline. A few practice runs with the power off will build the muscle memory you need.
What I really appreciate about this method is how it scales. Need to groove a bunch of boards? The setup stays the same. Working with different thicknesses? Just adjust your fence height with more scrap. It’s the kind of flexible thinking that makes small shops efficient.