This project was built and designed by Izzy Swan.
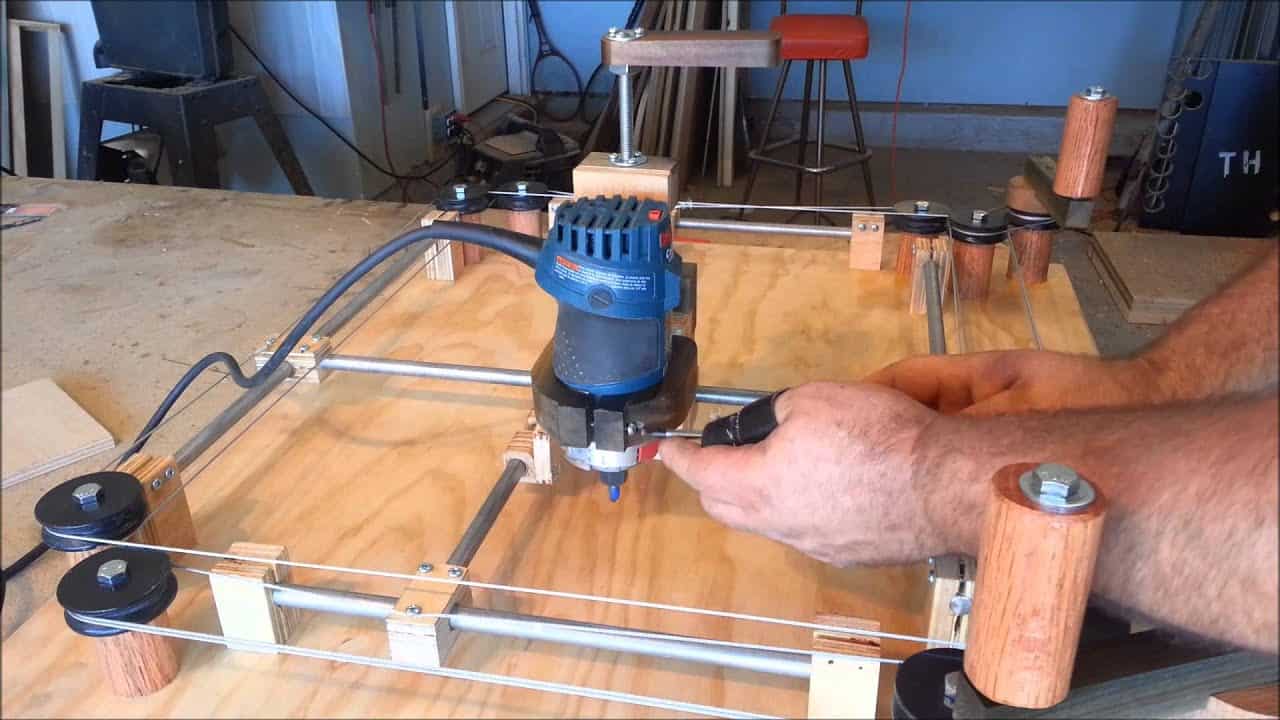
Izzy makes a three-axis router jig inspired by the classic Etch A Sketch to encourage kids to spend more time learning in the shop.
The mechanism lets the router move along X, Y, and Z axes so children can experiment with shape making while getting hands-on experience with basic woodworking concepts.
Watch the full video and subscribe to Izzy Swan:
Design
The jig’s design borrows the playful interface of an Etch A Sketch, converting hand-driven controls into linear motion for a router carriage.
This approach prioritizes usability and curiosity, making the tool approachable for children while still offering meaningful woodworking lessons.
Key design choices center on simplicity and robustness so that the jig survives repeated use and minor mistakes. The overall form is easy to adapt into different sizes or to fit different router models without redoing the core motion system.
Lumber Prep and Base Construction
Material selection is kept straightforward: stable sheet goods for the base and simple hardwoods or plywood for the moving parts. Emphasis is on flat, stable surfaces and predictable joinery that keep the axes square and minimize binding during movement.
Allowing parts to acclimate and checking for warp before assembly reduces friction issues later on.
Careful layout and consistent part numbering make it easier to sandwich bearings, guides, and fasteners into the build without having to redesign on the fly.
Motion, Controls, and Mechanisms
The heart of the jig is the three-axis motion system that translates knob turns into precise linear movement of the router. Using threaded rods, bushings, or simple lead screws gives repeatable motion that kids can understand while learning cause-and-effect in a tactile way.
Mounting the router on a stable sled and using hardened guides or bearings helps keep cuts consistent and reduces the risk of tear-out. The same concepts apply whether the maker uses store-bought components or shop-made hardware—smooth, supported motion is the goal.
Joinery and Assembly
Joinery for this project focuses on strong, repeatable connections rather than decorative complexity.
Simple mechanical fasteners and laminated blocks are preferable because they allow tuning and replacement as parts wear from use.
Where movement is involved, parts that can be adjusted post-assembly—such as shims or slotted fasteners—improve long-term performance. Designing assemblies with serviceability in mind makes it easier to teach maintenance as part of the learning experience.
Shaping, Finishing, and Kid-Friendly Details
Edges should be rounded and finishes chosen for durability and safety, especially because the jig is meant for children.
A smooth paint or wipe-on sealer and sanded edges reduce splinters and make the tool more pleasant to handle.
Visual cues—like contrasting knobs, color-coded axes, or simple graphics—help new users immediately understand how the jig works. These small touches increase engagement and make the learning curve less steep.
Why This Jig Matters
The Etch A Sketch-style router jig blends play and practical skill development, making woodworking accessible to younger learners. It offers a low-pressure way to practice tool control, spatial reasoning, and basic machine maintenance.
Because the design is modular and forgiving, it can be adapted for different ages, toolsets, or workshop spaces and used as a stepping stone toward more advanced projects.
The jig’s educational value lies in its ability to spark curiosity and confidence at the bench.
Please support Izzy by visiting his website: https://www.izzyswan.com/.

Matt’s Take
These are my personal thoughts and tips based on my own experience in the shop. This section is not written, reviewed, or endorsed by the original creator of this project.
This is such a clever approach to introducing kids to routing — turning what can be an intimidating power tool into something familiar and fun. The Etch A Sketch interface removes a lot of the fear factor while still teaching genuine woodworking principles. I love how the threaded rod system gives kids that immediate tactile feedback between turning the knobs and seeing the router move.
Safety-wise, this setup is brilliant because it puts multiple layers of control between the child and the spinning bit. The mechanical advantage of the lead screws means movements are deliberate and controlled — no sudden jerky motions that could cause problems. Just make sure to use a plunge router with a good base lock, and consider limiting the depth of cut with stops or collars until kids get comfortable with the feel.
The real genius here is in the learning progression. Kids can start by just making simple lines and curves to understand how the axes work together, then gradually move to more complex shapes as their confidence builds. It’s also a great way to introduce concepts like feed rate and grain direction without the pressure of ruining an actual project.
One thing I’d definitely recommend is having spare sacrificial surfaces ready to go. Kids will want to experiment, and having fresh material keeps the learning momentum going without having to stop and resurface the work area every time.