This project demonstration was created by Jeff from Today’s Craftsmen.
In a production setting where efficiency and precision matter, Jeff shares a router bit that changes how laminated panels are prepared for CNC operations.
By using a double flush trim bit with a center bearing, Jeff eliminates the need for flipping panels or repeating tool passes. The result is a faster, safer, and more accurate way to expose clean substrate edges for registration.
Watch the full video and subscribe to Jeff’s channel:
Watch the full video and subscribe to Jeff and Jon’s channel:
The Problem in Production Shops
In Jeff’s commercial shop, a production run required trimming dozens of laminated panels. Each one had a plywood core and overhanging laminate on both faces, which made it difficult to register them accurately on the CNC using pop-up locating pins.
Trimming both faces by hand was time-consuming and posed safety concerns. Flipping routers upside down or running multiple passes per panel introduced more opportunity for error and inconsistency.
That’s where the center-bearing double flush cut bit made all the difference. With one pass, both faces could be trimmed cleanly and simultaneously.
What Is a Double Flush Cut Bit?
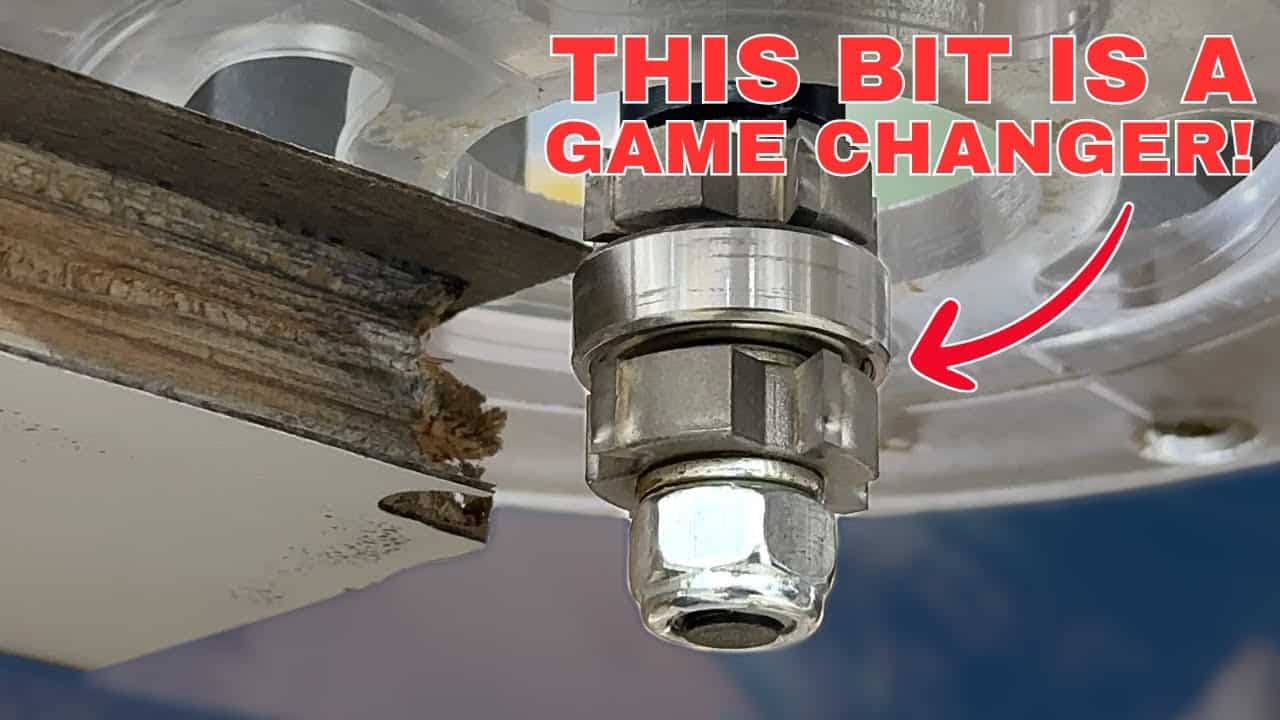
This bit features two cutting edges with a bearing located between them. One cutter trims the top face, the other trims the bottom, and the center bearing rides along a reference surface like a plywood core or template.
It’s designed to keep both cuts aligned without the need for flipping or resetting the router. The concept is simple, but the time and consistency gains are significant.
Why It’s Useful in a Shop Environment
For anyone trimming sheets with overhanging laminate or veneer, this bit solves several problems at once:
- Speed: A single pass replaces two separate flush-trim operations.
- Alignment: Both faces are cut relative to the same center reference, resulting in a consistent edge.
- Safety: No need to invert the router or perform awkward maneuvers to reach the bottom face.
In high-volume jobs where dozens or even hundreds of panels need preparation, this kind of workflow improvement can save hours.
Real Shop Example from Jeff
Jeff used this bit on a stack of laminated plywood panels. The laminate overhung slightly on both sides and needed to be trimmed flush with the plywood core so the CNC pop-up pins could reference a clean edge.
Previously, the shop used a two-pass method: trim the top, then flip the router and trim the bottom. While this worked, it was inefficient and carried extra risk.
With the center-bearing bit, Jeff clamped the panel securely, made a single guided pass, and had both faces trimmed flush in one motion. The result was a clean, consistent edge, ready for CNC operations.
Tips for Best Results
Jeff shared several useful tips during the demo:
- Clamp securely: The panel must stay flat and still so the bearing can ride accurately along the edge.
- Clean the bearing: Ensure the bearing spins freely without drag or debris buildup.
- Choose feed direction carefully: Jeff used a climb cut for cleaner results with laminate, but this depends on your material and setup.
- Use sharp cutters: Dull edges will cause burning, tear-out, or chatter on laminated materials.
Understanding Climb Cut vs. Conventional Cut
In a climb cut, the router moves in the same direction as the rotation of the bit. This often gives a cleaner finish on laminates, but it also applies more pulling force to the workpiece.
Jeff preferred a climb cut in this application for the better edge quality it produced. However, he noted that this requires secure clamping and a steady hand. Shops should always test on scrap before committing to a climb cut in production.
When This Bit Works Best
The center-bearing double flush cut bit is ideal when:
- Both sides of the material need to be flush with a center substrate.
- You’re prepping sheets for CNC referencing and need a uniform edge.
- You’re working in volume and want to reduce time and passes.
It may not be the right tool in every case. For brittle substrates, irregular edge profiles, or one-off projects, traditional methods may still make more sense.
Alternatives to Consider
If this type of bit isn’t available, other approaches include:
- Standard flush-trim bits used twice — once for each face.
- Panel saws or edge banders to trim the laminate before routing.
- Hand trimming or scraping for small-volume cleanup.
These methods work, but they require more time or leave more room for human error. The double flush approach compresses the process into a single pass with consistent results.
Practical Considerations for Buying
Jeff used a model sourced from a specialty tooling supplier. Before purchasing, check:
- Shank diameter and router compatibility.
- Cutter diameter for your application.
- Whether the bit allows for angled cutter swaps if beveling is needed.
The performance improvements in Jeff’s shop made the investment worthwhile, especially for repetitive CNC prep work.
Final Thoughts
This specialty router bit isn’t just a novelty — it’s a practical tool that solves real problems in a busy woodworking shop. For anyone working with laminated or veneered panels, it offers a cleaner, faster way to expose the core material and prep sheets for CNC use.
It’s the kind of upgrade that doesn’t change what you do — just how efficiently and safely you do it.
Please support Jeff and Jon by visiting their website: https://todayscraftsmen.com/.

Matt’s Take
These are my personal thoughts and tips based on my own experience in the shop. This section is not written, reviewed, or endorsed by the original creator of this project.
This center-bearing double flush bit is one of those specialty tools that really shines in the right application. The concept is brilliant — having that bearing positioned between two cutters means you’re referencing off the substrate while trimming both faces simultaneously. It’s the kind of efficiency gain that makes a real difference when you’re dealing with volume work.
The climb cut approach Jeff mentions is worth paying attention to. With laminates, you often get cleaner results going with the grain direction of the rotation, but it does require more control. The router wants to pull itself along, so having that panel locked down tight is critical. I’d definitely recommend testing feed rates and clamping pressure on scraps first — especially if you’re not used to climb cutting with bearing-guided bits.
For CNC prep work, having that perfectly consistent reference edge is everything. Pop-up pins are unforgiving, and any variation in your panel edges will throw off your whole program. This bit eliminates the human error that can creep in when you’re doing two separate passes or flipping routers around. The time savings are obvious, but the consistency gains might be even more valuable in a production environment.
One thing to keep in mind with any specialty bit like this — keep that bearing clean and spinning freely. Built-up adhesive or debris will throw off your reference, and you’ll end up with wavy edges that defeat the whole purpose. A quick cleaning between jobs goes a long way toward maintaining accuracy.