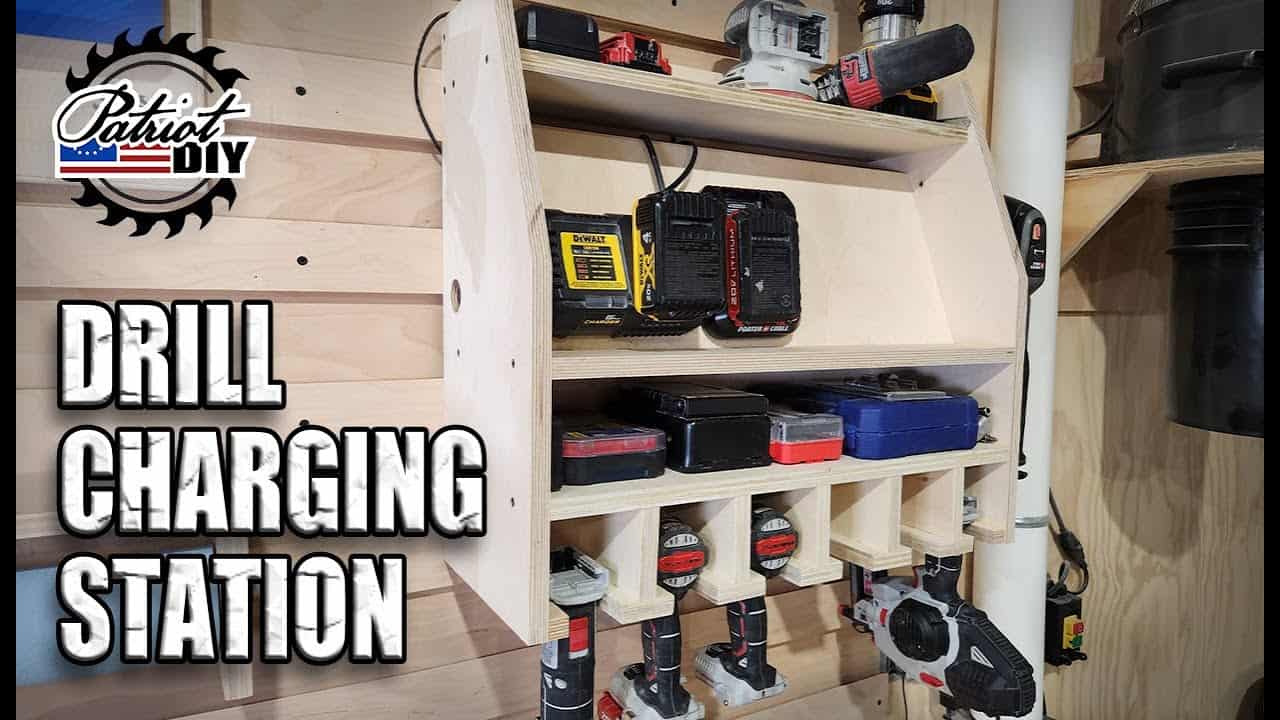
This project was built and designed by Jason from PatriotDIY. It’s a wall-mounted charging station that organizes cordless drills, chargers, and batteries, all while making the most of scrap plywood and limited shop space.
With a clean layout and efficient design, this project is a great way to declutter your workspace and improve tool accessibility. Whether you’re just getting started or refining your shop setup, this build offers practical value and smart organization.
Watch the full video and subscribe to Jason’s channel:
Why Build a Drill Charging Station?
Creating a dedicated space for your battery-powered tools offers a lot of benefits. It keeps your drills and drivers off the workbench, prevents tangled cords, and allows you to charge everything in one centralized location.
This setup is especially useful in smaller shops where space is tight. By mounting it on the wall using a French cleat, you gain flexibility in placement without sacrificing floor or bench space.
Materials and Tools
The entire station is built from plywood, most of which can be sourced from scraps left over from other projects. This makes the project budget-friendly while still looking polished.
Basic tools are all that’s needed: a table saw or track saw, a miter saw for crosscuts, and a brad nailer or drill for assembly. A Forstner bit or standard drill bit helps with mounting hardware and running power cables cleanly.
Cutting the Components
The build begins by breaking down plywood sheets into panels for the sides, shelves, and tool slots. Jason uses a table saw and track saw to make clean, square cuts and to size each piece according to the design layout.
To hold the drills securely, T-shaped tool hangers are created from offcuts. These are assembled by gluing and nailing blocks together, leaving just enough space for the drill handles to slide in and out easily.
Framing the Structure
With all components cut, the sides are shaped to add a bit of visual interest and reduce bulk. An angled top section gives the charging station a more intentional look and allows space for charger cords to route cleanly.
Glue and brad nails are used to attach the sides to the base and back. A middle shelf is added with spacers to form a small cubby—perfect for storing extra batteries, drivers, or bits.
Jason makes sure to leave room for power cables and strip placement as he goes, helping avoid having to cut access holes after the fact.
Mounting the Chargers
Most tool chargers come with built-in mounting slots. To line these up precisely, Jason uses painter’s tape as a template: place the tape across the mounting holes, mark the positions, then transfer the tape directly to the plywood.
This trick saves time and avoids guesswork. For any charger without mounting holes, heavy-duty Velcro is a practical alternative, keeping things secure without drilling.
Once the chargers are mounted, the power strip is installed on the side or inside the back panel. This allows multiple chargers to be plugged in at once without excess cord clutter.
Using a French Cleat System
To mount the station on the wall, Jason uses a French cleat system. This method involves cutting a 1×4 board at a 45-degree angle and attaching one piece to the back of the station and the other to the wall.
The angled fit creates a strong mechanical hold while allowing the station to be lifted off or repositioned easily. This makes it simple to move the unit if your shop layout changes or if you want to expand on the design later.
Final Assembly and Adjustments
After mounting the cleat and hanging the station, all drills and batteries are slotted into place. Jason tests for clearance, checks for balance, and adjusts hanger spacing if needed.
The charging cords are routed through built-in gaps and tied down to keep everything clean and manageable. At this point, the station is fully functional—ready to charge, store, and streamline tool access in the shop.
Customization and Expandability
One of the best parts of this project is how easy it is to tailor it to your shop. The size and number of tool slots can be adjusted depending on your collection. You can also add cubbies for bits, hooks for cords, or drawers for accessories.
Because it’s made from plywood, modifying the design later is simple. Whether you want to expand upward, add labels, or include LED lighting, there’s plenty of room to make it your own.
Plans and Additional Resources
Jason offers digital plans for this build on his website, which include measurements, material lists, and detailed build steps. It’s a helpful resource if you’d like to recreate the project exactly or use it as a starting point for your own custom version.
The charging station adds both organization and efficiency to the shop. And with its clean layout, it’s easy to keep your tools charged, visible, and ready to go.
Please support Jason by visiting his Etsy Store: https://www.etsy.com/shop/patriotdiy.

Matt’s Take
These are my personal thoughts and tips based on my own experience in the shop. This section is not written, reviewed, or endorsed by the original creator of this project.
Tool organization projects like this are some of my favorite builds because they solve real problems we all face in the shop. There’s nothing worse than hunting for a dead battery or having drills scattered across your workbench when you need to get something done quickly. A dedicated charging station keeps everything visible and ready to go.
The French cleat mounting system is brilliant for shop organization projects. It gives you that rock-solid hold on the wall, but you can still lift the whole unit off if you need to modify it or rearrange your space. I’ve found that shops evolve constantly, so having that flexibility is worth the extra effort of cutting those 45-degree angles.
One thing I really appreciate about this design is how it accommodates different drill sizes and brands. Those T-shaped hangers can be sized for whatever tools you have, and the modular approach means you can always add more sections later. If you’re working with mixed scrap plywood, just make sure your thicknesses are consistent within each component—it’ll make assembly much smoother and give you cleaner lines.
Safety-wise, make sure that power strip is rated for the combined load of all your chargers. Most modern chargers are pretty efficient, but it’s worth checking the amperage, especially if you’re running four or five units simultaneously.