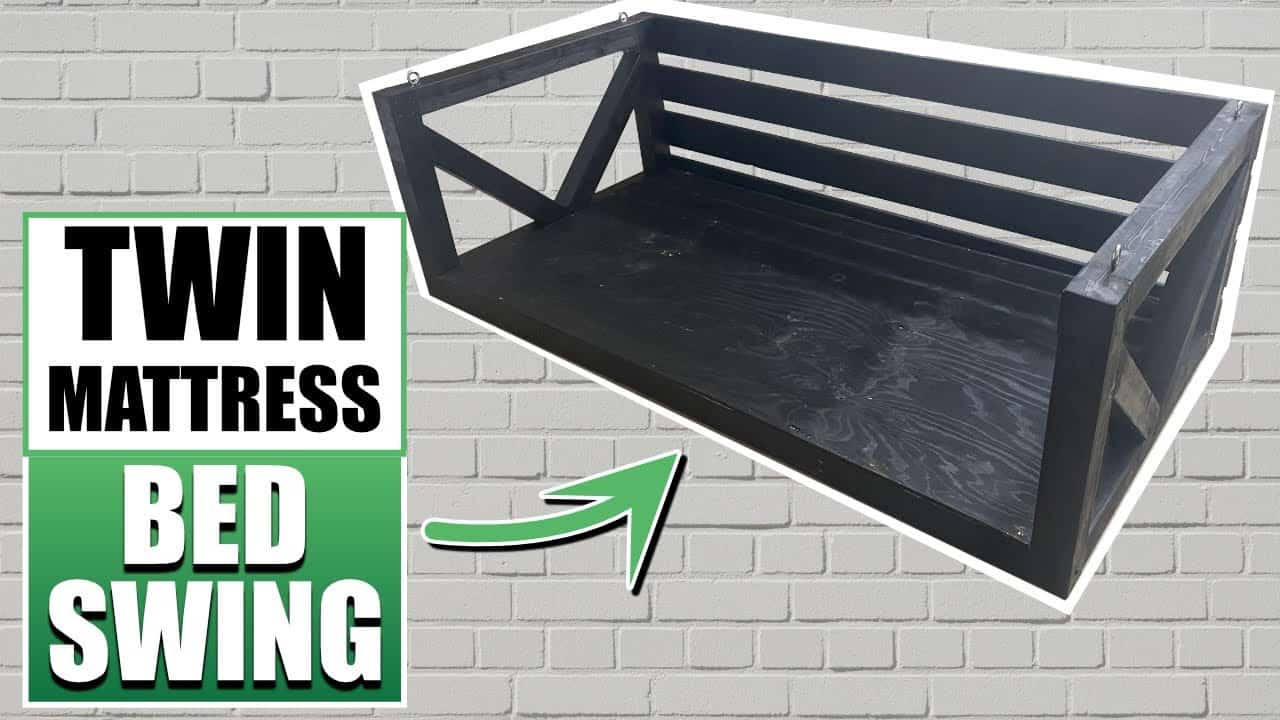
This project was built and designed by Nick from Rocky River Woodworks. It’s a heavy-duty porch swing sized for a twin mattress, offering a perfect blend of form, function, and long-lasting comfort for any outdoor space.
Built with clean joinery and thoughtful design choices, this swing bed provides a cozy spot for reading, relaxing, or even napping. Whether you’re working with a covered porch or a sturdy arbor, this build makes a rewarding weekend project.
Watch the full video and subscribe to Nick’s channel:
Why Build a Bed Swing?
A porch swing bed combines relaxation and craftsmanship in one package. It’s more than just a piece of furniture—it’s an experience. From enjoying warm afternoons with a book to adding a unique focal point to your outdoor setup, this swing offers both utility and charm.
By building it yourself, you can control the dimensions, finish, and hardware, ensuring that it fits your style and space perfectly. And since it’s built around a standard twin mattress, sourcing the cushion is simple.
Materials and Initial Setup
Nick begins by cutting down 4×4 posts that serve as the upright arms of the swing. These provide the structural backbone, so selecting strong, weather-resistant wood is essential. Pressure-treated lumber or durable hardwoods are good options for outdoor durability.
Along with 4x4s, he uses 2x4s for the base and frame, as well as a plywood sheet for the swing surface. Basic joinery, screws, wood glue, and a durable exterior stain round out the material list.
Using Half Lap Joints for Strength
To build the main frame, Nick creates half lap joints on the 4×4 posts using a dado blade. These joints remove half the thickness of each mating piece so they sit flush when joined, creating a strong, interlocking structure.
Half lap joints are ideal for a swing like this, where the frame must handle shifting weight and constant movement. They also provide a clean appearance, making them both a structural and visual upgrade.
Assembling the Platform
Once the side assemblies are ready, Nick moves on to constructing the base. 2x4s are cut and attached to form a rectangular frame, which is then reinforced with middle supports to prevent sagging.
The platform is assembled with wood screws and checked for square before being secured to the side assemblies. The spacing of the inner supports ensures the swing remains sturdy once the mattress is added.
Securing the Frame
The platform is attached to the side posts using screws and lag bolts. Pilot holes are drilled first to prevent splitting, and heavy-duty hardware ensures the frame holds up under weight.
This added layer of reinforcement at key stress points—like the corners and swing mounts—makes a big difference in long-term stability. Nick’s method balances strength with ease of assembly, especially for beginners.
Adding the Swing Surface
A piece of plywood is cut to fit inside the platform frame and secured using evenly spaced screws. This creates a solid foundation for the mattress and helps distribute weight evenly across the swing.
Nick double-checks the placement and spacing before moving forward to ensure no shifting occurs after installation.
Building the Backrest
To make the swing more comfortable for lounging or sitting upright, Nick adds a vertical backrest. One-by-six boards are cut and spaced across the rear side of the platform, providing both support and a finished look.
The backrest boards are secured with wood screws, and the spacing between them is adjusted for comfort and airflow.
Sanding and Finishing
Once the structure is assembled, Nick gives the entire swing a thorough sanding. He starts with a coarse grit to round over edges and remove any mill marks, then follows up with finer grits for a smoother feel.
Dowel plugs are used to hide exposed pilot holes for a cleaner finish. The swing is then stained using a weather-resistant wood stain that enhances the grain and provides protection against sun and moisture.
Installing the Eye Bolts
To hang the swing, Nick installs heavy-duty eye bolts into the top corners of the side assemblies. These are the anchor points for the rope or chain and must be securely embedded into the wood.
Choosing the right mounting location is critical—Nick recommends attaching the swing to a beam or joist capable of supporting the full weight of the swing plus its users.
Final Setup and Hanging
Once the eye bolts are installed, Nick threads heavy rope through the corners and adjusts the length for a balanced, level hang. Cutting and tying the rope evenly on all sides ensures the swing won’t tilt or rock unexpectedly.
He also advises stretching the mattress and testing the fit before finalizing the rope length, so the swing remains taut and comfortable over time.
A Comfortable, Durable Outdoor Upgrade
This twin mattress swing bed is a standout addition to any porch or patio. It’s sturdy, comfortable, and sized just right for relaxing alone or with company.
Nick’s approach uses basic tools and clear steps, making it a great choice even for first-time builders. With smart joinery and a few extra finishing details, this project offers high reward without unnecessary complexity.
Please support Nick by visiting his website here: https://www.rockyriverwoodworks.com/.

Matt’s Take
These are my personal thoughts and tips based on my own experience in the shop. This section is not written, reviewed, or endorsed by the original creator of this project.
Half lap joints are a smart choice for swing construction – they create strong mechanical connections that handle dynamic loads much better than simple butt joints. When cutting them with a dado blade, taking your time on the setup pays off. Test cuts on scrap wood help dial in the depth so your joints fit snugly without gaps.
For outdoor projects like this, I always recommend pre-drilling every screw hole, especially near board ends. The constant movement and weather changes put extra stress on fasteners, and split wood is the last thing you want on a swing. Those lag bolts at the attachment points are doing serious work – don’t skimp on pilot hole diameter.
The eye bolt placement is critical for safety. Make sure you’re hitting solid structure above – a 2×8 joist minimum, ideally with backing blocks. I like to see at least 3 inches of thread engagement through the mounting point. And here’s a shop tip: when hanging with rope, marine-grade rope holds up better to UV and moisture than standard hardware store options.
That plywood deck is smart engineering too. It distributes the mattress weight evenly and prevents the frame from racking over time. A little construction adhesive on the frame before screwing down the plywood adds even more rigidity to the whole assembly.