

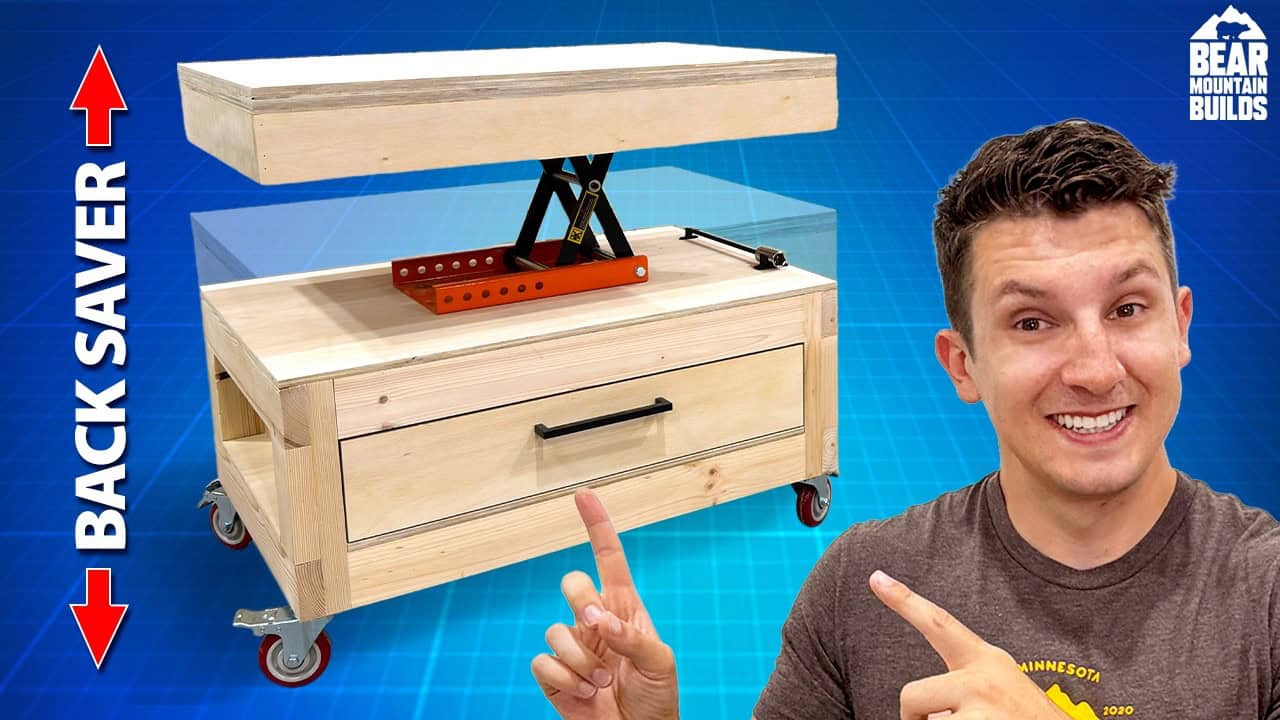
This project was built and designed by Zach from Bear Mountain Builds.
Zach set out to solve a problem that a lot of woodworkers run into when working on large frames or panels: standard workbench height forces awkward reaching, while working on the floor means hunching over or kneeling. His solution was a custom lift table built around a motorcycle lift, giving him a sturdy plywood-and-2×4 table that can be raised or lowered to whatever height a project needs, with a built-in drawer for storage.
Watch the full video and subscribe to Bear Mountain Builds:


Design and Motivation
Zach’s inspiration came from repeatedly working on tall frame assemblies that left him reaching above his head at his normal workbench height. Commercial lift tables exist, but he found them expensive, so he decided to design his own using a motorcycle lift as the core mechanism. The result is a compact table that sits low to the floor but can rise significantly higher, making it useful not just for assembly work but also for lifting heavy tools like a planer up to a comfortable working height.
Beyond solving the ergonomic issue, the table also doubles as extra rolling storage. Since it can be lowered and tucked under another workbench when not in use, it saves floor space while keeping heavy equipment easily accessible.
Frame Construction
The base frame is built from standard 2×4 lumber, chosen for its strength and affordability. Zach planes down his stock slightly before cutting to get cleaner, more uniform joints, though he notes this step is optional for anyone without a planer.
The legs use lap joints, which Zach favors because they’re quick to cut and create a very strong structure. With stretchers running through the legs, the load path transfers directly through the wood into the platform and eventually the floor, meaning the screws are really just holding the joint together rather than bearing the weight.
Pocket holes are added to the stretchers to allow the platforms to be mounted from the inside, keeping fasteners hidden on the visible faces. The side frames are assembled first, then joined together with cross pieces, with the shorter bottom platform slipped into place before the second side frame is attached, since there isn’t room to add it afterward.
To keep everything square, Zach uses a simple ratchet-strap trick: measuring the diagonals to check for square, then cinching a strap around two legs to nudge the frame back into alignment before locking the platform in with glue and pocket screws.
Building the Lid
The tabletop is made by laminating two layers of plywood together for extra rigidity. Zach intentionally oversizes the panels before gluing so the edges can be trimmed flush afterward, since laminated layers rarely line up perfectly on their own.
Once trimmed to final size, bracing is added around three sides of the lid to reinforce it further, leaving one side open for access to the lift mechanism underneath. The braces are joined with pocket screws and glued and brad-nailed onto the lid itself for a stiff, stable top.
Adding a Drawer
To make the table more functional, Zach built in a drawer for storage. Side walls are first added inside the frame, set back slightly from the front so the drawer face can sit flush with the surrounding frame for a clean look.
The drawer box itself is assembled using overlapping side walls to hide end grain, held together with adjustable corner clamps and brad nails for a fast, square assembly. Spacers are used throughout to keep the sliders parallel and to set consistent gaps when installing the drawer front, which is attached using carpet tape and screws from the back for a secure hold.
A drawer pull is added using a dedicated jig to keep it centered and level, and the back of the frame is closed off with a plywood panel to fully enclose the storage area.
Mounting the Lift Mechanism
The heart of this build is a motorcycle lift, rated to support well over a thousand pounds and operated with a drill rather than the included hand crank for smoother, faster adjustments. Since the lift was originally designed to sit on the floor, Zach had to remove its rubber pad and drill new mounting holes to attach it directly to both the underside of the tabletop and the base frame, being careful to avoid internal components inside the lift housing.
With the lift centered and secured to the lid, the whole assembly is flipped and mounted onto the base frame, giving the table its signature raise-and-lower capability.
Final Touches and Testing
Casters were added underneath so the entire table can roll around the shop with ease. Zach also 3D-printed a small mount to keep the socket and extension needed to operate the lift stored conveniently underneath the tabletop rather than buried in the drawer.
To test the lift’s capacity, Zach loaded it with sandbags and even stood on it himself, watching it rise and lower smoothly under real-world weight. The table performed well beyond what most shop projects would ever demand, proving it could handle the frames, tools, or panels most woodworkers would place on it.
Why This Build Matters
This lift table addresses a common but often overlooked issue in the shop: working at the wrong height for a given project. By combining a simple, strong 2×4 frame with a motorcycle lift, Zach created a versatile tool that adjusts to fit the task rather than forcing the woodworker to adapt to a fixed surface.
Whether it’s used as an assembly table for large frames, a mobile stand for heavy tools, or simply a lower work surface to ease strain on the back and knees, the adjustable height makes it one of the more practical additions to any shop. It’s a great example of how a bit of creative repurposing—turning a motorcycle lift into a woodworking table base—can solve a problem that store-bought options often price too high to justify.
See This’s plans here: https://www.bearmountainbuilds.com/products/lift-table

Matt’s Take
These are my personal thoughts and tips based on my own experience in the shop. This section is not written, reviewed, or endorsed by the original creator of this project.
Repurposing a motorcycle lift for this is a smart move, and it’s a good reminder that some of the best shop solutions come from looking outside the woodworking aisle entirely. Those lifts are built to handle serious weight day in and day out, so using one as the backbone of a work surface is honestly overbuilt in the best way for anything you’d throw at it in a home shop.
A couple of things worth keeping in mind if you’re tackling something similar: when you’re drilling into a lift mechanism to add mounting holes, take your time identifying where the internal moving parts are before you commit to a hole location. A stray drill bit into a hydraulic or scissor mechanism can turn a $150 lift into scrap metal fast. It’s also worth double-checking the lift’s rated capacity against dead weight versus dynamic load — standing on a platform while it’s rising is a different stress case than just resting tools on it.
On the woodworking side, laminating plywood layers for a tabletop like this is a great technique any time you need extra rigidity without going to a thicker single sheet. Oversizing the panels and trimming flush afterward is the way to go — trying to get two full sheets perfectly aligned during glue-up is nearly impossible, especially once clamps start shifting things around.
And don’t skip the caster hardware quality here. A table with this kind of weight potential deserves locking casters rated well above what you think you’ll need, since a mobile table that won’t stay put under load is more of a hazard than a convenience.